Valentine’s Day Iced Heart Cookies (AIP Paleo friendly)

Valentines Day AIP Cutout Heart Cookies
Valentine’s Day is fast approaching, and with it hopefully some wonderful Spring weather!

We all want to feel a little extra special on Valentine’s Day! I happen to like cookies!

Iced Valentines Day Cookies

I also like icing on cookies, especially when they are big heart shaped ones that I can add a splash of natural pink icing to for Valentine’s Day!

AIP Valentines Day Cookies

This is a small batch of six cookies that are a little bigger than average. I made them with all natural ingredients free of many allergens, including no eggs, nuts, dairy, gluten or grains. They are AIP Paleo friendly!Trio of Iced Valentines Day Cookies

They have a crunchy texture and a toasted nut like flavor without nuts!

Valentine’s Day Iced Heart Cookies

Preheat your oven to 350° F.

Ingredients:

1/2 Cup of Coconut Flour

1/4 Cup of Avocado Oil

1/4 Cup of Shredded Unsweetened Coconut

3 Tablespoons of Coconut Butter

3 Tablespoons of Honey

2 Tablespoons of Coconut Sugar

1 Tablespoon of Grass Fed Gelatin

1 Tablespoon of Arrowroot

1/4 Teaspoon of Sea Salt

1/4 Teaspoon of Baking Soda

1/4 Teaspoon of Cream of Tartar

1/8 Teaspoon of Vanilla Powder

Directions:

In a medium mixing bowl with a hand held mixer, beat your gelatin into the avocado oil. Add the coconut sugar, coconut butter (softened in the microwave for about ten seconds) and honey. Beat until creamy and smooth.

Next add in the coconut flour, arrowroot, vanilla powder, salt, baking soda, and cream of tartar. Beat well. Finally, add in the shredded coconut, and beat until incorporated. The dough will resemble crumbs. Dump the dough out onto a parchment sheet, and form a ball. Press the ball flat, and add a second sheet of parchment on top so you can roll out the dough without it sticking to your rolling pin. Roll the dough to 1/4 inch thickness. Use a heart shaped cookie cutter to cut out the cookies. I used a 3 3/4″ Wilton cookie cutter which made 6 cookies.

Cutting Out Heart Valentines Day Cookies

Carefully move the cookies to a parchment lined baking sheet.

heart cookie on spatula

Bake for approximately ten minutes until the cookies are brown on the edges. Remove from the oven and cool completely on the cookie sheet. Don’t attempt to move the cookies until they are cool, or they will break. Once cooled they are sturdy.

Make the icing

Ingredients:

1/4 Cup of Organic Shortening

2 Teaspoons of Honey

1/2 Teaspoon of Beet Powder (I used this)

Beat the ingredients together and spread a heart shape onto your cooled cookies leaving a 1/2 boarder all around.

Makes 6

Happy Valentine’s Day!

These Heart Felt Valentines Day Iced Cookies say I love you! They are AIP Paleo, egg, dairy, nut, and grain free!

*This post has affiliate links in it. I receive a very small commission if you purchase through my links. The small commission helps cover the cost of maintaining this blog. Thanks! 🙂

Benefits of Oranges and Get Some Egg On Your Face! Healthy Food Tips and Natural Skin Care!

orange benefits

Did you know the smell of orange can reduce stress by up to 70%? You know that smell when you first start peeling an orange and you get that burst of citrus? Oooo, that smells oh so good!!! 😃
There are many benefits to eating oranges. We all know about the Vitamin C. But, oranges are also rich in fiber (17% of your daily allowance is in one large orange), and they can also improve heart health. Studies have also shown that the flavonoids may preserve brain health. Oranges enhance immunity, digestion, and skin health! They are full of other micronutrients too, like folate, potassium, and thiamine, and it’s no secret that the antioxidants in oranges in skin care has pretty impressive results like anti-aging, anti-wrinkle, UV protection, and decreasing age spots! Ask me which Posh products have loads of orange in them! 

citrus 2
Oranges are low in calories, but you won’t get the same benefits by drinking orange juice. The fiber in the whole orange slows down absorption of sugar into the bloodstream, so make sure you go for the whole orange. 🍊

Sandy wit Orange Pillow

I’m really enjoying how this new Egg On Your Face with Korean skin care technology cleanser is making my skin look and feel!!! Awesome!!!! 👍🌺🌈
It is a very nourishing cleanser that is great for sensitive skin and formulated for all skin types.
This is a Wonderful Winter cleanser that gently washes away toxins, makeup, dirt, and excess oil while it adds Poshbiotics to your face! What is that???? 🤔 Well, Poshbiotics is a proprietary blend by Perfectly Posh of pre and probiotics, milk and eggs that soothes, smoothes, and balances pH. I’ve noticed more even skin tone and a softer smoother complexion. It comes in a nice 4 oz. tube and smells very lovely!!! It’s a top notch way to pamper your face! 🧚‍♀️🧚‍♀️🧚‍♀️

egg on your face

If you are ready to reap the benefits of orange and eggs in your skin care, head on over to Perfectly Posh where I am a consultant. I appreciate your business so much, and I am here to help you find your perfect products! They are a natural based skin care company who specializes in pampering without toxic ingredients. Have a wonderful day!!!

Orange Based Posh Skin Care

Hidden Fruit and Veggie Chocolate Muffins Your Toddler Will Love!

While so many are obsessed with Keto lately, some of us are still just trying to get a toddler to eat their veggies!

fruitandveggiemuffinsinabasket

These Hidden Fruit and Veggie Muffins appeal to all ages, but if you are trying to get a toddler to eat more veggies, and his palate is just not there yet, these taste like regular ole chocolate muffins! They are quite nutritious and low in added sugar.

chocolatefruitandveggiemuffinscenter

My 2 year old Grandson, Theodore, gobbles these up happily! Sometimes he even eats two at a time!

theoeatingchocolatemuffin

Such a happy face!!! toddlerapproved

Hidden Fruit and Veggie Chocolate Muffins

Preheat your oven to 350° F.  Line a muffin pan with muffin liners.

Ingredients:

3 Eggs

1 15 oz. Can of Butternut Squash (I use Farmer’s Market Organic which is readily available in most grocery stores)

1/2 Cup of Diced Zucchini

1/2 Cup of Fresh or Frozen Blueberries (thawed)

1/2 Cup of Coconut Flour

1/4 Cup of Cacao Powder (I used this kind)

1/4 Cup of Avocado Oil or Olive Oil

1/4 Cup of Pure Maple Syrup

1 Teaspoon of Vanilla Extract

1 Teaspoon of Baking Powder (Here’s my DIY Corn Free Baking Powder Recipe)

1 Teaspoon of Cinnamon

1/2 Teaspoon of Sea Salt

1/2 Teaspoon of Baking Soda

Directions: It is so simple because we are using a food processor with a blade attachment. Add your eggs, diced zucchini, butternut squash and blueberries to the food processor and process until smooth. Add all the remaining ingredients and process for one minute. Scrape down the sides of the bowl, and process another 30 seconds.

Fill your muffin cups evenly. I like to use a muffin scoop. Bake in your preheated oven for 35 minutes, or until a toothpick inserted into the center of a muffin comes out clean.

Makes 12 Muffins

chocolatefruitandveggiemuffins4

thesemuffinsarechocolatelyandyourtoddlerwouldneverguessheiseatingfruitandveggies21glutenfree2cdairyfree2cgrainfree

*This post has affiliate links in it. I receive a very small commission if you purchase through my links. The small commission helps cover the cost of maintaining this blog. Thanks! 🙂


Immune Boosting Smoothie!

cold busting smoothie

You’ve washed your hands like crazy and practiced prevention to avoid a cold. but here it is! You got one anyway!

What now? I know you want it to go away, like yesterday!!!

Here’s an immune boosting smoothie you can make every day while you have a virus, or for prevention, to boost your immune system and assist in making your cold as short as possible! Each ingredient serves a purpose.

Immune Boosting Smoothie

Ingredients:

1 Large Orange (Vitamin C)

1 Cup of Frozen Mango (Vitamin C)

1 Cup of Brewed and Cooled Chamomile Tea (Soothes Sore Throats)

1 Tablespoon of Fresh Lemon Juice (Vitamin C)

2 Tablespoon of Unsweetened Coconut Flakes (Fiber)

1 Teaspoon of Chia Seeds (Fiber and Omega 3)

1/8 Teaspoon of Cinnamon (anti-bacterial & anti-inflammatory)

1 Teaspoon of Black Elderberry Syrup (I use this) (immune boosting, antioxidants)

1 Teaspoon of Raw Honey (antibacterial, helps relieve sore throats and coughs)

Directions:

Blend all the ingredients together, except the elderberry syrup, in a blender on high. Pour into a glass. Drizzle the elderberry syrup on top. You can add some additional mango on top if you want to.

In addition, while you have a cold, make sure you get enough rest, stay hydrated, sip warm liquids (chamomile tea helps soothe a sore throat), add moisture to the air, and use an over the counter saline nasal spray.

light and yummy, every ingredient in this smoothie serves a purpose! dairy free and gluten free.

*This post has affiliate links in it. I receive a very small commission if you purchase through my links. The small commission helps cover the cost of maintaining this blog. Thanks! 🙂

Chocolate Cherry Valentine Hearts

chocolate cherry hearts gluten free dairy free
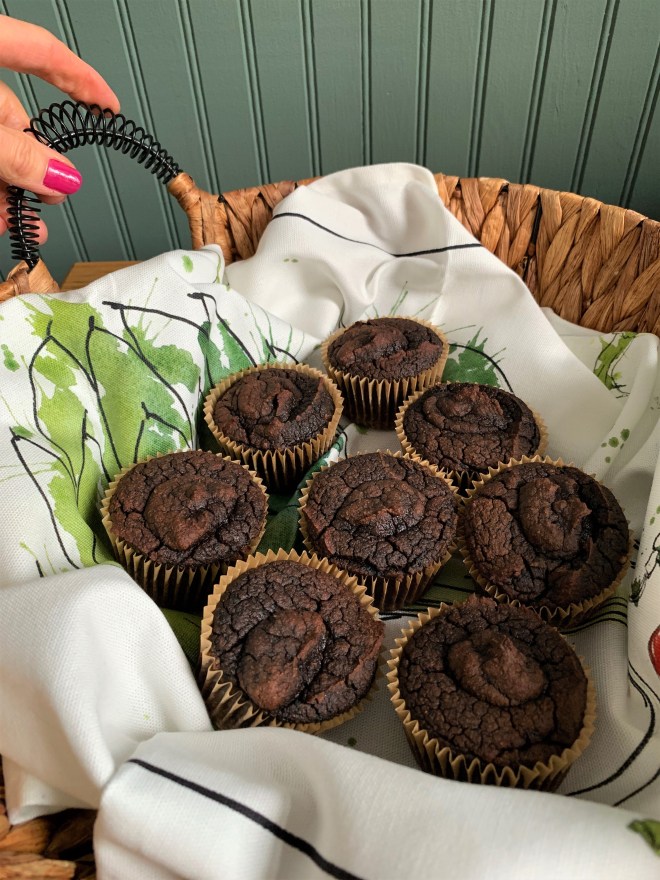
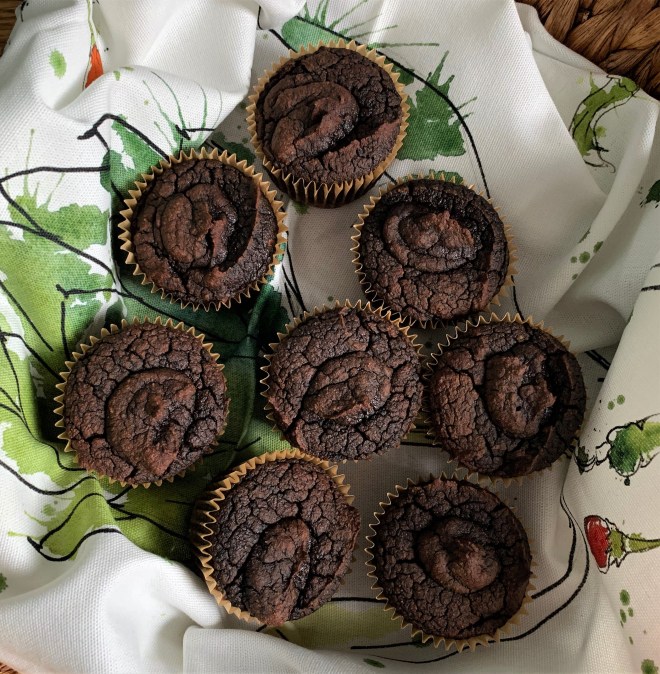
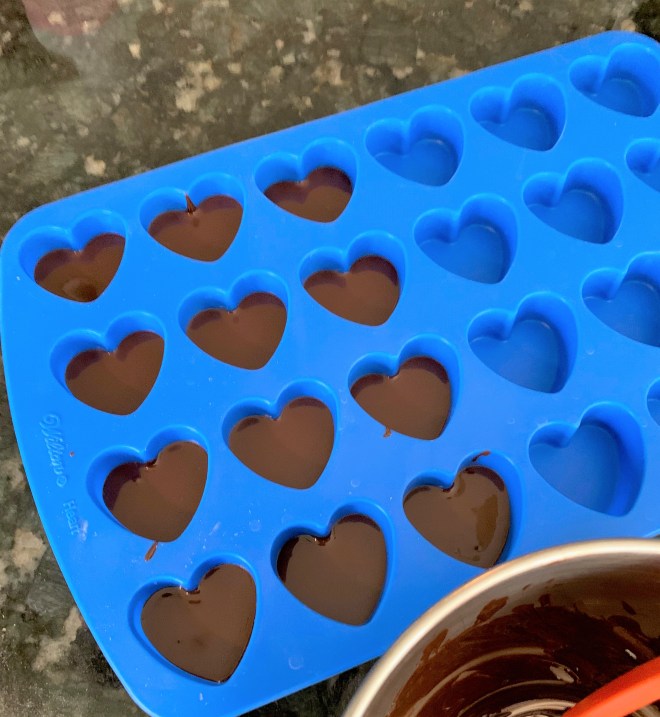
These gorgeous chocolate candies are pretty easy, and use just three delicious ingredients. Plus, they are gluten and dairy free! They package well for gifts too!

I think coconut butter is divine in candy, because it gives you that melt in your mouth feel. Who am I kidding, I can eat it straight off the spoon! In this recipe I combined it with cherry concentrate for the candy centers and layered it between dark chocolate.

chocolate cherry valentine hearts

I used a silicon candy mold to make the heart shapes (here). Mini muffin cups will work also, but the mold was inexpensive and can be used for baking too!

chocolate cherry valentine hearts to make yourself

These are perfect for Valentines Day, but I wouldn’t say no to them any time. You can even use different shaped molds depending on the season or occasion!!!

packaged chocolate cherry valentine hearts

Here’s a photo of the mold as I was making the candy. This is the first layer.

wilton mold

Chocolate Cherry Valentine Hearts

Ingredients:

1 Cup of Dark Chocolate Chips, divided (I used Enjoy Life)

1/2 Cup of Coconut Butter

2 Tablespoons of Cherry Concentrate (I used this organic brand)

Directions:

In a double boiler, place 1/2 cup of dark chocolate chips, and melt them stirring slowly.

Put a teaspoon of melted chocolate in the bottom of twelve heart molds, and put the mold on a cookie sheet. Tap the cookie sheet vigorously on the counter, so the melted chocolate spreads over the bottom of the hearts evenly. Put the mold in the refrigerator for ten minutes to set the chocolate.

Measure your coconut butter into a small microwave safe bowl that is big enough to use a hand held mixer in later. Melt the coconut butter in ten second increments, stirring in between until soft. Using a hand held mixer, and beat in the cherry concentrate.

Remove the candy mold from the refrigerator, and form the cherry filling into teaspoon sized balls. I use a teaspoon scoop to make this easy, and I scoop and roll them between my hands. Place a ball in each heart mold on top of the chocolate and press down to evenly cover the heart.

Melt the remaining 1/2 cup of dark chocolate chips, and spoon it evenly over the tops of the cherry filling. Vigorously tap the pan on the counter to flatten the melted chocolate and help it spread evenly. Refrigerate for ten minutes to set.

Makes 12 Heart Candies

diy chocolate cherry valentine hearts. these easy candies are great for gift giving and are dairy and gluten free!

*This post has affiliate links in it. I receive a very small commission if you purchase through my links. The small commission helps cover the cost of maintaining this blog. Thanks! 🙂

Plum Pudding with Hard Sauce

Gluten Free Plum Pudding with Hard Sauce

I grew up eating my Grandmother Carrie’s Plum Pudding every Christmas and New Years as a child. It is a part of the holidays and just the smell says Christmas and New Years to me. The recipe she made had been passed down to her four generations ago, and six generations ago to me. It came from her Great, Great Grandmother from the Old Country as she referred to England.

Grandma had the recipe committed to memory, as she did many of her family dishes, casseroles, jams and pickles. But she wrote it down as she got older and her daughter (my mother) wanted the recipe.

Her plum pudding always had a warm hard sauce to spoon over the top rich with aromatic brandy. The spices of the plum pudding were deep and warming and the sauce sweet and decadent, it’s purpose to soak into the pudding on your plate.

Here is my modified recipe of her pudding. It is mostly the same, except I have taken out the wheat flour and made it grain and dairy free. I hope I have done you proud Grandma!

whole plum pudding grain free

Plum Pudding with Hard Sauce

Ingredients:

1/2 Cup of Raisins

1/2 Cup of Currants

1/2 Cup of Chopped Apple

1/2 Cup of Coconut Flour

1/2 Cup of Olive Oil

2 Eggs

6 Tablespoons of Maple Syrup or Honey

2 Tablespoons of Molasses

2 Tablespoons of Brandy (you can substitute lemon juice of desired)

1/2 Cup of Coconut Milk

2 Teaspoons of Ground Cinnamon

1 Teaspoon of Ground Ginger

1/2 Teaspoon of Ground Nutmeg

1/2 Teaspoon of Ground Cloves

1/4 Teaspoon of Sea Salt

1/2 Teaspoon of Baking Soda

1/2 Teaspoon of Baking Powder (this is corn free)

Directions:

Preheat your oven to 350° degrees F. Grease a fluted 2 quart pan or other two quart pan with high sides with organic vegetable shortening.

Beat the eggs, olive oil, molasses, maple syrup, coconut milk and brandy in a stand mixer with a paddle attachment until creamy. You can use a hand held mixer if you don’t have a stand mixer. Whisk together all the dry ingredients (the remaining ingredients). Add the dry mixture slowly to the wet mixture until incorporated, then turn the mixer to medium high and beat for two minutes. Stir in the raisins, currant and apple on low until completely mixed.

Pour the batter into your prepared pan. Fill a large casserole dish with very hot water so when you place your fluted plum pudding pan into it the water comes half way up the sides. (You are creating a bain marie). Bake the plum pudding for 40 minutes, then tent with foil for 20 more minutes. It is a 60 minute bake total. If it should cave in a bit in the center when removed from the oven that’s ok. Let sit for five minutes, then tip it out of the fluted pan and onto a platter.

Hard Sauce

Ingredients:

1/2 Cup of Coconut Sugar

1/4 Cup of Maple Syrup

1/4 Cup of Water

2 Tablespoons of Coconut Oil

1 Tablespoon of Brandy

2 Teaspoons of Tapioca Starch

A Pinch of Nutmeg

Directions:

For the hard sauce whisk together all the ingredients except the tapioca starch. Then, bring to a boil. After the sauce comes to a boil, reduce it to a simmer and whisk in the tapioca starch until smooth. Continue to simmer for five minutes.

Serve the Plum Pudding by slicing it while warm. Then spooning warm hard sauce over it. While you can serve the cake cold, and just put warm hard sauce over it, it was traditionally served warm. You can reheat the pudding in the oven by wrapping it in foil and reheating for ten to fifteen minutes.

Paleo British Plum Pudding with Hard Sauce. This is a delicious traditional plum pudding made Grain and Dairy Free. The original recipe comes from my Grandmother from the Old Country.

Paleo Chai Tea Mix

There is nothing that says comfort and feels like a warm hug more than a cup of hot Chai Tea. Hot Chai smells so good, and I have sweetened this mix with low glycemic coconut sugar! If you are looking for a sweetened, creamy Chai mix that you can scoop into your cup and make at a moments notice when you want Chai, this recipe is for you! You can make it with the non-dairy milk of your choice for a latte or hot water for a creamy Chai Tea. Enjoy!!!

Chai Tea Mix Dairy Free

Chai Tea Mix

1 Cup of Powdered Coconut Milk (I use this)

1/2 Cup of Laird’s Superfood Coffee Creamer (here)

3/4 Cup of Coconut Sugar

1/2 Cup of Instant Tea (I use this all natural kind)

2 Teaspoons of Cinnamon

1 Teaspoon of Cardamom

1/2 Teaspoon of Cloves

Directions:

Pulse the Coconut Milk, Coconut Sugar, Instant Tea and Spices in a food processor to combine. This makes the Coconut Sugar less coarse, so it dissolves faster.

Layer the tea mixture and the Laird’s Creamer in a glass jar alternating between the tea mixture and the creamer. Add your mix to hot milk of choice or hot water and whisk to taste. I like 3 to 4 tablespoons per cup, but make it how you like it. It really depends on how big your cup is and personal preference.

*This post has affiliate links in it. I receive a very small commission if you purchase through my links. The small commission helps cover the cost of maintaining this blog. Thank you.

Paleo Chai

Paleo Chai Tea Mix. Combine it with hot water or your favorite non-dairy milk for a delicious hot Chai that is sweetened with coconut sugar!

Healthy Holiday Tips to Avoid Weight Gain and if you have Food Sensitivities

How to Have a Healthier Holiday with Packing on the Pounds

Most of us have to be mindful during the holidays of what we eat to avoid weight gain and also digestive upset. Ugghh, who wants that?

Above are some tips for avoiding the fallout of the holiday celebrations on your health and still enjoy the festivities. Of course if you are having dessert and are allergic or sensitive to something in the dessert, don’t eat it. That is where it is a good idea to bring your own to share.  If you are lucky enough to get a thoughtful hostess who asks about food sensitivities, that is always a bonus!

Also, you can completely change your focus! Yes, there is a lot of emphasis on food, but it really does make a difference if you set an intention. For instance, “I intend to really enjoy the time I get to spend with my friends or family talking and catching up.” Put your focus more on the activities other than food that are happening at your party or get together.

Taking or preparing a dish or two of your own, or a healthier treat, will also keep you on track and keep you from feeling deprived or left out.

Don’t forget to stay hydrated. This is important in colder months. It keeps your mucus membranes hydrated, your skin, organs, and sometimes we mistake thirst for hunger. Not drinking enough water can also contribute to constipation.

Going for a brisk walk with your pet, friend or family member helps digestion, is energizing, burns calories, is great for circulation and your metabolism, and you benefit from fresh air!

If you have food sensitivities, you will be very happy that you resisted and came prepared, because the next day, you will feel good. When the holidays are over and you still have energy, can fit into your clothes, and don’t have to try to lose the holiday gain, you will be very thankful.

Sandra

Gluten Free Crispy Cinnamon Raisin Cookies

Chewy and crispy cookies are my jam this month! There is something about sinking your teeth into a chewy cookie that has the warmth of cinnamon in it and soft raisins, plus the crispiness of brown rice cereal that is just magic.

Crispy Cinnamon Raisin Cookies Egg Free Gluten Free, Egg Free

This new cookie recipe is a low allergen recipe. What is low allergen? I mean it is free of the top allergens. It is gluten free, dairy free, egg free, nut free, corn free, and soy free. Sweetened with honey, it is also refined sugar free. I am very pleased with the structure of these cookies too. The crumb is very nice.

Crispy Cinnamon Raisin Cookies Gluten Free Egg Free Nut Free

The inside is perfect, and the bottoms are a perfect golden brown!

Inside Crispy Cinnamon Raisin Cookies

Gluten Free Crispy Cinnamon Raisin Cookies

Preheat your oven to 350° F. Lay out a large cookie sheet lined with parchment paper or two small cookie sheets.

Ingredients:

1/2 Cup of White Rice Flour (I used this)

1/4 Cup of Organic Shortening

1/4 Cup of Good Honey

1/3 Cup of Crispy Brown Rice Cereal (I used this kind)

1 Tablespoon of Coconut Flour

1/3 Cup of Raisins

2 Tablespoons of Coconut Butter, (warm until soft in the microwave, be gentle)

1 Tablespoon of Gelatin (I used Vital Proteins)

1/2 Teaspoon of Vanilla Extract

1/2 Teaspoon of Cinnamon

1/2 Teaspoon of Baking Soda

1/4 Teaspoon of Sea Salt

1/8 Teaspoon of Nutmeg

Directions:

In a medium mixing bowl, cream together with an electric hand mixer the shortening, Honey, Vanilla Extract, and warmed Coconut Butter until light and creamy.

Sift together the White Rice Flour, Coconut Flour, Cinnamon, Nutmeg, Baking Soda, Salt and Gelatin.

Add the dry ingredients to your shortening and honey mixture and beat until incorporated. Mix in the Crispy Brown Rice Cereal and Raisins.

With a tablespoon scoop,  scoop the cookie dough into balls. Roll them into rounds between your hands, and place them on your prepared cookie sheet. Flatten the cookies with the bottom of a glass, Make sure the cookies have 2 inches between them on the sheet. Bake in your preheated oven for 9 – 10 minutes until they are golden brown.

Makes 1 dozen cookies.

Allergen Friendly, Chewy and Crispy Cookies!


Chocolate Mocha Cups

‘Tis the Season for something yummy! I love these Mocha Cups because they are lower in sugar And really delicious! Chocolate and Coffee treats are one of my favorite combinations! These have a creamy coffee coconut cream center enrobed in delicious dark chocolate! They are a healthier treat for special occasions. Plus with just six ingredients they couldn’t be easier to make. They are also free of nuts, dairy and soy!Chocolate Mocha Cups Dairy Free Gluten Free Delicious

Chocolate Mocha Cups

Ingredients:

1 cup of Enjoy Life Dark Chocolate Chips

1/2 Cup of Coconut Butter

1 Tablespoon of Coconut Milk

2 Teaspoons of Instant Coffee Crystals (I used these)

1/4 Teaspoon of Pure Vanilla Extract

Pinch of Sea Salt

Directions:

Place 14 mini muffin liners into a mini muffin pan.

Heat the coconut milk in a small bowl in the microwave until simmering, then stir in the coffee crystals until dissolved. Measure the coconut butter into a medium bowl and soften slightly in the microwave in ten second increments until you can stir it easily with a fork. Note: If you overheat the coconut butter it will freeze up. Whisk the coffee and coconut milk mixture into the coconut butter with a fork. Stir in 1/4 teaspoon of vanilla and a pinch of sea salt. Make 14 teaspoon sized balls with the coconut butter mixture, and set aside.

In a double broiler on the stove melt your chocolate chips over simmering water. (I do this by placing a small saucepan with an inch of water on the stove, then creating a double broiler with a stainless steel bowl on top with the chocolate chips in it.) Make sure the water doesn’t touch the bottom of the bowl. Melt the chocolate stirring with a fork.

Place a teaspoon of chocolate in the bottom of each mini muffin cup. Rap the tin on counter to spread the chocolate evenly in the bottom of the cups. Place a prepared coconut cream mocha ball in each cup, and flatten it slightly with your fingertip. Spoon the remaining melted chocolate over the balls to make the cups. Rap the tin on the counter to make nice, flat chocolate tops. Refrigerate until set, about 20 minutes.

Makes 14 Cups

Dairy Free Nut Free Chocolate Mocha Cups

1 10 11 12 47