Tag Archives: Dairy Free

Guest Post: Traditional Spanish Tortilla

I am so delighted to welcome Max from My Health Food Service as a guest today! Max lives in Spain and is sharing with us an authentic Spanish Tortilla Recipe:

Spanish Tortilla (Tortilla EspaƱola) is a traditional dish from Spain that is made with potatoes, onions, and eggs. It is a simple yet satisfying dish that can be enjoyed as a main course, a side dish, or even a quick snack. It does require some practice to get it right, so don’t worry if you don’t nail it first try.

Ingredients:

  • Around 1 Kg of potatoes (about 5 medium sized potatoes)
  •  1 medium-sized onion, thinly sliced
  •  7-8 eggs
  •  Salt and pepper, to taste
  •  Olive oil

Feel free to use more or less of these ingredients. The quantities are not necessarily exact. Try to use around 0.7-0.8 eggs per 100g of potatoes.

Instructions:

  • Peel the potatoes, clean them and chop them up into slices as seen in the image below. Add some salt to the potatoes and stir.
  • Add the sliced potatoes to a pan with olive oil and fry them until they are soft and lightly browned. If you have an air fryer, use that as it will be a healthier option.
  •  In a separate pan, fry the chopped-up onions on low heat until they are translucent. Once ready, add into a large bowl together with the potatoes
  • In a separate bowl, beat the eggs and pour them over the potatoes and onions. Gently stir everything together.
  • Heat a splash of olive oil in a pan on medium-high heat, and once ready pour the whole mix into the pan. leave for a few minutes, and then start separating the tortilla from the sides or walls with a wooden spoon.
  • Once you can reach down and move the whole tortilla with the spoon, and you can just see that the bottom is going golden brown but the top is still liquid, it’s ready to turn around. This is the most important part.
  • Get a large plate that can cover the whole pan easily and place it over the top. Place a hand on the top of the plate and hold it firmly whilst you lift quickly turn it over. The tortilla should be left on the plate. Most Spanish households have a special plate designated for flipping tortillas, like the image below, but any plate large enough to cover the whole pan fully will work fine.
  • Place the pan back on the fire and slide the tortilla back in, so that the golden brown side is now on the top, and flatten it out with a wooden spoon. Leave it for another few minutes until you can again see that the bottom is turning golden brown.
  • Once ready, place the plate over the pan again and perform the same flip as before, just to take out the tortilla.

Some people like to have a tortilla with a solid middle part and some people prefer the center a bit more liquid. Feel free to try both by leaving the mix a bit longer or shorter on the second side before taking it out.

The Spanish Tortilla can be served hot, warm, or at room temperature, and can be garnished with chopped parsley or chives if desired. It’s great as a main course, side dish, or even as a snack and it’s a great way to use up leftover potatoes. You can also add some diced vegetables such as peppers, zucchini, or spinach, or even some cooked bacon, chorizo, or other meats, to make it more hearty and filling.

If you liked this recipe and would like to see more content like this, please check out My Health Food Service. Feel free to ask any questions related, to the editor Max.

Delicious Spiralized Antipasto Zoodles Salad, Winter Health Tips, and Clean Skincare

Winter Health Tips, Spiralized Antipasto Health Zoodles Salad and Safer Skincare

Happy New Year friends!! The days are getting longer, and I am craving fresh, delicious, food that makes me feel good because of all the nutrients in it! This Spiralized Antipasto Zoodles Salad is full of all the flavor, is low in carbs and it’s fun to make…..because….zoodles are just so fun!

Spiralized Antipasto Zoodles Salad

First off if you don’t already have a spiralizer, it is affordable! and a great investment in your kitchen accessories. I use my spiralizer frequently and is as necessary to my kitchen as a food processor and blender. This is my favorite spiralizer of the three I have tried. This one suctions to the countertop and makes a wonderful variety of spiralized shapes, and I have had it 5 years and it is still going strong. Oh, and this is a no cook recipe!

Delicious Spiralized Antipasto Zoodles Salad

Ingredients:

5 medium to small zucchini, spiralized (I used the FS Blade on my spiralizer)

1 Teaspoon of Salt to draw moisture out of the zucchini (see directions)

3 oz. of Sopressata, diced (I used Culinary Tours gluten free brand.) You can also use thin sliced Salami

1/4 cup of Fresh Basil, torn

3 Green Onions (scallions), sliced

Sliced Black Olives (I used a 3.8 oz. can)

1/4 cup of Roasted Red Peppers, diced

1/4 cup of oil packed Sundried Tomatoes, finely diced I use Mediterranean Brand Organic Sundried Tomatoes In Olive Oil

Dressing:

3 Tablespoons of Garlic Infused Olive Oil

3 Tablespoons of Red Wine Vinegar

2 Tablespoons of Good Olive Oil

1 Tablespoon of Fresh Lemon Juice

1 Teaspoon of Nutritional Yeast (adds umami and a cheesy flavor)

1/4 Teaspoon of dried Oregano

1/4 Teaspoon of dried Parsley

1/4 Teaspoon of Salt

1/4 Teaspoon of Black Pepper

Whisk all the dressing ingredients together in a bowl until emulsified.

Directions: Spiralize your zucchini. Spiralizing really magnifies the amount of zucchini. Look!

Making Zoodles with a Spiralizer

Place the spiralized zucchini in a colander over a bowl, and toss the zucchini in the teaspoon of salt. Let sit over the bowl for 30 minutes. The zucchini will release some juices. This helps prevent the salad from being watery. Zucchini has a lot of water in it. After 30 minutes, take a large serving spoon or rubber spatula and press the zucchini in the colander firmly to release more of the liquid. Now, we are ready to make the rest of the salad! Let’s go!

It really is just assembly at this point and so easy! Put your zoodles in a large bowl. Add the rest of the chopped, sliced and diced ingredients. Whisk up your delicious dressing, and pour it over everything. Grab you salad tongues and toss thoroughly, but gently. It’s ready to eat, or you can store it in the refrigerator until you are ready to serve it. It will just increase in flavor.

This Spiralized Antipasto Zoodles Salad is a wonderful addition to any meal or a delicious lunch. It’s pretty, fun, and healthy and good for you!

Now, here’s some health tips to get your through the winter months! Since the days are colder and darker, it is important to implement mindful self care for yourself.

Winter Health Tips

Which of these have you already implemented and which ones are you going to add? Please reach out to me with any questions. I love to hear from you.

As far as the sunscreen in the winter goes, are you choosing a safe sunscreen? It defeats the purpose of protecting your skin if you are putting chemicals on that absorb into your bloodstream. I recommend Beautycounter safer sunscreen with non-nano zinc. It is the safest out there and also reef friendly. My family and I have been using it for 9 years now, almost as long as Beautycounter has been making safer skincare products. They celebrate their ten year anniversary in March, and I love their mission and the high quality and safety of their products. If you want to know more or go see all the safer skincare, makeup and family care they have, here is the link. I have been a consultant with them for almost four years now after using their products for several years before, and they are a highly reputable company that is changing laws for safer skincare and beauty for all, have a strong recycling and sustainability mission, and their skincare is high quality.

https://beautycounter.com/sandrashields

Getting through winter requires maintaining all areas of our health. This time of year we can get restless and tired of the constant darkness and cold. Many people suffer from seasonal affective disorder (SAD) which lasts through the winter months. Try these 12 health tips to help get your through the winter.

Enjoy the salad recipe! I plan on making this on a weekly rotation, wearing my sunscreen, and implementing winter health tips!

Healthy Chocolate Avocado Date Sweetened Pudding

There is not many who don’t like a sweet treat, but sugar can be very addicting and not good for our health. A whole foods diet rich in plants, healthy fats like olive oil, avocado, nuts, seeds and good sources of protein is very beneficial to our bodies and promotes health. This chocolate pudding satisfies my sweet tooth, and I know it is good for me. It is guilt free, creamy and chocolatey! It is sweetened with whole dates which are a natural whole food, plant based sweetener that contains the health benefits of antioxidants and minerals, and has creamy avocado that is full of healthy PUFA’s…..the good fat, raw cocoa powder that is a great source of antioxidants and a mood elevator (good for winter blues!), coconut milk for a creamy non-dairy pudding. If you want a touch more sweetness, a little bit of pure monk fruit can be added, but less sweetness in desserts is an acquired taste, so if you already are eating less sugar, you may not need it.

Here is to the healthiest you in 2023. I wish you a healthy, happy, bountiful new year and will be sharing other health promoting recipes and tips throughout the coming year!

Healthy Chocolate Avocado Date Sweetened Pudding

Ingredients:

2 Cups of Ripe Avocado, cubed

1/2 Cup of Full Fat Coconut Milk

6 Medjool Dates soaked in hot water for five minutes to soften and then pitted, Joolies are my favorite!

1/4 Cup of Raw Cocoa Powder

1 Teaspoon of Vanilla Extract

1/8 teaspoon of pure Monk Fruit I use this brand

a pinch of Sea Salt

Cocoa Nibs (optional)

Blend all the ingredients in a high speed blender until completely smooth. Spoon into 4 serving dishes, sprinkle with cocoa nibs and eat immediately or keep it in the refrigerator for up to two days. Enjoy!! I always love to hear from you!

Mediterranean Chicken Salad

Mediterranean Chicken Salad

There are so many varieties to chicken salad, and I love a good chicken salad recipe! It seems like every time I make one it is gobbled up to the point people are fighting over the last of it. Maybe I don’t make it often enough.

If you ask me, “Do we need another chicken salad recipe?”, it is a resounding “yes!”. Variety is important, and this Chicken Salad is very colorful! After all, we eat with our eyes first! The wonderful thing about this chicken salad is it is Mediterranean! Mmmm! So much flavor, and one of the healthiest ways to eat in the world. It has sundried tomato bruschetta, fresh basil (my favorite fresh herb), delicious roasted red peppers, black olives and the tang of red wine vinegar. It also has the crunch from fresh celery, and two kinds of onion flavor…..green onions and chives! You will need a whole roasted chicken, and I am totally all for a good store bought rotisserie chicken if you are tight on time. There are so many good ones, and many of them are gluten free. If you are making the chicken at home, you can oven roast it or use an instant pot to cook it. Another good trick of mine is to roast two chickens at once. One is for dinner that night, and I make the other one into chicken salad. It’s a time saver and smart cooking!

Chicken salad is such a great lunch option in my opinion. You can heap it over a salad, one of my favorite ways to eat it, make a sandwich, or serve it alongside something else. For dinner, I like to pull it out of the refrigerator after having made it earlier in the day, and then make some sides to go with it. It makes an easy dinner night that everyone here really loves. Did I mention Make Your Own Wrap night? That’s another winner. Just put out the wraps, the chicken salad and some toppings and sauces. People can make it their own. Another great thing about this recipe is, it is just as delicious, if not better, the next day with all the flavors melding. I do hope you will try this recipe, Let me know what you think!

Mediterranean Chicken Salad

Ingredients:

1 Whole Cooked Chicken, deboned, skin off and chopped

3/4 Cup of Sliced Black Olives

1/2 Cup of Sundried Tomato Bruschetta

1/2 cup of Fresh Basil, torn

1/2 cup of Sliced Green Onion (aka scallions)

1/3 Cup of Mediterranean Organic Roasted Red Peppers, diced

2 Stalks of Fresh Celery, diced and you can include the leaves too

1/3 Cup of Chopped Pecans or you can use Pine Nuts

1/4 Teaspoon of Salt

1/2 Teaspoon of Black Pepper

1 Tablespoon of Chives (fresh or dried)

1/2 Teaspoon of Dried Oregano

1/3 Cup of Olive Oil

2 Tablespoons of Red Wine Vinegar

Directions: Whisk together the olive oil, red wine vinegar, salt, pepper, chives and oregano to make your dressing. Place all the other ingredients into a large bowl after chopping and prepping them as directed above, and then pour over the dressing and toss thoroughly. Store in the refrigerator until ready to serve.

I hope you love this recipe as much as I do! I’d love to hear from you.

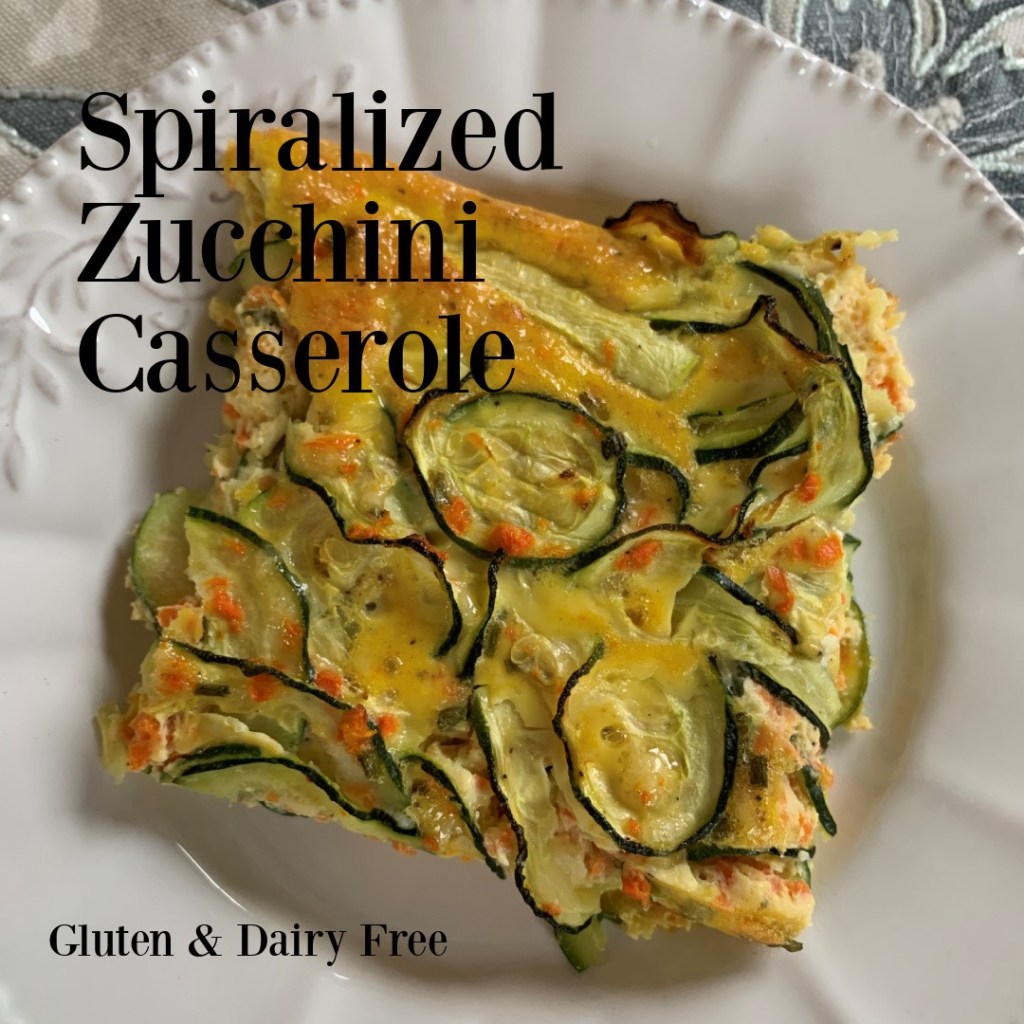
Spiralized Zucchini Casserole

Spring is finally here! It’s time for dishes that are lighter, and Easter is just around the corner.

Spiralized vegetables add variety and interest to meals instead of eating them the same old way. This Spiralized Zucchini Casserole is perfect for spring, and it is perfect for Easter brunch or dinner too.

There is no dairy in this dish, but I did add some nutritional yeast which gives it a hint of umami flavor, plus it is a great source of B12 vitamins. If you haven’t tried a spiralizer yet, I highly recommend one. They are very inexpensive and you can do so much with them.

Here’s the recipe:

Spiralized Zucchini Casserole

Ingredients:

4 Medium Zucchini Spiralized, I used the ribbon blade (about 4 cups)

13 Eggs

1/2 Cup of Good Mayo

2 Shredded Carrots

2 Teaspoons of Nutritional Yeast

1 Heaping Tablespoon of Djon

2 Teaspoons of Dried Chives

1 Teaspoon of Dried Parsley

1 Teaspoon of Salt, or to preference

1/2 Teaspoon of Black Pepper

Directions: Preheat your oven to 375 degrees F. Grease a 9 x 13 glass baking dish and set aside.

Spiralize your zucchini into ribbons and lay them evenly in your greased pan. If you want to make it even faster, you can buy fresh spiralized zucchini at your grocery store.

Whisk together your eggs, nutritional yeast, mayonnaise, Djon mustard, chives, parsley, salt and pepper. Stir in your shredded carrots. Pour the egg mixture over the spiralized zucchini in your casserole pan. It will cover your zucchini, but some will still be poking up. Use a fork to get as much under the eggs as possible. It doesn’t need to be completely immersed. Bake in your preheated oven for 30 to 40 minutes until the edges are golden brown and the eggs are set.

Spiralized Zucchini Ready for Egg Mixture

Serve! Yum! These make excellent leftovers for breakfast too! Let me know what you think! Any other recipes you would like to see me healthify? Let me know in the comments!

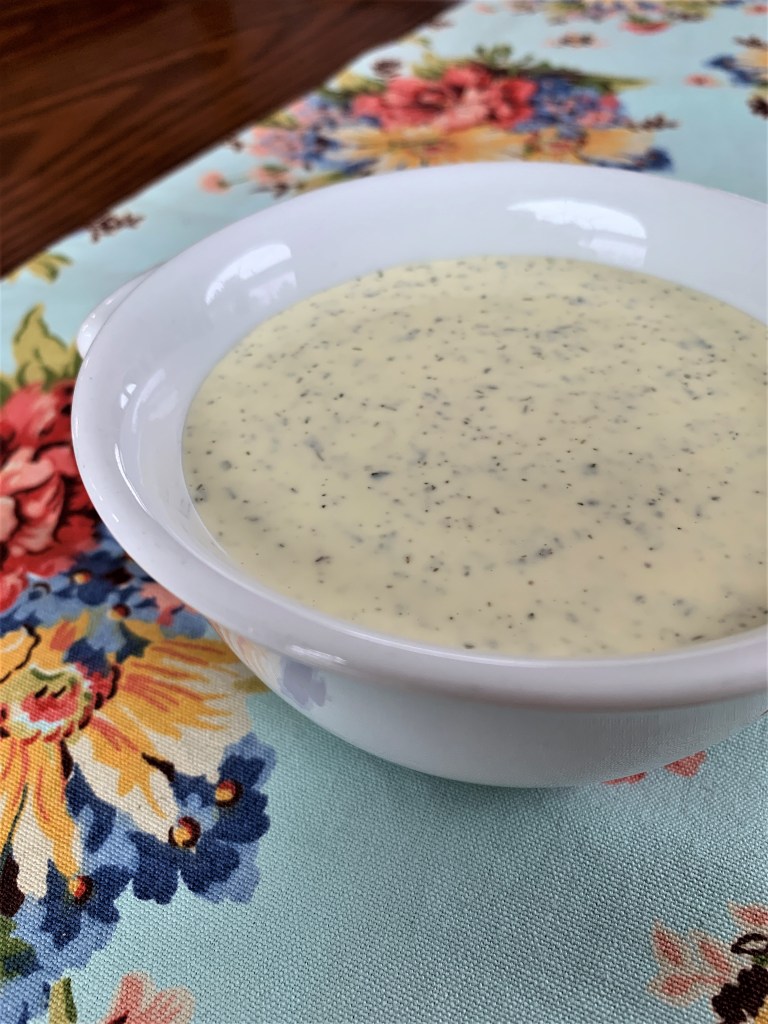
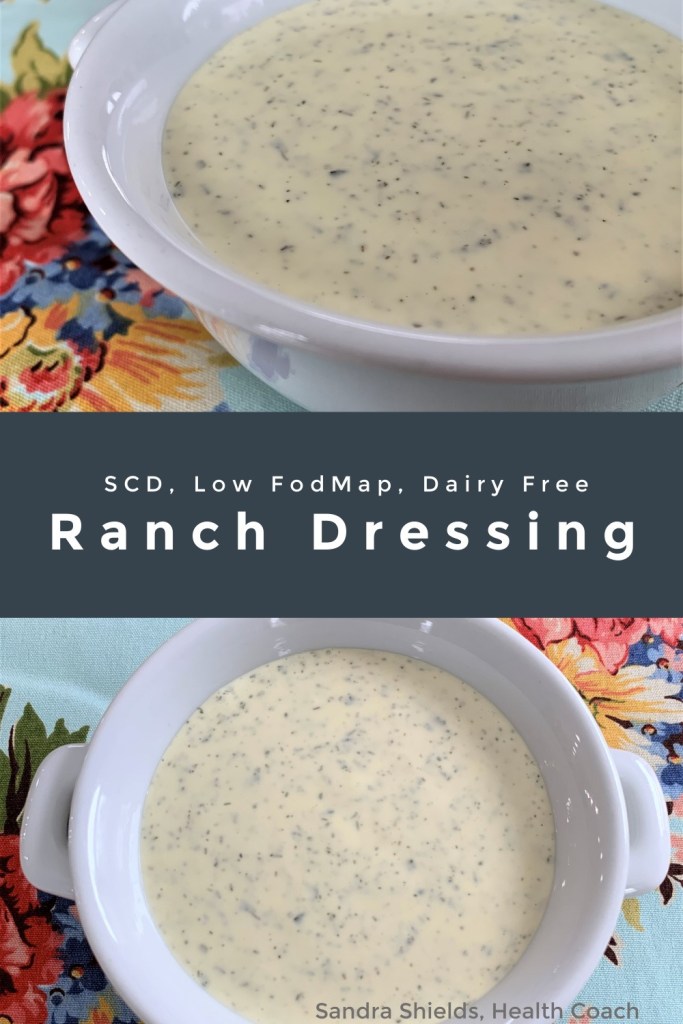
Ranch Dressing SCD, Low FodMap, Dairy Free

If you are looking for a great ranch dressing that is low fodmap, SCD Friendly or dairy free, here you go!

Garlic is a fodmap and not allowed on a low fodmap diet, but garlic Infused oil is allowed, and it is a fantastic replacement. If you haven’t been using it yet, you need to grab some! Chives give the dressing the signature ranch flavor, along with dill, and chives are also low fodmap.

This can be used on and with anything you like to eat with ranch. Delish!

SCD, Low FodMap, Dairy Free Ranch Dressing

Ingredients:

  • 1 Cup Paleo mayonnaise, (I use Primal Kitchen)
  • 1/4 Cup of fresh lemon juice
  • 2 Tablespoons Garlic Infused Olive Oil
  • 1 teaspoon of dried chives
  • 1 teaspoon of dried parsley
  • 1/2 teaspoon of dried dill
  • 1/2 to 1 teaspoon of salt to taste

Add all the ingredients into a bowl, whisk until fully incorporated and enjoy! Mmmmm! So good!

Easy Macadamia Peanut Butter Cups SCD, Healthy

The holidays are here, and it is easy to feel deprived when you are following a special diet when all the traditional treats are floating around.

These Macadamia Peanut Butter cups are SCD Legal, healthy and delicious. Those seeking healthier treats this holiday season will love these scrumptious, creamy cups with a balance of honey and a pinch of salt.

Each batch makes one dozen and can be easily doubled.

Easy Macadamia Peanut Butter Cups

Directions:

You will need two medium bowls that are microwave safe. Lay out a mini muffin tin with 12 paper liners.

Ingredients:

1/4 Cup of Peanut Butter, no sugar

1/4 Cup of Tahini, unsweetened

1/4 Cup of Coconut Butter (I use this kind – my fav!)

2 Tablespoons of Honey, Divided

Twelve whole raw Macadamia Nuts (I love Nuts.com for these. They are gluten free)

Sea Salt, two pinches

Directions: In the first bowl, add 1/4 cup of peanut butter, 2 tablespoons of coconut butter, 1 tablespoon of honey and a pinch of salt. Microwave just ten seconds at a time, stirring until it is smooth and fluid.

In the second bowl, add 1/4 cup of Tahini, 2 tablespoons of coconut butter, 1 tablespoon of honey and a pinch of salt. Microwave just ten seconds at a time again, stirring until it is smooth and fluid.

Using a teaspoon cookie scoop and just judging by eyeing it, divide the peanut butter mixture evenly between 12 mini muffin cup liners. Rap the pan on your countertop to flatten the surface. Then place in the freezer for ten minutes. After ten minutes the bottom layer should be firm. Scoop the Tahini mixture on top of the peanut butter base as you did before. Then, add one whole macadamia but to the top of each cup. Tap gently on the counter just to set the madacamia but in the top. Freeze for ten minutes, then they are ready to eat. Store them in an airtight container in the freezer until ready to serve.

Enjoy!

Speculaas, SCD Legal, Grain, Dairy, Egg and Gluten Free – Gift Ideas, Winter Self Care and Clean Beauty Lip Swaps!

Are you ready to bake Christmas cookies? These are Grain, Gluten, Egg and Dairy Free and SCD Legal.

Speculaas have been baked as far back as the 15th century in the Netherlands and Germany, but over the years their popularity has spread to many other countries. They are definitely associated with Christmas and were embossed with images of Saint Nicholas and were delicious cookie treats gifted to children.

This recipe for Speculaas is Grain, Dairy, Gluten and Egg Free to accommodate many, and they are SCD Legal. The cookie is absolutely delicious, and the warming spices make this a holiday cookie to be loved and made over and over. They are a perfect treat with a cup of tea! I can’t wait until cookie time to have these lately.

If you don’t have a Speculaas and Springerle roller, you can still make these cookies with an embossed cookie cutter, or just roll them out and cut them into pretty shapes like you would a sugar cookie. But these can be made the traditional way with a roller like I did. This is where I got my Speculaas Rolling Pin. There are also some really pretty ones here.

Here’s the recipe:

Speculaas

Ingredients:

1 1/2 Cups of Raw Cashews

1/2 Cup of Tahini

1/4 Cup of Runny Honey

1 Teaspoon of Vanilla Extract

1/4 Teaspoon of Baking Soda

1/4 Teaspoon of Salt

and the following warm spices that make the traditional Speculaas flavor:

1/2 Teaspoon of Cinnamon

1/4 Teaspoon of Nutmeg

1/4 Teaspoon of Cloves

1/8 Teaspoon of Ginger

1/8 Teaspoon of Ground Anise

1/8 Teaspoon of Cardamom

Directions:

In a food processor, grind the cashews until finely ground. Add the spices, baking soda and salt and pulse until thoroughly combined. Now add the tahini, honey and vanilla extract and process until thoroughly blended stopping to scrape down the sides as needed.

Gather up your dough and pat it out on a piece of plastic wrap into a 4 x 6 rectangle. Wrap it tightly and refrigerate for one hour.

After one hour, preheat your oven to 350 degrees F. and lay out a cookie sheet lined with parchment paper.

Take our your refrigerated cookie dough and place it between two sheets of parchment. With a regular rolling pin, roll the dough between the parchment out to a little less than 1/2 inch thick. Remove the top sheet of parchment, and straighten up your sides with your hands to make a rectangle. Now, take your Speculaas rolling pin and roll with medium pressure across the dough. I did this in two rows. You will get the feel for how much you need to press. This will spread your dough a little more as you roll and also emboss the cookie dough. It doesn’t need to be perfect. With a pizza cutter or a sharp knife, score the cookie dough also trimming the outer sides, but not moving the cookies.

Bake in your preheated oven for 14 minutes or until deeply golden brown, but not burned. I like to start checking after 12 minutes.

Take the baked cookies out of the oven and while still warm, run your pizza cutter or sharp knife down the scored lines again to separate the cookies. Let them cool completely on the cookie sheet. Store in an airtight container after cooled.

If you need some holiday shopping ideas and winter self care, here is a list of some of the things my family loves!

Some of our favorite things!

The cutest comfy nightgowns The sheep are adorbs!

A beautiful Matcha Tea Gift Set

Elderberry Syrup for Immunity

Magnesium Body Lotion for Better Sleep, More Magnesium, Aches and Pains (scent free)

For the little children:

Super Cool Train Set

Unicorn Chair for the Little Princesses

Rainbocorns are very popular in the elementary age crowd right now.

Beautiful Dog Collars for the Pups. Ming has the red one.

Also, giving the gift of clean beauty is always a wonderful way to show your love and appreciation for someone and switch to safer products. Do you have a lip wear preference? I like to wear something on my lips to protect them, give me a color pop, shimmer or shine and take good care of my lips. If you’ve ever had chapped lips, you know how uncomfortable that is. Beautycounter lip products are all GLUTEN-FREE, nut-free, soy-free & vegan AND are tested 3 times for safety from hormone disrupting chemicals and heavy metals. BC lips are my favorite of all time, not just safer – theyā€™re so hydrating and not sticky! Here’s some more helpful info when choosing a lip product:

Clean Lip Products that are Gluten Free!

TheĀ JelliesĀ shimmer and shine and fit right into your pocket. They are a cushy, non-sticky gloss. They come in duos of Sorbet & Peppermint, Orange Cream & Honey, or Raspberry & Cocoa.

Beyond GlossĀ delivers shimmer (if you pick a shimmer shade) and shine with sheer clean color. I LOVE that is has Responsibly sourced vanilla: ECOCERT-certified organic vanilla from Madagascar is responsible for this glossā€™ signature sweet scent. Our supplier is committed not only to sourcing the highest quality of vanilla, but also to improving the quality of life for their community of farmers.

Sheer Genius Conditioning LipstickĀ is creamy and buildable with the conditioning benefits of a balm, so it gives you color with the benefits of a balm. Again with that Responsibly sourced vanilla that smells so darn good!

Color Intense LipstickĀ is a long wearing lipstick with a satin finish with natural peppermint oil. My current favorite is 9 to 5, but I can’t wait to try some other shades too. A definite Date night or Dress Up lipstick, or if you like a matte look.

You can shop Beautycounter with me here: https://www.beautycounter.com/sandrashields

I’d love to help you switch to safer, and every time I can be of service helping someone switch to safer, I do a little jazzy hands, happy dance!

As always, I love to hear from you! Drop me a comment below and touch base. Have a wonderful holiday season!

xoxo

Delicious Healthy Peanut Butter Cups

First of all, this is an absolutely delicious recipe for peanut butter cups that uses honey to sweeten them and is healthier for you. If you prefer not to use peanut butter, choose another nut butter. They will still be delicious!

Also, I have to get something off my chest, because lately I am seeing people unfollow on social media because someone posts a treat, or a funny food quote that isn’t “healthy”. I am here to tell you, Don’t let perfection be the enemy of the good! Life is about balance. When one area is out of balance, all the other areas can be affected. A sense of humor when approaching life, health and food are just as important as what you are eating.

We had a little exercise in nutrition school called The Circle of Life, and you looked at all the areas of wellness and balance on a color wheel. It helps see what is out of sync. The categories are:

~Joy

~Social Life

~Relationships

~Home Environment

~Home Cooking

~Physical Activity

~Health

~Education

~Career

~Finances

~Creativity

You can go take the quiz yourself right here: https://www.integrativenutrition.com/circle-of-life

I encourage you to take the quiz every three to four months to help you be aware of your life balance so you can make changes.

Now, for a absolutely delicious Peanut Butter Cup Recipe! There are some amazing benefits to eating chocolate! Like enhancing brain function, mood and it’s loaded with flavanols!

Delicious Healthy Peanut Butter Cups

Directions:

Line a mini muffin cup pan with twenty mini liners

Bottom Layer:

1/3 Cup of No Sugar Added Creamy Peanut Butter

2 Tablespoons of Runny Honey

2 Tablespoons of Coconut Oil (Melted)

2 Tablespoons of Cocoa Powder

1 Teaspoon of Vanilla Extract

1/8 Teaspoon of Sea Salt

Whisk together all the ingredients with a fork until combined.

Spoon the mixture evenly into the bottom of your muffin liners.

Top Layer:

1/3 Cup of No Sugar Added Creamy Peanut Butter

2 Tablespoons of Runny Honey

2 Tablespoons of Melted Coconut Oil

1/2 Teaspoon of Vanilla Extract

1/8 Teaspoon of Sea Salt

Whisk together the ingredients until thoroughly combined and spoon over the bottom layer, dividing evenly. Rap the filled muffin tin onto the counter several times to flatten the peanut butter cups. Optional, sprinkle a little flaky sea salt on top like Fleur de Sel.

Place the peanut butter cups into the freezer to firm for 30 minutes. Store these in either the freezer or refrigerator in a sealed container depending on how firm you like them.

As always, I love to hear from you. Did you go take the Circle of Life quiz?

Healthier Snickerdoodles – Gluten Free

Warm spices always sound so delicious and enticing when September hits. I like to fill my kitchen with the aroma, and Snickerdoodles are one of my favorite cookies. It’s nice to have an allergen friendly cookie recipe in my arsenal, and one that is healthier too but still tastes sweet and yummy.

This is a new recipe for Snickerdoodle cookies that are gluten, dairy and nut free. I have a few options for you as well with ingredients you have right in your cupboard.

You can make these with maple sugar for a cinnamon maple flavor. Very good! But you can also use pure cane sugar if you choose. They are delicious both ways. I love the whole grain single flour option in this recipe. I started out making them with quinoa flour, and then I tested them with brown rice flour. They both tasted like a great Snickerdoodle with a nice texture. The main difference is when you use quinoa flour, the cookies tastes nutty. I like them both ways and have been rotating how I make them.

With a little lower sugar, these cookies are better for you. I also used half shortening and half olive oil. I have seen more and more baking with olive oil lately, and it is a healthy option. Italy for instance has been using it for baking for many, many years with delicious results.

Here’s how to make my healthier Snickerdoodles!

Gluten Free Snickerdoodles

Preheat your oven to 350 degrees F.

Ingredients:

2 Cups of Quinoa Flour or Brown Rice Flour

1/2 Cup of Maple Sugar or Pure Cane Sugar

1/2 Cup of Organic Shortening

1/2 Cup of Olive Oil

1 Egg

1 1/2 Teaspoons of Vanilla Extract

1/2 Teaspoon of Baking Soda

1/4 Teaspoon of Salt

Cinnamon for the tops (about a tablespoon)

Directions:

In a mixing bowl, beat the sugar, shortening and olive oil until creamy. Add the egg and vanilla extract, and beat again to incorporate well.

In another bowl, whisk together your flour, baking soda and salt. Then, add the flour mixture to the wet ingredients and mix until completely incorporated.

With a tablespoon cookie scoop, scoop out 24 tablespoon sized cookies onto two parchment lined cookie sheets. Flatten the cookies with the palm of your hand to half inch thick rounds. Sift the cinnamon over the tops of the cookies directly onto the cookie sheet.

Bake in your preheated oven for 12 to 14 minutes until the cookies are starting to turn golden brown around the edges. Cool on the cookie sheet.

Makes 24 cookies

Drop a line to let me know what you think. I always like to hear from you!

Sandra

1 2 21