Tag Archives: SCD

Sheet Pan Salsa Chicken

Sheet Pan Salsa Chicken

Two words…chicken and salsa! They just go together in a palate pleasing way, and sheet pan meals are some of my favorite weeknight ways to cook for the family!

When I am roasting boneless chicken, thighs are my go to, because they never disappoint! I do love a juicy chicken breast, but honestly you need to be right on top of it to get the chicken out right when it reaches 165 degrees F. and not a minute after to get a really juicy breast, and the best flavor for chicken breasts is bone in. I had seven chicken thighs, but this will vary depending on the size.

Back to this utterly delicious Salsa Chicken recipe! It’s on my rotation menu based on all the Mmmm’s I am getting from the kids and hubby. Choose your favorite salsa for this. I used Fody Foods Low FodMap Salsa in this recipe which was surprisingly delicious since it didn’t have the traditional onion and garlic in it. But use your favorite, and your favorite heat level! The salsa is a vessel for the fresh tangy lime juice and green onion. Another spring favorite addition to meals. Greens onions are lovely sprinkled on savory dishes in general. They are exceptional on salads too. If you are eating Low FodMap, Fody Foods is a great choice. You will also need a can of black beans. My favorite canned beans brand is Eden which is headquartered in my home state of Michigan. They are non-gmo, soaked (very important for digestion), organic, and in BPA free cans. I always rinse my beans under cold running water before using them.

Low FodMap Salsa

I have never in my recent memory been so glad for Spring to be here. The winter seemed longer than usual, and I love the promises of Spring with renewal all around us and new growth! When I saw this blue sheet pan I’m using at my local Marshall’s I had to grab it. The color was so gorgeous! It is so good to go outside for a walk and hear so many birds singing, and best of all, wearing tennis shoes instead of boots. There is a feeling of freedom not being bundled up against the cold. I am not one to stay inside all winter, I need to be outdoors because the fresh air just feels good, and it boosts my mood. I’m just starting to get out into my gardens and do some clean up! I see the deer are out and about too. They are very hungry, even eating out of my bird feeder, so I forgive them for digging up a couple of my tulip bulbs.

Mexican Seasoned Chicken for Sheet Pan Salsa Chicken

In this chicken recipe I have two colors of peppers. Did you know peppers are higher in Vitamin C than oranges? They are a perfect addition to this salsa chicken. Feel free to substitute any colored peppers you have on hand. Green would be good too.

I mixed up a Low FodMap Mexican Spice blend to coat the chicken that is delectable. Cumin gives the chicken a smoky flavor, and it is not hot, so it won’t blow your socks off! If you are into that, you can use a hot salsa and your favorite hot sauce at the table like my son, Jeff. 🙂

I’d like to add that if you are having digestive problems, a gut health and microbiome test can be very helpful, and balancing your gut can be a huge help in overcoming FodMap intolerance. FodMaps are very beneficial to feeding the good bacteria in your gut, which you want. Low FodMap eating can help alleviate symptoms, but it is always good to get to the root cause. I highly recommend this Gut Health Test from Thorne which is surprisingly reasonable, I just took it myself, you can do it at home and the report is extensive and very helpful with recommendations based on your results and a deep dive into your gut.

To make this dish very Low FodMap, omit the black beans which are a moderate fodmap. Beans do have a lot of health benefits, and soaked beans are easier to digest.

Sheet Pan Salsa Chicken

Ingredients:

3 pounds of boneless chicken thighs

1 16 oz. jar of salsa

2 large bell peppers, one yellow one red

1 can of Black Beans, drained and rinsed under water (I always use Eden in my recipes)

3 green onions, sliced (green parts only for Low FodMap)

Juice of 1 Lime (A juicy one. Limes can be finnicky)

Garlic Infused Olive Oil

Mexican Spice Blend:

1 Tablespoon of Cumin

2 Teaspoons of Chili Powder

1/2 Teaspoon of Oregano

1/2 Teaspoon of Salt

1/2 Teaspoon of Black Pepper

Directions: Preheat your oven to 400 degrees F. Lightly grease a large sheet pan. I used Avocado Oil spray. Put your chicken thighs in a medium bowl. Add a tablespoon of garlic olive and toss to coat the chicken.

Mix together the Mexican Spice Blend. Sprinkle it over your chicken, and toss again until the chicken is evenly coated. Place the chicken thighs evenly spaced on your large sheet pan. Put the chicken in the preheated oven and roast for 20 minutes.

While the chicken is roasting. Put your salsa in a bowl. Add the can of drained and rinsed beans, sliced green onion, and the juice of a lime. Stir it together. Mmm. It’s looking good!

Wash, seed and slice your peppers into long strips. In a bowl, toss the peppers with an additional Tablespoon of Garlic Olive Oil and sprinkle with salt and pepper to taste.

When the 20 minutes are up for the chicken roasting in the oven, pull it out and nestle the peppers around the chicken thighs, not on top of them. That’s for the salsa. Now, mound the black bean salsa mixture over each of the thighs evenly. Place the sheet pan back in the oven and continue roasting for 20 more minutes until the peppers are tender and the chicken is cooked through. Your house is going to smell amazing by the way.

It is ready to serve. You can serve this over cauliflower rice or a rice of your choice. It is absolutely delicious. Don’t forget the pan juices. Spoon them up too. If you love Mexican food, you and your family will love this meal. It is a wonderful, healthy and delicious sheet pan chicken meal! Leftovers are not a problem either, unless you don’t have any. Guess what I’m having for lunch today? 😉 Please leave any comments below. I love to hear from you. Are you enjoying Spring? What is blooming in your area, and what is your favorite Spring meal lately? Have a wonderful day!

Tahini Honey Ice Cream, Dairy Free, SCD Low FodMap

Ahhh, ice cream! It is so creamy and delicious. It a delectable treat! The problem is when it doesn’t love us back. This Tahini Honey Ice Cream is gut friendly, dairy free, with healthful ingredients like raw honey (at a low fodmap serving size of under two tablespoons per serving.) It is lovely and sweet with just one tablespoon of clover honey per 1/2 cup. Egg yolks in ice cream give it the classic custardy, creamy mouthfeel, and the tahini and honey go together so well with a little vanilla extract and creamy, dairy free coconut milk.

If you don’t have an ice cream maker, no worries, this is churn free!

I love a good tahini. I can eat it right from the spoon. My current favorite is Soom roasted tahini which I get at Thrive Market and has no sugar added.

Tahini Honey Ice Cream

Ingredients:

1 Can of Full Fat Coconut Milk with no additives 1 1/2 Cups

1/4 Cup of Good Tasting Tahini with no sugar added

1/4 Cup of Clover Honey (clover honey is low fodmap up to a 2 tablespoon serving. See Dr. Siebecker’s SCD, Low FodMap SIBO Specific Food Guide on my homepage. It’s downloadable!)

2 Egg Yolks

1 Teaspoon of Vanilla Extract

a pinch of salt

Directions: Whisk all the ingredients together with a wire whisk in a medium saucepan.

Cook over medium high heat whisking constantly until the mixture reaches 160 degrees F. Do not boil. It should coat the back of a spoon. This takes about 5 minutes or so.

Pour the ice cream mixture into a loaf pan, and place it in the freezer. Stir the ice cream every hour for 4 hours, or until its a nice ice cream consistency. At this point you can eat it, or put it into a freezer safe container for later. When serving from the freezer, let it set on the counter for about ten minutes to soften.

It is a delicious and healthy treat. I hope this helps you enjoy ice cream again in a healthful way. Delicious whether you are following a SCD Low FodMap diet or just looking to eat healthier treats!

*The low fodmap serving size is 1/2 cup.

*Tahini is SCD legal after 3 months of no symptoms. This is also delicious with Almond Butter.

Turkey Roulade, SCD, Low FodMap and Grain Free

Turkey Roulade, SCD, Low FodMap and Grain Free

This is a delicious way to make a boneless turkey breast that is a little bit fancy, but quite simple really.

This recipe uses a low fodmap pesto – here and some aged cheese grated over the pesto before rolling it up. It is then skewered and rubbed with melted ghee, rosemary, salt and pepper before roasting. This is also exceptional the next day served chilled. You can slice it very thin after chilling, and it is delicious on salads!

Turkey Roulade

Ingredients:

1 approximately 4 pound boneless turkey breast

1/4 cup of pesto (here’s my low fodmap recipe)

1/2 cup of packed shredded aged cheese like Parmigiano Reggiano or an aged Romano

2 Tablespoons of crushed dried rosemary

2 Tablespoons of ghee

salt and pepper to taste

Skewers like kabob skewers

Directions:

Butterfly the boneless turkey breast so it lies in a flat rectangle. Leave the skin attached. Place the turkey on a cookie sheet, and pound it with a meat mallet until it is in a rectangle about 14 by 8 inches.

With the skin side down, spread the turkey with the pesto and shredded cheese. Starting at a short side, roll the turkey up into a tight roll. Take your kabob skewers and poke them through the turkey roast starting at the seam and all the way through to hold your spiral together.

Now, melt the ghee and stir in the rosemary, salt and pepper. Brush the melted ghee mixture all over the roast. Place the turkey roast in a roasting pan, skin side up, and roast at 350 degrees F. for 1 1/2 to 2 hours depending on the weight of the roast or until the internal temperature measures 365 degrees F. Remove the roulade from the oven and let set 15 minutes before carving into slices. Enjoy and happy eating!

Speculaas, SCD Legal, Grain, Dairy, Egg and Gluten Free – Gift Ideas, Winter Self Care and Clean Beauty Lip Swaps!

Are you ready to bake Christmas cookies? These are Grain, Gluten, Egg and Dairy Free and SCD Legal.

Speculaas have been baked as far back as the 15th century in the Netherlands and Germany, but over the years their popularity has spread to many other countries. They are definitely associated with Christmas and were embossed with images of Saint Nicholas and were delicious cookie treats gifted to children.

This recipe for Speculaas is Grain, Dairy, Gluten and Egg Free to accommodate many, and they are SCD Legal. The cookie is absolutely delicious, and the warming spices make this a holiday cookie to be loved and made over and over. They are a perfect treat with a cup of tea! I can’t wait until cookie time to have these lately.

If you don’t have a Speculaas and Springerle roller, you can still make these cookies with an embossed cookie cutter, or just roll them out and cut them into pretty shapes like you would a sugar cookie. But these can be made the traditional way with a roller like I did. This is where I got my Speculaas Rolling Pin. There are also some really pretty ones here.

Here’s the recipe:

Speculaas

Ingredients:

1 1/2 Cups of Raw Cashews

1/2 Cup of Tahini

1/4 Cup of Runny Honey

1 Teaspoon of Vanilla Extract

1/4 Teaspoon of Baking Soda

1/4 Teaspoon of Salt

and the following warm spices that make the traditional Speculaas flavor:

1/2 Teaspoon of Cinnamon

1/4 Teaspoon of Nutmeg

1/4 Teaspoon of Cloves

1/8 Teaspoon of Ginger

1/8 Teaspoon of Ground Anise

1/8 Teaspoon of Cardamom

Directions:

In a food processor, grind the cashews until finely ground. Add the spices, baking soda and salt and pulse until thoroughly combined. Now add the tahini, honey and vanilla extract and process until thoroughly blended stopping to scrape down the sides as needed.

Gather up your dough and pat it out on a piece of plastic wrap into a 4 x 6 rectangle. Wrap it tightly and refrigerate for one hour.

After one hour, preheat your oven to 350 degrees F. and lay out a cookie sheet lined with parchment paper.

Take our your refrigerated cookie dough and place it between two sheets of parchment. With a regular rolling pin, roll the dough between the parchment out to a little less than 1/2 inch thick. Remove the top sheet of parchment, and straighten up your sides with your hands to make a rectangle. Now, take your Speculaas rolling pin and roll with medium pressure across the dough. I did this in two rows. You will get the feel for how much you need to press. This will spread your dough a little more as you roll and also emboss the cookie dough. It doesn’t need to be perfect. With a pizza cutter or a sharp knife, score the cookie dough also trimming the outer sides, but not moving the cookies.

Bake in your preheated oven for 14 minutes or until deeply golden brown, but not burned. I like to start checking after 12 minutes.

Take the baked cookies out of the oven and while still warm, run your pizza cutter or sharp knife down the scored lines again to separate the cookies. Let them cool completely on the cookie sheet. Store in an airtight container after cooled.

If you need some holiday shopping ideas and winter self care, here is a list of some of the things my family loves!

Some of our favorite things!

The cutest comfy nightgowns The sheep are adorbs!

A beautiful Matcha Tea Gift Set

Elderberry Syrup for Immunity

Magnesium Body Lotion for Better Sleep, More Magnesium, Aches and Pains (scent free)

For the little children:

Super Cool Train Set

Unicorn Chair for the Little Princesses

Rainbocorns are very popular in the elementary age crowd right now.

Beautiful Dog Collars for the Pups. Ming has the red one.

Also, giving the gift of clean beauty is always a wonderful way to show your love and appreciation for someone and switch to safer products. Do you have a lip wear preference? I like to wear something on my lips to protect them, give me a color pop, shimmer or shine and take good care of my lips. If you’ve ever had chapped lips, you know how uncomfortable that is. Beautycounter lip products are all GLUTEN-FREE, nut-free, soy-free & vegan AND are tested 3 times for safety from hormone disrupting chemicals and heavy metals. BC lips are my favorite of all time, not just safer – they’re so hydrating and not sticky! Here’s some more helpful info when choosing a lip product:

Clean Lip Products that are Gluten Free!

The Jellies shimmer and shine and fit right into your pocket. They are a cushy, non-sticky gloss. They come in duos of Sorbet & Peppermint, Orange Cream & Honey, or Raspberry & Cocoa.

Beyond Gloss delivers shimmer (if you pick a shimmer shade) and shine with sheer clean color. I LOVE that is has Responsibly sourced vanilla: ECOCERT-certified organic vanilla from Madagascar is responsible for this gloss’ signature sweet scent. Our supplier is committed not only to sourcing the highest quality of vanilla, but also to improving the quality of life for their community of farmers.

Sheer Genius Conditioning Lipstick is creamy and buildable with the conditioning benefits of a balm, so it gives you color with the benefits of a balm. Again with that Responsibly sourced vanilla that smells so darn good!

Color Intense Lipstick is a long wearing lipstick with a satin finish with natural peppermint oil. My current favorite is 9 to 5, but I can’t wait to try some other shades too. A definite Date night or Dress Up lipstick, or if you like a matte look.

You can shop Beautycounter with me here: https://www.beautycounter.com/sandrashields

I’d love to help you switch to safer, and every time I can be of service helping someone switch to safer, I do a little jazzy hands, happy dance!

As always, I love to hear from you! Drop me a comment below and touch base. Have a wonderful holiday season!

xoxo

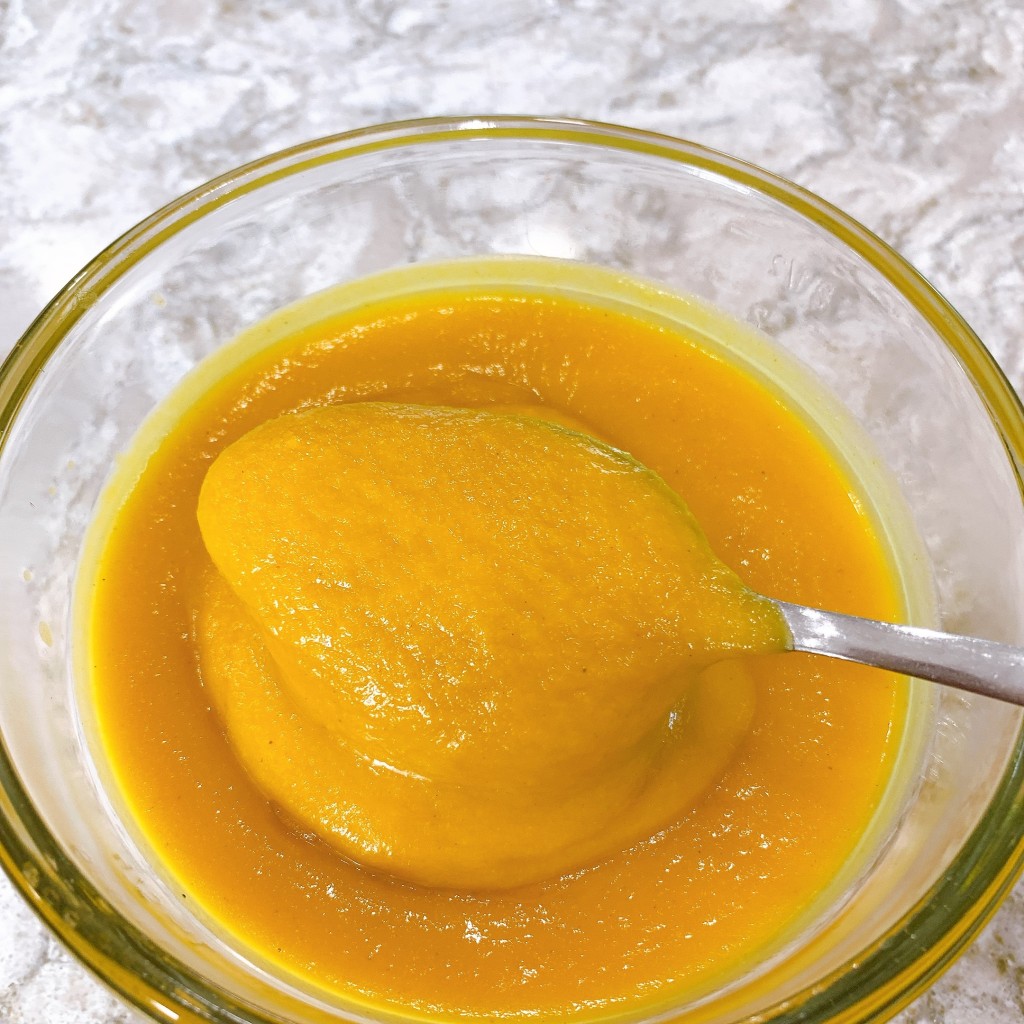
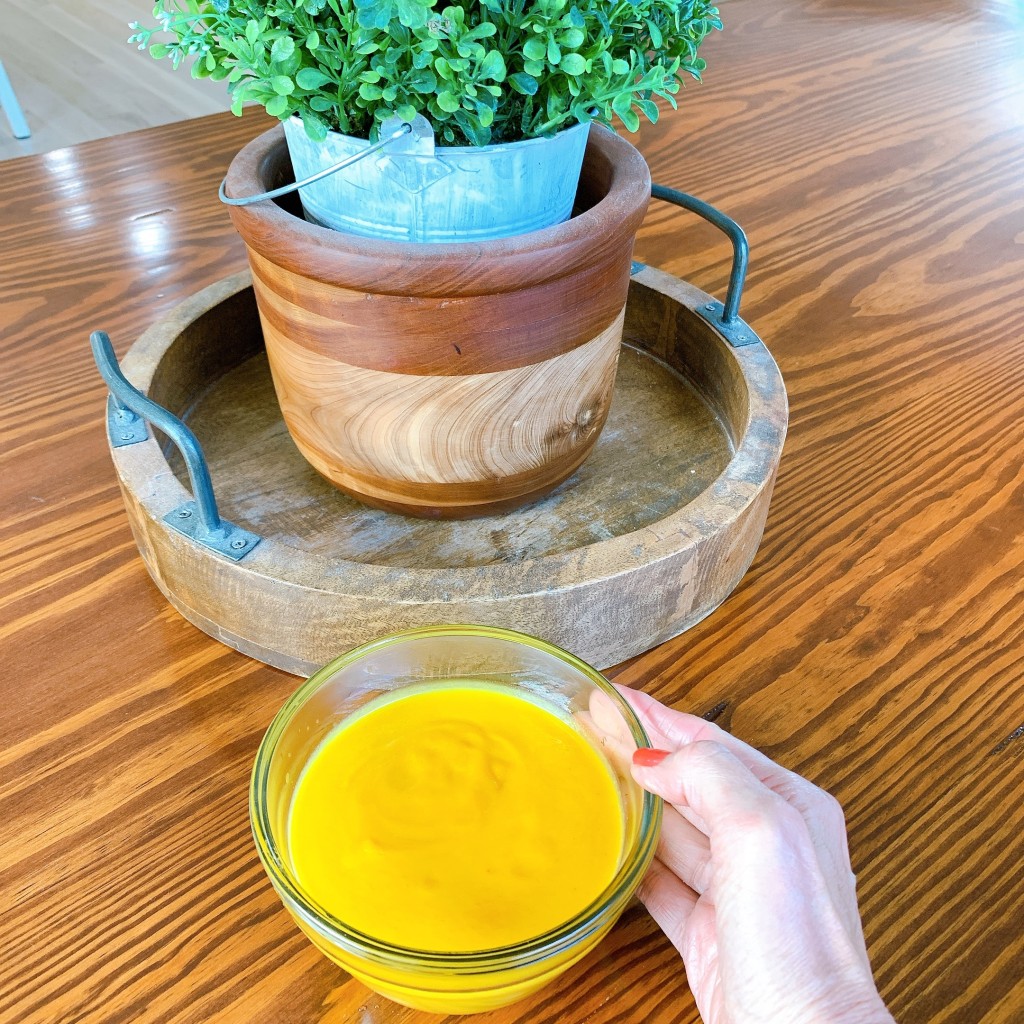
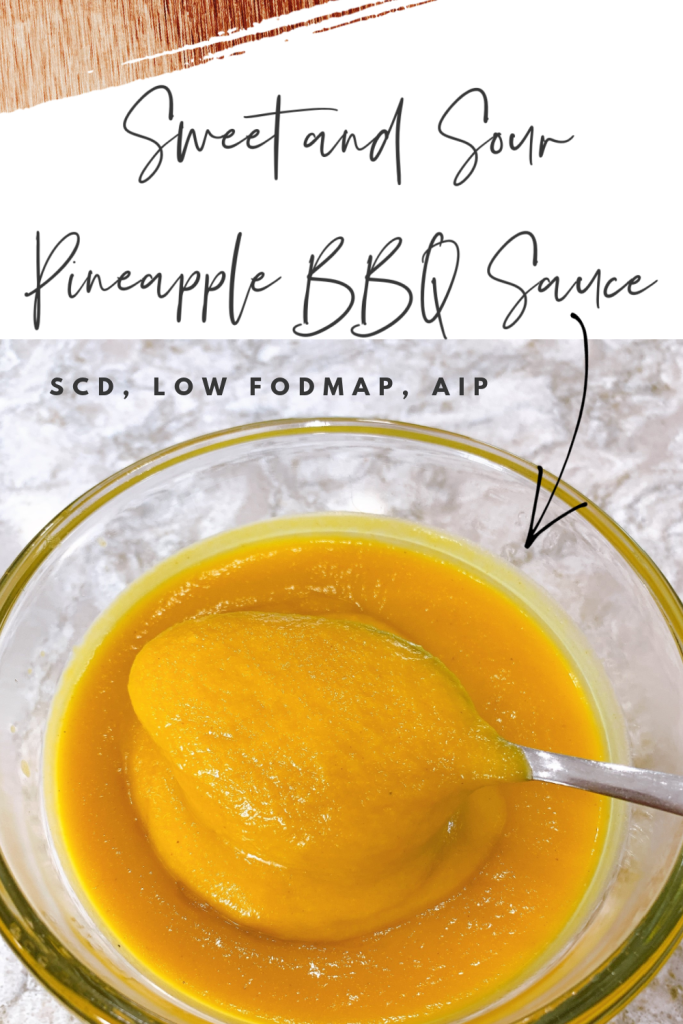
Sweet and Sour Pineapple BBQ Sauce SCD, Low FodMap, AIP

I’m always on the hunt for new healthy sauces I can make that are versatile and can be used throughout the week to make meals more interesting and delicious!

This Sweet and Sour BBQ is a very versatile sauce that you can use on chicken, vegetables and as a dipping sauce for delicious savory sweet and sour flavor. You will love that the ingredients in this sauce are so good for you with very little added sweetener. It’s the pineapple that gives it most of it’s sweetness with a little smoked salt, honey and cider vinegar for sweet tanginess. there is also a little butternut squash puree in it to give it beautiful color, creaminess and sneak in some veggies that kids won’t even know is there. This recipe is SCD, Low Fodmap and AIP Paleo!

Sweet and Sour Pineapple BBQ Sauce SCD Low FodMap

Ingredients:

1 Can of Native Forest Organic Pineapple Chunks (14 oz.) This is in it’s own juice only

1/2 Cup of Pureed Cooked Butternut Squash

1/4 Cup of Apple Cider Vinegar

2 Tablespoons of Garlic Infused Olive Oil

2 Tablespoons of Clover Honey (clover honey is low fodmap if under 2 tablespoons)

1 Teaspoon of Ground Ginger

1/4 Teaspoon of Smoked Salt (optional but highly recommended)

3/4 Teaspoon of Salt (use a whole teaspoon if omitting the smoked salt)

In a high speed blender, blend all the ingredients using the whole can of pineapple with the juice. Do not drain. Pour the blended ingredients into a medium saucepan, and bring to a boil on the stovetop. When the BBQ sauce comes to a boil, turn the heat down to a simmer, and simmer for 15 minutes until it has reduced by a third, stirring often.

Cool the sauce if you are not using it right away. Pour the BBQ sauce into a container and store it in the refrigerator.

Yesterday, I made some crab spring rolls using rice spring roll wrappers in my air fryer, and this sauce was delicious to dip them in. You can also make a double batch and freeze half. It’s so good to have a variety of homemade sauces on hand with no additives!

Turkey and Vegetable Stuffed Spaghetti Squash

Stuffing vegetables is very tasty and healthy! This Turkey Stuffed Spaghetti Squash does not disappoint!

I used Butcher Box ground turkey and lots of delicious and flavorful vegetables and herbs in this recipe. To meld it all together, you will stir in some good mayonnaise and top it with aged real shredded parmesan cheese. To make it dairy free and Whole 30, just omit the cheese.

Since I’m all about efficiency in the kitchen, and although I love to cook, time matters, (Seems I’m often pinched for time) so, I split and bake the spaghetti squash the day before and then refrigerate it until the next day when I’m ready to make the dish. That way you are spending under an hour in the kitchen to make dinner. Here’s how to make it:

Turkey and Vegetable Stuffed Spaghetti Squash

Ingredients:

1 Spaghetti Squash

2 lbs. of ground turkey (I used Butcher Box) You can get $15. off here.

2 Medium Zucchini (diced)

1 Large Fennel Bulb (diced)

1 Red Bell Pepper ( seeded and diced)

1 Bunch of Scallions (sliced)

1 Cup of real Parmesan Cheese, grated (optional)

3 Tablespoons of Garlic Infused Olive Oil (divided)

1 Tablespoon of Dried Chives

2 Teaspoons of Black Pepper

1 1/2 Teaspoons of Smoked Paprika

1 1/2 Teaspoons of Dried Parsley

1 1/2 Teaspoons of Ground Cumin

3/4 Teaspoon of Dried Oregano

1 1/2 Teaspoons of Salt, or to taste

1 Tablespoon of Fresh Lemon Juice

1/2 Cup of Avocado Oil Mayonnaise (I use this brand)

Directions:

Preheat your oven to 400 degrees F. Split the spaghetti squash stem to stem and remove the seeds. Place the squash halves cut side down on a baking sheet, and bake for one hour. Remove the squash from the oven when tender and flip to cool. At this point, you can store in the refrigerator until the next day if desired.

On the day you make the dish, preheat your oven to 400 degrees F. Put the Spaghetti Squash back into the oven to rewarm for ten minutes cut side down, and prepare it for stuffing. To make the Turkey and Vegetable Stuffed Spaghetti Squash, in a large skillet, add two tablespoons of garlic infused olive oil, and cook the diced zucchini, fennel, red bell pepper and scallions for two minutes on medium high heat. Add 1 teaspoon of salt, 1 teaspoon of black pepper, the chives, smoked paprika, parsley, cumin and oregano. Continue cooking and stirring occasionally until the vegetables are tender. Remove the vegetable mixture to a bowl, and in the same pan, add the last tablespoon of garlic infused olive oil, the ground turkey, a teaspoon of salt and a teaspoon of pepper and cook, breaking the turkey up with a spatula into small crumbles as it browns.

Add the vegetable mixture back into the cooked turkey. Then, stir in the mayonnaise and lemon juice. Brush the inside of the spaghetti squash with a little extra olive oil and sprinkle with salt and pepper. Mound the filling equally between the two halves of spaghetti squash. (You may have extra filling depending on the size of your squash. It’s wonderful just as is.) Then, sprinkle the tops with the grated parmesan. Bake in the preheated oven for 1/2 hour. To serve, scoop out portion sizes with a large serving spoon right down to the bottom of the squash.

This is a delicious recipe and a wonderful way to get a variety of vegetables into your dinner.

I recently signed up for monthly deliver of Butcher Box meats, and I absolutely love the quality and convenience. The ground turkey is the best I have ever tasted. You can choose your box each month and switch things out depending on what you’d like. You get to build your own box, plus they have specials each month. The link here gives you a special code for 15% off. I highly recommend it for quality meat!

Enjoy!

Zucchini Squash Casserole

Squash Casserole 1

This is such a great old fashioned squash casserole!

Squash Casserole 4

If you like zucchini, but it gets boring for you the same old way. Or, if you are a fan of comfort food in the form of casseroles, like your Mom or Grandma used to make, here’s one that is healthy, delicious and comforting.

Squash Casserole 2

Casserole is great leftover for lunch too! Love me some leftover casserole!  This casserole is meat free, so feel free to use it as a side dish. I like to make pork tenderloin, chicken or bun free burgers to go with it.

Squash Casserole 3

Squash Casserole

Ingredients:

1 1/2 lbs. of sliced zucchini (this is about 3 to 4 medium, depending on the size)

1/3 Cup of Good Olive Oil or Melted Ghee

2 Eggs

1/2 Cup of Mayo (I use Avocado Oil Mayo like this)

1/2 Cup of sliced green onions

1 Orange Bell Pepper, diced

1/2 Teaspoon of Sea Salt

1/4 Teaspoon of Black Pepper

Topping:

1/2 Cup of  Pecans

2 Tablespoons of Goat Cheese (optional) Omit for SCD or substitute with a SCD Legal Cheese. There is a free PDF guide at the top of my home page you can download and print for free.

1 Tablespoon of Garlic Infused Olive Oil

1 Teaspoon of Dried Chives

1 Teaspoon of Dried Parsley

1/4 Teaspoon of Black Pepper

1/8 Teaspoon of Sea Salt

Directions:

Preheat your oven to 350°F.

Grease a 12″ x 8 1/2″ Casserole dish.

To make the casserole filling:

Bring 2 inches of salted water to a boil in a large frying pan with a lid. When the water comes to a boil, add the sliced zucchini and cook for 8 to 10 minutes until tender. Drain the cooked zucchini into a colander. Allow it to sit and drain for ten minutes in the colander. You don’t want a soggy casserole. Meanwhile, whisk together in a large bowl, the olive oil, eggs, mayonnaise, salt and pepper until well combined. Whisk in the scallions and orange bell pepper. Pat the drained zucchini with paper towel to remove any excess water. Then, stir the zucchini into the egg mixture. Pour the zucchini mixture into your greased baking casserole.

Now, make the topping.

Finely chop the pecans, or alternatively pulse in a food processor. I like this handy mini Ninja Express one for this job. It has made my life so much easier, and I don’t have to clean the big food processor. This goes right in the dishwasher! Add in the salt, pepper, chives and parsley, and mix thoroughly. Sprinkle the crumb topping evenly over the casserole. Now, if you are using goat cheese, which is very delicious in this recipe if you tolerate it, sprinkle small pieces of goat cheese over the crumb topping.

Place the casserole into your preheated oven, and bake for 50 to 60 minutes, until the top is golden brown and the casserole is bubbly.

This casserole can be prepped up to a day ahead and baked from the refrigerator. You will need to increase your baking time by ten minutes.

Enjoy!

Squash Casserole 5

*This post has affiliate links in it. I receive a very small commission if you purchase through my links. The small commission helps cover the cost of maintaining this blog.

Squash Casserole, Gluten and Grain Free, SCD

Orange Ginger Marinated Chicken Thighs

I have a lovely recipe for marinated chicken thighs that I’ve been making the last few months that is definitely a keeper. It is SIBO friendly, Low FodMap and makes twelve chicken thighs. That may seem like a lot, but for a family of five, I can tell you that they do not last long enough.

Orange Ginger Marinated Chicken Thighs 2

The thighs are wonderful to use leftover and sliced on top of a salad for lunch the next day. Marinating them infuses them all the way through with a delicious orange ginger flavor. If you are looking for more leftover inspiration, cut the leftover chicken off the bone into bite size pieces, and make a fresh pot of hot Jasmine Rice (I use my mini rice cooker frequently for the purpose of having fresh hot rice in small quantities.) If you’ve never tried one, they are inexpensive and cook rice perfect every time without having to watch it or worry about it overcooking, and it keeps it hot until you are ready to eat it. I will never be without one again. To make the chicken fried rice, warm the chicken in garlic infused olive oil on the stove top in a skillet. Then, stir in the hot, fresh cooked rice, drizzle it with sesame oil and a pinch of white pepper, then stir in a few sliced scallions.  Push aside the chicken and rice mixture to one side of the pan. Add a little more garlic olive oil to the empty side, and add in two whisked and seasoned eggs, and scramble them over medium heat. Now, incorporate the egg into the chicken and rice mixture for an easy chicken fried rice. Yummmm!

Orange Ginger Marinated Chicken Thighs 3

The chicken should marinate at least 8 hours and preferably overnight for the most robust flavor infusion.

Orange Ginger Marinated Chicken Thighs 1

Orange Ginger Marinated Chicken Thighs

1/4 Cup of Fresh Squeezed Orange Juice

8 Sliced Scallions (green parts only for low fodmap)

2 Tablespoons of Fresh Minced Ginger

2 Tablespoons of Garlic Infused Olive Oil (my favorite brand)

2 Tablespoons of Coconut Aminos (this is not on the SCD Legal list, but many do well with it, so listen to your body. It is an excellent substitute for Soy Sauce. Here is a discussion about it on Danielle Walker’s Facebook page.)

2 Tablespoons of Sesame Oil

Zest of One Orange

1 Tablespoon of Ume Plum Vinegar (SCD Safe according to wellbees.com)

1 Tablespoon of Honey or Maple Syrup

1/2 Teaspoon of Sea Salt or more to taste

1/2 Teaspoon of Black Pepper

Directions: Whisk together the marinade ingredients in a medium bowl. Lay out 12 bone in chicken thighs in a large, deep baking pan. Pour the marinade over the thighs, then flip them to coat all the surfaces evenly. Cover with wrap, and refrigerate for 8 hours or up to 24 hours.

To bake the thighs, preheat the oven to 400° degrees F. Lay out a cookie sheet covered with parchment, if you want an easy to clean pan. 🙂 Remove the chicken thighs from the marinade allowing the scallions, ginger and orange zest to remain on the thighs, and lay them out in one layer onto the large sheet pan. Bake in the middle of the oven for 40 minutes. The skin will be crispy and brown. Enjoy!

Chicken Marinade


Orange Ginger Marinated Chicken Thighs, Paleo, Low FodMap


Cashew Lemon Cookies

Cashew Lemon Gluten Free Cookies

Light Lemon Cookies made with Raw Cashews and Flaked Coconut are perfectly delicious! The best part is they have good for you ingredients and no dairy or grains in them. In fact, I am liking all these ingredients so much, I am having a hard time not giving the green light to eat these for breakfast!

Cashew Lemon Cookies Dairy Free Grain Free

Cashew Lemon Cookies

Preheat your oven to 350º degrees F. Lay out parchment lined cookie sheets.

Ingredients:

1 Cup of Raw Cashews

1/4 Cup of Coconut Flour (I used this)

1/4 Cup of Olive Oil

3 Tablespoons of Pure Maple Syrup (substitute honey for SCD Legal)

1 Pastured Egg

1/2 Teaspoon of Sea Salt

1/2 Teaspoon of Baking Soda

1 Teaspoon of Vanilla Extract

Zest of one Lemon

1/4 Cup of No Sugar added Finely Shredded Coconut (like this)

Directions:

In a food processor with a blade attachment, add the Raw Cashews and pulse until you have fine crumbs. Add the coconut flour. Pulse again until you have a flour consistency. Add in the Maple Syrup, Olive Oil, Egg, Vanilla, Lemon Zest, Salt and Baking Soda. Blend until you get a creamy dough that starts to form a ball in the processor.

Using a tablespoon cookie scoop, scoop the dough into balls. Roll the balls in shredded coconut, pressing the coconut into the balls of dough. Flatten each ball onto your cookie sheet until they are approximately 1/2 inch thick. Bake in the oven for 11 minutes or until the edges are turning golden brown.

Cool on a wire rack.

Yummy. I love Lemon!!!

Cashew Lemon Cookies - Light Delicious Grain, Gluten and Dairy Free Cookies Rolled in Coconut. So delicious with ingredients nourishing enough for breakfast!!!


Griddle Burger and Sandwich Buns – Coconut Flour

These savory griddle buns are the perfect vessel for burgers and sandwiches! They have carrots and scallions in them and are nutritious, delicious and grain free! These are great for egg sandwiches, meatloaf sandwiches, and burgers of all kinds. Top it with my Tomato Basil Jam recipe and your eyes will roll to the back of your head. 🙂 Leave out the scallions and make a nut butter and blueberry jelly sandwich using my Blueberry Spoon Fruit recipe!

Griddle Burger and Sandwich Buns (Carrot Scallion)

I used steamed carrots in this recipe, and they would be equally delicious with pumpkin or butternut squash, so feel free to switch it up. The pumpkin would be very handy if you didn’t have time to steam the carrots.

Griddle Burger and Sandwich Buns

Griddle Burger and Sandwich Buns

Ingredients:

  • 3 Tablespoons Coconut Milk or Almond Milk
  • 1/2 Cup of  Coconut Flour
  • 2 Cups Steamed Carrots, Mashed (or substitute butternut or pumpkin)
  • 2 Scallions, green parts only for Low FodMap, thinly sliced
  • 4 Eggs
  • 1/4 Cup of Olive Oil, Coconut Oil or Ghee
  • 1/2 teaspoon Sea Salt or  Himalayan Pink Sea Salt
  • 1/4 teaspoon Baking Soda

Directions:

Preheat a large electric griddle to 350º F degrees.

These are easy and quick! Add all your ingredients to a food processor, and blend until smooth.  Let batter sit for 5 minutes.

Then, brush the griddle lightly with olive oil. With a muffin scoop or 1/4 cup measure, scoop the batter onto the griddle, and spread with the back of a spoon to rounds about the thickness of pancakes. Cook until golden brown, and then flip and cook the other side, just like you would a pancake. Cool on a wire rack.

Makes ten buns or five sets of sandwich buns.

You can make a double batch and freeze these for weeknight ease!

Have a fabulous day!

Sam 🙂

1 2 15