Monthly Archives: January 2017

Chinese Almond Cookies – Gluten Free

Chinese Almond Cookies made with almond flour

Chinese Almond Cookies made with Almond Flour

In celebration of Chinese New Year, which we have celebrated every year since the adoption of my two youngest daughters, I made a grain free almond cookie! Whether you celebrate this holiday or not, this is a delicious Chinese Almond Cookie! Gung Hay Fat Choy!

Chinese Almond Cookies made with almond flour

Chinese Almond Cookies – Gluten Free, Paleo

Chinese Almond Cookies, Gluten Free and Paleo

Chinese Almond Cookies, Gluten Free and Paleo


Chinese Almond Cookies

Ingredients:

1 1/2 Cups of Almond Flour

1 Egg

1/4 Cup of Honey

1/4 Teaspoon of Sea Salt

1/4 Teaspoon of Baking Soda

1/4 Teaspoon of Almond Extract

12 Whole Almonds for the Top of the Cookies (I used sprouted almonds)

Directions: Preheat your oven to 350º degrees F. Line a cookie sheet with parchment paper. In a bowl with an electric hand-held mixer, beat the egg and honey. Add the almond flour, sea salt, baking soda and almond extract. Beat until fully incorporated for about one minute. With a tablespoon cookie scoop, scoop the cookie dough onto the prepared cookie sheet about 1 1/2 inches apart. Place one almond on top of each cookie, in the center, and press down gently. Bake in your preheated oven for ten minutes, or until the cookies are golden brown. Cool on the cookie sheet.

Makes one dozen cookies. Low FodMap 1 cookie.

chinese-almond-cookies-ready-to-bake

Grain Free Chinese Almond Cookie

Grain Free Chinese Almond Cookie

Chinese Almond Cookies - Paleo Gluten Free

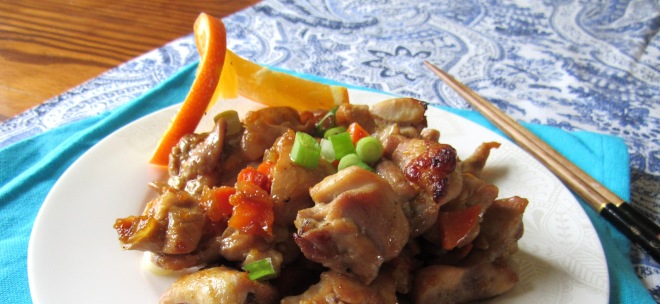
Chinese Orange Chicken

Juicy chicken thighs and fresh squeezed orange juice and zest really make this skillet to oven soy free Chinese Orange Chicken shine!

Chinese Orange Chicken

Chinese Orange Chicken


Coconut aminos is a fantastic substitute for soy sauce. I was thrilled to discover it several years ago, because it is hard to make some favorite Asian dishes without that distinctive salty umami flavor.

As with so many Chinese dishes, there is chopping and dicing required, but this Orange Chicken comes together very quickly after the prep, which can be done at your convenience, or all at once, and there is no messy deep frying. The total cooking time is about 25 minutes from stove to oven. Feel free to serve this with a steaming hot scoop of Jasmine Rice! There is plenty of sauce to meld into the rice. 🙂

Chinese Orange Chicken

Chinese Orange Chicken


Chinese Orange Chicken - Soy Free

Chinese Orange Chicken – Soy Free


Chinese Orange Chicken

Ingredients:

2 1/2 pound of boneless chicken thighs, diced into 2 inch pieces

2 Cups of Diced Carrots

1 1/2 Cups of Diced Yellow Onion

1/2 Cup of Sliced Green Scallions

1/4 Cup of Honey

1/3 Cup of a Good Quality Honey or Molasses Sweetened BBQ Sauce (like this or this both gluten free)

Zest and Juice of 1 Large Orange (make sure your microplane grater is sharp to get all the zest like this one)

3 Tablespoons of Apple Cider Vinegar

2 Tablespoons of Coconut Aminos (find it here)

3 Tablespoons of Olive Oil (Garlic Infused if you are eating Low FodMap)

3 Cloves of Garlic, Minced

1 1/2 Teaspoons of Sea Salt, divided

3/4 Teaspoon of Ground Ginger

Directions: Preheat your oven to 375º degrees. Use a large oven-safe, non-stick skillet, or stainless steel pan.

Add one tablespoon of olive oil to the pan and warm over medium high heat. Add the diced carrot and onion and a half teaspoon of sea salt. Cook for 5 minutes, stirring occasionally. Remove the carrots and onions from the pan and set aside. Add the remaining two tablespoons of olive oil to the pan along with the garlic (or garlic infused olive oil) and let it just sizzle. Add the diced chicken. Your pan should still be over medium high heat. Don’t disturb the chicken for about five minutes or until it is browned on the bottom. With a large spatula, flip the chicken pieces to the other side, and brown that side for about five more minutes. Meanwhile, whisk together the orange juice, zest, honey, coconut aminos, ginger, cider vinegar, and bbq sauce. When the chicken is browned, add the carrots and onions back in and incorporate. Pour the sauce over the mixture, and let it come to a simmer. Pop the whole pan into the oven and bake for ten minutes. Remove from the oven. The sauce will have thickened just right and the chicken will be cooked through.


*Affiliate Link – I receive a very small commission (cents) when you purchase products I recommend through my Amazon links. I use these products myself and never recommend anything I haven’t tried and use regularly. The small commission helps me keep my blog up, so if you have enjoyed my posts and recipes, I appreciate your support. You don’t pay any extra for your products. Thank you.🙂

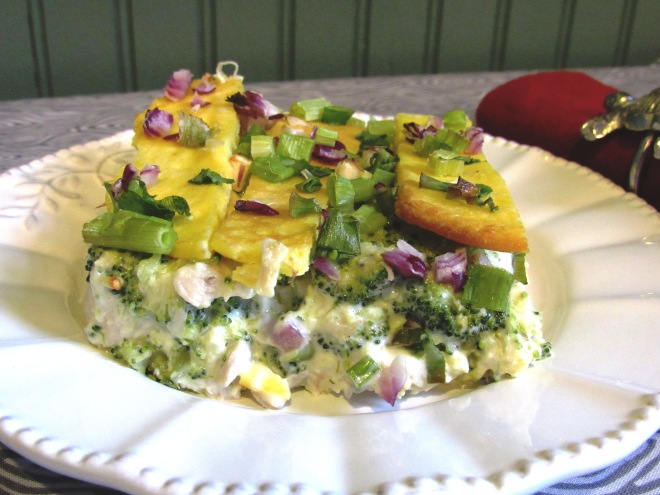
Chicken and Broccoli Casserole {Gluten Free – Paleo}

Casseroles became popular in the 1950’s, and although I wasn’t around then, they are still a very versatile and popular one dish meal worthy of the table today. I have created a healthy version of one of my favorites!

Chicken and Broccoli Casserole {Gluten Free - Paleo}

Chicken and Broccoli Casserole {Gluten Free – Paleo}

A good casserole should be moist, tasty and have all the components for a one dish meal.  I have been making this casserole recently on a weekly basis. My kids love it! It is really, really good leftover, and great as a packed work lunch.

I used dried tarragon in the filling, which is so good with chicken! A good quality mayonnaise and eggs bind the filling together with the chicken and broccoli. I made coconut flour crepes to layer between the creamy chicken filling. I have made the casserole and baked it right away, and I have also assembled it and refrigerated it for up to a day before baking.

If you like the idea of batch cooking, their are options for cooking the chicken! I like to cook two whole chickens and use one for dinner one night, and shred or chop the other one to use in this casserole. If you use all chicken breasts, the same theory saves time! When you roast the breasts, I highly recommend bone-in, skin on for the moistest chicken breast!

Let’s make a piping hot casserole!

Chicken and Broccoli Casserole {Gluten Free – Paleo}

Ingredients:

4 Cups of Cooked, Diced Chicken

3 Cups of Steamed Broccoli (chopped)

1 1/4 Cups of Good Mayo (I use Primal Kitchen Mayo, it is so good and healthy – here)

3/4 Cup of Full Fat Coconut Milk (my favorite additive-free brand)

2 Eggs

1 Teaspoon of Dried Tarragon

1/2 Teaspoon of Sea Salt or Himalayan Pink

1/2 Teaspoon of Onion Powder

For the filling, whisk together the Mayonnaise, Coconut Milk, Eggs, Tarragon, Salt and Onion Powder. Add in the cooled chopped chicken and chopped broccoli. Place in the refrigerator while you make the crepes.

Crepes

1 Cup of Full Fat Coconut Milk

8 Eggs

1/4 Cup of Coconut Flour

2 Tablespoons of Lemon Juice (I like fresh squeezed)

2 Tablespoons of Olive Oil

1 Teaspoon of Sea Salt

Topping

1/2 Cup of Chopped Red Onion

1/2 Cup of Sliced Green Onion

Directions: Preheat a large non-stick electric griddle to 350º degrees. (A stove top non-stick pan will work too, just make sure your heat is set at medium). Whisk together the crepe ingredients. Whisk until there are no lumps! This is a good time to develop those arm muscles! Let the batter sit for 5 minutes to thicken slightly. Using a 1/4 cup measuring scoop, ladle the batter onto your preheated griddle, and cook until very lightly brown, flip and repeat, just like a pancake. You should have about eight crepes. Cool them on a wire rack. Then, cut them into 1 inch strips.

Preheat your oven to 350º degrees. Grease a 14″ x 10″ casserole with olive oil (size is approximate). Line the bottom of the casserole with 1/2 of the crepe strips. You will not have the bottom perfectly covered, and it is okay. Add the chicken and broccoli filling. Spread the filling evenly. Top with the remaining crepe strips. With a pastry brush, lightly brush on additional olive oil, just onto the strips. Sprinkle with diced red onion and sliced scallions.

Bake for 30 minutes in your preheated oven. Remove the casserole from the oven and cool ten minutes before digging in. Enjoy!

*This casserole can be easily modified to Low FodMap by omitting the red onion and onion powder. Just add more scallions. It is delicious that way as well.

Healthy Chicken and Broccoli Casserole

Healthy Chicken and Broccoli Casserole

Chicken and Broccoli Casserole {Gluten Free - Paleo}

Chicken and Broccoli Casserole {Gluten Free – Paleo}

*Affiliate Link – I receive a very small commission (cents) when you purchase products I recommend through my Amazon links. I use these products myself and never recommend anything I haven’t tried and use regularly. The small commission helps me keep my blog up, so if you have enjoyed my posts and recipes, I appreciate your support. You don’t pay any extra for your products. Thank you.🙂

chicken and broccoli casserole. this casserole is a creamy, grain free, hot casseerole you can assemble in advance and bake later.

Eat Your Nutrients!

Eat Your Nutrients!


Chocolate Coconut Milk Whip

Chocolate Coconut Milk Whip with Raw Cacao

Chocolate Coconut Milk Whip with Raw Cacao


I love a hot coffee in the morning that has some whip on top to slurp! I adore the cold creamy whip with the hot coffee. You don’t need an ISO whip to make this either. I am really loving mine and have been squirting it atop my coffee with abandon. However, I have also made the whip and kept it in a glass container in the refrigerator. It isn’t as airy, but it is definitely yummo. If you want to invest in an ISO Stainless Steel Whipped Cream Dispenser, you can find one here.

So, here is the recipe!

Chocolate Coconut Milk Whip with Raw Cacao

One can of Chilled Full Fat Coconut Milk

2 Tablespoons of Raw Cacao Powder

1 – 2 Tablespoons of Honey (to taste)

1/2 Teaspoon of Vanilla Extract

Directions:

Scoop the coconut cream off the top of the refrigerated coconut milk. It rises to the top of the can when refrigerated for a few hours. Keep the runny part for something else.

In a small blender, like a Ninja or Magic Bullet, blend all the ingredients. Pour it into your ISO Whip Dispenser and charge it as directed. If you aren’t using a dispenser, pour it into a glass container with a lid and refrigerate until it sets up. Then scoop it onto your coffee. Viola! Whip! A good tip is to store the can on it’s side, then whenever you want whip, you can just take it out the refrigerator and shake it a few times before dispensing.

Chocolate Coconut Milk Whipped Latte Topping

Chocolate Coconut Milk Whipped Latte Topping


Chocolate Coconut Milk Whip!

Chocolate Coconut Milk Whip!

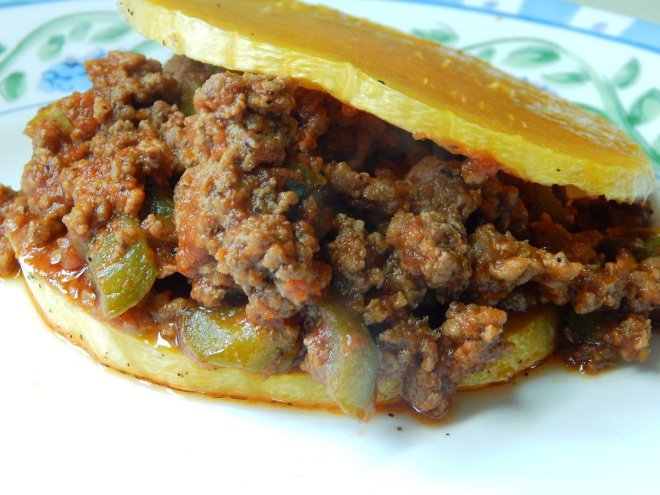
Butternut Squash Lasagna

butternut-squash-lasagna-with-a-fork

A piping hot casserole is on the top of my list in the colder months! Intuitively we want to have warmer, heavier foods during the winter season. When you get in tune with your body’s signals, it tells you what it needs. If you think about it, we naturally want to eat with the seasons when we are really in tune with ourselves.

One of the tips I learned in Health Coaching school was to eat until I was 80 percent full, and it is really effective. I feel great when I don’t eat until I am completely stuffed and have had enough to feel satiated and comfortable. This way of eating keeps weight pretty much the same without having to restrict calories. I really dislike restriction of food, I am a foodie, but I love feeling great in my clothes! Don’t deprive me! 🙂 So, eating nutrient rich food is not only great for you, it avoids dieting and keeps the body fed and full of energy.  I prefer “crowding out” which simply means, eating more real food so you don’t have room for the opposite. When you are eating healthy, whole foods made into scrumptious dishes like this casserole, you don’t crave junk. All my recipes have health benefits, even the sweet ones! One of the things I tell and have proven to my clients is, when they give their taste buds time to change, by taking out processed food for a few months, when they go back to eating them, they will taste artificial and too sweet or chemically. They actually will prefer the real stuff! You can eat food that isn’t just good for you, but is also just G-O-O-D!

Getting back to the scrumptious lasagna though, this Butternut Squash Lasagna uses thin sliced butternut as the noodles and is hearty and flavorful with a nice caramelized top! There are lots of nutritious dried herbs and one of my favorite flavor additions, chopped fennel!

butternut-squash-lasagna

Butternut Squash Lasagna

Preheat your oven to 375º degrees. You can assemble this dish in advance and refrigerate it covered until you are ready to bake it!

Ingredients:

1 Butternut Squash (Medium to Large)

1 Pound of Grass Fed Ground Beef

1 Pound of Ground Pork

1 Fennel Bulb (medium sized, diced)

1 Cup of Sliced Scallions

1 Jar of Strained Organic Tomatoes (24 oz.), or Tomato Puree (I like this brand)

2 Tablespoons of Garlic Olive Oil (or 2 TBS of Regular EVOO plus 3 minced garlic cloves)

1 Tablespoon of Olive Oil

1 Teaspoon of Dried Parsley

1 Teaspoon of Dried Basil

1 Teaspoon of Dried Oregano

1/2 Teaspoon of Dried Marjoram

1/2 Teaspoon of Dried Thyme

1/4 Teaspoon of Dried Rosemary

1 1/2 Teaspoons of Sea Salt (or Himalayan Pink my personal favorite)

Directions:
Peel the butternut squash. Divide the peeled whole squash in half lengthwise and remove the seeds. Laying the two squash halves flat side down on a cutting board, cut it into 1/2 inch slices so they form half moon shapes perfect for layering as noodles. Set aside.

In a large skillet, add 2 Tablespoons of Garlic Olive Oil (or your olive oil and fresh minced garlic) over medium high heat. Add your ground beef, pork and 1/2 teaspoon of sea salt, and brown. When almost brown, but still a little pink, add the diced fennel, scallions, dried herbs and another 1/2 teaspoon of salt. Keep browning until the fennel is tender, about five minutes. Drain off the excess fat. Add the crushed tomatoes, and thoroughly combine with the meat and herbs bring it to a simmer. Remove from the heat and set aside.

In a large bowl, toss your butternut squash slices with 1 Tablespoon of Olive Oil and 1/2 teaspoon of sea salt.

Coat a 14″ x 10″ inch casserole dish (approximate size) with olive oil. Add a single layer of butternut squash, filling in the gaps as well as you can, it doesn’t have to be perfectly covered. Add 1/3 of the meat mixture. Add another layer of butternut squash and another 1/3 of the meat mixture. Add the final layer of butternut squash, and finish with the last 1/3 of the meat mixture.

Cover with aluminum foil, and bake in the oven for 1 hour. Remove the foil, and bake another 15 to 30 minutes, or until the top is browned and caramelized and the squash is really tender.

Remove from the oven, and let it sit ten minutes before serving!

*Optional Pecorino cheese grated on the top. It is a delicious Italian cheese made from sheep’s milk.

Like all lasagna, this is even better leftover!

Eat Your Nutrients!

Eat Your Nutrients!

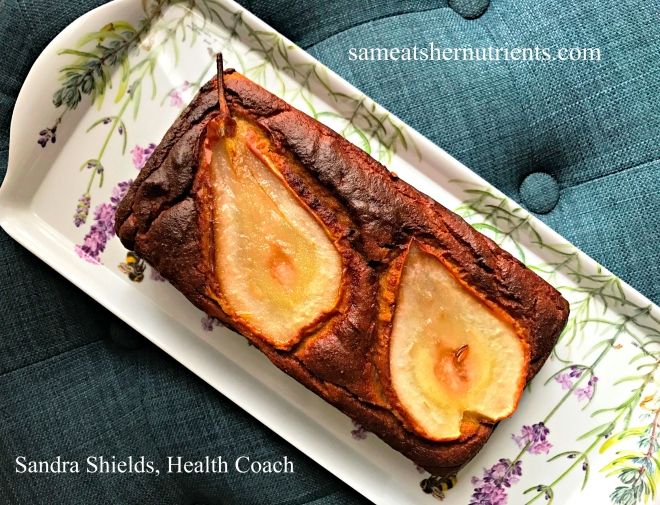
Vanilla Pear Bread made with Coconut Flour

Looking for a pretty, yummy bread recipe? This pear bread is moist and low in carbohydrates. It has a subtle vanilla flavor and lovely delicate sweetness because of the ripe pears incorporated into the batter. I found that just two tablespoons of honey gave it the perfect sweetness!

sliced-vanilla-pear-bread-coconut-flour

Coconut flour makes really delicious quick breads and cakes, in addition it is low carb and a very good source of fiber. The eggs and olive oil in the recipe bestows the loaf with healthy fat. You need healthy fats in your diet for many reasons, including shiny hair and healthy skin! I don’t know about you, but I am always wanting that! You will need two to three ripe pears for this recipe! Ready? You’re gonna love it!

vanilla-pear-bread-coconut-flour

Vanilla Pear Bread Made with Coconut Flour

Preheat your oven to 325º degrees. Grease a 5″ x 7″ Loaf Pan and line it with parchment. I like to cut a piece to fit the long sides of the pan with some extra over the edges so I can simply lift it out of the pan. See photo below.

Ingredients:

6 Eggs

1/2 Cup plus 2 Tablespoons of Coconut Flour, scooped and leveled (I use this brand)

1 Cup of Chopped Pear, packed and very ripe

1/3 Cup of Good Olive Oil

1/4 Cup of Grass Fed Collagen (optional but great for skin, hair, nails and gut) (I like this kind)

2 Tablespoons of Local Honey (Clover if Lower FodMap)

2 Teaspoons of Pure Vanilla Extract

1 Teaspoon of Fresh Lemon Juice

1/2 Teaspoon of Cinnamon

1/4 Teaspoon of Sea Salt

1/8 Teaspoon of Mace (you may substitute nutmeg, mace is the outside of the nutmeg) (here)

1/2 Teaspoon of Baking Soda

1 Ripe Pear for the Top of the Loaf

Directions:

In a food processor with a blade, put your chopped pear and eggs and turn it on until pureed. Add the Coconut Flour and remaining ingredients, except the pear for the top, and process for about two minutes, scraping the sides of the bowl a couple times with a rubber spatula. The coconut flour will start absorbing the liquid and be a nice cake-like batter. With a rubber spatula, scrape all the batter into your prepared loaf pan, and rap the pan on your counter a couple times to level the batter somewhat. Take your nicely ripened pear, and cut it into 3/4″ inch slices from stem to bottom. Choose your prettiest two slices and lay them on top of the loaf, gently pressing the pear a bit into the batter, but keep the pear completely visible. Bake in the oven for 55 minutes keeping a close eye on the bread at the end. It is done when the loaf springs back in the center when touched with your finger.

Vanilla Pear Bread Gluten Free Grain Free

pear-bread-fresh-from-the-oven

Cool for five minutes, then remove from the pan, and cool completely on a wire rack before slicing!

Eat Your Nutrients!

Eat Your Nutrients!


*Affiliate Link – I receive a small commission when you purchase products I recommend through my Amazon links. I use these products myself and never recommend anything I haven’t tried and use regularly. The small commission helps me keep my blog up, so if you have enjoyed my posts and recipes, I appreciate your support. You don’t pay any extra for your products. Thank you.🙂


Top 5 Most Popular Recipes of 2016!

Happy New Year! The top five most popular recipes of 2016 for Sam Eats Her Nutrients were:

  1. Homemade Grain Free Garlicky Croutons

homemade-grain-free-garlicky-croutons


2. SCD Low FodMap BBQ Sauce

scd-low-fodmap-bbq-sauce

3. Messy Jessie’s

messy-jessies

4. Chesapeake Crab Cakes

chesapeake-crab-cakes-paleo

5. Weeknight Tacos, SCD, Low FodMap Paleo

weeknight-tacos

Thank you to you all! The top five were all savory!

Please e-mail me privately at sameatshernutrients@gmail.com or comment on this post below to let me know what you would like to see me create for 2017!

Warmly,

Sam

Eat Your Nutrients!

Eat Your Nutrients!


Tips For Buying Produce Without a Grocery List or Menu Plan!

In our busy schedules, it is not always easy to plan ahead what meals you will be making for the week. I like to shop for produce that looks the freshest and most colorful and take it from there. Watch the short video below of me at the store.  It is easier than a menu plan where they may or may not have what I am looking for, helps me eat plenty of vegetables and fruit at their best, and keeps it interesting!