Tag Archives: GAPS

Ranch Dressing SCD, Low FodMap, Dairy Free

If you are looking for a great ranch dressing that is low fodmap, SCD Friendly or dairy free, here you go!

Garlic is a fodmap and not allowed on a low fodmap diet, but garlic Infused oil is allowed, and it is a fantastic replacement. If you haven’t been using it yet, you need to grab some! Chives give the dressing the signature ranch flavor, along with dill, and chives are also low fodmap.

This can be used on and with anything you like to eat with ranch. Delish!

SCD, Low FodMap, Dairy Free Ranch Dressing

Ingredients:

  • 1 Cup Paleo mayonnaise, (I use Primal Kitchen)
  • 1/4 Cup of fresh lemon juice
  • 2 Tablespoons Garlic Infused Olive Oil
  • 1 teaspoon of dried chives
  • 1 teaspoon of dried parsley
  • 1/2 teaspoon of dried dill
  • 1/2 to 1 teaspoon of salt to taste

Add all the ingredients into a bowl, whisk until fully incorporated and enjoy! Mmmmm! So good!

Lemon Baked Cod with Cucumber Plum Salsa

If you are looking for a fresh and light entree, this Lemon Baked Cod with Cucumber and Plum Salsa is perfect! The salsa is delicious over fish, and with just a few ingredients.

Lemon Baked Cod with Cucumber Plum Salsa

I am trying to eat seafood twice a week, and I like creative ways to enjoy it. Cod is a good source of B-12, selenium, phosphorus, protein, choline, Omega 3 and more. A fruit and vegetable salsa on top of the baked cod with the tang of a splash of white balsamic makes this the perfect spring dish, and also fantastic for the waistline, being a source of lean protein, while still being very satisfying! Gotta go try on my swimsuits soon. Does anyone else dread shopping for those? I love the quote, “Unlike Swimsuits, Flip Flops Fit Year after Year!” 🙂

Lemon Baked Cod with Cucumber Plum Salsa

Lemon Baked Cod with Cucumber Plum Salsa

Preheat the oven to 350º degrees F.

First the Salsa:

You want your salsa to have time to sit while the fish is cooked to marry the flavors.

Ingredients:

2 Ripe Plums, washed, peeled and diced

1/2 English Cucumber, peeled and diced

1/4 Cup of Red Onion, finely diced

2 Tablespoons of White Balsamic Vinegar (my go to 12 Year Aged White Balsamic – I don’t receive commission for sharing this. If you have an oil and vinegar shop, get yours there. It is superior.)

1/4 Teaspoon of Sea Salt

Directions for the Salsa: After you have chopped everything, toss the plums, cucumber and red onion with the white balsamic and salt, and set aside to meld the flavors. Now the fish!

Ingredients for the Cod:

4 Wild Caught Cod Filets

Zest of One Lemon

2 Tablespoons of Lemon Juice

2 Tablespoons of Olive Oil

Sea Salt and Pepper to Taste (don’t be stingy, the fish will thank you.)

Directions: Brush a tablespoon of olive oil on the fish, both sides. Use more if needed. Season your fish with sea salt and black pepper, and rub it with the lemon zest. In a non-stick, oven safe skillet, add the other tablespoon of olive oil, and heat to a shimmer over medium-high. Add your seasoned fish, and cook three minutes, then flip the fish gently and cook for another three minutes. Pop the fish in the oven and bake for five to seven minutes, or until the fish registers 145º degrees in the center. Be careful to check it after five minutes, because you do not want dry fish, and it cooks fast. Remove the cooked fish from the oven and drizzle the lemon juice. When serving, mound the Cucumber Plum Salsa generously on top of the fish….delightful!


Lemon Baked Cod with Cucumber Plum Salsa


Tuna, Avocado Grain Free Wraps with Gremolata Dip and Truffle Aioli

I had to guard these spirals when I was testing the recipe in order to have a chance to photograph them for you all! It was a Saturday morning, and the kids and hubby were home, and I didn’t dare turn my back. 🙂 I have been watching my baby Grandsons during the week, so I develop recipes mostly on Saturdays these days.

Tuna and Avocado Grain Free Wraps with Gremolata and Truffle Aioli Dipping Sauce

The two dips for these delectable spirals stand alone, so you could easily double the recipes to have more sauces on hand. I have been eating gremolata on everything savory lately. I love the salty lemon flavor with the bright taste of parsley. The two dips eaten with the spirals makes them very fun to eat! Who doesn’t love a dip, let alone two?

Tuna and Avocado Wraps with Gremolata and Truffle Aioli Dipping Sauce

You can eat these highly nutritious wraps as soon as you assemble them, or wrap them up after rolling, and refrigerate them until you are ready to eat! Take them out of the refrigerator and slice the wraps right before you want to have them. They are a little easier to slice when cold, delicious right away as well!

Tuna Avocado Egg Wraps

Tuna, Avocado Egg Spirals

Ingredients: For each Egg Wrap you will need:

3 Pastured Eggs

1 Tablespoon of Water

1/8 Teaspoon of Salt

Pinch of Black Pepper

1 1/2 Tablespoons of Olive Oil

Whisk the eggs, water, salt and pepper in a medium bowl. In a 14 inch non-stick skillet, add the olive oil and heat over medium-high heat. Add the egg mixture, and swirl the pan to spread the egg evenly. Cook for a few minutes until the middle is starting to set and the edges are no longer runny. With a large rubber spatula, gently flip the egg wrap, and cook about 30 seconds on the other side. Slide out of the pan onto a cutting board.

Tuna Filling (this is enough for two egg wraps, if you want to make one wrap, half the recipe)

Ingredients:

2 Cans of Wild Albacore Tuna (I buy this kind that is mercury tested)

1/2 Cup of Mayo (I use Avocado Oil Mayo here)

1/4 Cup of Diced Dill Pickle

1/2 Teaspoon of Sea Salt

1/4 Teaspoon of Black Pepper

1 Ripe Avocado (diced) This does not go in the filling. It is used when assembling the spiral.

Directions: Mix the tuna filling together.

Gremolata Dip

Ingredients:

3 Tablespoons of Garlic Infused Olive Oil (or 3 Tablespoons of Olive Oil and a Clove of Minced Garlic)

Zest of 1 Organic Lemon

2 Teaspoons of Dried Parsley

1/2 Teaspoon of Sea Salt

Directions: Whisk the ingredients together.

Truffle Aioli

Ingredients:

1/4 Cup of Mayo (my favorite is healthy avocado oil mayo here)

1 Tablespoon of Fresh Squeezed Lemon Juice

1 Tablespoon of Garlic Infused Olive Oil

1/8 Teaspoon of Truffle Salt (here)

1/8 Teaspoon of Black Pepper

Directions: Whisk all the ingredients together. Store refrigerated.

Now to Assemble the Spirals:

Lay out the egg wraps, spread them with half the tuna filling each. Sprinkle each wrap with half of the diced avocado. Roll them up snuggly, and then slice into 1 1/2 inch slices with a bread knife. Serve with the sauces.

Serves 2 to 4 people depending on if you have a Papa Bear or a Baby Bear appetite!

Strawberry Pecan Pie – Grain Free, Dairy Free

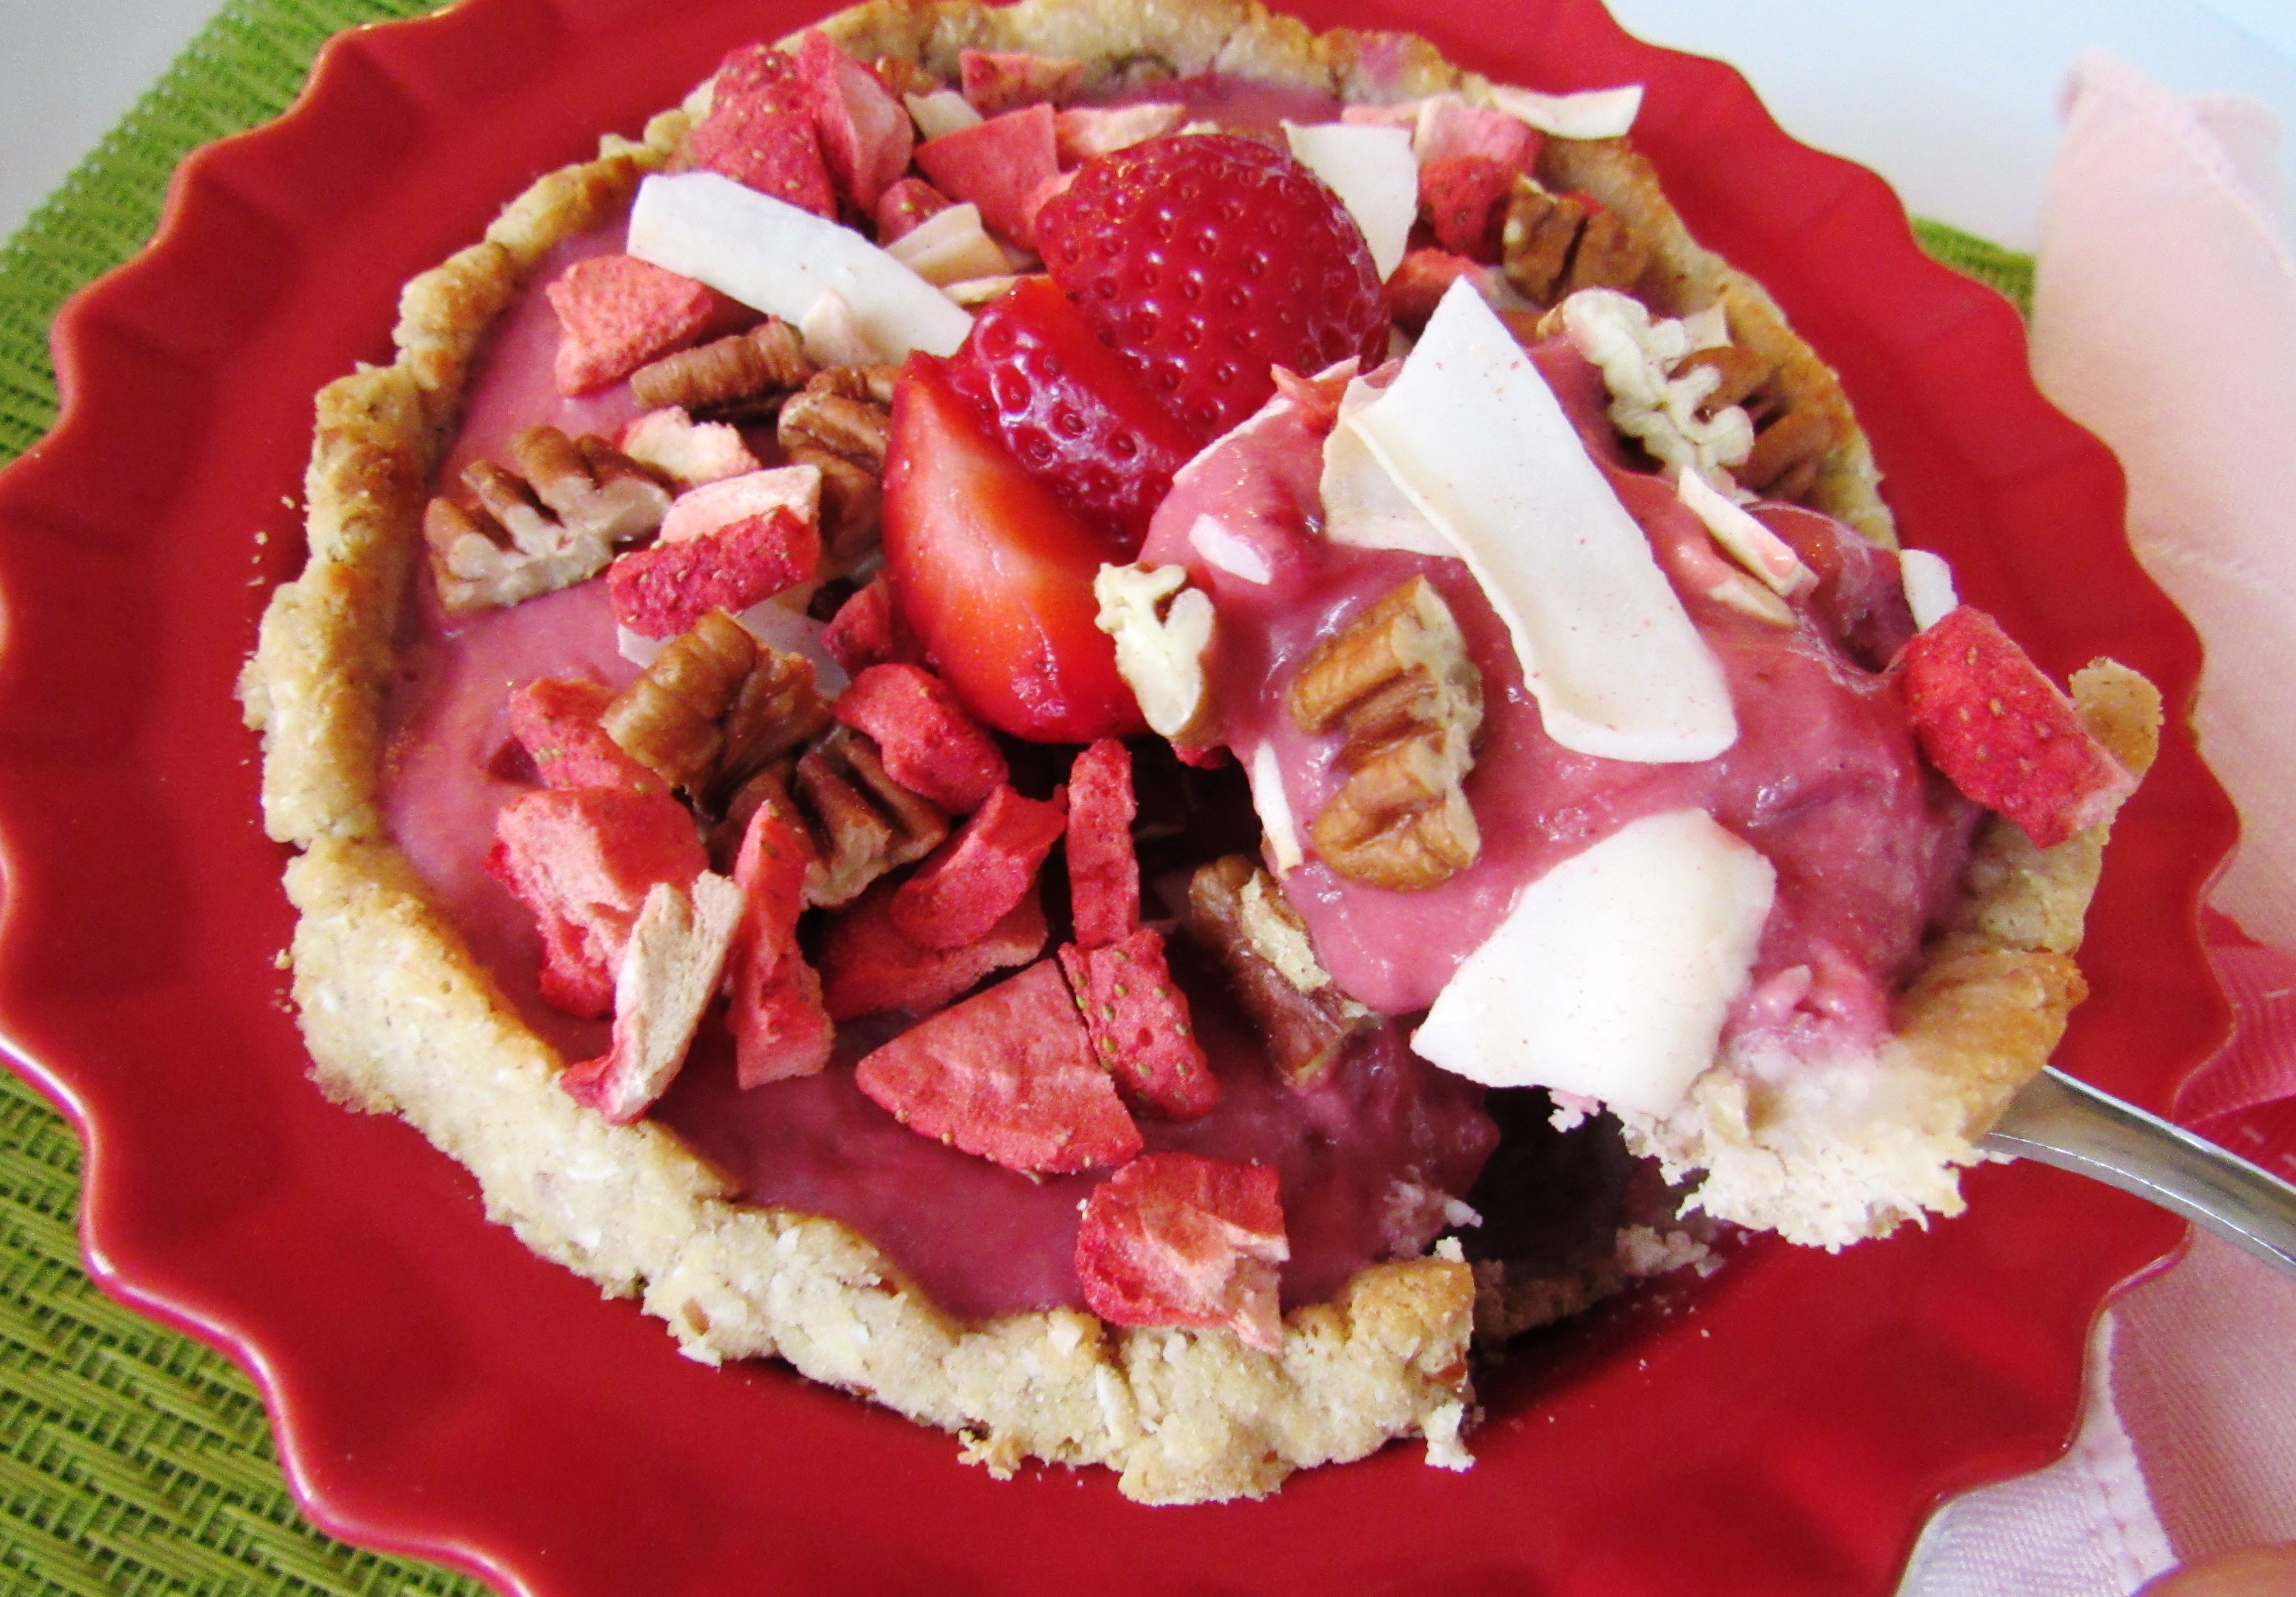
You know what I love about February besides having three of my daughter’s birthdays in this month and Valentine’s Day? I start seeing good strawberries in the store again! I also find people are starved for color, and February is full of red and pink and hearts. This Strawberry Granola Dessert is just right!

Strawberry Pecan Granola Tart

Strawberry Pecan Pie

The crust for the pie is a coconut pecan crust that is grain free. It rolls really well and blind bakes beautifully. The pecans and coconut in the recipe with a touch of honey makes it very tasty!

There is a jammy berry bursting filling that has berries cooked down to intensify the strawberry flavor naturally, and fresh strawberries stirred in afterwards, along with some coconut butter to add creaminess.

The granola on the top of this pie adds a crunchiness that is fun to eat and delicious with the creamy filling. It is crunchy and airy with the freeze dried strawberries, toasted coconut flakes and crunchy chopped pecans. The granola topping stands alone in my opinion, so make extra to snack on!

Strawberry Pecan Granola Tart with Coconut Pecan Crust

Strawberry Pecan Pie with Coconut Pecan Crust


Strawberry Pecan Granola Tarts

Strawberry Pecan Pie


Strawberry Pecan Pie (makes two smaller or one full pie sized)

Coconut Pecan Crust

For the crust: Preheat your oven to 350º degrees F.

In a food processor with a blade attachment add the following ingredients:

1/4 Cup of Coconut Flour

1/3 Cup of Pecan Halves

1/4 Cup of Coconut Butter (I could eat this brand right out of the jar)

1/4 Cup of Coconut Flakes (unsweetened, shredded)

1 Egg

2 Tablespoons of Honey

1/8 Teaspoon of Sea Salt

Pulse all the ingredients in the food processor until it forms a ball. Grease your pan of choice. This is either a full sized pie pan, or like the ones I used which hold 2 Cups each.

Roll out the crust between two pieces of parchment paper or plastic wrap with a rolling pin. If you have two pans, divide the crust in half, one for each pan. Take off the top layer of parchment after rolling the crust out, and carefully transfer it to the pans. It will probably need some patching, so use your fingers to form the crust to your liking. Don’t panic. 🙂

Bake for ten minutes, or until the crust is golden brown on the edges. Remove it from the oven and cool. Now let’s make the filling!

Coconut Pecan Pie Crust

Coconut Pecan Pie Crust

Filling

1 Lb. of Fresh Strawberries for making the jam filling

1 Cup of Fresh Strawberries for stirring in

1/4 Cup of Coconut Butter

3 Tablespoons of Honey

1 Tablespoon of Fresh Squeezed Lemon Juice

a Pinch of Sea Salt

In a heavy medium saucepan over medium high heat, cook the ingredients. When the jammy filling comes to a simmer, mash the berries using a potato masher to break up the berries. Continue cooking for five to ten minutes at a high simmer until the mixture thickens,stirring occasionally. Remove from the heat and fold in one cup of fresh diced strawberries. Set aside to cool.

Strawberry Granola Topping

This is an easy peasy granola, and you are going to love it!

1/4 Cup of Pecan Halves

1/4 Cup of Freeze Dried Strawberries (my favorite here)

1/4 Cup of Dang Lightly Salted, Toasted Coconut Flakes (they are amazing straight out of the bag…here. Easy to find in grocery stores too)

Directions: Break up the strawberries and coconut flakes with your hands or a knife. Coarsely chop the pecans. Mix them all together in a bowl.

Simple Strawberry Granola Ingredients

Simple Strawberry Granola Ingredients

Assemble!

Pour the Jammy Strawberry filling into the cooled pie crust, and spread it evenly. Sprinkle the delicious, crunchy Strawberry Granola Topping on top. Be artistic! Refrigerate for four hours before serving.

Happy February!

Dishing it Up! Strawberry Pecan Granola Tart

Dishing it Up! Strawberry Pecan Pie (smaller version)

strawberry pecan pie - grain free, dairy free

Eat Your Nutrients!

Eat Your Nutrients!


Chinese Orange Chicken

Juicy chicken thighs and fresh squeezed orange juice and zest really make this skillet to oven soy free Chinese Orange Chicken shine!

Chinese Orange Chicken

Chinese Orange Chicken


Coconut aminos is a fantastic substitute for soy sauce. I was thrilled to discover it several years ago, because it is hard to make some favorite Asian dishes without that distinctive salty umami flavor.

As with so many Chinese dishes, there is chopping and dicing required, but this Orange Chicken comes together very quickly after the prep, which can be done at your convenience, or all at once, and there is no messy deep frying. The total cooking time is about 25 minutes from stove to oven. Feel free to serve this with a steaming hot scoop of Jasmine Rice! There is plenty of sauce to meld into the rice. 🙂

Chinese Orange Chicken

Chinese Orange Chicken


Chinese Orange Chicken - Soy Free

Chinese Orange Chicken – Soy Free


Chinese Orange Chicken

Ingredients:

2 1/2 pound of boneless chicken thighs, diced into 2 inch pieces

2 Cups of Diced Carrots

1 1/2 Cups of Diced Yellow Onion

1/2 Cup of Sliced Green Scallions

1/4 Cup of Honey

1/3 Cup of a Good Quality Honey or Molasses Sweetened BBQ Sauce (like this or this both gluten free)

Zest and Juice of 1 Large Orange (make sure your microplane grater is sharp to get all the zest like this one)

3 Tablespoons of Apple Cider Vinegar

2 Tablespoons of Coconut Aminos (find it here)

3 Tablespoons of Olive Oil (Garlic Infused if you are eating Low FodMap)

3 Cloves of Garlic, Minced

1 1/2 Teaspoons of Sea Salt, divided

3/4 Teaspoon of Ground Ginger

Directions: Preheat your oven to 375º degrees. Use a large oven-safe, non-stick skillet, or stainless steel pan.

Add one tablespoon of olive oil to the pan and warm over medium high heat. Add the diced carrot and onion and a half teaspoon of sea salt. Cook for 5 minutes, stirring occasionally. Remove the carrots and onions from the pan and set aside. Add the remaining two tablespoons of olive oil to the pan along with the garlic (or garlic infused olive oil) and let it just sizzle. Add the diced chicken. Your pan should still be over medium high heat. Don’t disturb the chicken for about five minutes or until it is browned on the bottom. With a large spatula, flip the chicken pieces to the other side, and brown that side for about five more minutes. Meanwhile, whisk together the orange juice, zest, honey, coconut aminos, ginger, cider vinegar, and bbq sauce. When the chicken is browned, add the carrots and onions back in and incorporate. Pour the sauce over the mixture, and let it come to a simmer. Pop the whole pan into the oven and bake for ten minutes. Remove from the oven. The sauce will have thickened just right and the chicken will be cooked through.


*Affiliate Link – I receive a very small commission (cents) when you purchase products I recommend through my Amazon links. I use these products myself and never recommend anything I haven’t tried and use regularly. The small commission helps me keep my blog up, so if you have enjoyed my posts and recipes, I appreciate your support. You don’t pay any extra for your products. Thank you.🙂

Chicken and Broccoli Casserole {Gluten Free – Paleo}

Casseroles became popular in the 1950’s, and although I wasn’t around then, they are still a very versatile and popular one dish meal worthy of the table today. I have created a healthy version of one of my favorites!

Chicken and Broccoli Casserole {Gluten Free - Paleo}

Chicken and Broccoli Casserole {Gluten Free – Paleo}

A good casserole should be moist, tasty and have all the components for a one dish meal.  I have been making this casserole recently on a weekly basis. My kids love it! It is really, really good leftover, and great as a packed work lunch.

I used dried tarragon in the filling, which is so good with chicken! A good quality mayonnaise and eggs bind the filling together with the chicken and broccoli. I made coconut flour crepes to layer between the creamy chicken filling. I have made the casserole and baked it right away, and I have also assembled it and refrigerated it for up to a day before baking.

If you like the idea of batch cooking, their are options for cooking the chicken! I like to cook two whole chickens and use one for dinner one night, and shred or chop the other one to use in this casserole. If you use all chicken breasts, the same theory saves time! When you roast the breasts, I highly recommend bone-in, skin on for the moistest chicken breast!

Let’s make a piping hot casserole!

Chicken and Broccoli Casserole {Gluten Free – Paleo}

Ingredients:

4 Cups of Cooked, Diced Chicken

3 Cups of Steamed Broccoli (chopped)

1 1/4 Cups of Good Mayo (I use Primal Kitchen Mayo, it is so good and healthy – here)

3/4 Cup of Full Fat Coconut Milk (my favorite additive-free brand)

2 Eggs

1 Teaspoon of Dried Tarragon

1/2 Teaspoon of Sea Salt or Himalayan Pink

1/2 Teaspoon of Onion Powder

For the filling, whisk together the Mayonnaise, Coconut Milk, Eggs, Tarragon, Salt and Onion Powder. Add in the cooled chopped chicken and chopped broccoli. Place in the refrigerator while you make the crepes.

Crepes

1 Cup of Full Fat Coconut Milk

8 Eggs

1/4 Cup of Coconut Flour

2 Tablespoons of Lemon Juice (I like fresh squeezed)

2 Tablespoons of Olive Oil

1 Teaspoon of Sea Salt

Topping

1/2 Cup of Chopped Red Onion

1/2 Cup of Sliced Green Onion

Directions: Preheat a large non-stick electric griddle to 350º degrees. (A stove top non-stick pan will work too, just make sure your heat is set at medium). Whisk together the crepe ingredients. Whisk until there are no lumps! This is a good time to develop those arm muscles! Let the batter sit for 5 minutes to thicken slightly. Using a 1/4 cup measuring scoop, ladle the batter onto your preheated griddle, and cook until very lightly brown, flip and repeat, just like a pancake. You should have about eight crepes. Cool them on a wire rack. Then, cut them into 1 inch strips.

Preheat your oven to 350º degrees. Grease a 14″ x 10″ casserole with olive oil (size is approximate). Line the bottom of the casserole with 1/2 of the crepe strips. You will not have the bottom perfectly covered, and it is okay. Add the chicken and broccoli filling. Spread the filling evenly. Top with the remaining crepe strips. With a pastry brush, lightly brush on additional olive oil, just onto the strips. Sprinkle with diced red onion and sliced scallions.

Bake for 30 minutes in your preheated oven. Remove the casserole from the oven and cool ten minutes before digging in. Enjoy!

*This casserole can be easily modified to Low FodMap by omitting the red onion and onion powder. Just add more scallions. It is delicious that way as well.

Healthy Chicken and Broccoli Casserole

Healthy Chicken and Broccoli Casserole

Chicken and Broccoli Casserole {Gluten Free - Paleo}

Chicken and Broccoli Casserole {Gluten Free – Paleo}

*Affiliate Link – I receive a very small commission (cents) when you purchase products I recommend through my Amazon links. I use these products myself and never recommend anything I haven’t tried and use regularly. The small commission helps me keep my blog up, so if you have enjoyed my posts and recipes, I appreciate your support. You don’t pay any extra for your products. Thank you.🙂

chicken and broccoli casserole. this casserole is a creamy, grain free, hot casseerole you can assemble in advance and bake later.

Eat Your Nutrients!

Eat Your Nutrients!


Vanilla Pear Bread made with Coconut Flour

Looking for a pretty, yummy bread recipe? This pear bread is moist and low in carbohydrates. It has a subtle vanilla flavor and lovely delicate sweetness because of the ripe pears incorporated into the batter. I found that just two tablespoons of honey gave it the perfect sweetness!

sliced-vanilla-pear-bread-coconut-flour

Coconut flour makes really delicious quick breads and cakes, in addition it is low carb and a very good source of fiber. The eggs and olive oil in the recipe bestows the loaf with healthy fat. You need healthy fats in your diet for many reasons, including shiny hair and healthy skin! I don’t know about you, but I am always wanting that! You will need two to three ripe pears for this recipe! Ready? You’re gonna love it!

vanilla-pear-bread-coconut-flour

Vanilla Pear Bread Made with Coconut Flour

Preheat your oven to 325º degrees. Grease a 5″ x 7″ Loaf Pan and line it with parchment. I like to cut a piece to fit the long sides of the pan with some extra over the edges so I can simply lift it out of the pan. See photo below.

Ingredients:

6 Eggs

1/2 Cup plus 2 Tablespoons of Coconut Flour, scooped and leveled (I use this brand)

1 Cup of Chopped Pear, packed and very ripe

1/3 Cup of Good Olive Oil

1/4 Cup of Grass Fed Collagen (optional but great for skin, hair, nails and gut) (I like this kind)

2 Tablespoons of Local Honey (Clover if Lower FodMap)

2 Teaspoons of Pure Vanilla Extract

1 Teaspoon of Fresh Lemon Juice

1/2 Teaspoon of Cinnamon

1/4 Teaspoon of Sea Salt

1/8 Teaspoon of Mace (you may substitute nutmeg, mace is the outside of the nutmeg) (here)

1/2 Teaspoon of Baking Soda

1 Ripe Pear for the Top of the Loaf

Directions:

In a food processor with a blade, put your chopped pear and eggs and turn it on until pureed. Add the Coconut Flour and remaining ingredients, except the pear for the top, and process for about two minutes, scraping the sides of the bowl a couple times with a rubber spatula. The coconut flour will start absorbing the liquid and be a nice cake-like batter. With a rubber spatula, scrape all the batter into your prepared loaf pan, and rap the pan on your counter a couple times to level the batter somewhat. Take your nicely ripened pear, and cut it into 3/4″ inch slices from stem to bottom. Choose your prettiest two slices and lay them on top of the loaf, gently pressing the pear a bit into the batter, but keep the pear completely visible. Bake in the oven for 55 minutes keeping a close eye on the bread at the end. It is done when the loaf springs back in the center when touched with your finger.

Vanilla Pear Bread Gluten Free Grain Free

pear-bread-fresh-from-the-oven

Cool for five minutes, then remove from the pan, and cool completely on a wire rack before slicing!

Eat Your Nutrients!

Eat Your Nutrients!


*Affiliate Link – I receive a small commission when you purchase products I recommend through my Amazon links. I use these products myself and never recommend anything I haven’t tried and use regularly. The small commission helps me keep my blog up, so if you have enjoyed my posts and recipes, I appreciate your support. You don’t pay any extra for your products. Thank you.🙂


Steamed Egg Custard with Clams and Rosemary

steamed-egg-custards-with-clams-and-rosemary-in-the-instant-pot

I usually make savory egg custards in my bamboo steamer, but I am really enjoying my Instant Pot for it’s speed and ease, and the custard came out silky just like it should. If you don’t have an Instant Pot you can check them out here, or make the custard in a regular steamer. (Directions are below)  It will just take longer for them to cook.

I first started making egg custards 15 years ago for my little girls. They are an Asian dish I first discovered when we were in China, and the very nice chefs at the hotel where we were staying made them for the babies who were about one year old, including my daughters, as they are very soft and delicate and just right for babies. The girls adored them! However, they are also eaten by adults! This version has clams and rosemary in it and is absolutely delicious as a first course or with a light lunch accompanied by a side salad. I personally think they are fantastic for breakfast! If you have never tried steamed egg custard, I highly recommend it! They are delightful, light, creamy and silky on the tongue.

steamed-egg-custard-with-clams-and-rosemary-using-an-instant-pot

These cook in 9 minutes in the Instant Pot. Straining the egg mixture through a fine meshed strainer is the secret to the silkiness! I try to incorporate seafood into my weekly meals at least once or twice a week. Canned clams are something you can stock right in your pantry, and they are a great source of B-12 which is essential for a healthy nervous system, Iron and Vitamin C.

Steamed Egg Custard with Clams and Rosemary

Ingredients:

3 Eggs

1/2 Cup of Full Fat Coconut Milk (my favorite)

1/3 Cup Plus a Tablespoon of Canned Baby Clams (I use Crown Prince Wild Caught here)

2 Green Scallions, sliced

1 Teaspoon of Fresh Minced Rosemary

1 Teaspoon of Coconut Aminos, this is a soy substitute and tastes amazing (here)

1/4 Teaspoon of Sea Salt or Himalayan Pink (my personal favorite) 🙂

Directions: In an Instant Pot, pour in 2 cups of water and add the trivet that came with it. Set out three heat proof ramekins or bowls, and make sure they fit into the Instant Pot on the rack. They should hold approximately 3/4 cup each.

In a bowl, whisk together your eggs, coconut milk, coconut aminos, and sea salt. Now pour it through a fine meshed strainer (like this one) into another bowl. This makes it super silky. Discard any egg white residue left in your strainer. Stir in the clams, rosemary and scallions. Divide evenly into the three ramekins. Cover each ramekin tightly with foil, and place on your trivet rack in the instant pot.

egg-custards-in-the-instant-pot

Place the top on the instant pot, and seal the top and the steamer valve. Choose the manual button on your pot and set the timer to 9 minutes on the low setting (there is a choice between low and high). When the timer is up, release the pressure valve, remove the lid and carefully remove the hot ramekins and take off the foil.

Cool for ten minutes. The steamed custards are ready to serve.

To steam them in a bamboo or other steamer, follow the instructions above, however, steam for 15 to 18 minutes on low, making sure the centers are set but still jiggly.

Makes 3 Savory Custards

Eat Your Nutrients!

Eat Your Nutrients!

*Affiliate Link – I receive a small commission when you purchase products I recommend through my Amazon links. I use these products myself and never recommend anything I haven’t tried and use regularly. The small commission helps me keep my blog up, so if you have enjoyed my posts and recipes, I appreciate your support. You don’t pay any extra for your products. Thank you.🙂


Orange Tarragon Chicken with Caramelized Pears

Tarragon imparts sweetness to sauteed pears. This chicken dish comes together quickly and tastes elegant.

orange-tarragon-chicken-and-caramelized-pears-plated

I received a fruit and nut gift basket this week as a gift, and it included organic pears which are delicious just plain when perfectly ripe…..so good! When you slice and cook them in some olive oil and add onions, they are divine, soft, savory and sweet. Then add some juicy chicken thighs, and you have a fantastic main dish!

Orange Tarragon Chicken with Caramelized Pears

Preheat oven 375º degrees.

Ingredients:

8 boneless chicken thighs

1 Ripe Pear, cored and sliced (it doesn’t need to be really ripe, but soft)

1 Yellow Onion, diced

Zest and Juice of Two Oranges

3 Tablespoons of Olive Oil

2 1/2 Teaspoons of Tarragon

1 1/2 Teaspoons of Herbamare Sea Salt Seasoning (this kind)

Directions: In a large oven proof skillet, add 2 tablespoons of olive oil and heat over medium high heat until warm. Add the pears and onion to the olive oil in the skillet, then sprinkle with 1/2 teaspoon of Herbamare and 1 teaspoon of tarragon. Cook for 5 to 10 minutes stirring occasionally until the pears and onion are soft and starting to caramelize.

pears-onion-tarragon-in-olive-oil

Meanwhile, cut each boneless chicken thigh into quarters and sprinkle with the remaining 1 1/2 teaspoons of tarragon and 1 teaspoon of Herbamare seasoning salt.

Remove the caramelized pear and onion from the pan and set aside. Add the last tablespoon of olive oil, and then the seasoned chicken. Sprinkle the orange zest onto the chicken. Sautee for 4 minutes then flip the chicken and cook for 4 more minutes. Add the orange juice to the pan and cook for 1 minute to reduce the juice. Stir in the pear and onion mixture. Place the pan in the oven for ten minutes.

Remove from the oven and serve and enjoy!

orange-tarragon-chicken-and-caramelized-pears

Eat Your Nutrients!

Eat Your Nutrients!


*Affiliate Link – I receive a small commission when you purchase products I recommend through my Amazon links. I use these products myself and never recommend anything I haven’t tried and use regularly. The small commission helps me keep my blog up, so if you have enjoyed my posts and recipes, I appreciate your support. You don’t pay any extra for your products. Thank you.🙂


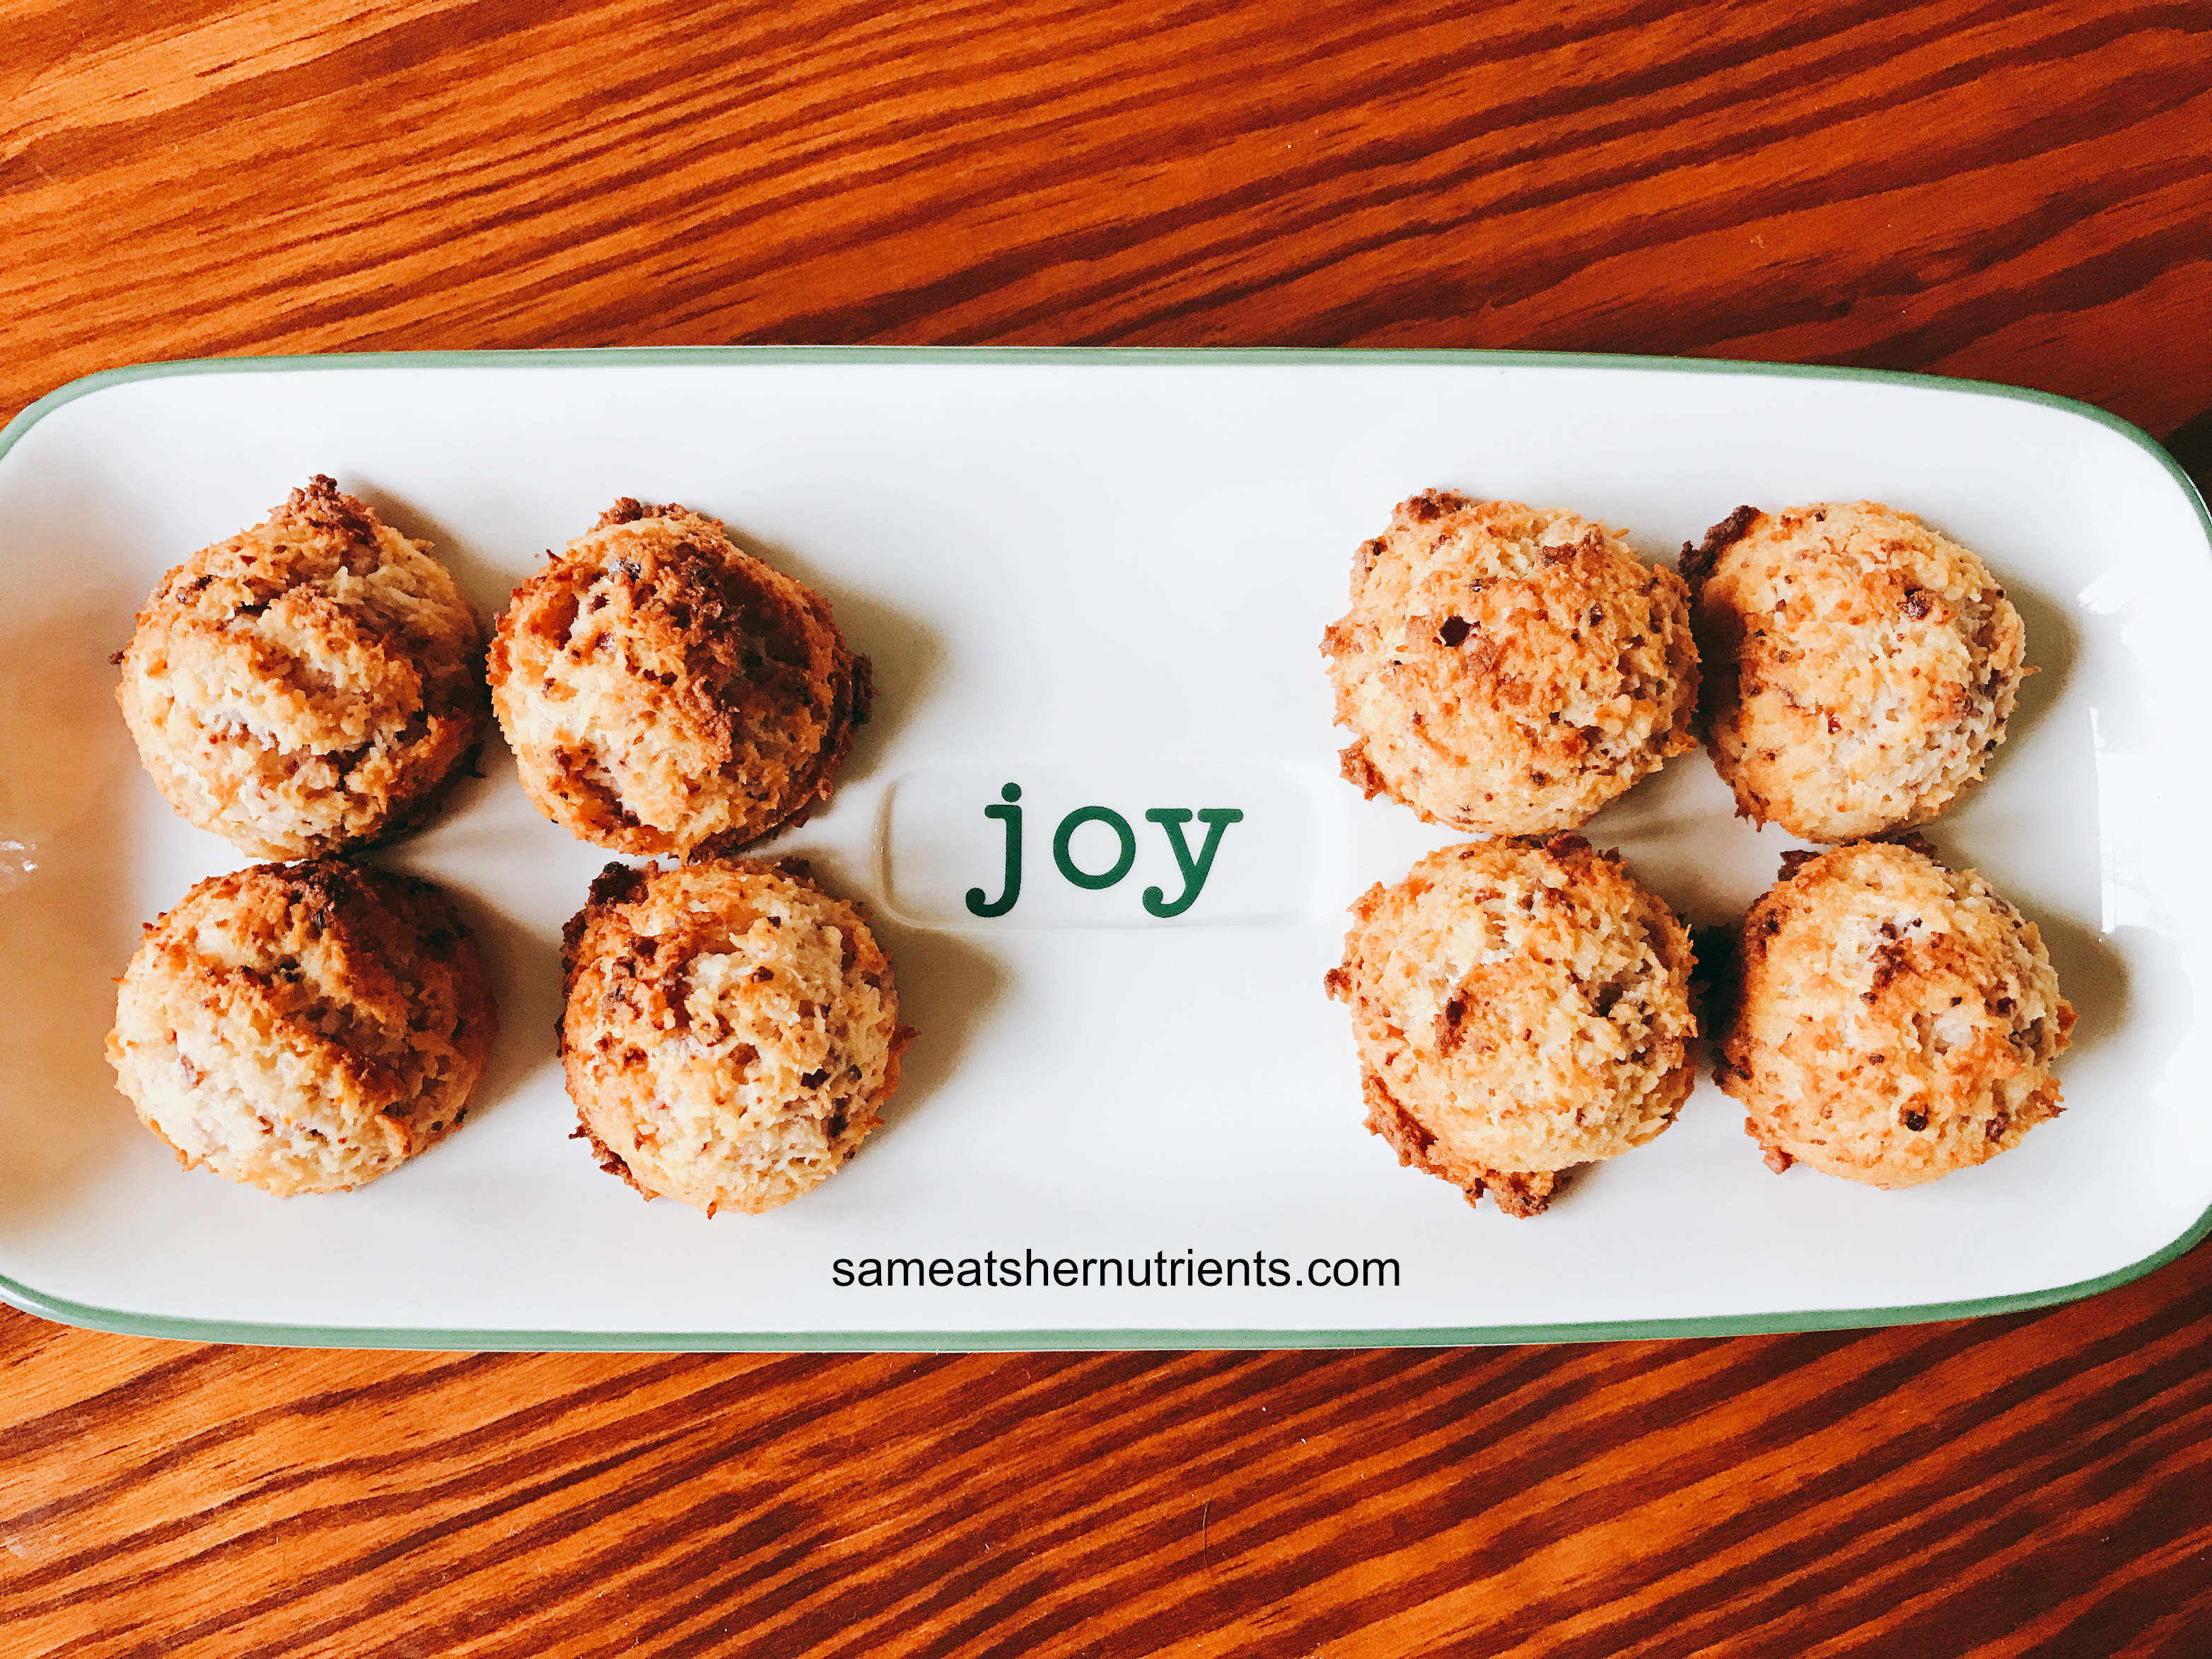
Honey Cherry Macaroons

Honey Cherry Macaroons

I am a fan of macaroons and cherries, so I thought, why not come up with a cherry macaroon? They are a perfect two bite cookie with a toasted outside and a moist, chewy interior. The way to get a tart cherry flavor and have these macaroons work is to use crushed, freeze dried cherries. The ingredients are simple and clean with no refined sugar. These cookies should definitely go on your holiday tray! They also make a very pretty packaged gift!

festive-cherry-macaroons

Cherry Macaroons

Ingredients:

5 oz. (1 1/2 Cup) of Unsweetened Finely Shredded Coconut (I like this kind)

1/2 Cup of Coconut Cream (also know as coconut butter, here’s my favorite)

1/3 Cup of Freeze Dried Cherries (this kind)

1/3 Cup of Good Honey (I use local)

2 Tablespoons of Coconut Milk (full fat)

2 Egg Whites

1/4 Teaspoon of Sea Salt (I am a big fan of Himalayan Pink for it’s minerals)

Directions:

Preheat the oven to 325º degrees.

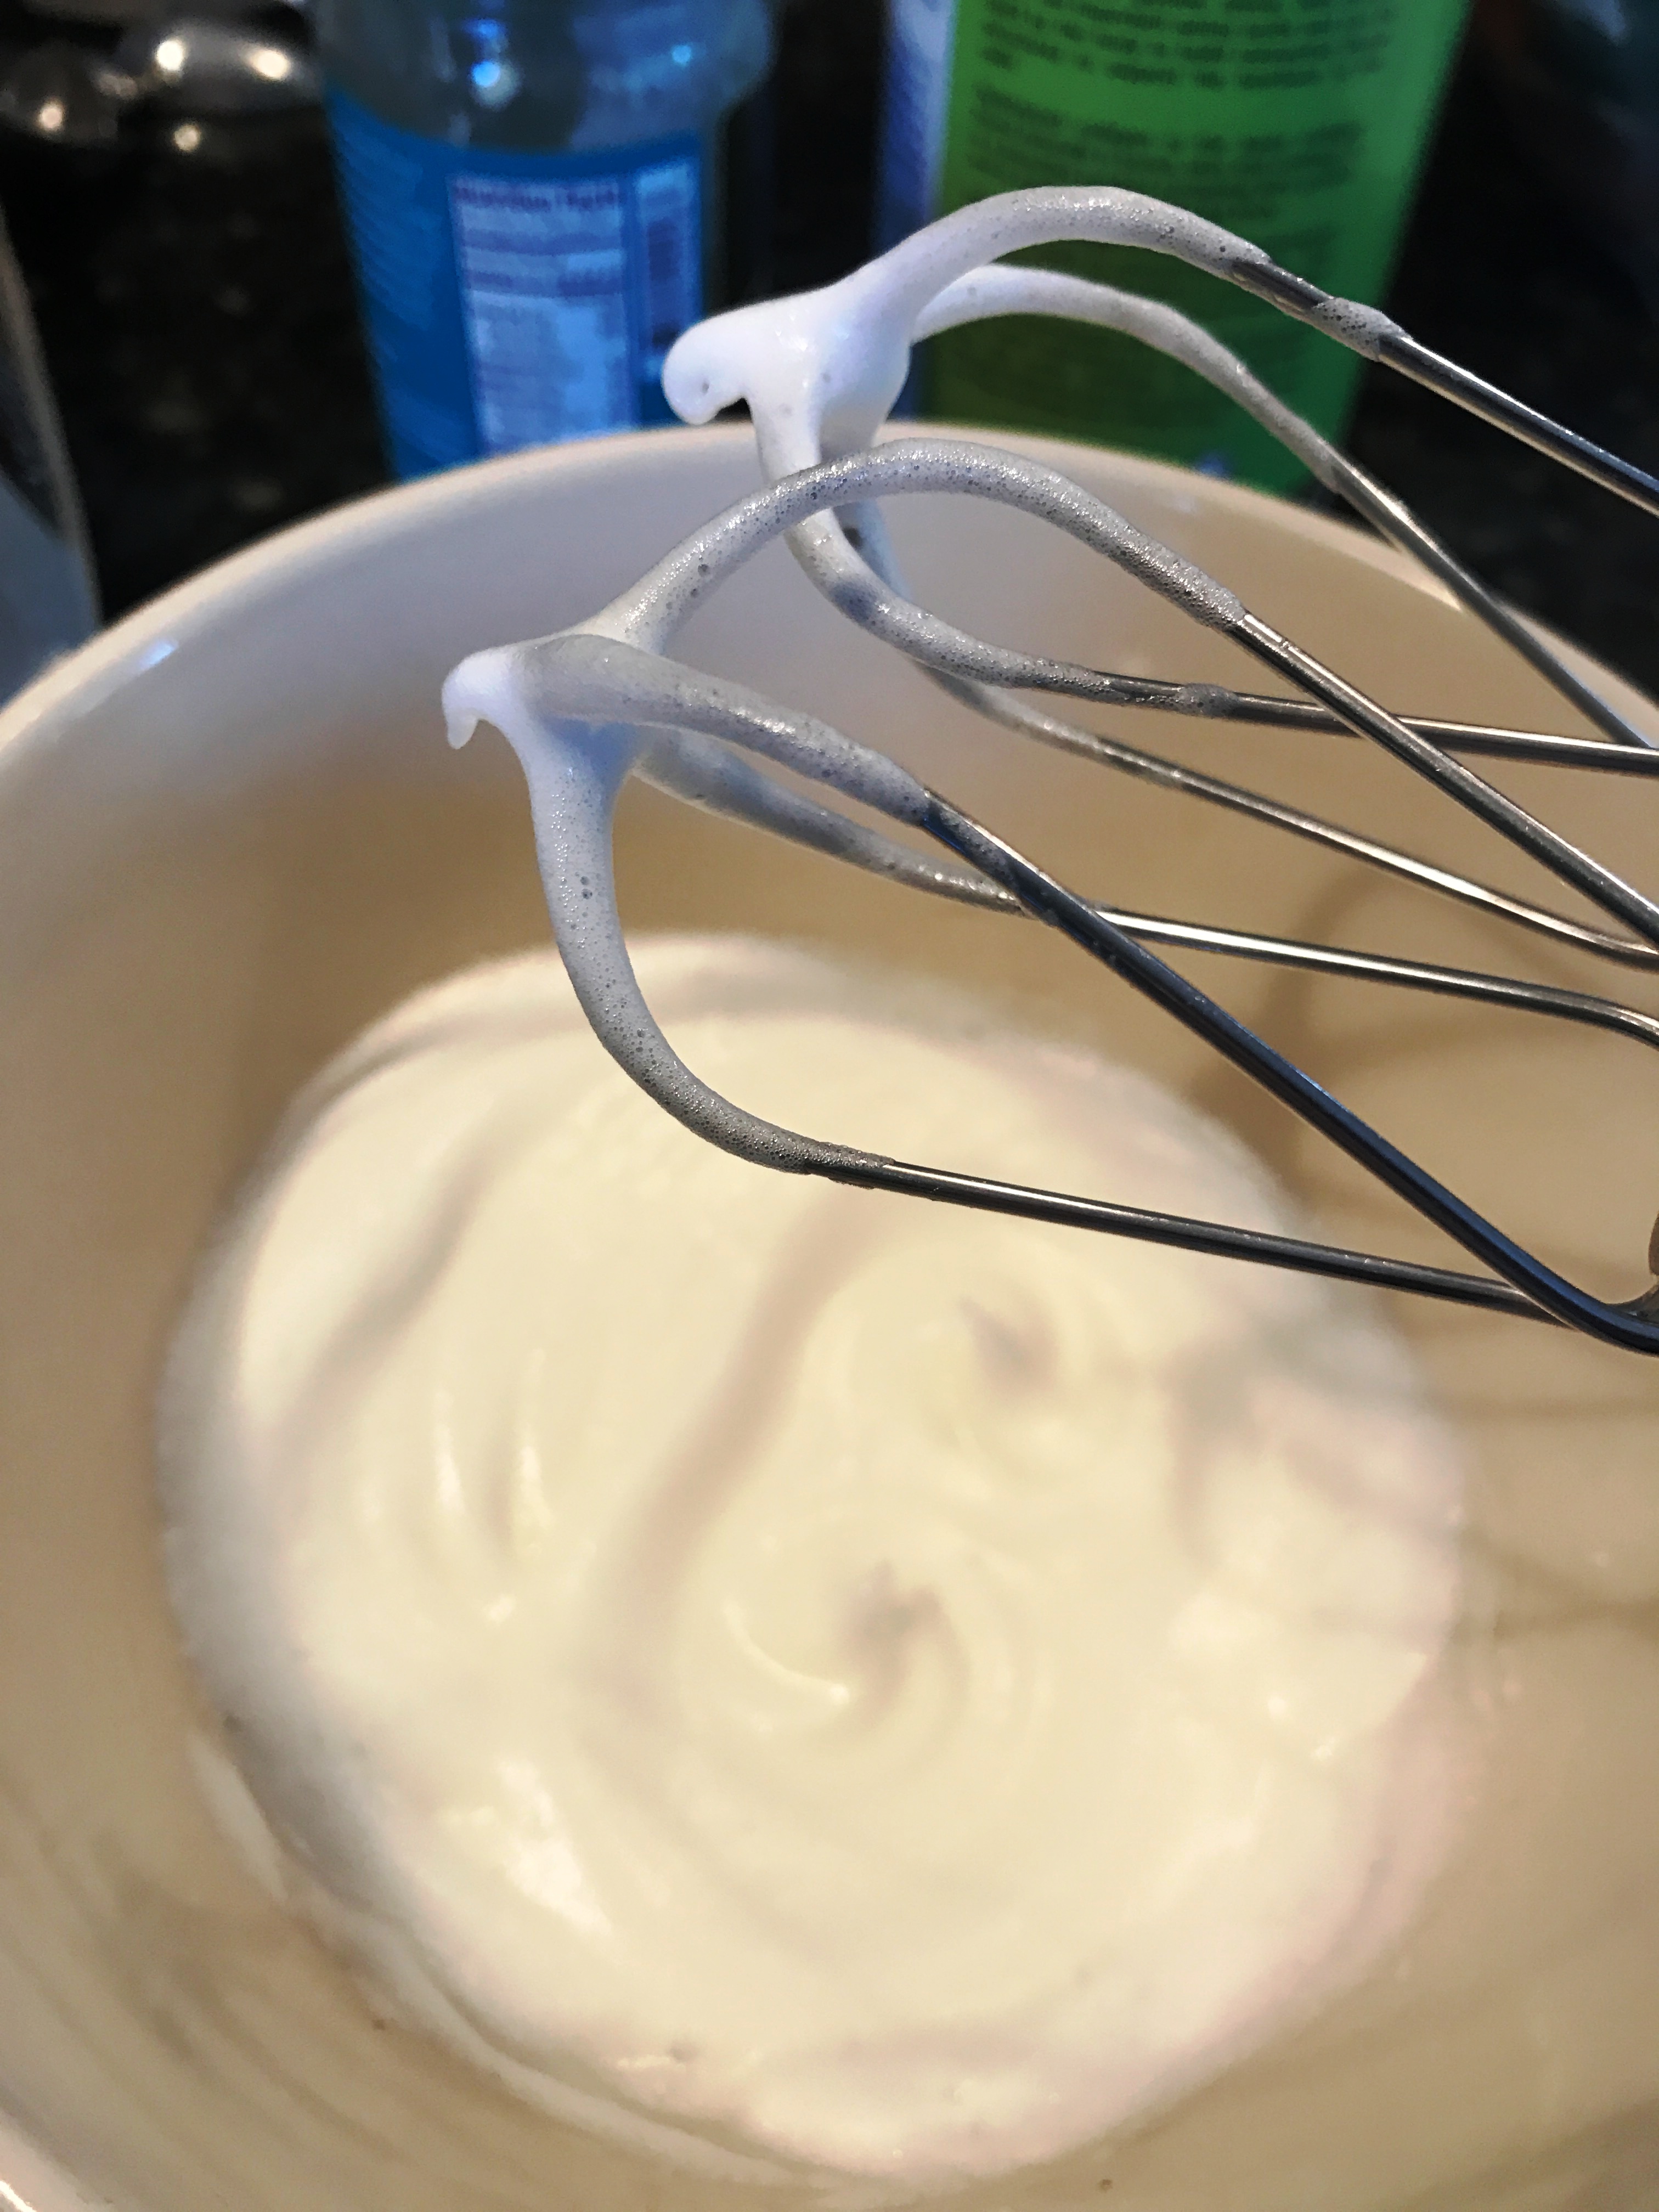
In a clean dry bowl, beat the egg whites and salt on high with a hand-held electric mixer until you have medium-firm peaks. Set aside.

egg-whites-medium-peaks

Put the cherries in a ziplock bag and crush them finely with a rolling pin. In a medium bowl, combined the shredded coconut and crushed cherries.

Coconut and Crushed Cherries

Coconut and Crushed Cherries

Add the honey, coconut cream (softened in the microwave), vanilla extract and coconut milk. Beat with a hand mixer until thoroughly creamed.

Carefully fold in the egg whites. Now, scoop with a tablespoon cookie scoop onto two parchment lined cookie sheets.

cherry-macaroon-dough

Bake in your preheated oven for 20 to 25 minutes, or until the outside is a pretty golden brown. Remove from the oven and cool.

macaroons-with-cherries-paleo

Makes 20 Macaroons. They will keep at room temperature for a week or more.


Eat Your Nutrients!

Eat Your Nutrients!

*Affiliate Link – I receive a small commission when you purchase products I recommend through my Amazon links. I use these products myself and never recommend anything I haven’t tried and use regularly. The small commission helps me keep my blog up, so if you have enjoyed my posts and recipes, I appreciate your support. You don’t pay any extra for your products. Thank you.🙂


1 2 5