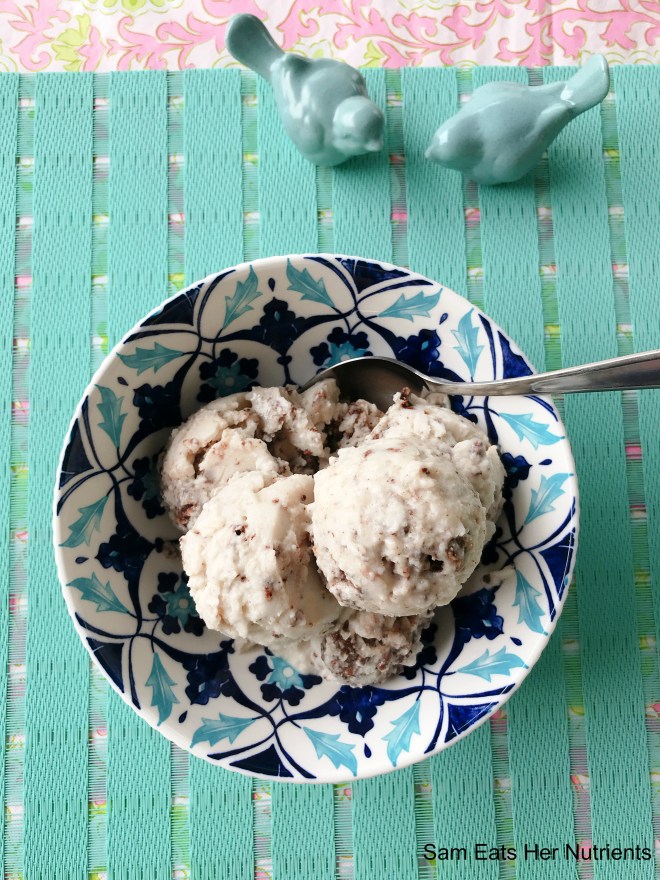
I have this slight obsession with toasted coconut ice cream with chocolate bits. There is this extraordinary ice cream shop where we vacation every Summer, and they have the Best ice cream……..Toasted Coconut is my favorite. It’s been around for years, but since becoming dairy intolerant, I haven’t chosen to partake. It is their #2 best seller. Of course, the ice cream has dairy (It is gluten free) which totally does not agree with me, and I don’t want to spend my vacay time with a belly ache and bloating because I couldn’t resist.

So, I was thinking “Dang Girl, aren’t you a food blogger and recipe developer?” Me to self, “Well, Ya”…… So, I made my own, getting as close as possible. This is a recipe to replicate my favorite Vacay Ice Cream without the refined sugar and dairy. It’s delicious, it’s got some crunch, and a whole lot of yum factor!
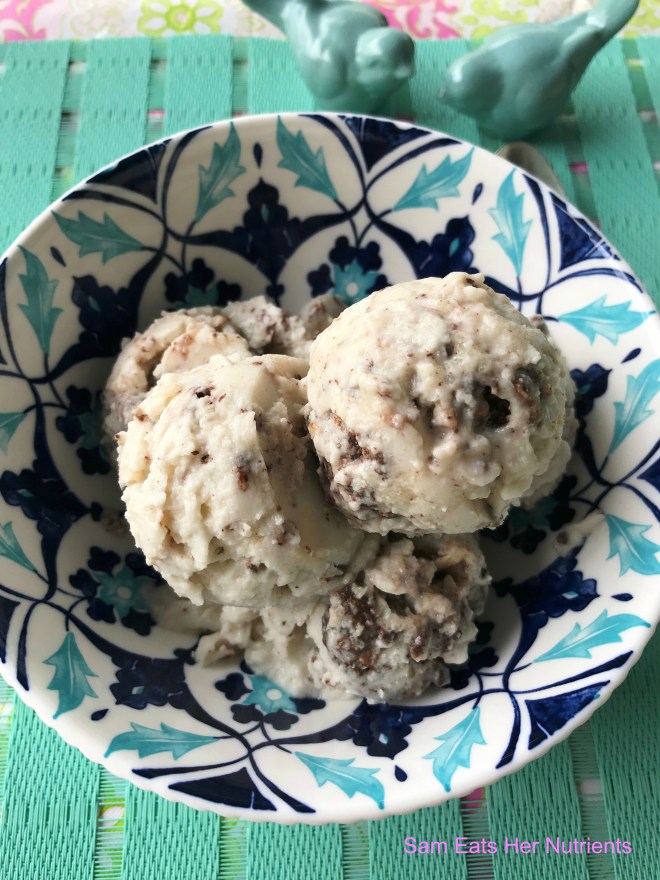
Toasted Coconut and Dark Chocolate Ice Cream
1 Cup of Dang Coconut Chips (this kind, already toasted for you)
1/3 Cup of Dark Chocolate Chips (I used Enjoy Life)
1 Can of Full Fat Coconut Milk, chilled
1/4 Cup of Pure Honey (local tastes best)
1/4 Cup of Coconut Butter, Softened
1 Teaspoon of Pure Vanilla Extract
1 Tablespoon of White Rum (I used Bacardi it’s Gluten Free)
1 Tablespoon of Grass Fed Collagen
1/8 teaspoon of Sea Salt
Directions:
In a mini food processor, process your coconut chips until they are fine in texture. Lay them out in a single layer on a parchment lined sheet. In a small microwave safe bowl, melt the chocolate chips for 30 seconds at a time until smooth and creamy. Stir them with a fork in between 30 second increments until they are completely melted and creamy. Drizzle the melted chips over the coconut. Toss the coconut and chocolate with forks on the sheet to coat about 75 percent of the coconut. Let sit for a couple hours at room temperature until it has solidifying and can be broken into bits with your hands.
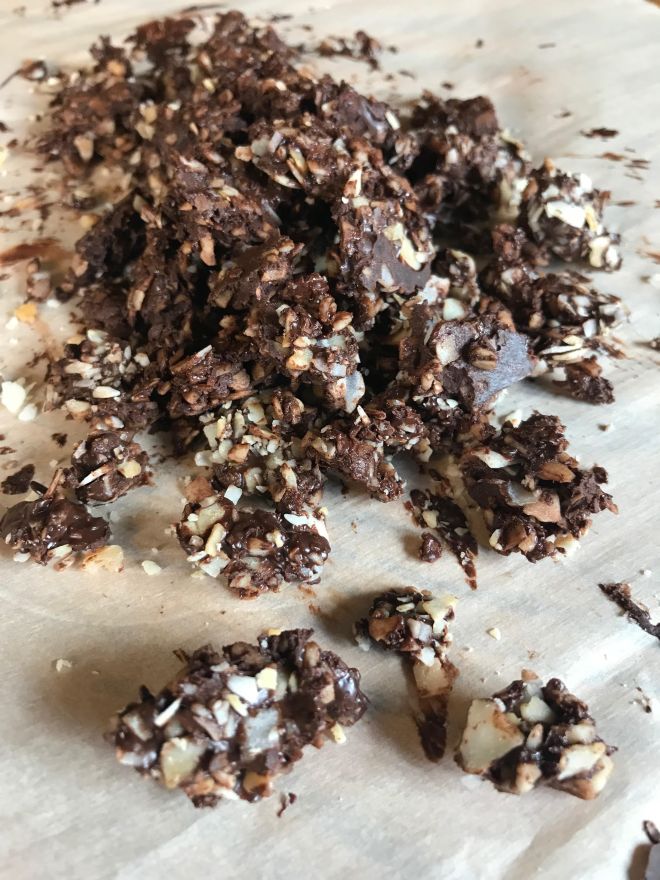
Once your coconut chocolate bits are ready, you can make your ice cream.
In a blender, blend the coconut milk, honey, coconut butter, vanilla, collagen, salt and white rum. The rum makes the ice cream softer. Add it to an electric ice cream maker and churn. At the end of churning time, add the coconut chocolate bits. This will be the last few minutes. Let the machine incorporate the chocolate coconut bits.
Serve!


 Sheet pan meals are a quick and easy way to get a full meal on the table. This Italian dish has lean pork tenderloins, butternut squash and red cabbage! The tenderloins are tender and juicy, and the secret ingredient that’s not so secret is truffle salt! If you have never used it before, it is a fantastic way to add umami. I am obsessed with it lately! Also, the combination of Three salts……a pink, a smoked, and a truffle salt, all used judiciously, makes this pork crusty and oh so good!


Recent Comments