Well hello! I hope the end of January is finding you well! We are craving warming, hearty meals here this time of year, and if you are busy, this one dish cast iron skillet meal checks all the boxes!! My hand is raised here. I am feeding a family of five who all seem to devour food like lumber jacks. No offense to the lumber jacks, but having three full grown children and a hard working husband with a hearty appetite in the house keeps me hopping! Fortunately, I have lots of help in the kitchen too. Clean up is my least favorite part of cooking. Especially the dish washing, and Doug is happy to get in there. He is an excellent scrubber.
This Sundried Tomato, Bean and Sausage Frittata is loaded with tasty ingredients like tangy sundried tomatoes, roasted red peppers, onion, pecorino Romano cheese for a sharp, salty flavor, savory sausage, and creamy white beans! My mouth is watering!
Who else loves a wonderfully seasoned cast iron skillet? It is non-stick when cared for properly and seasoned well, plus it is a wonderful non-toxic pan!
Let’s make an awesome, hearty frittata!
Sundried Tomato, Bean and Sausage Frittata
Preheat your oven to 400 degrees F. I used a ten inch cast iron pan. If yours is larger or smaller, it is fine, but the oven times will vary.
Ingredients:
1 Pound of Good Quality Pork Sausage
10 Eggs
1 Cup of White Navy Beans or Cannellini Beans (I use Eden Organic canned. Drain and rinse them under water in a colander before using.)
In your cast iron skillet, cook your sausage until brown and no longer pink. Remove it from the skillet to drain on a plate with paper towel. Wipe your skillet of excess grease. Then, melt your olive oil over medium heat and add the chopped yellow onion, a sprinkle of salt and pepper, and cook until translucent. While the onion is cooking, whisk together your eggs in a bowl along with the Greek yogurt, 1/2 cup of the Pecorino Romano cheese, 1/2 teaspoon of salt and 1/4 teaspoon of black pepper.
After the onions are translucent, fold in the rinsed beans and chopped roasted red pepper maintaining the heat at medium. Add the cooked sausage back to the pan and evenly mix the vegetables, beans and meat. With a spatula make an even layer of your mixture, then pour the eggs over the top. Do not stir! Sprinkle the Frittata with sundried tomatoes, sliced green onion and the remaining 1/2 cup of cheese. Place the cast iron skillet in your oven, and bake for approximately 25 minutes until set and the top is golden brown. Serve! This goes really well with a leafy green salad!
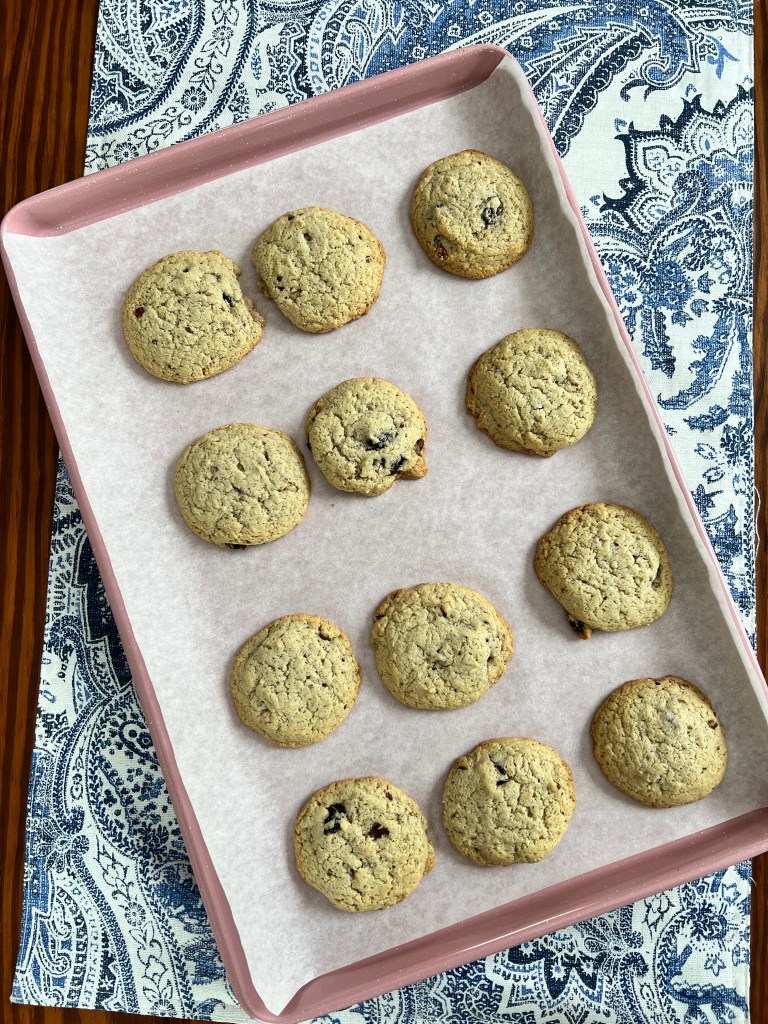
How are you doing so far in the new year? I was personally thankful to get a good solid three days of full sunshine here in Northern Michigan in January! I have a picture below of me at the lake where the ice was just beginning to freeze over it. I have found since moving back to my childhood state of Northern Michigan from Maryland, after living on the East Coast for 32 plus years, I did not know or even realize that there is less sunshine in the winter here by 25%. The plus side of that is we have more sunshine and daylight hours here in the Summer, and the weather is gorgeous, plus the air is so fresh all the time. I wanted to share a new grain and gluten free cookie recipe with you today that is tasty and has no refined sugar (sweetened with Maple Syrup).
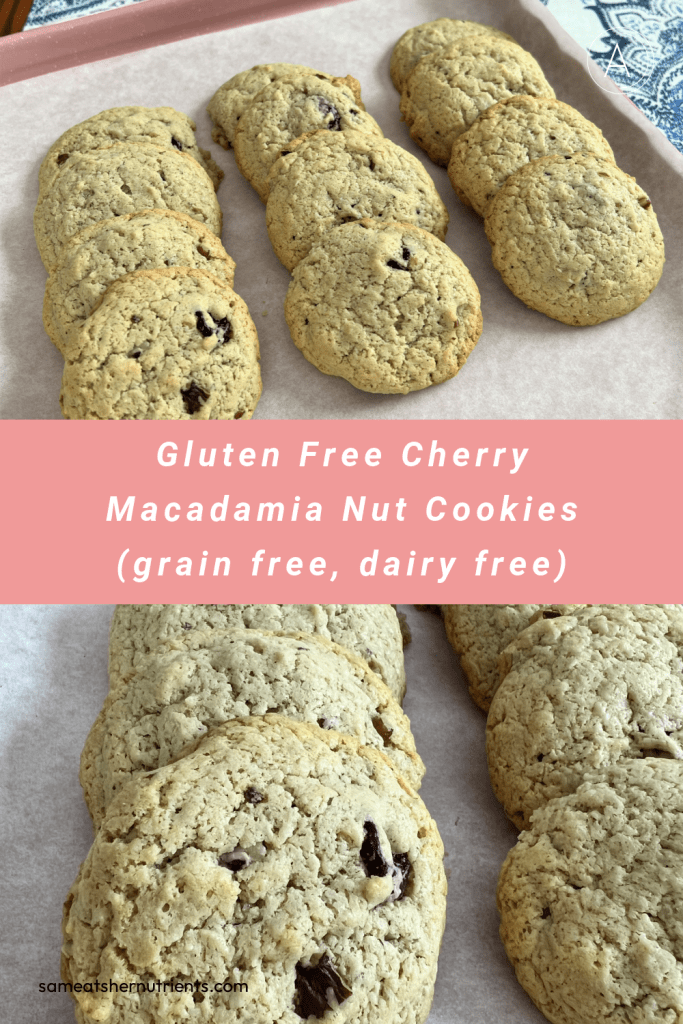
Gluten Free Cherry Macadamia Nut Cookies (Grain Free and Dairy Free Also)
These cookies come together easily with a hand mixer.
Ingredients:
1 Cup of Macadamia Nuts (ground in the food processor to a nut flour)
1/2 Cup of Cashew Butter
1/4 Cup of Coconut Oil
1/4 Cup of Dried Cherries
1/4 Cup of Pecans (coarsely chopped)
1 Egg
2 Tablespoons of Maple Syrup
1 Teaspoon of Vanilla Extract
1/2 Teaspoon of Baking Soda
1/4 Teaspoon of Salt
Directions:
Preheat your oven to 350 degrees F.
In a food processor, grind the macadamia nuts until they are fine like almond flour. Add the remaining ingredients except the dried cherries and pecans. Blend until completely combined, scraping the sides of the bowl half way through. Remove the blade from the food processor and stir in the cherries and pecans.
Scoop onto parchment lined cookies sheets with a tablespoon cookie scoop. Press down until they are an even height with your fingertips, and then bake in the preheated oven for 14 minutes.
Let cool, and enjoy.
Gluten Free Cherry Macadamia Nut Cookies Recipe
Here’s the photo of me at the lake in the sunshine. It’s very cool to skip stones across the thinly frozen ice. It makes a type of musical sound. The benefits of sunshine are numerous including better sleep, increasing vitamin D levels for immunity, brain and bone health. Exposure to sunshine also helps with Seasonal Affective Disorder and low mood.
Up North Michigan in the Sunshine
On another note, the world today seems a little more serious and impatient than is was five years ago, and I want to encourage you to make sure to find time to enjoy your life, have some fun, and find things that make you laugh.
Inspirational Quote
Kindness circles back to you. The more you send it out into the world, by the words you speak, the better the world will become. Here’s an example. Have you ever made someone’s day just by speaking kind words to a check out clerk at the store? They noticeably perk up, and then as you leave, you hear them greet the next person in line with a happier more animated tone? I have. That’s what kind words do. They start this whole effect of paying it forward. Kindness increases people’s faith in humans in general and creates a ripple effect. It’s like a tiny seed you plant every time you speak. It grows, creates new plants and then more seeds you may never see, but they are happening and making the world a better place.
The added benefit of these small connections is you feel happier, healthier and more positive as you feel a little more connected to other humans. Those casual connections are important. The next time you are in line at a store and get to the cashier, ask them how their day is going.
Swap out Dryer Sheet for Wool Dryer Balls
Now I have a healthy living tip to share. Swap out dryer sheets and fabric softener for wool dryer balls.
Wool dryer balls can be used over and over and over and don’t release toxic chemicals onto your clothing that you then put on your skin! They are eco friendly and great for fluffing up your clothes and preventing wrinkles too.
Dryer sheets are from synthetic polyester, with toxic chemicals which release to target the electrostatic charges. Dryer sheet manufacturers typically list only some of the ingredients on the dryer sheet box, but others don’t list any ingredients at all. Dryer sheets are a sneaky single-use plastic, designed to be used once then tossed out, where they will persist in the environment forever. Instead try 100% Wool Dryer Balls, which not only reduce static – but reduce drying time, too! If you want an added scent, add a few drops of your favorite Essential Oil. Here’s the wool dryer balls I use.
I hope you love the new recipe, tips, encouragement and inspiration. I love to hear from you. Drop me a comment anytime.
I am so delighted to welcome Max from My Health Food Service as a guest today! Max lives in Spain and is sharing with us an authentic Spanish Tortilla Recipe:
Spanish Tortilla (Tortilla Española) is a traditional dish from Spain that is made with potatoes, onions, and eggs. It is a simple yet satisfying dish that can be enjoyed as a main course, a side dish, or even a quick snack. It does require some practice to get it right, so don’t worry if you don’t nail it first try.
Ingredients:
Around 1 Kg of potatoes (about 5 medium sized potatoes)
1 medium-sized onion, thinly sliced
7-8 eggs
Salt and pepper, to taste
Olive oil
Feel free to use more or less of these ingredients. The quantities are not necessarily exact. Try to use around 0.7-0.8 eggs per 100g of potatoes.
Instructions:
Peel the potatoes, clean them and chop them up into slices as seen in the image below. Add some salt to the potatoes and stir.
Add the sliced potatoes to a pan with olive oil and fry them until they are soft and lightly browned. If you have an air fryer, use that as it will be a healthier option.
In a separate pan, fry the chopped-up onions on low heat until they are translucent. Once ready, add into a large bowl together with the potatoes
In a separate bowl, beat the eggs and pour them over the potatoes and onions. Gently stir everything together.
Heat a splash of olive oil in a pan on medium-high heat, and once ready pour the whole mix into the pan. leave for a few minutes, and then start separating the tortilla from the sides or walls with a wooden spoon.
Once you can reach down and move the whole tortilla with the spoon, and you can just see that the bottom is going golden brown but the top is still liquid, it’s ready to turn around. This is the most important part.
Get a large plate that can cover the whole pan easily and place it over the top. Place a hand on the top of the plate and hold it firmly whilst you lift quickly turn it over. The tortilla should be left on the plate. Most Spanish households have a special plate designated for flipping tortillas, like the image below, but any plate large enough to cover the whole pan fully will work fine.
Place the pan back on the fire and slide the tortilla back in, so that the golden brown side is now on the top, and flatten it out with a wooden spoon. Leave it for another few minutes until you can again see that the bottom is turning golden brown.
Once ready, place the plate over the pan again and perform the same flip as before, just to take out the tortilla.
Some people like to have a tortilla with a solid middle part and some people prefer the center a bit more liquid. Feel free to try both by leaving the mix a bit longer or shorter on the second side before taking it out.
The Spanish Tortilla can be served hot, warm, or at room temperature, and can be garnished with chopped parsley or chives if desired. It’s great as a main course, side dish, or even as a snack and it’s a great way to use up leftover potatoes. You can also add some diced vegetables such as peppers, zucchini, or spinach, or even some cooked bacon, chorizo, or other meats, to make it more hearty and filling.
If you liked this recipe and would like to see more content like this, please check out My Health Food Service. Feel free to ask any questions related, to the editor Max.
We are well into January, and I have to say I like the thought that the days are getting longer now! In fact, I find I have been using some of my Summer mugs, because they feel so bright and cheerful.
I am a lover of enchiladas and eating healthy. I think it is great to focus on foods that feed your body, mind and soul that are good for you and taste incredible, keeping in mind that if you have been eating a lot of processed and fast foods, taste buds need time to adjust to less salt and sugar. This is also a low carb recipe, so if you have been fighting belly fat, this is a wonderful casserole that tastes even better the next day.
1 Teaspoon of Salt, Divided plus some for sprinkling
1/2 Teaspoon of Black Pepper, Divided plus some for sprinkling
Directions:
Preheat your oven to 400 degrees F.
Lay the chicken thighs onto a baking sheet and brush lightly with olive oil. Then, sprinkle with salt and pepper, and roast in the oven for 35 minutes. Set aside to cool.
Meanwhile, steam your carrots either on the stovetop or following the directions of your instant pot. Once the carrots are steamed, set them aside to cool slightly before pureeing. Once the carrots have cooled so they are not steaming hot, place them in a food processor along with 1/2 cup of salsa, 1 Tablespoon of garlic olive oil, 1/4 cup of broth, 1/4 teaspoon of salt and 1/4 teaspoon of pepper.
Sautee the spinach with a drizzle of olive oil and a sprinkle of salt and pepper. Chop the spinach.
Chop your chicken into small bite sized pieces and place it in a large mixing bowl. Add 1/2 cup of salsa to the bowl with the chicken along with 1 cup of Greek yogurt, 1/2 cup of shredded cheddar cheese, the chopped, cooked spinach, 3/4 teaspoon of salt and 1/4 teaspoon of pepper.
Grease a large 15 by 10 inch casserole with olive oil. Now the easy and magical assembly. I was impressed with how well Swiss chard bakes in a casserole. Layer half the chopped Swiss chard evenly in the bottom of the casserole. Add your prepared chicken filling. Top with the remaining chopped Swiss chard. Now spread your carrot mixture evenly onto the top of the Swiss chard, covering it as evenly as possible. Sprinkle on the remaining 1/2 cup of shredded cheddar cheese. Sprinkle on a little extra black pepper.
Bake uncovered in your 400 degree F. oven for 35 minutes until the cheese is browned and the casserole is bubbly!
Yummy!!!
Today is National Houseplant Appreciate Day! Houseplants are a wonderful way to bring nature and it’s health benefits indoors. We spend so much time indoors, me too, even thought I love to exercise outdoors, garden and be outdoors, we still as humans spend the majority of time indoors. With all the inanimate objects in our homes like furniture, electronics, etc. it can feel good and benefit us to incorporate living plants in our rooms. They create a restorative atmosphere, are always changing and growing and can decrease stress and increase happiness. There are some beautiful plants out there, and some that are low maintenance and good if you have a black thumb.
The Benefits of Houseplants
Houseplants can improve air quality in your space, increase a sense of wellbeing, and give your eyes a much needed break from screens and help you relax and improve mental fatigue. They also can be a great addition to add beauty. It is important if you have small children or pets that you do your research and choose plants that are safe for them and also it is important to know if you have allergies or asthma, choose allergen friendly plants like cactus and succulents. Overwatering can cause mold growth, so read and make sure you know the water needs of your plants. I like to choose ones that need water once a week maximum. I also like to wipe my leaves with a damp cloth to keep them clean.
Houseplants in your home can add serenity and beauty
I am always striving for having the cleanest non-toxic living habits as possible. I want my home to be toxin free, my lawn and my skincare. That’s why I love Beautycounter so much. They are leading us to cleaner, safer beauty for all, and it doesn’t hurt that their skincare and makeup is high performing and really works. Here’s a few facts about them. I used them for a good five years before becoming a consultant, because I loved their mission and the changes they were making with beauty laws, not to mention being in love with their skin care products. They have an in house team of scientists and toxicologists, and they test for trace contaminants throughout the manufacturing process! Did you know lipsticks commonly contain lead? Yikes! The skincare regimens are fantastic, and I am obsessed with their Vitamin C Serum!
Beautycounter Clean Fact. They have in house scientists and toxicologists and are changing beauty products for the better.Beautycounter Clean Fact. The products are obsessively tested for trace contaminants you don’t want on your body or in your bloodstream.
Drop me a line. I love to hear from you! I hope you have a great day!
Winter Health Tips, Spiralized Antipasto Health Zoodles Salad and Safer Skincare
Happy New Year friends!! The days are getting longer, and I am craving fresh, delicious, food that makes me feel good because of all the nutrients in it! This Spiralized Antipasto Zoodles Salad is full of all the flavor, is low in carbs and it’s fun to make…..because….zoodles are just so fun!
Spiralized Antipasto Zoodles Salad
First off if you don’t already have a spiralizer, it is affordable! and a great investment in your kitchen accessories. I use my spiralizer frequently and is as necessary to my kitchen as a food processor and blender. This is my favorite spiralizer of the three I have tried. This one suctions to the countertop and makes a wonderful variety of spiralized shapes, and I have had it 5 years and it is still going strong. Oh, and this is a no cook recipe!
Delicious Spiralized Antipasto Zoodles Salad
Ingredients:
5 medium to small zucchini, spiralized (I used the FS Blade on my spiralizer)
1 Teaspoon of Salt to draw moisture out of the zucchini (see directions)
3 oz. of Sopressata, diced (I used Culinary Tours gluten free brand.) You can also use thin sliced Salami
1/4 cup of oil packed Sundried Tomatoes, finely diced I use Mediterranean Brand Organic Sundried Tomatoes In Olive Oil
Dressing:
3 Tablespoons of Garlic Infused Olive Oil
3 Tablespoons of Red Wine Vinegar
2 Tablespoons of Good Olive Oil
1 Tablespoon of Fresh Lemon Juice
1 Teaspoon of Nutritional Yeast (adds umami and a cheesy flavor)
1/4 Teaspoon of dried Oregano
1/4 Teaspoon of dried Parsley
1/4 Teaspoon of Salt
1/4 Teaspoon of Black Pepper
Whisk all the dressing ingredients together in a bowl until emulsified.
Directions: Spiralize your zucchini. Spiralizing really magnifies the amount of zucchini. Look!
Making Zoodles with a Spiralizer
Place the spiralized zucchini in a colander over a bowl, and toss the zucchini in the teaspoon of salt. Let sit over the bowl for 30 minutes. The zucchini will release some juices. This helps prevent the salad from being watery. Zucchini has a lot of water in it. After 30 minutes, take a large serving spoon or rubber spatula and press the zucchini in the colander firmly to release more of the liquid. Now, we are ready to make the rest of the salad! Let’s go!
It really is just assembly at this point and so easy! Put your zoodles in a large bowl. Add the rest of the chopped, sliced and diced ingredients. Whisk up your delicious dressing, and pour it over everything. Grab you salad tongues and toss thoroughly, but gently. It’s ready to eat, or you can store it in the refrigerator until you are ready to serve it. It will just increase in flavor.
This Spiralized Antipasto Zoodles Salad is a wonderful addition to any meal or a delicious lunch. It’s pretty, fun, and healthy and good for you!
Now, here’s some health tips to get your through the winter months! Since the days are colder and darker, it is important to implement mindful self care for yourself.
Winter Health Tips
Which of these have you already implemented and which ones are you going to add? Please reach out to me with any questions. I love to hear from you.
As far as the sunscreen in the winter goes, are you choosing a safe sunscreen? It defeats the purpose of protecting your skin if you are putting chemicals on that absorb into your bloodstream. I recommend Beautycounter safer sunscreen with non-nano zinc. It is the safest out there and also reef friendly. My family and I have been using it for 9 years now, almost as long as Beautycounter has been making safer skincare products. They celebrate their ten year anniversary in March, and I love their mission and the high quality and safety of their products. If you want to know more or go see all the safer skincare, makeup and family care they have, here is the link. I have been a consultant with them for almost four years now after using their products for several years before, and they are a highly reputable company that is changing laws for safer skincare and beauty for all, have a strong recycling and sustainability mission, and their skincare is high quality.
Getting through winter requires maintaining all areas of our health. This time of year we can get restless and tired of the constant darkness and cold. Many people suffer from seasonal affective disorder (SAD) which lasts through the winter months. Try these 12 health tips to help get your through the winter.
Enjoy the salad recipe! I plan on making this on a weekly rotation, wearing my sunscreen, and implementing winter health tips!
Hello! I am Sam. I am a foodie, baker and a Health Coach who likes being in the kitchen making food. My recipes are all gluten free and there are recipes for different food intolerances as well. If you are looking to incorporate healthier eating habits and live a more balanced life, I hope to inspire you. I have had an obsession with baking since I was ten! I started this blog to share recipes I was making for myself after finding out I had gluten sensitivity and other food intolerances which I have mostly healed, but will always be sensitive to gluten. I went to school for Health Coaching as a second career at Institute for Integrative Nutrition. Nutrient dense food gives the body the best fuel and building blocks to be vibrant, healthy, prevent disease, and maintain great energy as well as heal. I am excited to share delicious food recipes, tips, baking and treats too!


Recent Comments