Monthly Archives: May 2014

Chinese Five Spice Chicken Bites – Paleo

Chinese Five Spice Chicken Bites - Paleo, Soy Free

Chinese Five Spice Powder is Amazing!  It is a combination of Star Anise, Fennel, Black Pepper, Cinnamon and Cloves.  It is a warming blend that pairs wonderfully with meat!  Here I use it to make Five Spice Chicken Thigh Bites using boneless chicken thighs.  This is very kid friendly because of the bite size pieces, and it is slightly sweet with fresh squeezed orange and lemon juices and just a bit of heat with red pepper flakes.  You can turn up the heat by adding more red pepper flakes if you like, but don’t leave them out.  You need them to balance the dish.

Ingredients:

2 1/2 pounds of boneless skinless chicken thighs

3 Tablespoons Coconut Oil

2 Tablespoons of Chinese Five Spice Powder (Gluten Free)

2 teaspoons Ground Ginger

3 Tablespoons of Clear Honey

1/4 Cup Fresh Squeezed Orange Juice

1/4 Cup Fresh Squeezed Lemon Juice

1 1/2 teaspoons Himalayan Pink Salt divided

1/2 teaspoon of Black Pepper

1/4 teaspoon of White Pepper

1/4 teaspoon Red Pepper Flakes

Preheat oven 375 degrees. Quarter each boneless chicken thigh into 4 cubes.  Mix together in a small bowl the Chinese Five Spice Powder, Ground Ginger, 1 Teaspoon Salt, White Pepper and Black Pepper.

Place Chicken Thigh cubes and powdered spice mixture into a gallon ziplock bag and shake until very well distributed.  Get in there and massage with your hands if necessary. 🙂

Mix together the orange juice, lemon juice, honey, red pepper flakes, and the other 1/2 teaspoon salt in a small saucepan and bring to a boil, then simmer until reduced by half. Melt the coconut oil in a large oven safe skillet or fry pan. Add the chicken cubes in one layer (very important for browning, so make sure your pan is big enough).

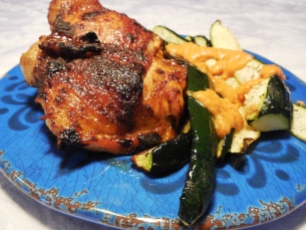
Sauteing Chinese Five Spice Chicken Bites

Chinese Five Spice Chicken Bites

Brown for five minutes not touching, then flip the cubes and brown 5 more minutes. Pour the reduced sauce over the chicken cubes and transfer to the oven in the pan and bake for 5 minutes.  Viola! Done!  Pour the chicken and sauce into a serving dish and toss a couple times to coat with the sauce.

Eat Your Nutrients!

Eat Your Nutrients!

I love to hear your comments!

SCD Paleo Summer Strawberry Pie w/ Toasted Hazelnut Vanilla-Orange Ice Cream

Summer Strawberry Pie with Toasted Hazelnut Vanilla Orange Ice Cream

Summer Strawberry Pie with Toasted Hazelnut Vanilla Orange Ice Cream

The strawberry patches are starting to ripen here, and there is nothing like the flavor of local berries!  You don’t have to give up treats in moderation on a SCD/Low FodMap diet.  I limit my treats to special occasions and stick to the legal ingredients only.  My daughters love fresh Strawberry Pie! Here is a spectacular pie recipe for when you want to treat yourself and those you love, full of ripe, juicy, nutritious strawberries.

First the crust:

Pie Crust Ingredients:

1 3/4 Cup Superfine Almond Flour (Scooped and Leveled)

1 Egg White

1/4 Cup Organic Shortening

1 tsp. fresh lemon juice

1/4 teaspoon Himalayan Pink Salt


Almond Flour Pie Crust

Almond Flour Pie Crust

Preheat your oven 350 degrees. Mix Almond Flour and Salt with a whisk. Cut shortening into the Almond Flour with a pastry cutter (it doesn’t need to be cold).  Add egg white and lemon juice and stir with a fork until it comes together. Press the crust evenly into the bottom and along the sides of a pie pan, crimping the edges as desired.  Bake in the preheated oven fifteen minutes or until starting to turn golden brown and crisp. Cool completely.

Strawberry Pie Filling Ingredients:

5 Cups Organic Strawberries

3/4 Cup Clear Honey

1 1/2 Cups Water

1 Tablespoon Great Lakes Gelatin (orange label)

1 Tablespoon Fresh Squeezed Lemon Juice

1/4 teaspoon Himalayan Pink salt

In a medium sized heavy saucepan, mash 2 cups of the strawberries with a potato masher.  Slice the other 3 cups of berries and place in the cooled pie crust.

Summer Strawberry Pie

Summer Strawberry Pie

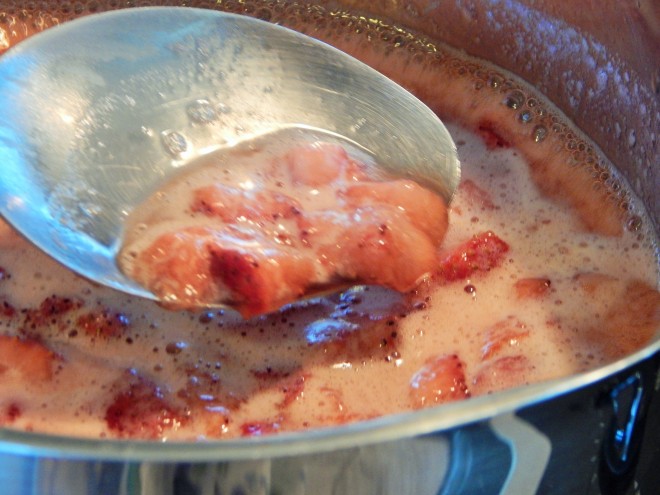
To the mashed berries, add the honey, water and salt and bring to a boil.  Once boiling return to a simmer, and simmer the berries for five to ten minutes stirring often.  Stir the gelatin into the lemon juice in a small bowl. Add to the simmering berries and cook for two more minutes whisking to incorporate the gelatin.  Pour the cooked berry mixture over the sliced berries in the crust, evenly.  Refrigerate uncovered until cool, and then cover with wrap until ready to serve!  Make sure you let it refrigerate 4 to 6 hours to fully set up.

Summer Strawberry Pie Filling

Summer Strawberry Pie Filling

I served the pie with my Toasted Hazelnut Vanilla-Orange Ice Cream on top.  The flavors compliment each other very nicely!  You can also serve with Coconut Milk Whipped Cream.

I love to hear your thoughts!

Eat Your Nutrients!

Eat Your Nutrients!

Easy Moist and Tender Pot Roast w/Carrots

Easy Moist & Tender Pot Roast

Easy Moist & Tender Pot Roast

There are many benefits to incorporating grass fed beef into your diet.  A big benefit I like is it contains more conjugated linoleic acid which may protect against heart disease, diabetes and cancer.  It has zinc, iron, potassium and phosphorus, and who doesn’t want more nutrients.  Chris Kresser has a article on the benefits you can read more about here: http://chriskresser.com/why-grass-fed-trumps-grain-fed

I like this pot roast for several reasons. It takes about 3 1/2 hours, but that is oven time not hands on time.  The prep is fifteen minutes and then it goes in the oven and you go about your day.  It is moist every time…..no dried out hard to chew pot roast here.  I make it often, because it is a winner!  There is a lot of flavor, and you can change up the sides depending on what is in season and the time of year.  People will ask you for this recipe. So let’s get to it!

Easy Moist & Tender Pot Roast

Ingredients:

1 – 3 1/2 to 4 pound boneless (grass fed/organic is best) beef chuck roast

Himalayan Pink Sea Salt

Black Pepper

2 Tablespoons Garlic Infused Olive Oil

1 Cup Dry Red Wine (one you would drink such as Syrah or Grenache)

2 Cups Homemade Broth if you are Low FodMap or Good Organic Gluten Free Broth of your choice

1 teaspoon Organic Italian Seasoning

1 teaspoon Organic Parsley

Preheat Oven 350 degrees.

Season your Beef with Salt and Pepper generously.  Using a Dutch oven or other heavy oven proof pot with a lid, heat 2 tablespoons of Garlic Infused Olive Oil over medium high heat.  Add your seasoned roast (make sure oil is hot enough to sizzle when beef is added). Brown five minutes without touching the meat, then flip it and brown five minutes on the other side.  Take the gorgeously browned roast out of the pan and set it on a plate.  Add a Cup of Dry Red Wine to the pan and release all the brown bits, bring to a boil for a minute, then add the broth and seasonings.  Add the roast back to the pot with the burner still on and bring it all just to a boil, then place the lid on your pot and place in the 350 degree oven. Roast for three hours, flipping after an hour and a half.  After three hours remove the roast from the oven and let it sit with lid on for fifteen minutes.  Serve with sides of your choice.  Here it is shown with some sauteed carrot coins.

I love to hear your thoughts.  Eat well, you deserve it!

Eat Your Nutrients!

Eat Your Nutrients!

Toasted Hazelnut Vanilla-Orange Ice Cream

It is that time of year when cold treats taste so good!  I adore the flavor of toasted hazelnuts.  There are flecks of real vanilla beans in this ice cream and a creamy orange flavor which melds beautifully with the toasted hazelnuts.  The vanilla, hazelnut and orange go so well together.  This ice cream is dairy free and egg free.  It is gorgeous and gourmet!  Wow people with this easy and amazing ice cream!

Toasted Hazelnut Orange Ice Cream

Toasted Hazelnut Vanilla-Orange Ice Cream

Toasted Hazelnut Vanilla-Orange Ice Cream

Ingredients:

2 Cups Canned Coconut Milk (Full Fat No Additives)

1/2 Cup Raw Hazelnuts

1/3 Cup Clear Honey

1 Vanilla Bean

1 Teaspoon Pure Vanilla (SCD Legal, no fillers, just vanilla and alcohol)

1 tsp. Great Lakes Gelatin (orange container)

1 Cup Freshly Squeezed Orange Juice

1 tsp. Orange Zest

Preheat oven 350 degrees.  Place whole hazelnuts on a cookie sheet and toast for ten to fifteen minutes until the hazelnuts skins start blistering and the nuts start to brown. Remove from oven and place in a lint free clean dish towel and wrap and let sit for one minute to steam.  This helps release the skins.  Now roll the towl around with the hazelnuts inside to remove most of the skins.  Cool and then finely chop the hazelnuts.  I like my mini Ninja for this or you can do it by hand.

Heat the coconut milk on the stove top until it comes to a simmer.   Split your vanilla bean length-wise and scrape out the seeds with a spoon.  Add the seeds and pod to the heated coconut milk and turn off the burner and steep for ten minutes.

Remove the vanilla bean pod and discard then whisk in the remaining ingredients except the hazelnuts.  Chill completely at least 6 hours.  You can do this step a day ahead of freezing the ice cream too.  Put the ice cream in your ice cream maker and add the hazelnuts and freeze the ice cream.  Serve! Yum!

Toasted Hazelnut Orange Ice Cream

Toasted Hazelnut Vanilla-Orange Ice Cream

This ice cream is spectacular with my Summer Strawberry Pie.  (recipe coming soon!) The flavors complement each other in a delicious way!

I love to hear your thoughts!

Eat Your Nutrients!

Eat Your Nutrients!


Ming Is A Good Listener

Ming Listening

Ming Listening

Ming is a great listener! She also understands a lot of what is being said.  You can tell her “Skyli will be home soon!” and she runs for the door, or “Lucy is coming over” and she runs to the window looking for her. Lucy is a Black Lab and a member of the extended family.  Ming, Ming loves chicken, and when you say “chicken”, her eyes get really, really wide.  She also watches t.v., especially if there are dogs in the show.  But what I love most about how Ming listens is when she just sits and listens while I am in the kitchen.  She sits near my feet and is content to stay there as long as I am there listening to me talk to her as I work.  She tilts her head side to side and looks straight at me.  I could learn a lesson or two from her complete attention.  She makes me remember to try and listen as well as she does.

Roasted Eggplant and Red Pepper Tapenade

Roasted Eggplant & Red Pepper Tapenade

Roasted Eggplant & Red Pepper Tapenade

Don’t you love dips and spreads?  I do, and it is so nice to know you can make them yourself with great ingredients that feed your body  and not only taste awesome, but have nothing but good ingredients.  I am also looking for easy and fast!  I served this tapenade recently with almond flour crackers.  It is good with vegees also, like cucumber rounds, or on top of a salad. The eggplant is peeled before roasting, which makes it easy to digest and pretty when pureed.

Ingredients:

1 Medium Eggplant, peeled and cubed

2 Red Bell Peppers, seeded and diced

3 Green Scallions (green parts only, sliced)

3 Tablespoons Garlic Infused Olive Oil

1/4 Cup Fresh Parsley

2 Tablespoons Fresh Basil

1 teaspoon Himalayan Pink Salt

1/2 teaspoon Black Pepper

1 Tablespoon – 18 year old aged Balsamic Vinegar

Preheat Oven 400 degrees.  Placed cubed eggplant and peppers on a parchment lined baking sheet and drizzle the olive oil over them and add salt and pepper, then toss until coated.  Place them in them in the oven and roast for 40 to 45 minutes tossing a few times during cooking until they are starting to brown and very soft.  The last 20 minutes of the cooking time, add the chopped green scallions, toss and continue roasting.

Roasted Eggplant and Red Pepper Tapenade

Roasted Eggplant and Red Pepper Tapenade

Remove from the oven. Cool for five minutes.  Then, place the roasted vegetables in a food processor with a steel blade and pulse a few times.  Add the balsamic, parsley and basil and continue pulsing until blended to your liking.  I like just a few bits of vegetables showing and not completely blended. Add additional salt and pepper to taste if needed.

Serve! This keeps in the refrigerator about a week and can be re-warmed or served cold.

Here is the tapenade served as a shrimp canape.

Roasted Eggplant & Red Pepper Tapenade Shrimp Canope

Roasted Eggplant & Red Pepper Tapenade Shrimp Canope

…..and served with crudites! There are so many options for this!

Roasted Eggplant & Red Pepper Tapanade

Roasted Eggplant & Red Pepper Tapenade

I love to hear your thoughts!

Eat Your Nutrients!

Eat Your Nutrients!

Red, White and Blueberry Snack Bread

Memorial Day weekend is almost here! I always get excited when Summer is just around the corner. I start thinking about fun summery food.  I love the 4th of July, hanging out with family and friends, picnics, the kids twirling around with sparklers waiting for the fireworks to start, parades, barbecues, happy laughter, and lots of outdoor time.  This bread is not only yummy, it is fun and just right for a picnic in the Summer.  I am serving this at a cookout over Memorial Day. It keeps well in the refrigerator, so it can be made in advance leaving you more time to play outside!  It would also be very delicious and pretty topped with some fresh berries and coconut milk whipped cream if you want to dress it up more.  But it is pretty just by itself, and it is soft and yummy.

Ingredients:

2 Cups Super Fine Almond Flour

2 Tablespoons Coconut Flour

1 teaspoon Baking Soda

1/2 teaspoon Himalayan Pink Salt

pinch of nutmeg

1/4 teaspoon Cinnamon

1/8 teaspoon of Pure Stevia Leaf (optional, I use one that contains just Stevia Leaf here.)

4 eggs

1/4 Cup Organic Palm Shortening (I like Spectrum) or Coconut Oil

2 Tablespoons Clear Honey

1 1/2 teaspoon SCD Legal Vanilla Extract (just vanilla and alcohol in the ingredients)

1/4 teaspoon SCD Legal Lemon Extract (optional)

1/2 Cup Diced Fresh or Frozen Strawberries

1/2 Cup Fresh or Frozen Blueberries

Red, White & Blueberry Bread Batter

Red, White & Blueberry Bread Batter

Directions:

Preheat Oven 350 degrees.  Lightly grease a medium loaf pan, then line it with parchment paper.

Mix together Almond Flour, Coconut Flour, Baking Soda and Salt and a pinch of nutmeg and the cinnamon.

In a separate bowl whisk eggs, then add the clear honey, melted palm shortening and the rest of ingredients up to the fresh berries. Add the wet ingredients to your dry ingredients and mix until just blended. Gently fold in the berries so you don’t start getting swirls of the berry in your batter (Red, White and Blue).

Pour batter into the loaf pan, smooth the top, and bake for approximately 50 to 60 minutes until a toothpick inserted in the center comes out clean.

Cool on a wire rack for ten minutes, then remove loaf from the pan and cool completely.  Serve warm or wrap tightly and refrigerate.  It is good warm from the oven, (but give it an hour to cool before cutting) and also cold from the fridge is delightful on a warm day.  Store in the refrigerator.  You can eat this bread anytime of day.  My daughters love it for breakfast!


SCD, Paleo Red, White & Blueberry Loaf

SCD, Paleo, Red, White & Blueberry Snack Loaf


I love to hear your thoughts!

Eat Your Nutrients!

Eat Your Nutrients!

Ming Loves The Beach!


Ming at the Beach

Ming at the Beach

We love to vacation in Northern Michigan by the Great Lakes.  That is where I was raised, and I never truly appreciated the fact that I grew up in a year-round vacation destination until I moved away.  We have been taking our children back every summer their entire lives.  It is a dog friendly state, and we have been able to find a few beaches that allow dogs, so we can take them to swim.  Yes, pugs swim! I am a bit surprised, but they have webbed toes.  We saw a pug last summer swimming and fetching a ball for it’s owner, and it was just like a fish!  Ming likes the water too, but not to that degree.  She likes to wade, smell things, put her puggy face in the sand, and run!  Here she is with my daughters and I, and also her little black pug sister, Lily.  This was last summer on Lake Michigan.  I wonder what she will do this year now that she is two?  Maybe she will be braver and leap into the waves!

I love to hear your thoughts!

Eat Your Nutrients!

Eat Your Nutrients!

Honey Mustard Chicken Wings


Honey Mustard Chicken Wings

Honey Mustard Chicken Wings

If you are craving some tangy, succulent wings that are easy and everyone will love, this recipe is a great choice!  The sauce is quick to mix together.   They smelled so good when they were baking in the oven, I could hardly wait to dig into them!  They would be great the next day in a lunchbox, but we didn’t have any left, so next time, I will need a double batch.  They are baked and then finished off under the broiler to get them nice and crispy.

Ingredients:

2 lbs. Chicken Wings

2 TBS. Garlic Infused Olive Oil

1 Tablespoon Clear Honey

1 Tablespoon Garlic Free Yellow Mustard

1 Tablespoon Djon Mustard

1 teaspoon Ground Cumin

1 teaspoon Chipotle Chili Powder

1 teaspoon Himalayan Pink Salt

1/8 teaspoon White Pepper

two dashes of Habanero Pepper Sauce

2 Tablespoons Fresh Squeezed Lime Juice

Preheat oven 375 degrees.  Lay wings on a parchment lined rimmed baking sheet, sprinkle with a little extra Himalayan Pink Salt and Black Pepper (pre-season your meat to build flavor) and bake ten minutes. Meanwhile whisk up the rest of the ingredients for the sauce.   After ten minutes of baking, remove wings and brush with some of the sauce…coat them well.  Bake another ten minutes, remove from the oven and turn the wings over and brush again and return to the oven ten more minutes. Repeat once more for ten minutes. Keep an eye on your wings.  (Depending on the size of them the time will vary.  My wings were medium sized and took 40 minutes.) Turn on broiler and broil the wings until they are at your desired crispiness, coating again and turning once.  This will only take a minute or two.  Serve!

Can't Resist Them - Honey Mustard Chicken Wngs

Can’t Resist Them – Honey Mustard Chicken Wings


What’s So Great About Himalayan Pink Salt?

Himalayan Pink Salt

Himalayan Pink Salt

You may have noticed I use Himalayan Pink Salt in my recipes.  I think it is the bomb, because it has 84 trace minerals in it, it is unprocessed, we need salt for our thyroid and many other body functions, and it makes things taste so good!  It also helps us stay hydrated, which may be why it is one of the reasons it claims to reduce the signs of aging, for that glow!  It also helps keep your bones strong and your circulation flowing.  There are other great salts out there as well, another favorite of mine if Redmond Real Salt, but I am partial to the Pink!

Kelly Bejelly of A Girl Worth Saving recently posted a very informative article, The Amazing Benefits of Himalayan Pink Salton her blog.  Just click on the above link to read it.  This salt is amazing!