Are you delighting in the journey? Even when life gets tough, keeping your focus on the positive by writing in a Gratitude Journal daily can make a big difference! Keep pressing forward, and you will see change.

Are you delighting in the journey? Even when life gets tough, keeping your focus on the positive by writing in a Gratitude Journal daily can make a big difference! Keep pressing forward, and you will see change.


What’s the secret to eating something that’s good as opposed to amazingly delicious and fun? It’s all in the sauce! There is no law that you have to eat a certain sauce with a certain food, although there are plenty of traditional ways to eat sauce, such as tartar sauce with fish, salsa with chips, pizza sauce on pizza.
I have talked many times about my love of sauces and their ability to elevate food to all new levels and make something gourmet.
So dish it out! Mix it up too! Being the foodie that I am, I like to keep it interesting. You won’t get bored with a little imagination and some sauce! Explore these winners. Try them all! They are delicious!
Fire Roasted Salsa from Paleo Leap
Enchilada Sauce by Jan’s Sushi Bar
Mayonnaise (30 Second Immersion Blender Recipe) at Real Food with Dana
Better than Peanut Sauce: Paleo Almond Satay Sauce by Rubies and Radishes
Buffalo Hot Sauce by Pete’s Paleo
Salsa Roja – Mexican Red Table Sauce by Chili Pepper Madness
Thai Sweet Chili Sauce by leelaLicious
Homemade Ketchup with Honey from An Oregon Cottage
Quick and Easy Homemade Pizza Sauce by Bowl of Delicious
Low FodMap Honey Orange Barbecue Sauce by Sam
3-Ingredient Bacon Jam by Real Food Liz
Chimichurri Sauce by Gimme Some Oven
Paleo Honey Mustard Sauce by Paleo Newbie
Ranch Dressing (SCD Low FodMap)
Won’t Miss a Thing Ranch Dressing
Paleo Worcestershire Sauce by Paleo Table
Enjoy!

Eat Your Nutrients!


Attention taco lovers! Skip the bottled taco sauce and make this easy, low fodmap, classic taco sauce at home!
I like it drizzled on top of a taco salad, a taco bowl, or my Weeknight Taco Recipe here. 🙂
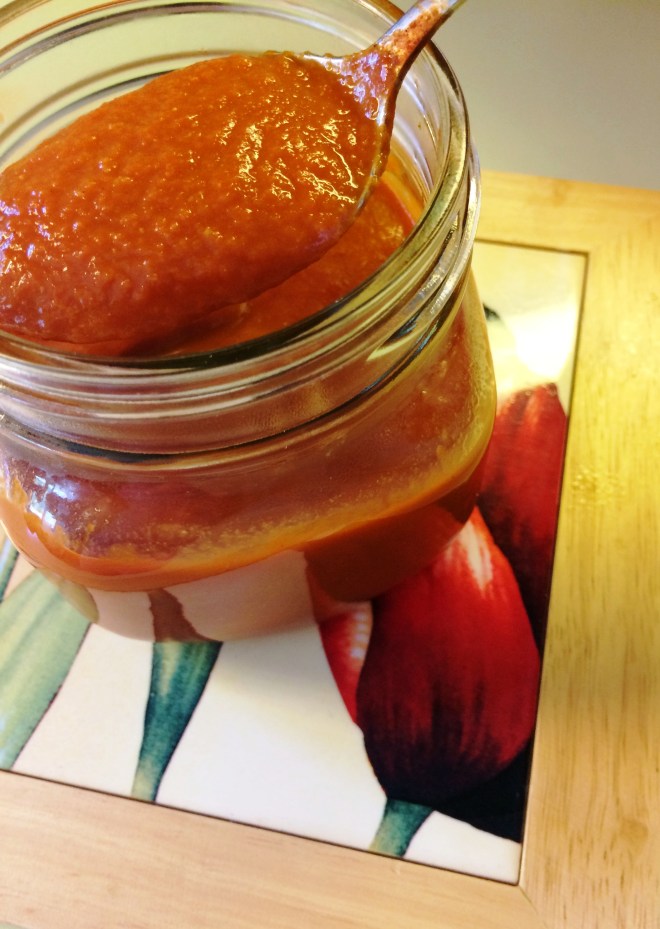
Delicious Low FodMap Taco Sauce
Low FodMap Taco Sauce
Ingredients:
2 Cups of Tomato Sauce
1/4 Cup of Sliced Scallions (green part only)
2 Tablespoons of Champagne Vinegar or White Wine Vinegar
1 Tablespoon of Garlic Infused Olive Oil
1 Tablespoon of Ground Cumin
1/2 Teaspoon of Ancho Chili Powder
1/8 Teaspoon of Cayenne Pepper
1 Teaspoon of Sea Salt
1 Teaspoon of Honey
Directions: Whisk together all the ingredients in a medium saucepan. Bring it to a low boil, and then reduce the heat and simmer for ten minutes. Pour the sauce into a blender and blend until smooth. Now, for silky smooth sauce, pour it through a fine mesh metal strainer. Store in a glass jar in the refrigerator.
Please, if you do not eat honey on the Low FodMap diet you are folllowing, do not bash the creator of the recipe. I write my recipes using the protocol I personally used and thousands of others have and do as well with success. It is available as a PDF for free at the top of my website. Dr. Allison Siebecker’s SIBO Specific Low FodMap food guide which allows for honey under 2 tablespoons. All rude comments will not be tolerated and removed. As a recipe writer, I work hard to write recipes for myself and others who have dietary restrictions and digestive challenges.
Eat Your Nutrients!

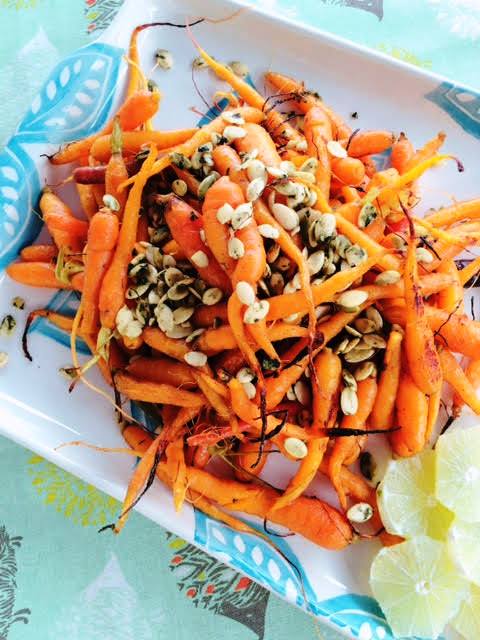
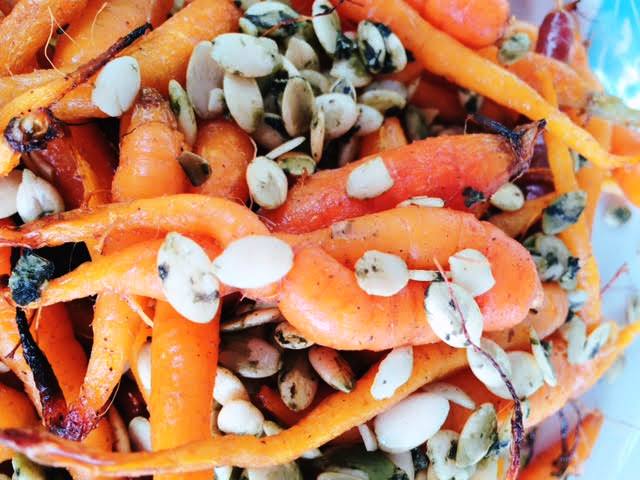
Oven Roasted Carrots with Cumin, Lime and Pumpkin Seeds
I find this time of year with fresh produce in abundance so inspirational!
The vegetables on display by local growers who take such pride in their offerings is sheer art!
Cumin and pumpkins seeds (also know as pepitas), are a very delicious combination and enhance the sweetness of the carrots. Did you know cumin also has the ability to aid digestion as well as help insomnia and respiratory ailments? It was used by the Egyptians 5,000 years ago, and is popular today in many cuisines.
Pumpkin seeds are a great alternative to nuts in cooking, and have excellent nutritional benefits like containing zinc for immune support, magnesium, fiber and plant based Omega 3’s.
Oven Roasted Carrots with Cumin, Lime and Pumpkin Seeds
Oven Roasted Carrots with Cumin and Pumpkin Seeds
Preheat your oven to 400º degrees.
Ingredients:
4 Cups of Young Carrots
1/4 Cup of Good Olive Oil
1 Tablespoon of Ground Cumin
Juice of 1 Lime
1 1/2 Teaspoons of Sea Salt or Himalayan Pink (My favorite :-))
1/2 Teaspoon of Pepper
1/3 Cup of Pumpkin Seeds
Directions: Toss the washed carrots with the olive oil in a large bowl. Add the Cumin, Salt and Pepper and squeeze the juice of one lime over it. Toss thoroughly to spread the seasoning evenly. Pour the Carrots onto a large parchment lined cookie sheet in a single layer.
Oven roast for 40 to 50 minutes until the carrots are starting to caramelize. Toss them once or twice during roasting to re-coat with the oil and seasonings.
Remove them from the oven, and sprinkle with the pumpkin seeds (pepitas).
Serve them hot!
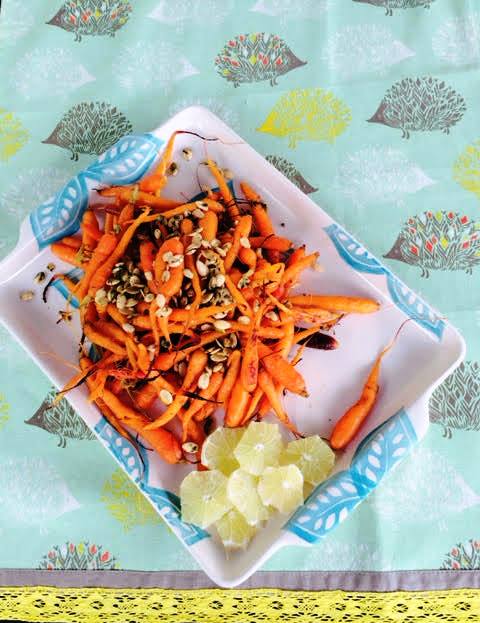
Oven Roasted Carrots with Cumin, Lime and Pepitas
Eat Your Nutrients!

No ice cream freezer? No problem! This old fashioned Ripple Ice Cream is made in a loaf pan! Then it is pressed between two Grain Free Chocolate Graham Crackers (recipe here!) for a spectacular ice cream sandwich!
The dairy free vanilla ice cream uses a handful of ingredients, and while it has it’s initial freeze, you can whip up the Blueberry Spoon Fruit (recipe here!) for the Ripple!

Chocolate Blueberry Ripple Ice Cream Sandwiches
Chocolate Blueberry Ripple Ice Cream Sandwiches
Ingredients:
1 Batch of Blueberry Ripple Ice Cream
1 Batch of Grain Free Chocolate Grahams (get the recipe here!) 🙂
Directions:
To make the Blueberry Ripple Ice Cream you need:
1 Cup of Full Fat Coconut Milk
3 Tablespoons of Good Honey, warmed
2 Tablespoons of Coconut Oil, melted
1/2 Teaspoon of Vanilla Extract
Whisk the ice cream ingredients together, and pour into a loaf pan. Freeze for 30 minutes. Then remove from the freezer and marble in the Blueberry Spoon Fruit by placing dollops onto the top of the vanilla ice cream and running a knife in swirling motions throughout.

Marbling Blueberry Ripple Ice Cream
Place back in the freezer until frozen solid. This will take 2 to 4 hours.
Soften the ice cream, by letting it set at room temperature for approximately ten minutes, until it is scoop-able!

Assembling Chocolate Blueberry Ripple Ice Cream Sandwiches
Take two grahams per ice cream sandwich, and scoop a ice cream scoop size ball of Blueberry Ripple Ice Cream onto one graham. Place the other graham atop the ice cream, and press gently to squish!

Melty, Cruchy, Gooey!
Eat right away, or they can be individually wrapped in plastic wrap and frozen to enjoy straight from the freezer. You can stock pile these by making a double batch!
Yield: 5 Ice Cream Sandwiches

Looking for a chocolate graham cracker that is grain free and starch free? I have tested and developed this recipe for you, and after several attempts, I do believe it is perfect! 🙂
They can be used however you like, but my favorite is sandwich style! Look here for my Chocolate Blueberry Ripple Ice Cream Sandwiches! They will wow you! The flavor is amazing! What a lovely ending to a warm Summer’s day!

Grain Free Chocolate Graham Crackers
Grain Free Chocolate Graham Crackers
Preheat your oven to 325º degrees.
Ingredients:
1 1/2 Cups of Superfine Almond Flour
1/4 Cup Raw Cacao Powder
4 Teaspoons of Gelatin like (Thrive Market Brand)
1/2 Teaspoon of Baking Soda
1/4 Teaspoon of Sea Salt
1/4 Cup of Coconut Oil, melted
1/4 Cup Good Honey
1 Tablespoon of Vanilla Extract
Directions: Whisk together the dry ingredients in a large bowl. In a separate bowl, whisk together the wet ingredients. Add the wet ingredients to the dry, and stir vigorously with a fork until completely blended and a ball of dough has formed.
Place the dough onto a large cookie sheet sized piece of parchment paper. Flatten slightly.

Grain Free Graham Cracker Dough Ready to Roll
Place a second piece of parchment on top of the dough, and roll out evenly to almost fill the parchment, or the size of your cookie sheet. The dough should be about a half inch thick.
With a pizza cutter, make squares as shown below. Pierce the grahams with a fork’s tines.

Ready to Bake Grain Free Chocolate Graham Crackers
Bake in the preheated oven for 15 minutes.
Remove from the oven and cool completely. Using a large kitchen knife, cut apart the graham crackers at the scored marks.
Enjoy!
Eat Your Nutrients!

Making Spoon fruit is a delicious way to use Summer’s fruit bounty! It is a technique that purees and reduces the fruit on the stove top, without added thickeners or refined sugar, to a jammy consistency.
For this luscious Blueberry Spoon Fruit, I used dates and a bit of fresh lemon juice, along with wild blueberries.
I use this spoon fruit in my Chocolate Blueberry Ripple Ice Cream Sandwiches.
Simple is often the best!

Blueberry Spoon Fruit
Blueberry Spoon Fruit
Ingredients:
1 Cup Blueberries
1/4 Cup of Pitted Dates (Roughly Chopped)
2 Tablespoons of Fresh Lemon Juice
Directions: In a small saucepan, bring the berry mixture to a boil, and simmer for ten minutes on low, stirring occasionally. Add mixture to a blender (I used a small Ninja) and puree.

Making Blueberry Spoon Fruit
Yield: approximately 3/4 cup

Date Sweetened Blueberry Spoon Fruit
Eat Your Nutrients!

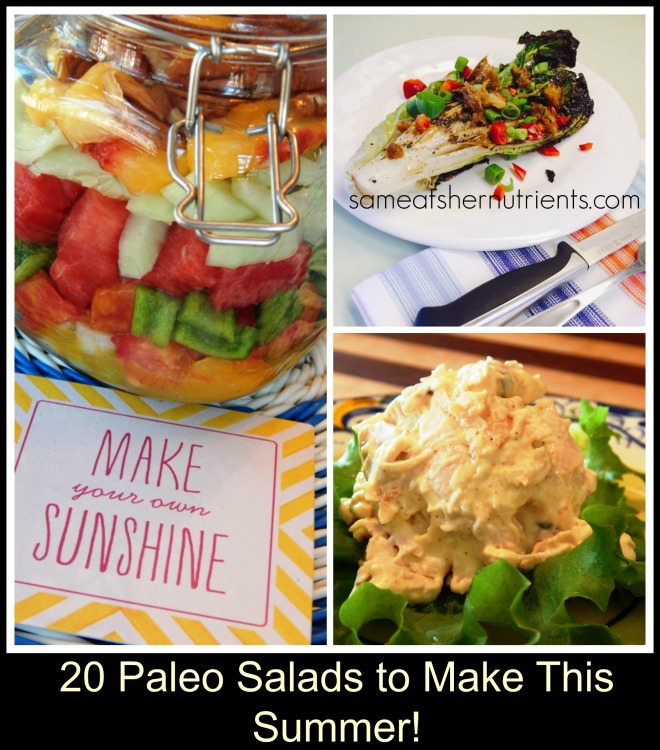
Looking to shake up your salads? I have you covered with 20 delicious recipes that I rounded up for you so you don’t have to! Lighter Fare is very appealing in the warmer months of Summer. The Farm Markets are bursting with peak-season produce chocked full of abundant nutrients.
Enjoy these 20 Paleo Summer Salad recipes by some wonderful bloggers. Mix it up! The fleeting availability of Summer fruit and vegetables make it an exciting time for salads. Make the most of the season!
Bacon Date Fennel Salad with Grilled Peaches from Savory Lotus
Low FodMap Seven Layer Salad from A Girl Worth Saving
Broccoli Salad with Crispy Bacon from Paleo Grubs
Paleo Steak Salad with Coconut Pan Fried-Peaches by Paleo Magazine
Tangled Thai Salad by Danielle Walker
Summer Peach and Berry Fruit Salad by Me 🙂
Paleo Detox Salad from Fed & Fit
Hot Cranberry Spinach Salad from The Paleo Mom
Warm Taco Style Salad from The Healthy Foodie
Bistro Lemon Chicken Dinner Salad by Me 🙂
Tarragon Chicken Salad with Asparagus, Strawberries and Djon Vinaigrette from The Thin Twin
Easy Turkey and Bacon Club Salad from Diane Sanfilippo of Balanced Bites
Italian Chopped Salad from Paleo Hope and Autoimmune Disease
Strawberry and Macadamia Nut Chicken Salad from Girl Meets Paleo
Chicken and Cabbage Salad with Almond Butter Dressing from Paleo Leap
Endive, Radicchio and Apple Salad with Porkitos and Hazelnuts by Nom Nom Paleo
Cape Cod Chopped Salad by Barefoot Contessa via Food Network (Cheese Optional)
Deli Chicken Salad by Sam
Peachy Jar Salad with Ginger Vinaigrette by Sam
Spiralized Golden Beet Salad by Sam

It’s grilling season! Grilling embodies so much more than food. In means hanging out in the backyard, more leisurely laid back moments, friends and family, children having the opportunity to have less structure to their day and time to daydream, warm weather, and parties!
Today I am sharing a new recipe for Grilled Romaine Salad. To make this salad you wash and halve Romaine Lettuce and brush it with Olive Oil, Salt and Pepper. Grilling gives the salad a mild, smokey flavor and also tenderizes the lettuce. I topped it simply with precooked bacon, and some chopped red pepper and scallions. Then I drizzled it with a zippy red wine vinaigrette! Here’s the recipe!

Grilled Romaine Salad – sameatshernutrients.com
Grilled Romaine Salad
Ingredients:
2 Heads of Romaine, washed and halved lengthwise
Good Olive Oil
Sea Salt
Black Pepper
1/2 Cup of Cooked, Crumbled Bacon
1 Diced Red Pepper
3 Scallions, Sliced
Red Wine Vinaigrette:
1/2 Cup Good Olive Oil
1/4 Cup Red Wine Vinegar
1 Tablespoon of Djon Mustard
1 Teaspoon Honey
1/2 Teaspoon of Sea Salt
1/4 Teaspoon of Black Pepper
Whisk the dressing together until emulsified.
Preheat your grill, then turn down to medium-high. Brush your halved Romaine generously with Olive Oil, then sprinkle with Sea Salt and Black Pepper as desired.

Ready for the Grill
Place the Romaine cut side down on your grill, close the lid and grill 3 to 5 minutes until there are nice grill lines on your Romaine and it is to your satisfaction. It will be slightly wilted.
Remove from the grill and plate your Romaine. Sprinkle with Scallions, Red Bell Pepper and Bacon Crumbles. Drizzle with the Red Wine Vinaigrette and additional Sea Salt and Pepper if desired. Serve warm.
Serves 4

Grilled Romaine Salad with Red Wine Vinaigrette
Eat Your Nutrients!


Recent Comments