Treats

Grain Free Cherry Berry Granola Bars

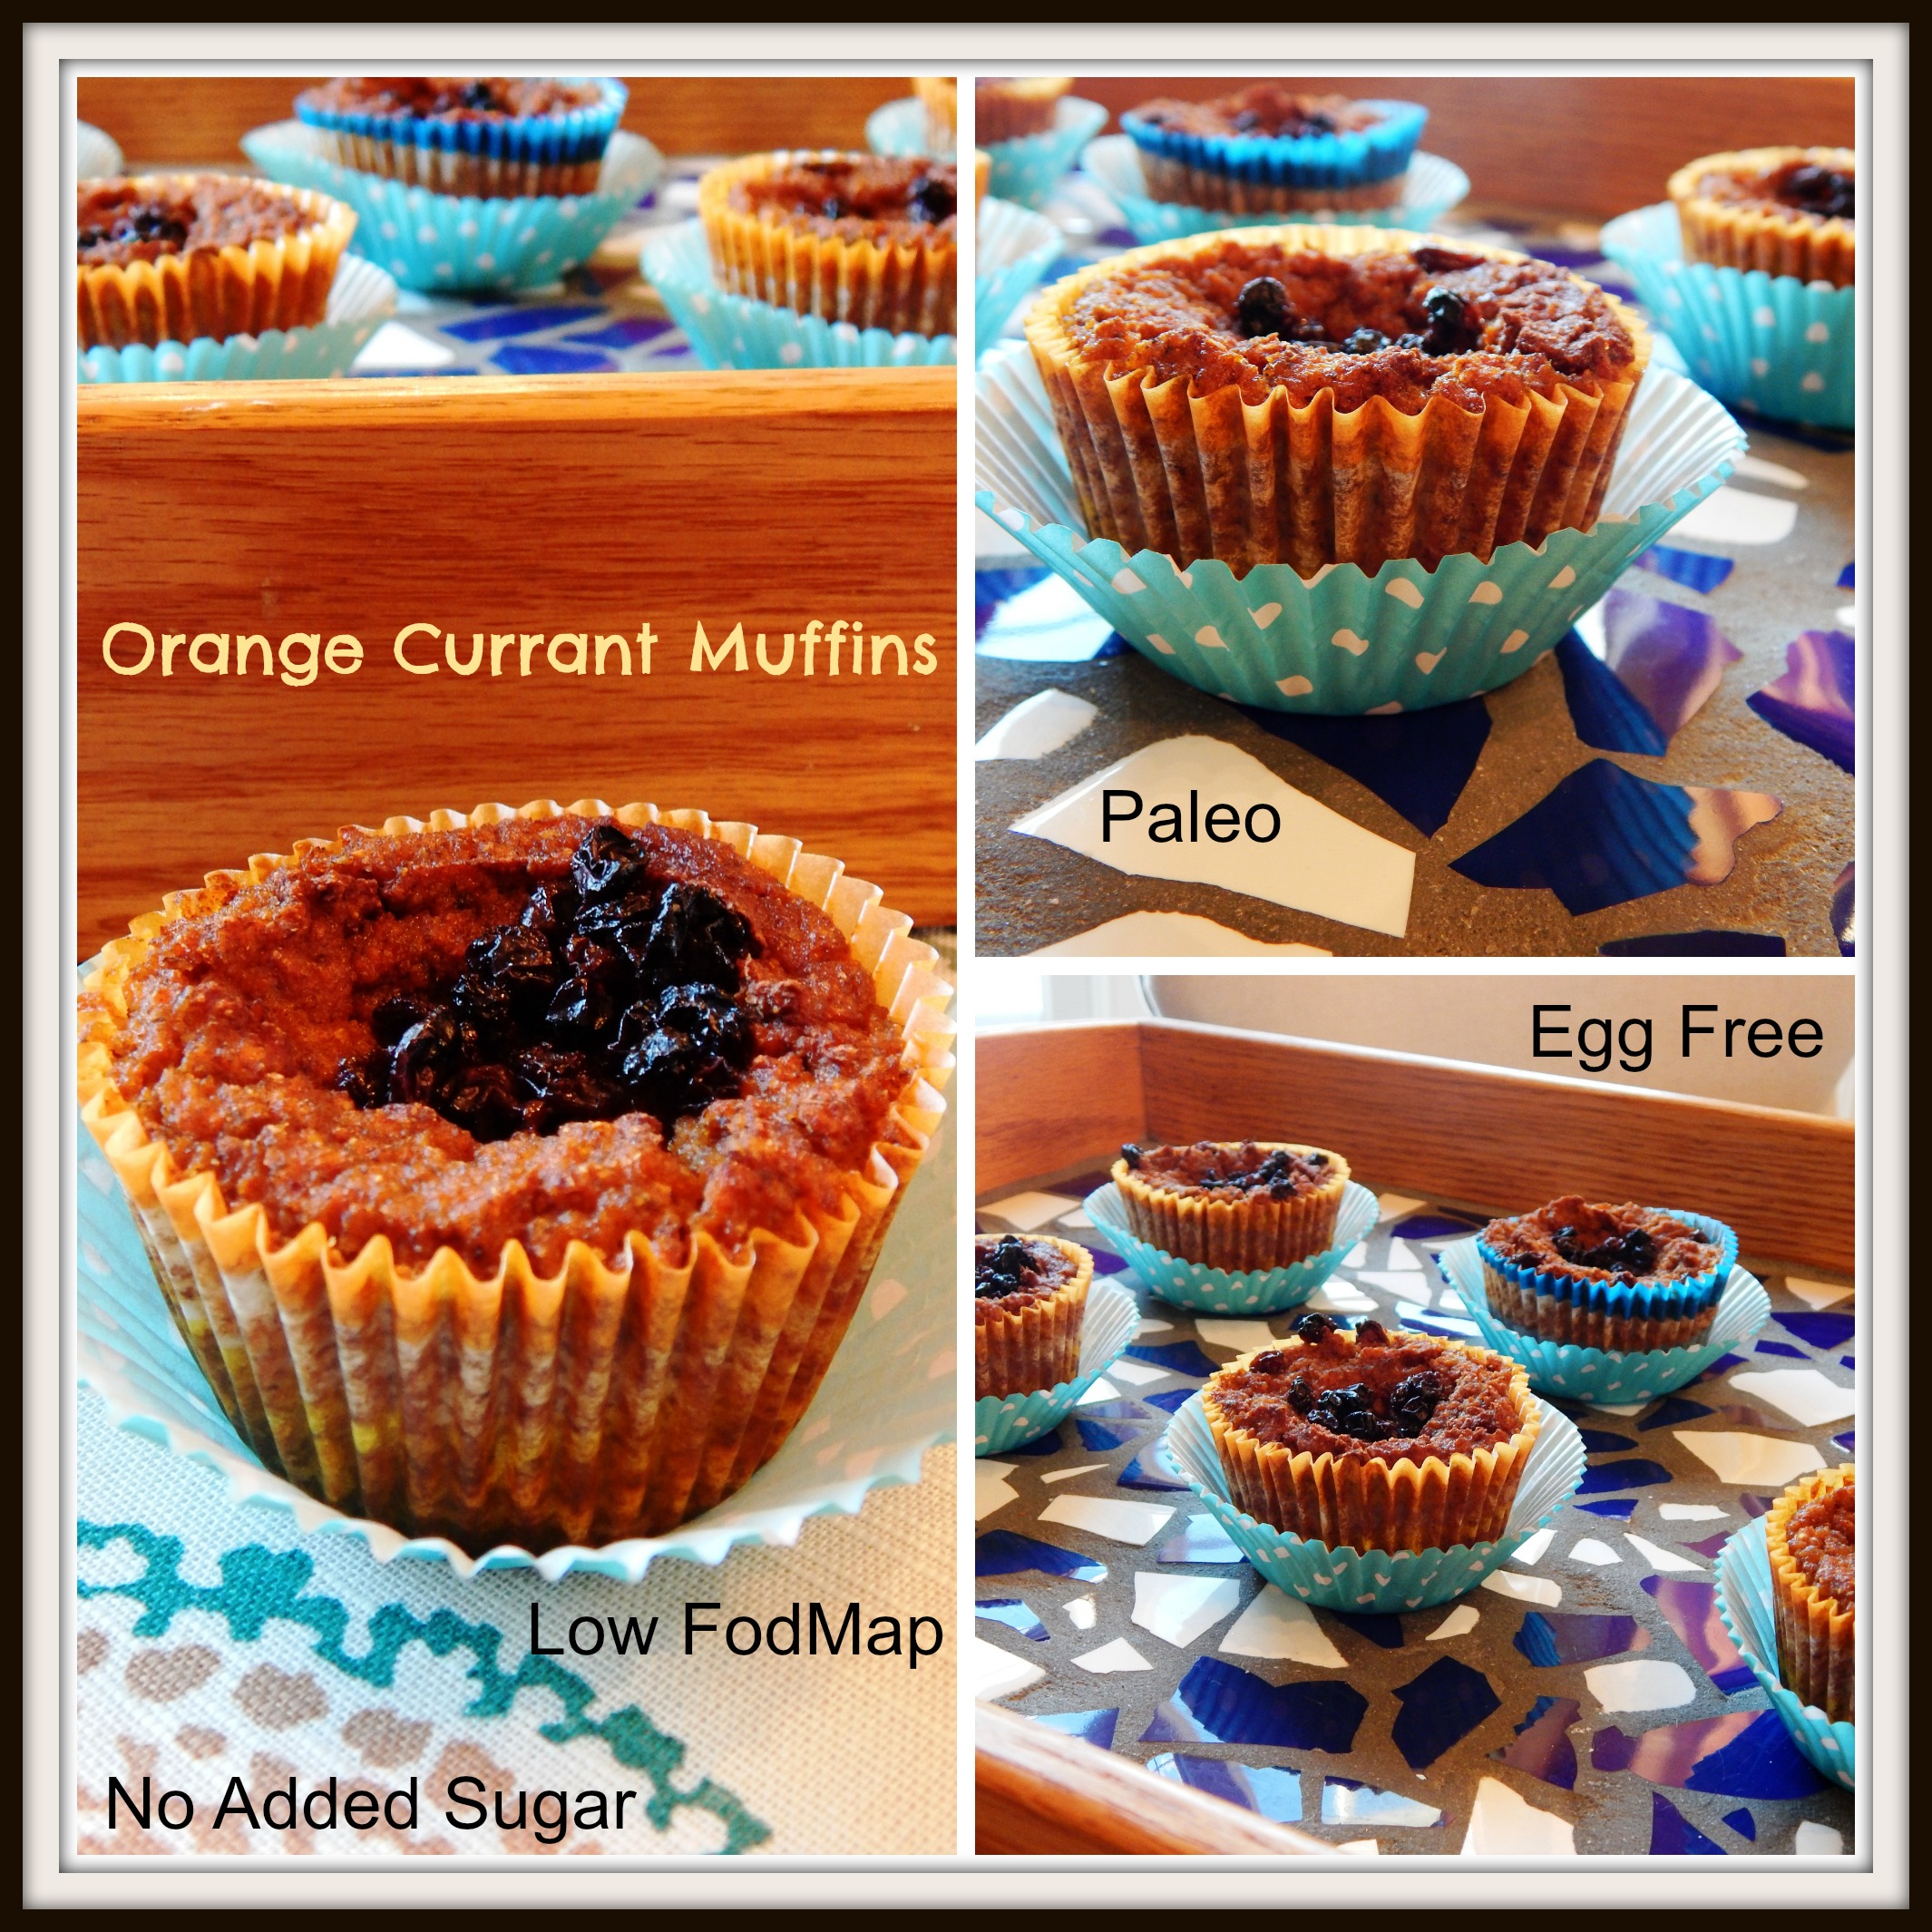
Granola Bars have been a long time favorite around our house, and today I have a grain free version for you! My girls have given me the thumbs up on them.

Grain Free Cherry Berry Granola Bars


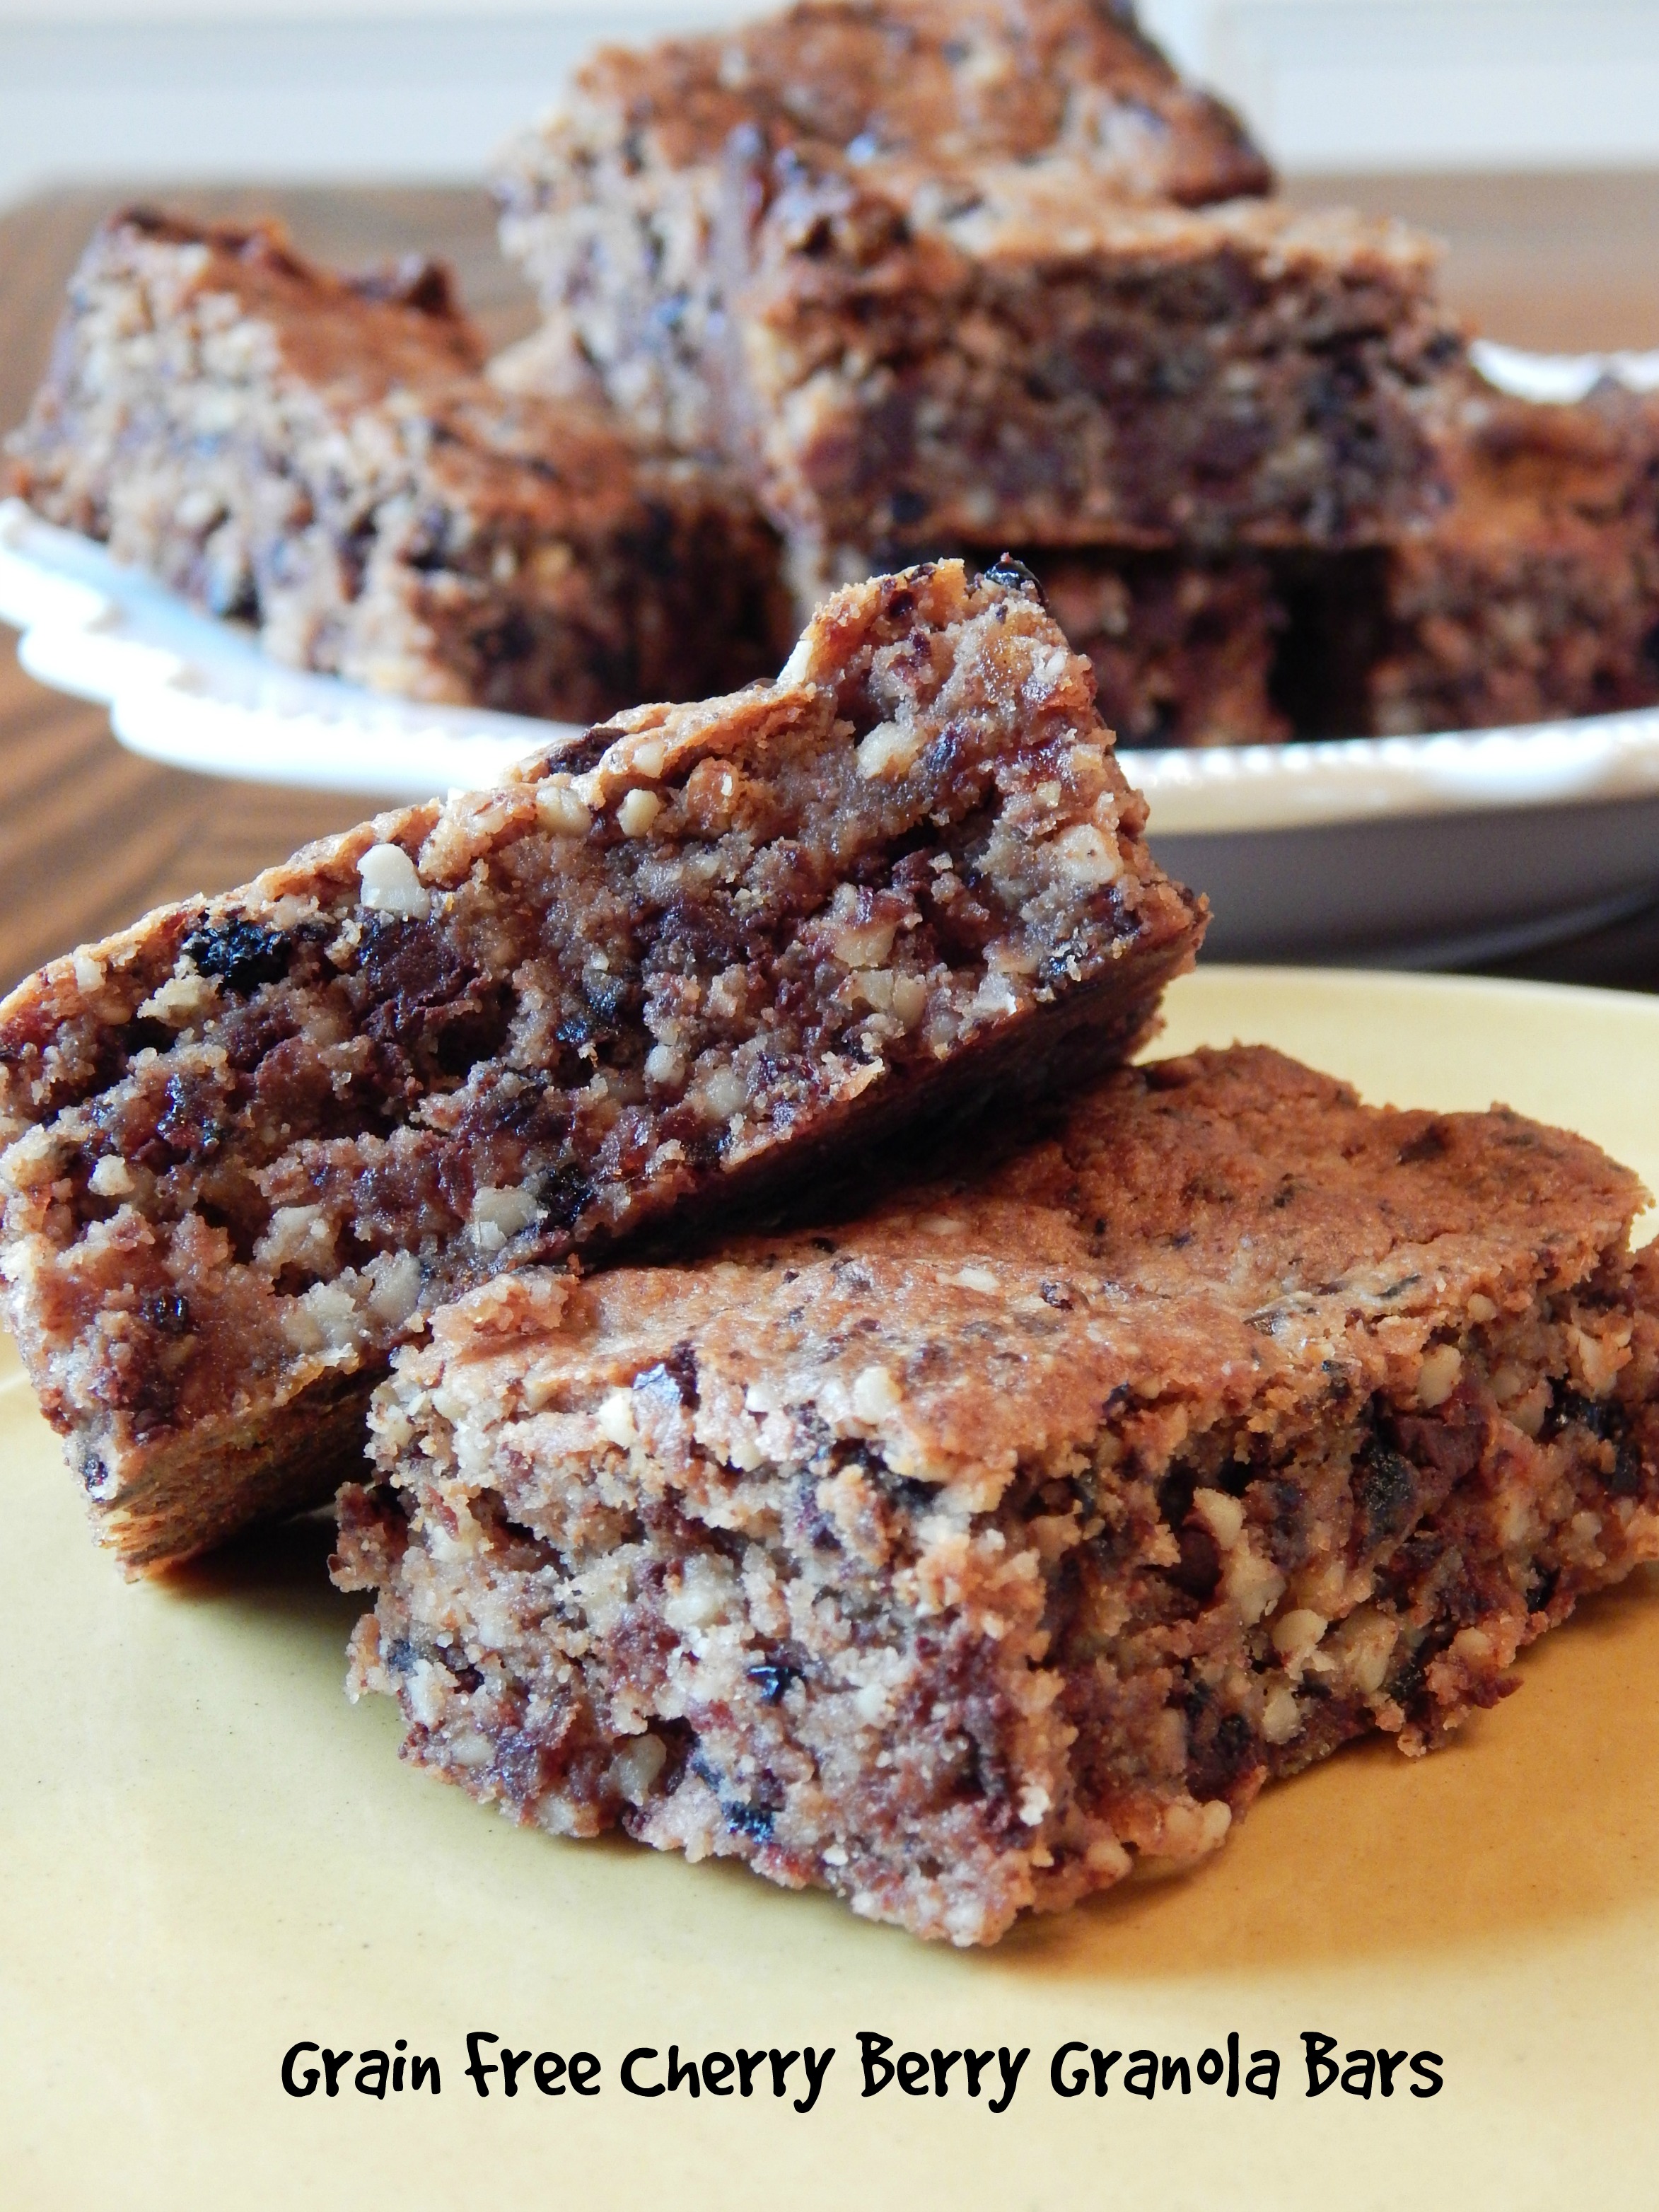
There is so much to love about granola bars. They stay fresh for several days, so you can make a big batch and wrap them individually for a quick snack, breakfast or a grab and go when you are heading out! Because, hey, the weather is getting so nice, who wants to spend a lot of time in the kitchen on a bright sunny day, or you have ball practice, a yoga class or workout to get to at the gym, or it is your day to……?

I really like the tahini in the recipe. I have noticed since consuming more nut and seed butters in the last six months, my hair is growing thicker and faster, and who doesn’t want that? Read this for information on 10 Superfoods to Prevent Hair Loss.

I added optional chocolate chips in the recipe. Note: If you use chocolate, they are not SCD approved. I have recently tried a mini dark chocolate chip that is sweetened with Stevia by Lily’s or use your favorite dark chocolate.

Grain Free Cherry Berry Granola Bars

Ingredients:

1 Cup Raw Pecans

1 Cup Raw Walnuts

1/2 Cup Dried Dates, pitted & coarsely chopped

1/2 Cup Coconut Flour

1/2 Cup Superfine Almond Flour

2/3 Cup Honey

1/2 Cup Tahini

3 Tablespoons Coconut Oil

1/2 Cup Dried Cranberries (no sugar added)

1/2 Cup Dried Blueberries (no sugar added)

1/2 Cup Mini Dark Chocolate Chips (optional, omit for SCD)

2 Teaspoons Pure Vanilla Extract

1/4 Teaspoon Himalayan Pink Salt or Sea Salt

(see In My Pantry here for product brands I use)

Directions: Preheat your oven 350º degrees. Line a square 8″ x 8″ baking pan with a sheet of parchment paper.

Using a Food Processor with a blade attachment, add the pecans, walnuts, coconut flour, almond flour, chopped dates and salt. Pulse in the processor until you have coarse pieces of nuts. Melt the coconut oil in the microwave (takes about 20 seconds), and add the melted coconut oil, honey, vanilla and tahini to the food processor and pulse until evenly combined but the mixture still contains chunks. Add the dried berries and chocolate chips if using.
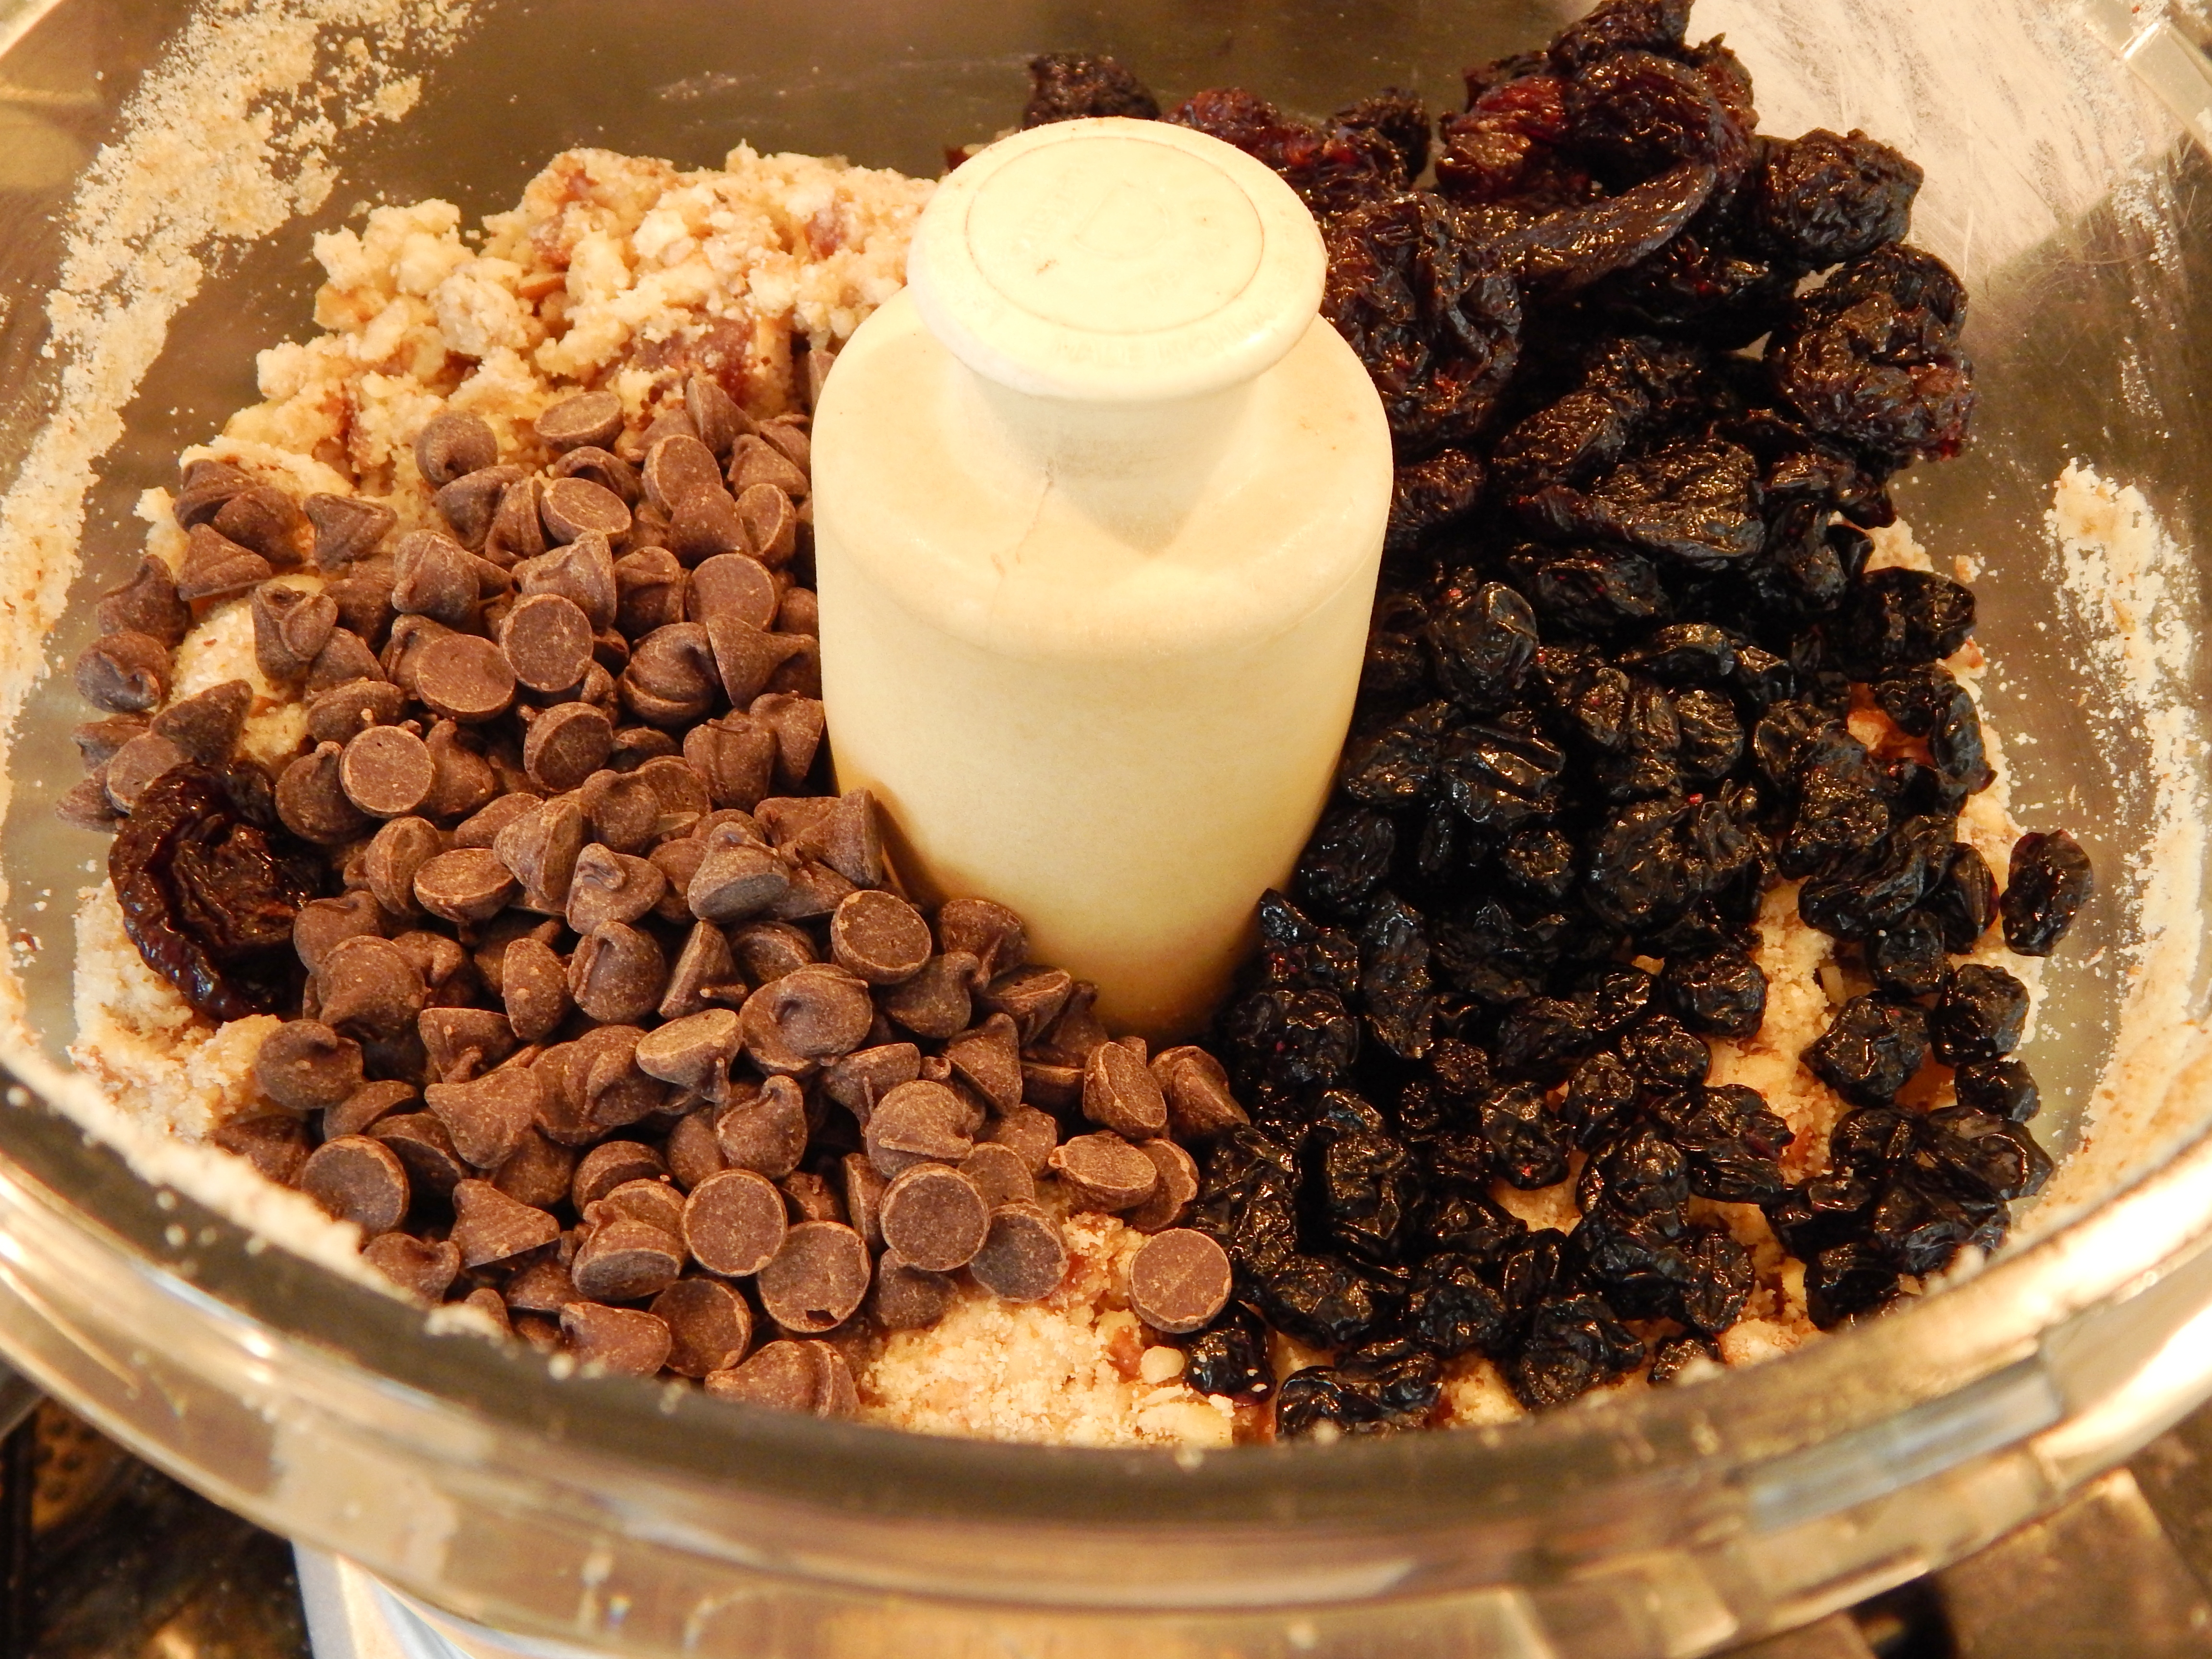
Granola Bar Mix

Granola Bar Mix

Pulse until evenly distributed. Transfer the dough to your parchment lined pan, and using a piece of plastic wrap to prevent it sticking to your hands, press the dough evenly into the pan.

Bake for 30 minutes in your preheated oven.

Remove from the oven and cool completely. After the bars have cooled, lift them easily from the pan using the edges of the parchment.

With a sharp knife on a cutting board. Cut the bars into 15 rectangles.

Enjoy!

Eat Your Nutrients!

Eat Your Nutrients!


Cherry Raspberry Popsicles

Cherry Raspberry Popsicles

Guess What??? Yep, that’s right! It’s popsicle season! How did you guess?

It is probably because you are an amazing human being! AND you want to fuel your body with clean food to stay super amazing or become even more super amazing! Am I right?

This month marks the one year anniversary of my blog. I am so excited!!! I have shared over 100 recipes with you all in the past year to help you reach your goals, as well as stories of Ming, Ming! Whether it is improving your health overall, better digestion, wanting more energy, cleaning up your diet, eating Paleo, Gluten Free, Dairy Free, Real Food, or healing from SIBO and other digestive difficulties, I am so glad you are here!

I have been honored to be a part of your journey, and also my journey through blogging to reach my health goals. I have to say, I have been feeling really great, and I hope you are too! I have met some amazing, super awesome, kind and generous people, and each and every one of your comments has touched me.

Today I am sharing a delicious, easy popsicle recipe that I know you are going to absolutely love! There is no garbage or artificial anything in them, just four ingredients and they are pretty too! I used popsicle molds to make these, but I have also made them in little paper cups with popsicle sticks inserted into them from the local craft store!

Cherry Raspberry Popsicles

Ingredients:

10 oz. Frozen Organic Raspberries

1 Cup Frozen Organic Tart Cherries

1/4 Cup Clear Honey

2 Teaspoons Pure Vanilla Extract

Directions:

Add the ingredients to your blender. Mix on high until smooth. Pour into molds. Freeze until solid (about 6 hours). To un-mold, run under hot tap water a few seconds. If they are in a paper cup, simply peel the paper off. Enjoy!!!!

Raspberry Cherry Popsicles - Real Fruit!

Eat Your Nutrients!

Eat Your Nutrients!


Strawberry Lemonade Ice Cream

strawberry lemonade ice cream 3 with text

I have a Spring “ice cream” recipe for you today that is tart, creamy and dairy free! It uses a pound of fresh strawberries, lemon juice, lemon zest (for the zing), coconut milk, honey and a pinch of salt. It is beneficial to use whole fruit in treats whenever possible to get in the fiber and nutrients the way they were meant to be consumed. It also slows down the absorption of sugars, as opposed to just using a juice with the fiber and fruit extracted. This Strawberry Lemonade Ice Cream is a Low FodMap recipe as well with just a quarter cup of honey in the batch, and it serves six! This would be delicious as an Easter treat or served at a Spring cookout. I really love the color of this ice cream, it is a beautiful shade of pink, all natural, and just a few ingredients. All you need is a blender…..no cooking…..and an ice cream maker. The one I use is the Cuisinart hereI have had it for years and it keeps going strong!

strawberry lemonade ice cream 4 with text


Strawberry Lemonade Ice Cream

Ingredients:

1 Pound Fresh Strawberries

1 Can Full Fat Coconut Milk, No Additives

6 Tablespoons of Fresh Squeezed Lemon Juice

Zest of Two Organic Lemons

1/4 Cup Clear Honey

Pinch of Himalayan Pink Salt or Sea Salt

Directions:

Clean and hull the fresh strawberries and place in the blender with the can of coconut milk. Zest the lemons and put the zest in the blender. Then, squeeze the juice of the lemons and add to the blender. Add the honey and salt. Blend on high for one minute, or until smooth.

Place in a sealed container in the refrigerator and chill for four hours and up to 24 hours. When chilled, churn your ice cream and serve. If you have any leftover, you can freeze it in a air tight container. When eating any leftover ice cream, make sure it sits at room temperature about 10 minutes to allow the ice cream to soften again.

Serves 6

Eat Your Nutrients!

Eat Your Nutrients!

Orange Currant Muffins

This new muffin recipe uses whole peeled oranges in it, which adds a lot of flavor! There are many benefits in eating food in it’s whole form the way nature made it, so I was very excited to come up with this recipe! There is no added sugar. They are sweet and flavorful from the banana, and oranges with an added benefit of carrots in the recipe. This is an ultra moist muffin and is egg free.

Orange Currant Muffins

Orange Currant Muffins

Directions:

Preheat your oven 350º degrees and line muffin pans with 16 natural liners.

Ingredients:

2 Flax Eggs (combine 2 Tablespoons of Ground Flax Seed and 6 tablespoons water, whisk and refrigerate 15 minutes)

1 Cup Very Ripe Banana (sliced and packed) this took 3 medium bananas, but measure

1/2 Cup Coconut Flour

1/2 Cup Superfine Almond Flour

2 Cups Orange Segments (no seeds, peeled)

2 Cups Peeled and Sliced Raw Carrots

1 Tablespoon Ground Cinnamon

2 Teaspoons Baking Soda

1 1/2 Teaspoons Pure Vanilla Extract

1 Teaspoon Apple Cider Vinegar

1/2 Teaspoon Himalayan Pink Salt or Sea Salt

1/4 Cup Dried Currants for the Tops

Orange Currant Muffins Ready to Go Into the Oven

Orange Currant Muffins Ready to Go Into the Oven

To Make the Muffins: Place all the ingredients except the dried currants in a food processor with a blade attachment. Pulse to start incorporating and chopping larger ingredients, then turn on and process for two minutes until completely blended. Fill each muffin cup almost to the top with a muffin scoop, refer to photo, (you should have 16 muffins) and sprinkle with dried currants, dividing evenly.

The muffins are sweet and moist! It is hard to believe they have no added sugars and are made completely with whole nutritious fruit!

Bake in the oven for 35 minutes. Enjoy!

Eat Your Nutrients!

Eat Your Nutrients!


Mango Banana Blender Ice Cream

This creamy blender ice cream is a guaranteed way to satisfy a sweet tooth and a craving, and it only takes seconds in the blender! Three ingredients is all you need, and you will have a nutritious, figure friendly ice cream without the guilt! All you need is Bananas, Mango and Vanilla Extract. I always keep frozen bananas on hand, because they are so creamy when blended into smoothies.

Mango Banana Ice Cream sam eats her nutrients logo

Most everyone knows that bananas are a good source of potassium, but did you also know they are a source of vitamin B6 which our body does not store and is used to make antibodies to fight infection? Bananas are also a source of vitamin C and have 3 grams of fiber each.  The Mango packs a punch of vitamin C  (96% in an average sized mango) as well as vitamin A, fiber and some calcium.

Mango Banana Blender Ice Cream

Ingredients:

2 Frozen Ripe Bananas, cut into chunks

1 Cup of Frozen Mango cubes, the riper the better

1/2 Teaspoon alcohol free for AIP Paleo or  Pure Vanilla Extract, No Additives,

Directions:

Place the ingredients in a high speed blender that comes with a plunger, and blend on high pushing the fruit down with your plunger until it is creamy and blended. Serve immediately.

1 – 2 Servings

Eat Your Nutrients!

Eat Your Nutrients!

Strawberry Apricot Granola (Grain Free)

It is pretty easy to make your own granola, and it is worth the extra effort. This week I have a really delicious granola recipe for you that is grain free! If you like variety in your granola, this Strawberry Apricot Granola recipe is a delicious way to add it.  It may become your new favorite! It is definitely my springtime favorite this year! With nuts, seeds, fruit and healthy fat, what’s not to love? I like to grab a handful for a snack, and for breakfast it is good with dairy free milk and fresh fruit. It is also fantastic with yogurt.

Strawberry Apricot Granola with wording

Strawberry Apricot Grain Free Granola

Ingredients:

1 Cup Raw Pecans

1/2 Cup Raw Pistachios

1/2 Cup Raw Sunflower Seeds

1/2 Cup Raw Brazil Nuts

3/4 Cup Dried Strawberries (like these) not freeze dried

6 Medjool Dates

1/2 Cup Dried Apricots

1/2 Cup Very Hot Water

1/2 Cup Unsweetened Coconut Flakes

2 Tablespoons Cinnamon

1 Tablespoon Ground Flax

1 Tablespoon of Pure Vanilla Extract

1 Teaspoon Himalayan Pink Salt or Sea Salt

1 Tablespoon Coconut Oil, Melted

Directions:

Preheat oven 325º degrees.

In a food processor with a blade attachment, puree dates, apricots, vanilla, coconut oil and hot water until it is smooth. Add the nuts, sunflower seeds, flax and coconut flakes and pulse until you have a medium grind and everything is sticking together nicely. Add in the cinnamon and salt and pulse to combine. Dice your dried strawberries into 1/2 inch pieces then add them to the food processor and pulse a few extra times to incorporate them.

Turn the granola out onto a parchment lined, rimmed baking sheet and bake in a 325º degree oven for 35 minutes, stirring every ten minutes, or until golden brown. Cool and store in an airtight container. Enjoy this delicious granola for breakfast or as a snack! It travels very well also!

Eat Your Nutrients!

Eat Your Nutrients!


Good Eats for a Lunar New Year Celebration!

CNY Year Collage Final

Gung Hay Fat Choy! It is the first day of the Lunar New Year Celebration, and I have put together a collection of recipes that you can make for a fun party! It is also known as the Spring Festival, and spring is just around the corner! Believe it, it is coming! This year is the year of the sheep. It is my daughter, Skyli’s year.  The date and animal changes every year, because it is based on the Chinese Lunar Calendar, you can see a calendar here and read fun facts! You have probably seen this calendar on a paper place mat at a Chinese restaurant.

Two of my daughters were born in China, so we celebrate every year, but you don’t have to be born there to celebrate! I have included here the Asian Fusion Shrimp Egg Custard with Scallion Oil Drizzle as a starter, Chinese Five Spice Chicken Bites, Asian Pork Ribs, Savory Carrot Scallion Pancakes and Matcha Green Tea Cookies. Serve it with some warm Jasmine Tea, Sliced Oranges (which signify good luck and prosperity in the coming year) and Cauliflower Rice or White Rice, and you have a party!

The Lunar New Year celebration lasts for two weeks, there are dragon dance parades, fireworks, good food and community culminating with the lantern festival. You will see a lion in the collage above. It is different from the dragon which comes at the end of the dragon dance parade. You can read more about Chinese New Year in China here. The decor is extraordinary during this time in Asia.  Google Chinese New Year Photos to see real pictures of the parade.

Here is a photo of my family in China several years back in the spring in Tiananmen Square.

Our Family in Tiananmen Square While Traveling in China

Our Family in Tiananmen Square While Traveling in China

There is nothing like traveling to the country of origin and eating the authentic food. It changed my entire view of Chinese food.

I hope you enjoy these recipes! For more delicious additions to your party, check out these Grain Free Chinese Almond Cookies on Tasty Yummies by Texarin Baking, or PaleoLeap’s Beef and Broccoli Stir-Fry.

Happy Chinese New Year everyone!

Eat Your Nutrients!

Eat Your Nutrients!

Note: White Rice is not Specific Carb Diet approved so go with cauliflower rice if you are on it.

Apple Pie “Oatmeal” Cookies

These cookies are my latest obsession! They are grain free, but have the texture of a soft oatmeal cookie and the flavor of apple pie! They are also egg free, dairy free, have no added sugar, and are packed with nutrition from apples, walnuts, dates, currants and healthy fat! I also think these cookies rock because, if your child wakes up and asks, “Mom, can I have a cookie for breakfast?”, like mine have done, you can say “Yes” to these cookies. There is something about putting wholesome ingredients together in cookie form that makes kids really love to eat them………….me too!

Let’s bake some cookies!

apple pie oatmeal final

Apple Pie “Oatmeal” Cookies

Ingredients:

3 Cups Diced Granny Smith Apples, cored peel left on

8 Medjool Dates, pitted

1/2 Cup Very Warm Water

1 Cup Raw Walnut Halves

1/2 Cup Shredded Coconut, Unsweetened like this

1/2 Cup Dried Currants

1/4 Cup Coconut Oil

1 1/2 Tablespoons Ground Cinnamon

1/4 Teaspoon Ground Nutmeg

1 Tablespoon Fresh Squeezed Lemon Juice

1 Tablespoon Pure Vanilla Extract, no additives like this

1/2 Teaspoon Himalayan Pink Salt or Sea Salt

1/2 Teaspoon Baking Soda

Directions:

Preheat your oven 350º degrees. Set out two cookie sheets covered in parchment paper.

Place your pitted dates in the 1/2 cup of very warm water and soak for ten minutes to soften. Meanwhile, in a food processor, place your chopped apples and lemon juice. Pulse until they are finely chopped. Drain your soaked dates, and add to the food processor along with the vanilla extract and coconut oil. Continue to pulse. When mostly smooth, add the remaining ingredients except the currants and walnuts. Puree until smooth, about one minute. Finally, add your currants and walnuts and pulse until the walnuts are coarsely chopped, about six pulses should do it.

Using a tablespoon cookie scoop, make rounded mounds of cookie dough on the parchment lined cookie sheets, twelve cookies per sheet. Using a fork, flatten cookie dough mounds to about 3/4″ inch thick.

Apple Pie "Oatmeal" Cookie Dough Ready to Flatten

Apple Pie “Oatmeal” Cookie Dough Ready to Flatten

Bake in your preheated oven for 28 to 30 minutes. They will be soft and golden brown when you remove them from the oven. They will firm up when they are completely cooled.

Makes 2 dozen nutritious, delicious cookies

Eat Your Nutrients!

Eat Your Nutrients!

Strawberry Nut Bites

Valentine’s Day is a fun time to eat these delicious little pop ins. They are rolled in crushed, organic, freeze dried strawberries that burst with flavor in your mouth and have the health benefits of Raw Almonds and Walnuts! I recently finished reading The Blue Zones: Lessons for Living Longer from The People Who Lived the Longest by Dan Buettner, and eating nuts is one of the things the octogenarians in all the blue zone regions had in common. They are simple to make and portable. I have been packing them in lunches, (include an ice pack), and they are great when you want a little something sweet.  February is a busy month at my house. Three of my daughters have birthdays this month….the 21, 22nd and 23rd, and also my youngest daughter’s adoption day is on the 22nd. For Valentines Day this year my husband is taking me out to our favorite Spanish Tapas restaurant. The food is excellent, and they are very aware and careful about food allergens. It is a Paleo friendly restaurant as well. The recipe for Strawberry Nut Bites is below.

Strawberry Walnut Truffles 1

Strawberry Nut Bites

Ingredients:

1 Cup Freeze Dried Organic Strawberries, Like These

1 Cup Raw Walnuts

1 Cup Raw Almonds

1/2 Cup Shredded Coconut, unsweetened

1/4 Cup Clear Honey

2 Teaspoons Pure Vanilla Extract

1/4 Teaspoon Cinnamon

1/8 Teaspoon Himalayan Pink Salt

Directions:

Place the strawberries in a food processor with a blade attachment and finely grind the strawberries. Remove them from the food processor and put in a medium bowl for rolling the formed nut bites in.

In the same food processor, place your nuts and coconut and pulse until finely chopped. Add the honey, vanilla, cinnamon and salt. Continue to pulse until the mixture forms a ball. Pinch off enough of the nut filling to form 1 1/2 inch balls with your hands, and roll the balls in the strawberries. Store them in the freezer or refrigerator. I like them frozen. They are berry delicious! Sorry, I couldn’t resist!

Whether you have a significant other or not at this time in your life, I hope you have a Happy Valentines Day, spread a little love, and enjoy these nutritious treats!

*Note: 1 Strawberry Nut Bite is a serving if you are very Low FodMap.

Eat Your Nutrients!

Eat Your Nutrients!


Banana Pineapple Coconut Leather

Are you ready for a portable treat that is oh so satisfyingly chewy and good for you? Was that a yea? Then these scrumptious snacks are going to make your day! I promised you some fruit roll ups, and this is the first one with more to come. The first time I made these, they were devoured right away, and I had to guard the last one for myself. They aren’t difficult, but you do have to wait for the dehydrator to do it’s job, so it requires patience……I am working on that in many areas of my life. I love the way they make the room smell like I am baking banana bread while they are dehydrating. It is like natural potpourri, but better because you get to eat it!

Banana Coconut Leather for blog

Banana Coconut Leather

Directions:

Turn your food dehydrator to 135º degrees. Line six dehydrator trays with parchment or teflon inserts.

Ingredients:

6 Ripe Bananas

1 Cup Chopped Fresh Pineapple

1/2 Cup Unsweetened Shredded Coconut

2 Tablespoons Honey

2 Teaspoons Fresh Lemon Juice

1 Teaspoon Ground Cinnamon

1/2 Teaspoon Himalayan Pink Salt

Add Bananas, Pineapple, Himalayan Pink Salt, Honey, Cinnamon and Lemon Juice to a high speed blender, like this one, and blend until smooth. Add the coconut and blend for 30 seconds. You still want small bits of coconut in it. Pour the batter onto the six trays evenly dispersing.

Banana Coconut Leather Ready To Go In Dehydrator

Banana Coconut Leather Ready To Go In Dehydrator

Now, pick up the tray and tip and swirl in a circular motion to spread the batter evenly. Dehydrate for seven hours, flipping them after six hours. They can go a little longer and be fine too. I have left them for ten hours, they will just be more crunchy instead of chewy. Remove from the dehydrator, cool and roll up with strips of parchment, or you can store them flat. These are a wonderful, yummy, healthy snack! My children’s friends are so envious when they bring them in their lunches! If you like these, stay tuned for more roll up recipes!

Eat Your Nutrients!

Eat Your Nutrients!

1 7 8 9 11