Tag Archives: SCD Diet

A Must Listen If You Are Struggling with SIBO, Candida or Digestive Problems

Chris Kresser, M.S., L.Ac really knows his stuff when dealing with healing digestion. He is a globally recognized leader in the fields of ancestral health, Paleo nutrition, and functional and integrative medicine. In his latest podcast he addresses how diet alone is not enough when trying to treat SIBO and Candida.

As you may know, I used antibiotics in conjunction with diet to rid myself of SIBO under the guidance of a naturopathic physician. I started this blog to empower myself and others to take charge of their digestion and regain vibrant health all while eating delicious food! Chris discusses FodMaps, SCD Diet, GAPS diet, Candida Diet, benefits of resistant starch, and going too low carb in this 30 minute must listen to podcast. You can find it here.

Eat Your Nutrients!

Eat Your Nutrients!

Pumpkin Vanilla Bean Pie (Paleo, SCD, Low FodMap)

You can be proud to bring this Pumpkin Vanilla Bean Pie to any gathering!  My husband, Doug, loves this recipe! It is extra special because of the vanilla bean and light rum in the filling, and the crust is just the right thickness. I played with the recipe quite a lot until I perfected it, and it is a winner!

Festive SCD Paleo Pumpkin Vanilla Bean Tart

Holiday Pumpkin Vanilla Bean Pie (Paleo, SCD, GAPS)

Ingredients:

Crust:

2 1/4 Cups Superfine Almond Flour

3 Tablespoons Organic Shortening

1 Pastured Egg

3/4 Teaspoon Himalayan Pink Salt

Pumpkin Filling:

1 Can SCD Legal Pumpkin

1/2 Cup Clear Honey

1 Vanilla Bean

3 Pastured Eggs

1/2 Cup Full Fat Coconut Milk (No Additives)

2 Tablespoons Light Rum (I used Bacardi)

1 Teaspoon Cinnamon

1 Teaspoon Ginger

1/4 Teaspoon Cloves

1/4 Teaspoon Allspice

1/8 Teaspoon Nutmeg

1/4 Teaspoon Himalayan Pink Salt

Directions:

Preheat your oven 350º degrees.

CRUST:

Grease the insides of a pie pan or 11 inch springform tart pan.  In a medium bowl, add the almond flour and shortening. Work the shortening into the almond flour with a fork and finish off by using your fingers until it is crumbly and well dispersed. Add a lightly whisked egg and the salt and stir with a fork until it forms a ball. Reserve 1/4 cup of the pie crust to decorate the top, and press the rest of the crust evenly onto just the bottom of the pan. Roll the 1/4 cup of crust between two pieces of parchment or plastic wrap to 1/4 inch thickness and cut out shapes of your choice with a small cookie cutter. Place the shapes on a parchment lined baking sheet. Bake the shapes for 5 minutes, the crust for 8 minutes in the oven, remove and cool while you prepare the filling.

FILLING:

Warm the honey in the microwave for 30 seconds in a small bowl. Split the vanilla bean lengthwise and scrape out the seeds with a small spoon. Whisk the vanilla bean seeds into the warmed honey. In a large bowl whisk together your pumpkin and coconut milk, add the honey and vanilla bean seed mixture. Whisk in the eggs and rum until fully incorporated. Finally, whisk in the spices and salt.

Place your pan on a rimmed cookie sheet to protect again spills, and pour the filling into the tart crust. Carefully place in the oven and bake for 45 minutes. Remove from the oven, top with your pie crust cutouts and chill for four hours before serving.

Festive Pumpkin Vanilla Bean Tart (Paleo, SCD)

Holiday Pumpkin Vanilla Bean Pie (Paleo, SCD, GAPS)

Serves 8

A delicious holiday dessert!

Pumpkin Tart

Eat Your Nutrients!

Eat Your Nutrients!

Real Pumpkin Spice Creamer Cups

Real Pumpkin Spice Beverage Flavor Drop-Ins

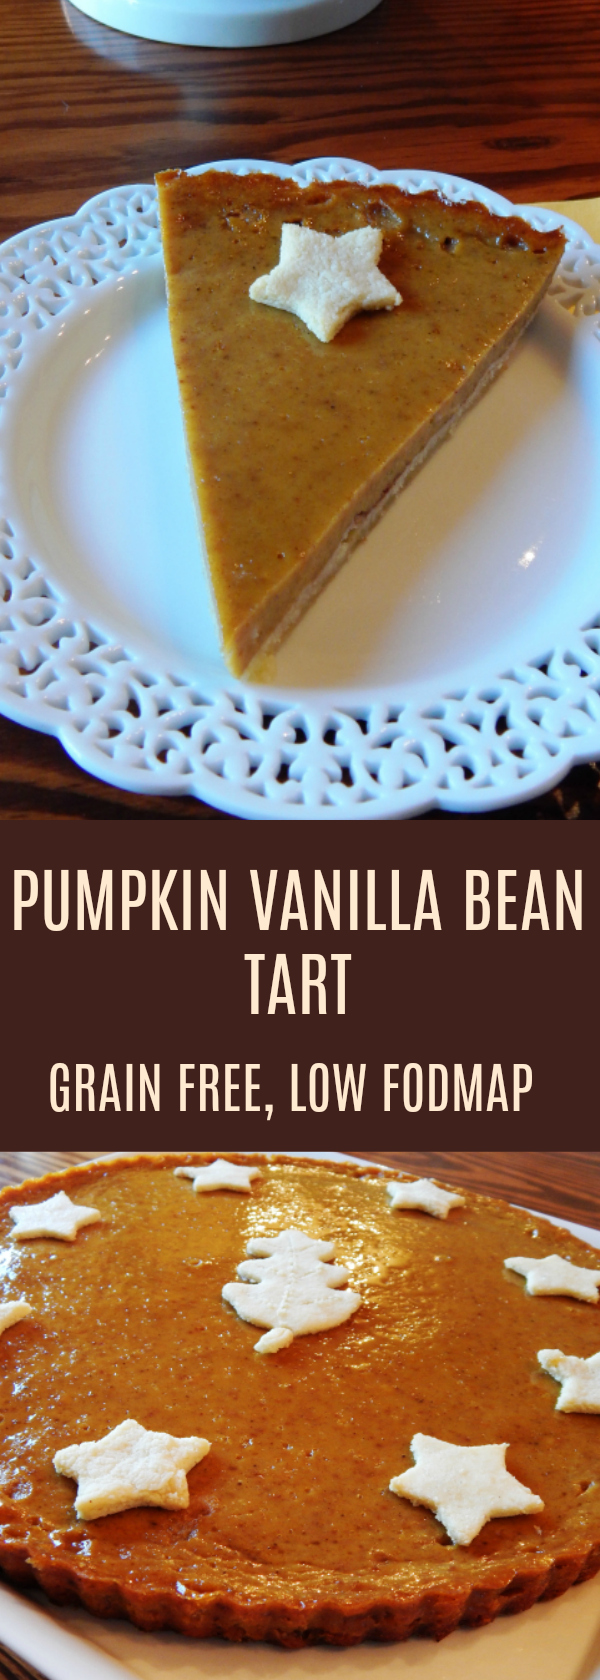
Real Pumpkin Spice Creamer Drop-In Cups

One of the best Fall traditions is pumpkins!  There has been a lot in the media lately about some of the pumpkin spice beverages out there and the less than healthy ingredients they contain, even though the are deliciously addictive.  I have a figure friendly, healthy, real food solution to a pumpkin spice beverage craving that will leave you feeling great with no sugar crashes or slumps.

These individual Pumpkin Spice Coffee Creamers are only 65 calories, contain all natural ingredients, including real pumpkin, and are frozen individually for convenience and freshness.  The recipe makes twelve. They have a true, delicious pumpkin spice flavor, are dairy free, and sweetened with just 1/2 teaspoon of honey per serving.  If you like yours sweeter, you can add more.  You also get 15% of your RDA of vitamin A from the real pumpkin each beverage contains along with beneficial spices.  You can use these all-in-one flavor drop-ins creamers for coffee, lattes, tea or steamers.

Pumpkin Spice Matcha Latte

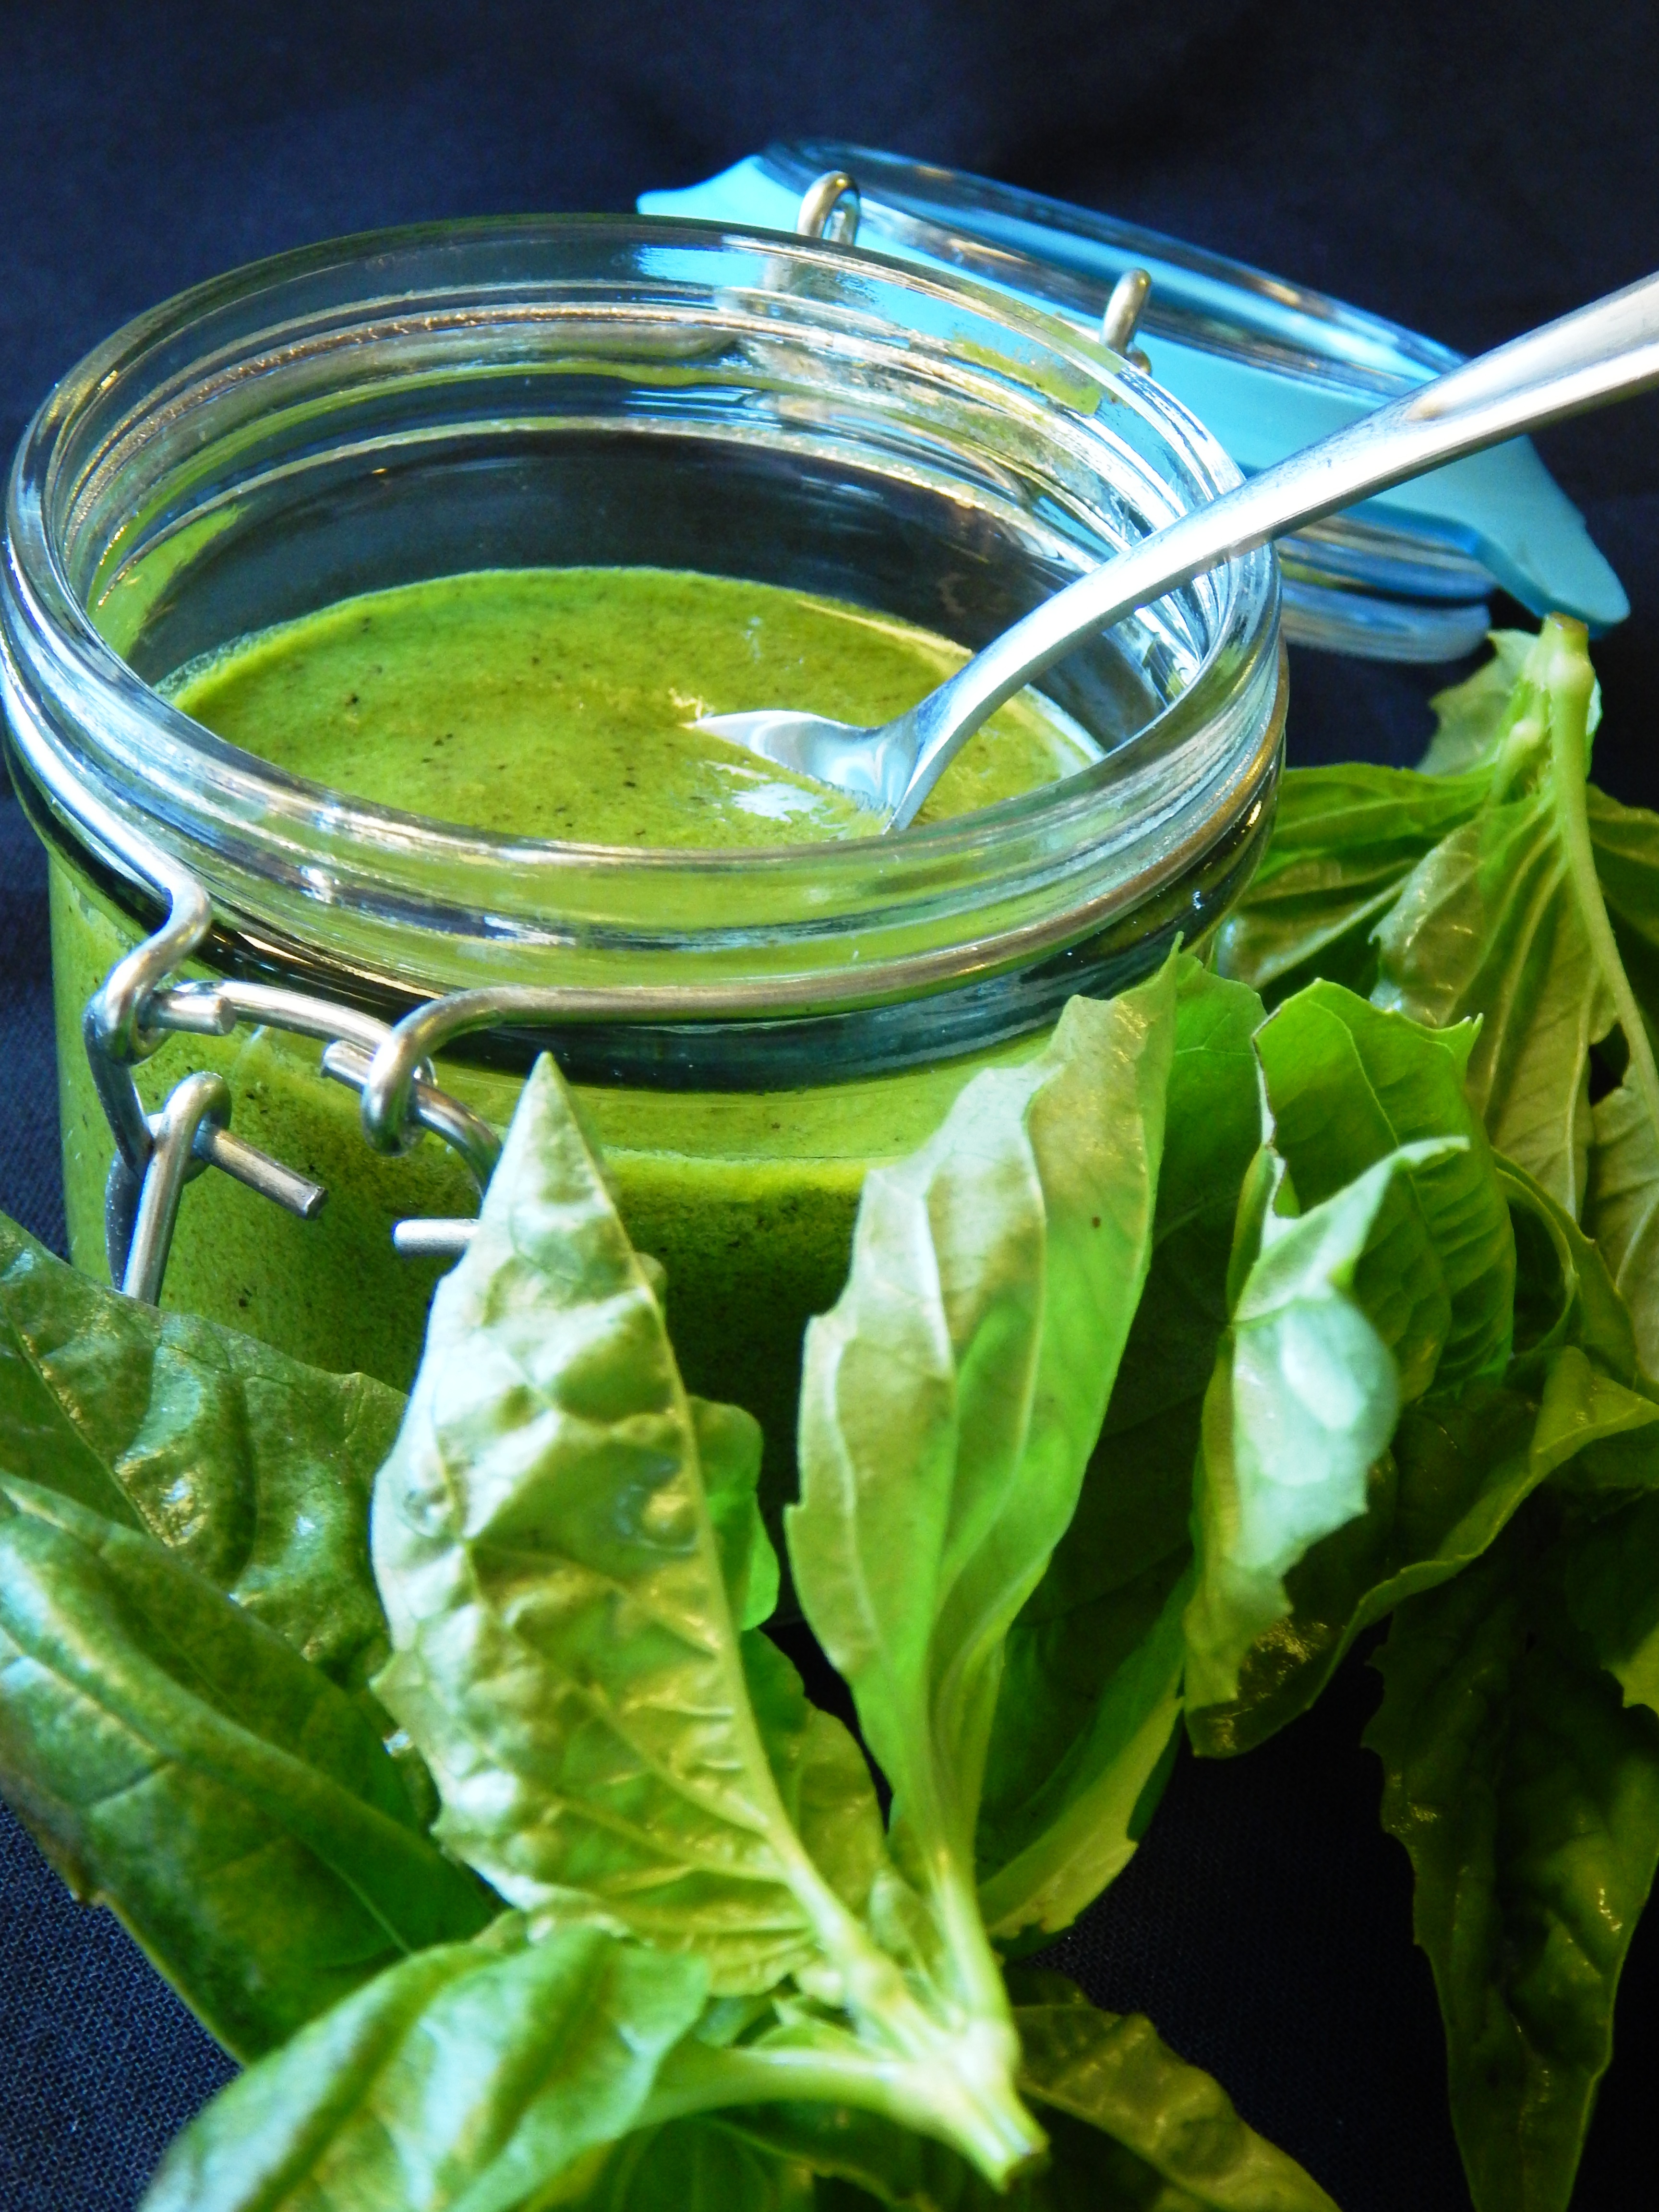
Real Pumpkin Spice Matcha Latte

Pumpkin Spice Beverage Drop Ins

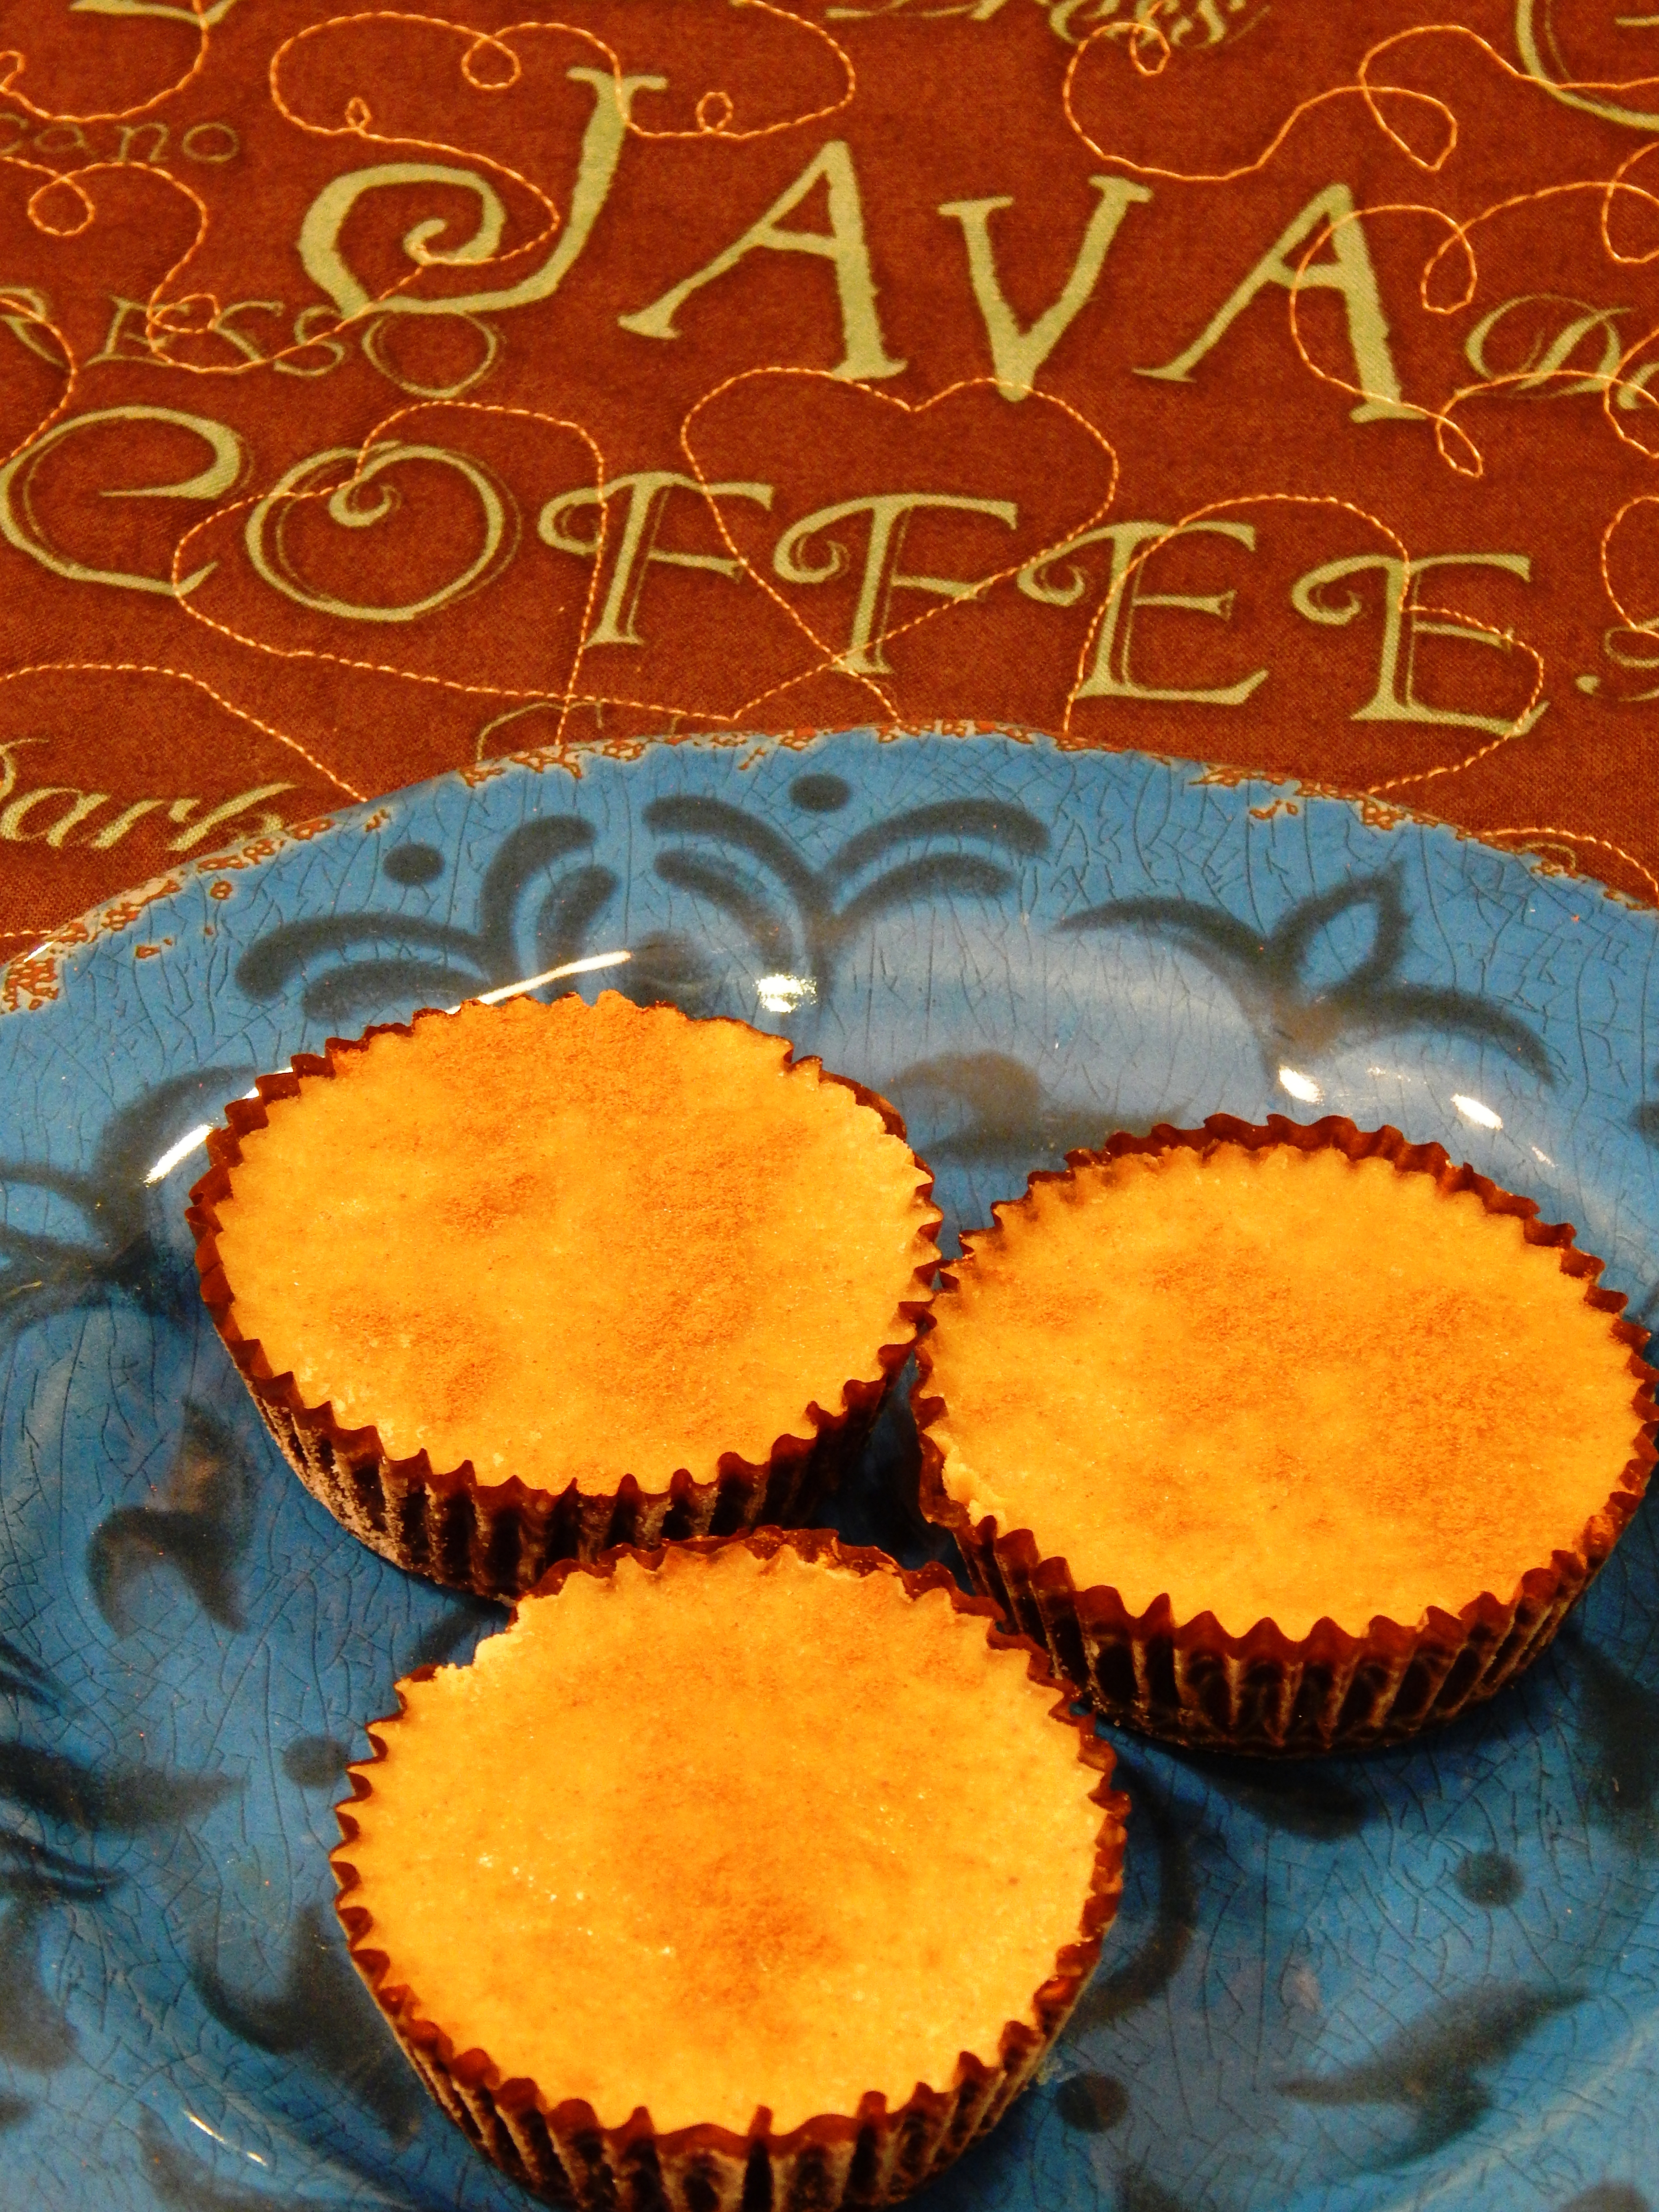
Real Pumpkin Spice Individual Portion Creamer

Recipe Ingredients:

Real Pumpkin Spice Coffee Creamer Cups

1 1/2 Cups Canned Pumpkin (this one is organic and SCD Diet legal)

1 1/2 Cups of Full Fat Coconut Milk, room temperature (this is my favorite and SCD Diet Legal)

3 Tablespoons of Pure Vanilla Extract

2 Tablespoons Clear Honey, warmed in the microwave more or less to taste (you can substitute Maple Syrup)

1 Tablespoon Ground Cinnamon

1 1/2 Teaspoons Ground Ginger

1/2 Teaspoon Ground Allspice

1/4 Teaspoon Ground Nutmeg

1/8 Teaspoon Ground Cloves

Line a muffin pan with good quality natural unbleached muffin papers.  They have a non-stick coating on the inside for easy removal. Add your pumpkin to a medium mixing bowl. Whisk the warmed honey into the pumpkin. I like mine just slightly sweetened. You can add more or less honey depending on your taste. Whisk in the room temperature coconut milk and vanilla extract.  Finally, whisk in all your spices. Using a level Muffin size scoop or a 1/4 cup measuring cup, scoop 1/4 cup of the pumpkin beverage drop-ins mixture into each muffin cup. Level by tapping the bottom of the pan on the counter top to flatten and place the pan in the freezer until they are frozen solid.  After they are frozen, remove them from the muffin pan and store in a gallon zip bag in the freezer.  When you need a pumpkin spice beverage, take one serving from the freezer and add it to your coffee, latte, tea or steamer. It is good to have the beverage slightly hotter than normal because the pumpkin spice drop-in is frozen.  I like to put everything in a shaker and shake it up then pour it into a mug, but you could also use a whisk in your mug.  This is the shaker I use (It is Awesome to get a frothy beverage!)

I hope you are enjoying Fall and pumpkin season!!! I look forward to having one of these every day!

Eat Your Nutrients!

Eat Your Nutrients!

Brazilian Cranberry Fig Bites

I love little energy bites when I am on the go, in a hurry, or after an afternoon workout.  The pace seems to always pick up when the school year starts doesn’t it? Summer has been relaxed and more laid back with the schedules, but now we are watching the clock more and checking our daily calenders. Am I the only one?

These little bites are a delicious, healthy snack that is portable.  The brazil nuts add selenium which good quantities of vitamins, anti-oxidants and minerals, and figs are full of nutrients and fiber, and just taste wonderful! The tart dried cranberries are lower in sugar than other dried fruits and give the bites a sweet tangy burst of flavor. (use dried cranberries sweetened with apple juice.)

You can make these in your oven or a food dehydrator.  They are easy and a delicious, healthy addition to your snack rotation that might save you time and your sanity when you are on the run.

Brazilian Cranberry Fig Bites

Brazilian Cranberry Fig Bites

Brazilian Cranberry Fig Bites

Ingredients:

12 Dried Figs (soaked in hot water 30 minutes)

1 Cup Raw Pecans

1 Cup Raw Brazil Nuts

1/2 Cup Unsweetened Coconut

1/2 Cup Dried Cranberries

1/4 Cup Clear Honey

1/4 Teaspoon Himalayan Pink Salt

1 Teaspoon Fresh Squeezed Lemon Juice

Directions:  Soak your figs submerged in very hot water for 30 minutes to soften. Add them to a food processor with the pecans, brazil nuts and coconut and pulse until they are a fine consistency.  Add remaining ingredients to the food processor and pulse again until it is combined and a sticky consistency that holds together. Scoop into tablespoon sized mounds. (I used a tablespoon cookie scoop, but you could also use a spoon) and roll into balls, then flatten slightly with the palm of your hand.  Place on your dehydrator trays or on a parchment lined cookie sheet if you are baking.

Dehydrate for 18 hours at 105º degrees or bake in your oven at 250º degrees for 45 minutes.

I like to individually package them in twos so we can grab them and go.

Enjoy these! They are so good and good for you!

Cranberry Fig Bites

Brazilian Cranberry Fig Bites

Eat Your Nutrients!

Eat Your Nutrients!

Sunflower Pumpkin Seed Crackers

Sometimes I just gotta have something crunchy!  Crackers are especially nice, because I like something to go with the crunch, if I am not eating them plain for a quick crunch fix. You can dress up a cracker with toppings.  I personally like to pile them with meat and veggies or eat them with a salad.  Some of the benefits of  pumpkin seeds are healthy fat, magnesium, zinc, tryptophan, and studies also show they aid in hair growth. Sunflower seeds contain many beneficial vitamins as well, including B vitamins and vitamin E.

This recipe for crackers is free of all major allergens, no nuts, dairy, soy, gluten, grain, and they are easy and fast.

Sunflower Pumpkin Seed Crackers

Sunflower Pumpkin Seed Crackers

You will need a high speed blender or food processor to grind the nuts into flour, two parchment lined cooking sheets, and a rolling pin if you want them thin.

Ingredients:

3/4 Cup Sunflower Seeds (I bought sprouted ones, but optional)

3/4 Cup Pumpkin Seeds (optional sprouted)

1 Pastured Egg or 1 Flax Egg, See Here for good directions on How to Make One

2 Tablespoons Tahini

2 Tablespoons Coconut Oil, melted or Olive Oil

2 Teaspoons Lime Juice

1/2 Teaspoon Himalayan Pink Salt

Directions:  Pulse the seeds in a blender or food processor until you have a very fine flour consistency.  Transfer the ground seeds to a bowl. and add the salt. Next Whisk egg and incorporate it into the nut flour mixture. Melt the coconut oil and tahini in the microwave together for ten seconds then whisk  to incorporate,  whisk in the lemon juice to the coconut oil mixture. Add the liquid ingredients to the nut flour, egg mixture and stir vigorously until a ball forms and the ingredients are thoroughly blended.

Divide dough in half, form into balls and place on two separate pieces of parchment paper.  Top each sheet with another piece of parchment paper to roll them thin and keep the dough from sticking to your rolling pin.  Roll or pat each cracker round out until 1/4 inch thick.  Take off the top parchment paper and bake in the oven 325º degrees for 15 minutes until golden brown.  After they cool, break into pieces.  Store cooled in an airtight container.

Eat Your Nutrients!

Eat Your Nutrients!


Cinnamon Date Thumbprint Cookies

I hope you all had a wonderful Memorial Day Weekend! The kids are all back in school now, so our routines are changing. We made this delicious cookie this weekend that I wanted to share with you. Thumbprints are such a fun cookie to eat and make.  I especially enjoy making them with my children because the process is very hands on and fun.

Here is a delicious version of a thumbprint cookie that has just the right amount of cinnamon and a date filled center.

Also, don’t forget to enter the giveaway! It is posted under Products I Love.  The giveaway ends Monday, September 8th, and is a very modern Cooler that is eco-friendly, light and functions so much better than the cheap styrofoam ones.  It is hosted by Rafflecopter, so just click on the link on the giveaway page, and it will take you there to enter.

So, here is the new cookie recipe! It makes 18 cookies.

Cinnamon Date Thumbprint Cookies

Cinnamon Date Thumbprint Cookies

Preheat your oven 350º degrees F.

Ingredients:

For Cookie:

1 1/2 Cups Blanched Superfine Almond Flour

6 Tablespoons Coconut Flour

1 Tablespoon Grass Fed Gelatin

1/2 tsp. Baking Soda

1/4 Teaspoon Himalayan Pink Salt

1 Tablespoon Cinnamon

1/2 Cup Coconut Oil

1/4 Cup Clear Honey

1 Tablespoon SCD Legal Vanilla Extract

In a small bowl, whisk together the dry ingredients.  In a separate bowl cream your coconut oil, honey and vanilla extract. Slowly add the dry ingredients to the wet and mix until incorporated thoroughly.  Scoop tablespoon sized cookies onto two parchment lined baking sheets two inches apart and make a thumbprint in the center. I used a tablespoon cookie scoop.

Filling:

4 Medjool Dates, Pits Removed

2 Tablespoons Hot Water

2 Tablespoon Finely Shredded Unsweetened Coconut

1 tsp. Vanilla Extract

1 tsp. Fresh Lemon Juice

Pinch of Himalayan Pink Salt

Puree the filling ingredients together until smooth. I used my small Ninja chopper for this, but anything that will puree fairly small amounts will work fine. Scoop a teaspoon of filling for each cookie and place it in the thumbprint.

Bake 20 minutes, then cool. I hope you enjoy these cookies like we do! Also, remember the great giveaway! I use my cooler all the time!

Web Site Chractor color corrected


Toasted Hazelnut-Vanilla Nut Milk & Lattes

Toasted Hazelnut Vanilla Nut Milk.jpg

Are you a hazelnut lover? I have this new recipe for Toasted Hazelnut-Vanilla Nut Milk that I adore with my cold brew iced coffee and matcha green tea. Nut milks are nutritious and easily made at home without the fillers and gums that can be difficult for your digestive system.

The nuts are plentiful in mono-unsaturated fatty acids and also essential fatty acid. Also, nutritionally, they contain Folate, B-Complex Vitamins, Copper, Magnesium, and Iron.  They make delicious milk!

You can make the milk with raw hazelnuts, but toasting them boosts the flavor profile and makes the milk even more delicious.  There is just three ingredients to make the milk. You do need a high speed blender and a nut milk bag. The nut milk bag is very inexpensive and handy to have around.

Homemade Nut Milk Tools. High Speed Blender & Nut Milk Bag

Homemade Nut Milk Tools. High Speed Blender & Nut Milk Bag

Ingredients:

4 Ounces Hazelnuts (Toasted & Skins Removed)

2 Tablespoons Pure Vanilla Extract (SCD Legal)

6 Cups of Filtered Water

1  Pinch Himalayan Pink Salt

Directions:

Preheat oven to 350° F.

On a parchment lined cookie sheet  toast hazelnuts in one layer in middle of oven 10 to 15 minutes, or until lightly colored and skins are blistered. Using a lint free kitchen towel, wrap the nuts hot from the oven and let them steam 1 minute.  Briskly rub nuts in the towel to remove loose skins (don’t worry about skins that don’t come off) and cool completely.

Place the nuts, vanilla, water and salt in your high speed blender and blend for three minutes.  Pour into the nut milk bag and drain the liquid squeezing gently at the end to extract all the liquid.  Pour into a pitcher or storage container and refrigerate.  It stays fresh for about a week, if it lasts that long.

Makes 6 cups

Here are some of the ways I love to use it.  You can also use it as you would any milk in your recipes and baking where you want a hazelnut flavor.

Make a Matcha Green Tea Latte!

Directions: Whisk 1 teaspoons of Matcha Green Tea into 1/4 Cup of hot water. Stir in 1 cup of Toasted Hazelnut-Vanilla Nut Milk and pour over ice. It is so refreshing!

iced-matcha-hazelnut-latte

Iced Hazelnut Matcha Green Tea Latte

Use it in Coffee for a delicious Hazelnut Flavor without the Syrups.  Iced or hot!  Here I made  iced coffee with a cold brew coffee, ice and toasted vanilla hazelnut milk.  You can choose to add honey if you like your beverages sweet.

toasted-hazelnut-milk-iced-coffee

Toasted Hazelnut Milk Iced Coffee


Eat Your Nutrients!

Eat Your Nutrients!

Lavender Sugar Cookies

There are so many ways to use lavender in cooking.  Here I have used it in a “sugar” cookie.  It is sweetened with SCD Legal honey and uses almond flour.  I have rolled and cut them out.  You could also make the recipe by scooping the cookies if you are short on time.  They will be softer that way instead of crunchy as a rolled cut out cookie.

Lavender Sugar Cookie

Lavender Sugar Cookie

Preheat Oven 350°. Place parchment paper on two cookie sheets.

Ingredients:

1 1/4 Cups Superfine Almond Flour

1/4 Cup Organic Palm Shortening, Melted

2 Tablespoons Honey

1 Teaspoon Dried Culinary Grade Lavender Buds, minced or placed in a spice grinder or mortar and pestle

1 Teaspoon Lemon Zest

1 1/2 Teaspoons SCD Legal Vanilla Extract

Pinch of Himalayan Pink Salt

Combine the dry ingredients in a medium bowl. Mix together the wet ingredients and add to the bowl of dry ingredients stirring with a fork until a ball forms.  Place the dough between 2 sheets of parchment paper and roll to about 1/4″ thickness.  Refrigerate on a cookie sheet for fifteen minutes, then cut out using a cookie cutter and place on your parchment lined cookie sheets.  Bake for 7 to 9 minutes until starting to brown around the edges.

Makes approximately 12 cookies depending on the size of your cutter.

Lavender Sugar Cookies

Lavender Sugar Cookies

Eat Your Nutrients!

Eat Your Nutrients!


Fresh Basil Pesto

The local basil is gorgeous right now, and making pesto with it is like sunshine in a jar! I put it on everything….meat, veggies, paleo crackers.  If you are eating Low FodMap, you can make amazing pesto with garlic infused olive oil. Basil has antibacterial properties, flavonoids, is high in Vitamin K and Magnesium.

Low FodMap Dairy Free Basil Pesto

Low FodMap Dairy Free Basil Pesto

Here’s how you do it:

Ingredients:

1 Cup Fresh Basil, packed tight to measure

2 Tablespoons Raw Walnuts

2 Tablespoons Pine Nuts

6 Tablespoons Garlic Infused Olive Oil

1/2 Teaspoon Himalayan Pink Salt

1/2 Teaspoon Black Pepper

1 Teaspoon Fresh Squeezed Lemon Juice

1 Tablespoon Fresh Oregano (optional)

Low FodMap Dairy Free Basil Pesto

Low FodMap Dairy Free Basil Pesto

Place all the ingredients into a high speed blender and blend until desired consistency. Spoon liberally onto everything!  It is amazing, savory, deliciousness and so good for you!

Eat Your Nutrients!

Eat Your Nutrients!


Banana Almond Swirl Cookies

Here is a moist drop cookie, that I am so excited to share!  It is egg free, sugar free and dairy free.  They are soft and cake-like.  I am an ex-cake addict.  They are tasty and moist!

Banana Almond Swirl Cookies

Banana Almond Swirl Cookies

Banana Almond Swirl Cookies

Banana Almond Swirl Cookies

There are two batters that you swirl together and then scoop and drop.

Preheat your oven to 350 degrees.

Ingredients:

Batter One:

1 Ripe Banana with Black Spots (this makes them sweet with no sugar and SCD Legal)

1 1/4 Cups Superfine Almond Flour

2 Tablespoons Cinnamon

2 Tablespoons Coconut Oil (softened but not melted. (If it is a warm day it will be soft of a few seconds in the microwave)

1 Teaspoon Pure Vanilla Extract (just vanilla and alcohol)

1/4 Teaspoon Pink Himalayan Salt

1/4 Teaspoon Gluten Free Baking Soda

Puree the banana, then in a medium bowl with a hand mixer, mix in the remaining ingredients. Set aside.

Batter Two:

1 Ripe Banana with Black Spots (this makes them sweet with no sugar and SCD Legal)

1 1/4 Cups Superfine Almond Flour

2 Tablespoons Coconut Oil (softened but not melted. (If it is a warm day it will be soft of a few seconds in the microwave)

1/2 Teaspoon Pure Vanilla Extract and 1/2 Teaspoon Pure Almond Extract (No additives, SCD Legal)

1/4 Teaspoon Himalayan Pink Salt

1/4 Teaspoon Baking Soda

Puree the banana.  With a hand mixer in a medium bowl, mix the remaining ingredients.

Add the Cinnamon Batter to the top of the almond batter and swirl with a knife until you get a nice marbled effect.  Scoop onto two parchment lined baking sheets with a cookie scoop.  Bake for 12 to 14 minutes. If you have any left after the first day, store them in the refrigerator.

Web Site Chractor color corrected