Tag Archives: Gluten Free

Rum Print Cookies

Instead of visions of sugarplums dancing through my head, I have rum prints on my mind. What in the world is a rumprint? I found a recipe quite a few years ago in a holiday magazine. The cookies were very unique and  memorable. I have never found another quite like them. Unfortunately,  I lost the magazine at some point in a move I made. So, here is a replication from my memory of what they were like. These have been Paleo-ized, and I have to say, they are as good as I remember. The cookie base uses finely ground walnuts, and the frosting uses cocoa butter for creaminess and stability.
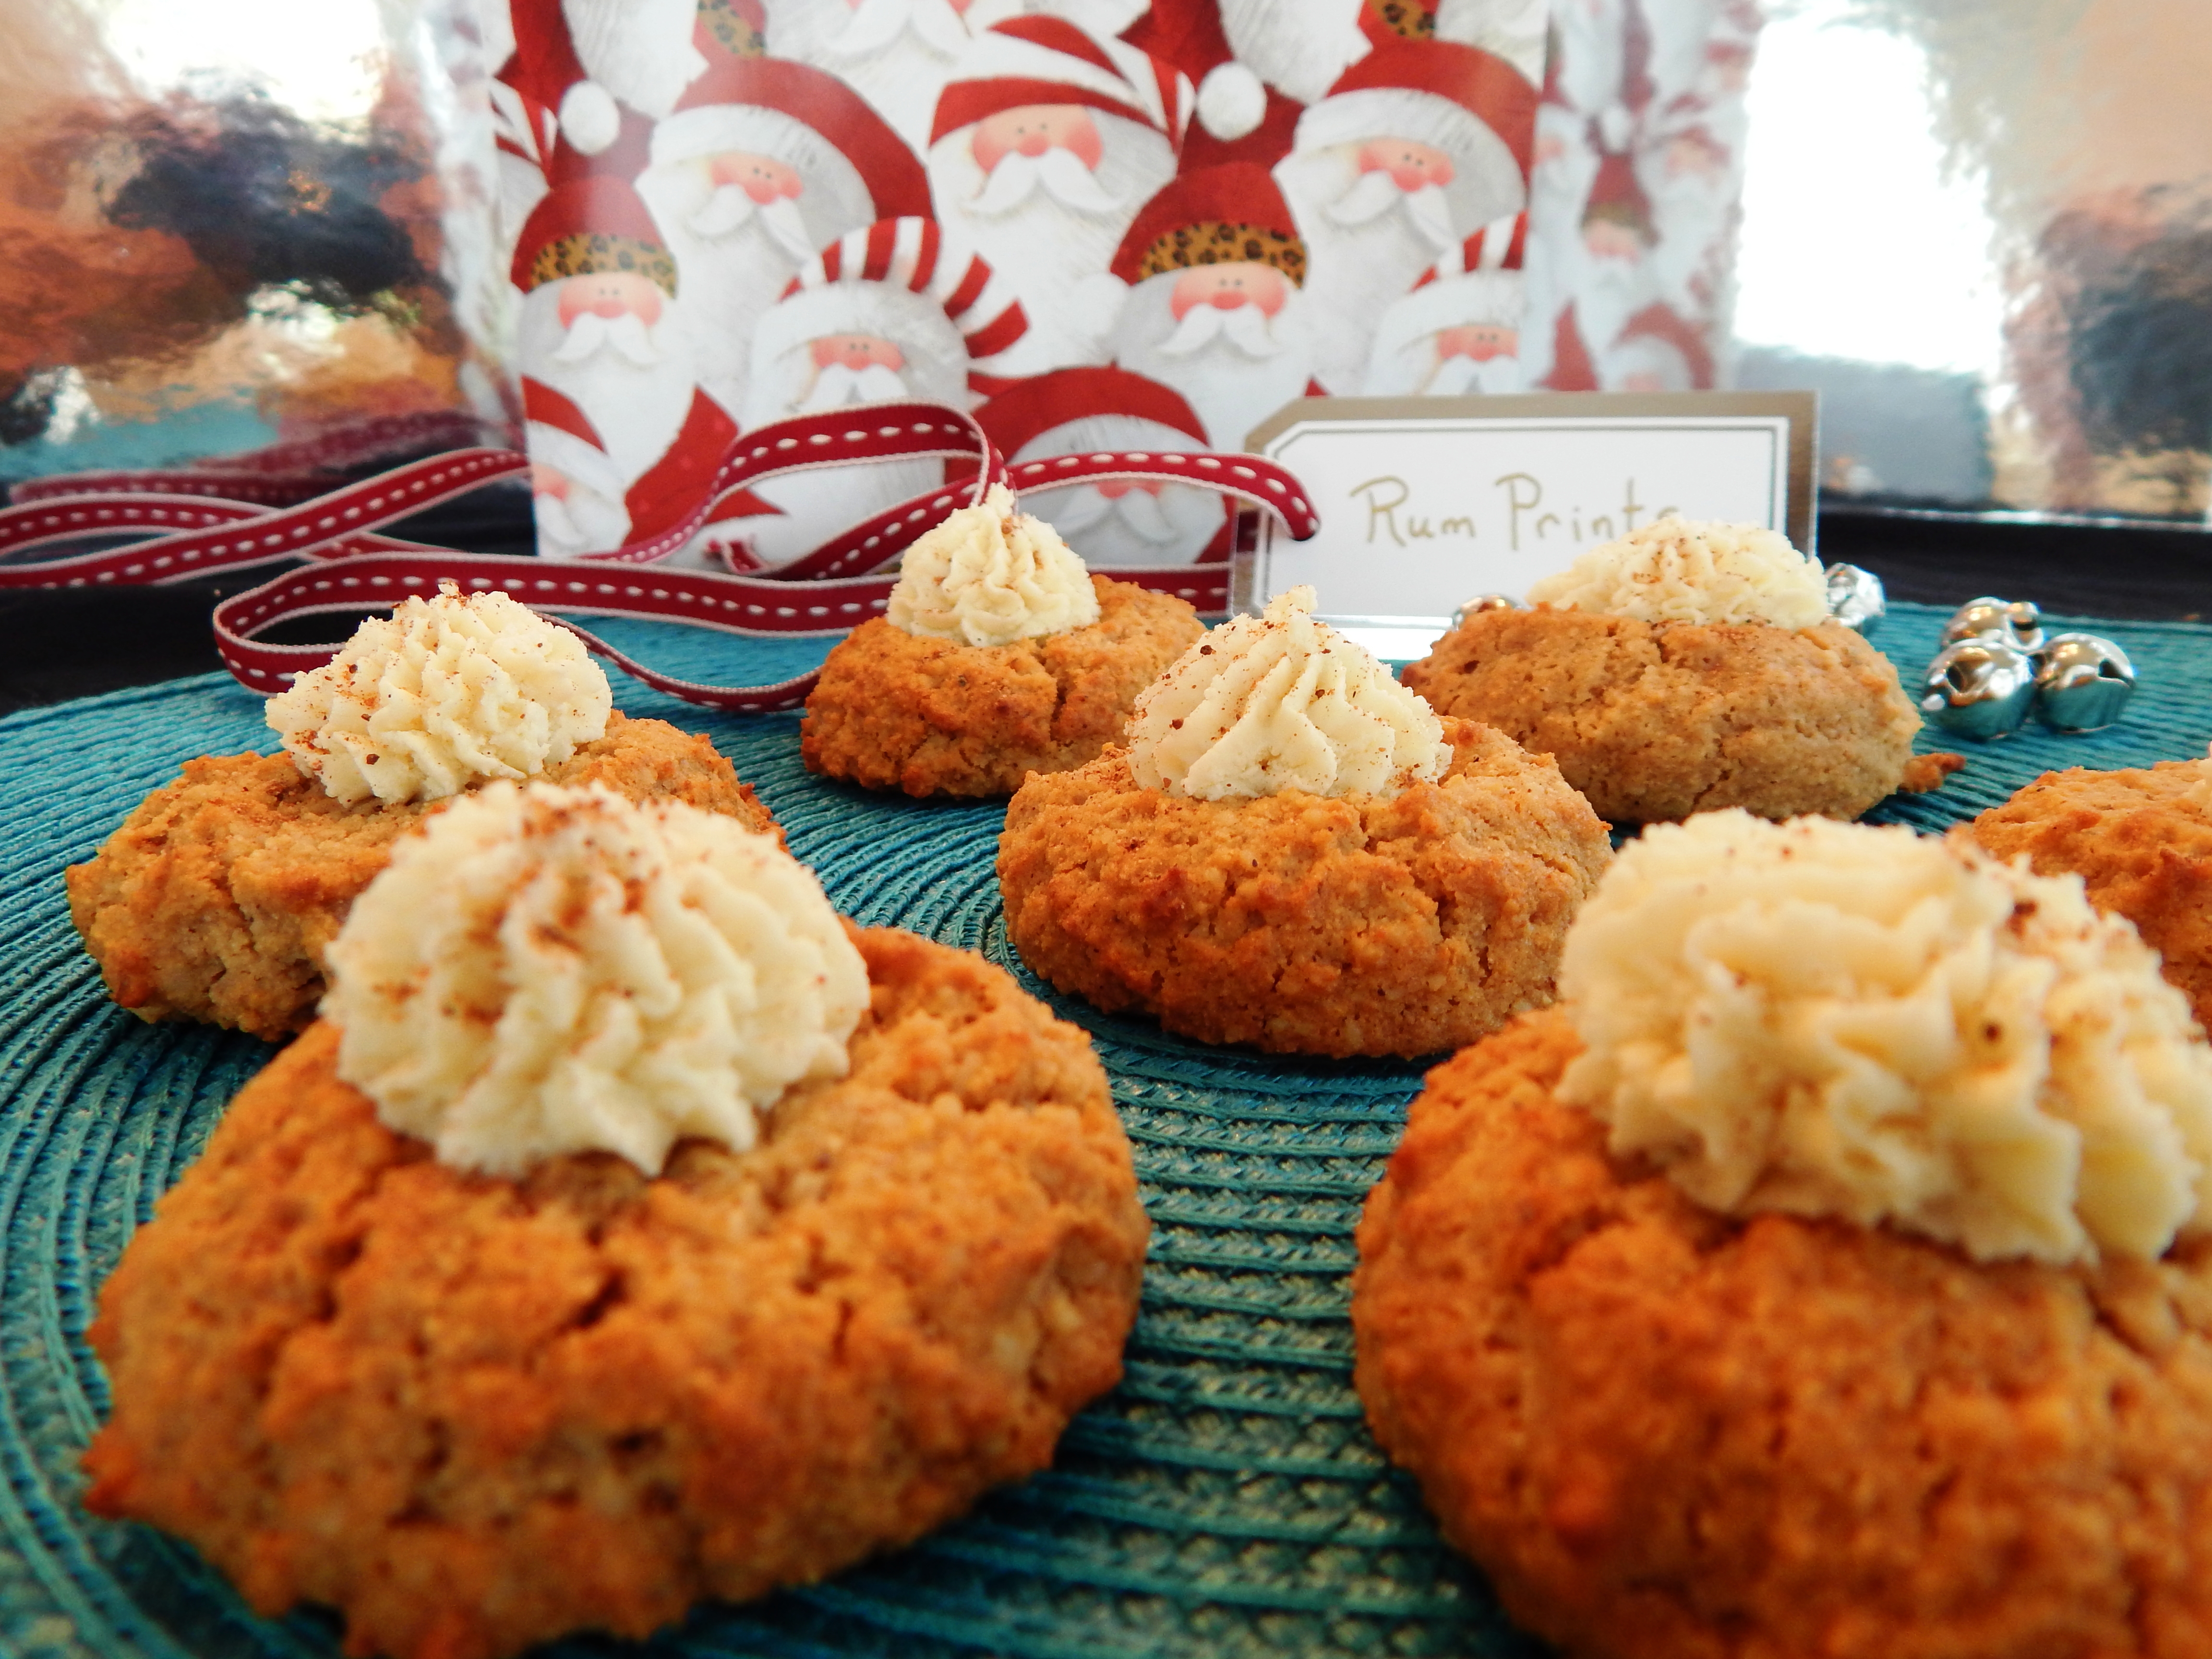
Rum Print Cookies

Rum Print Cookies

Ingredients for Cookie:

1 Cup of Walnuts (finely ground) I used a mini Ninja to do this (see Kitchen Equipment I Love)

1/4 Cup Coconut Flour

1/4 Cup Organic Palm Shortening

1/4 Cup Clear Clover Honey

1 Egg

1/4 Teaspoon Pink Himalayan or Sea Salt

1/4 Teaspoon Baking Soda

1 Teaspoon Ground Nutmeg

1 Teaspoon Vanilla Extract (SCD Legal)

Directions: Preheat oven 350º degrees. With an electric hand held mixer, cream together the shortening and honey. Add the egg and continue to beat for one minute. Add the vanilla extract and incorporate. In a small bowl whisk together the finely ground walnuts, coconut flour, salt, nutmeg and baking soda. Add to the wet ingredients and mix on medium speed until blended. With a tablespoon cookie scoop, scoop the dough onto a parchment lined cookie sheet. Bake 11 minutes.

When the cookies come out of the oven, using your thumb, make an indentation in the top of each cookie for the thumprint. Cool completely.

Frosting Ingredients:

1 Cup Raw Cocoa Butter, Chopped (See In My Pantry for Resources)

1/4 Cup Clover Honey

2 Tablespoons Organic Palm Shortening

4 Teaspoons White Rum

1/8 Teaspoon Himalayan Pink or Sea Salt

Nutmeg for Sprinkling

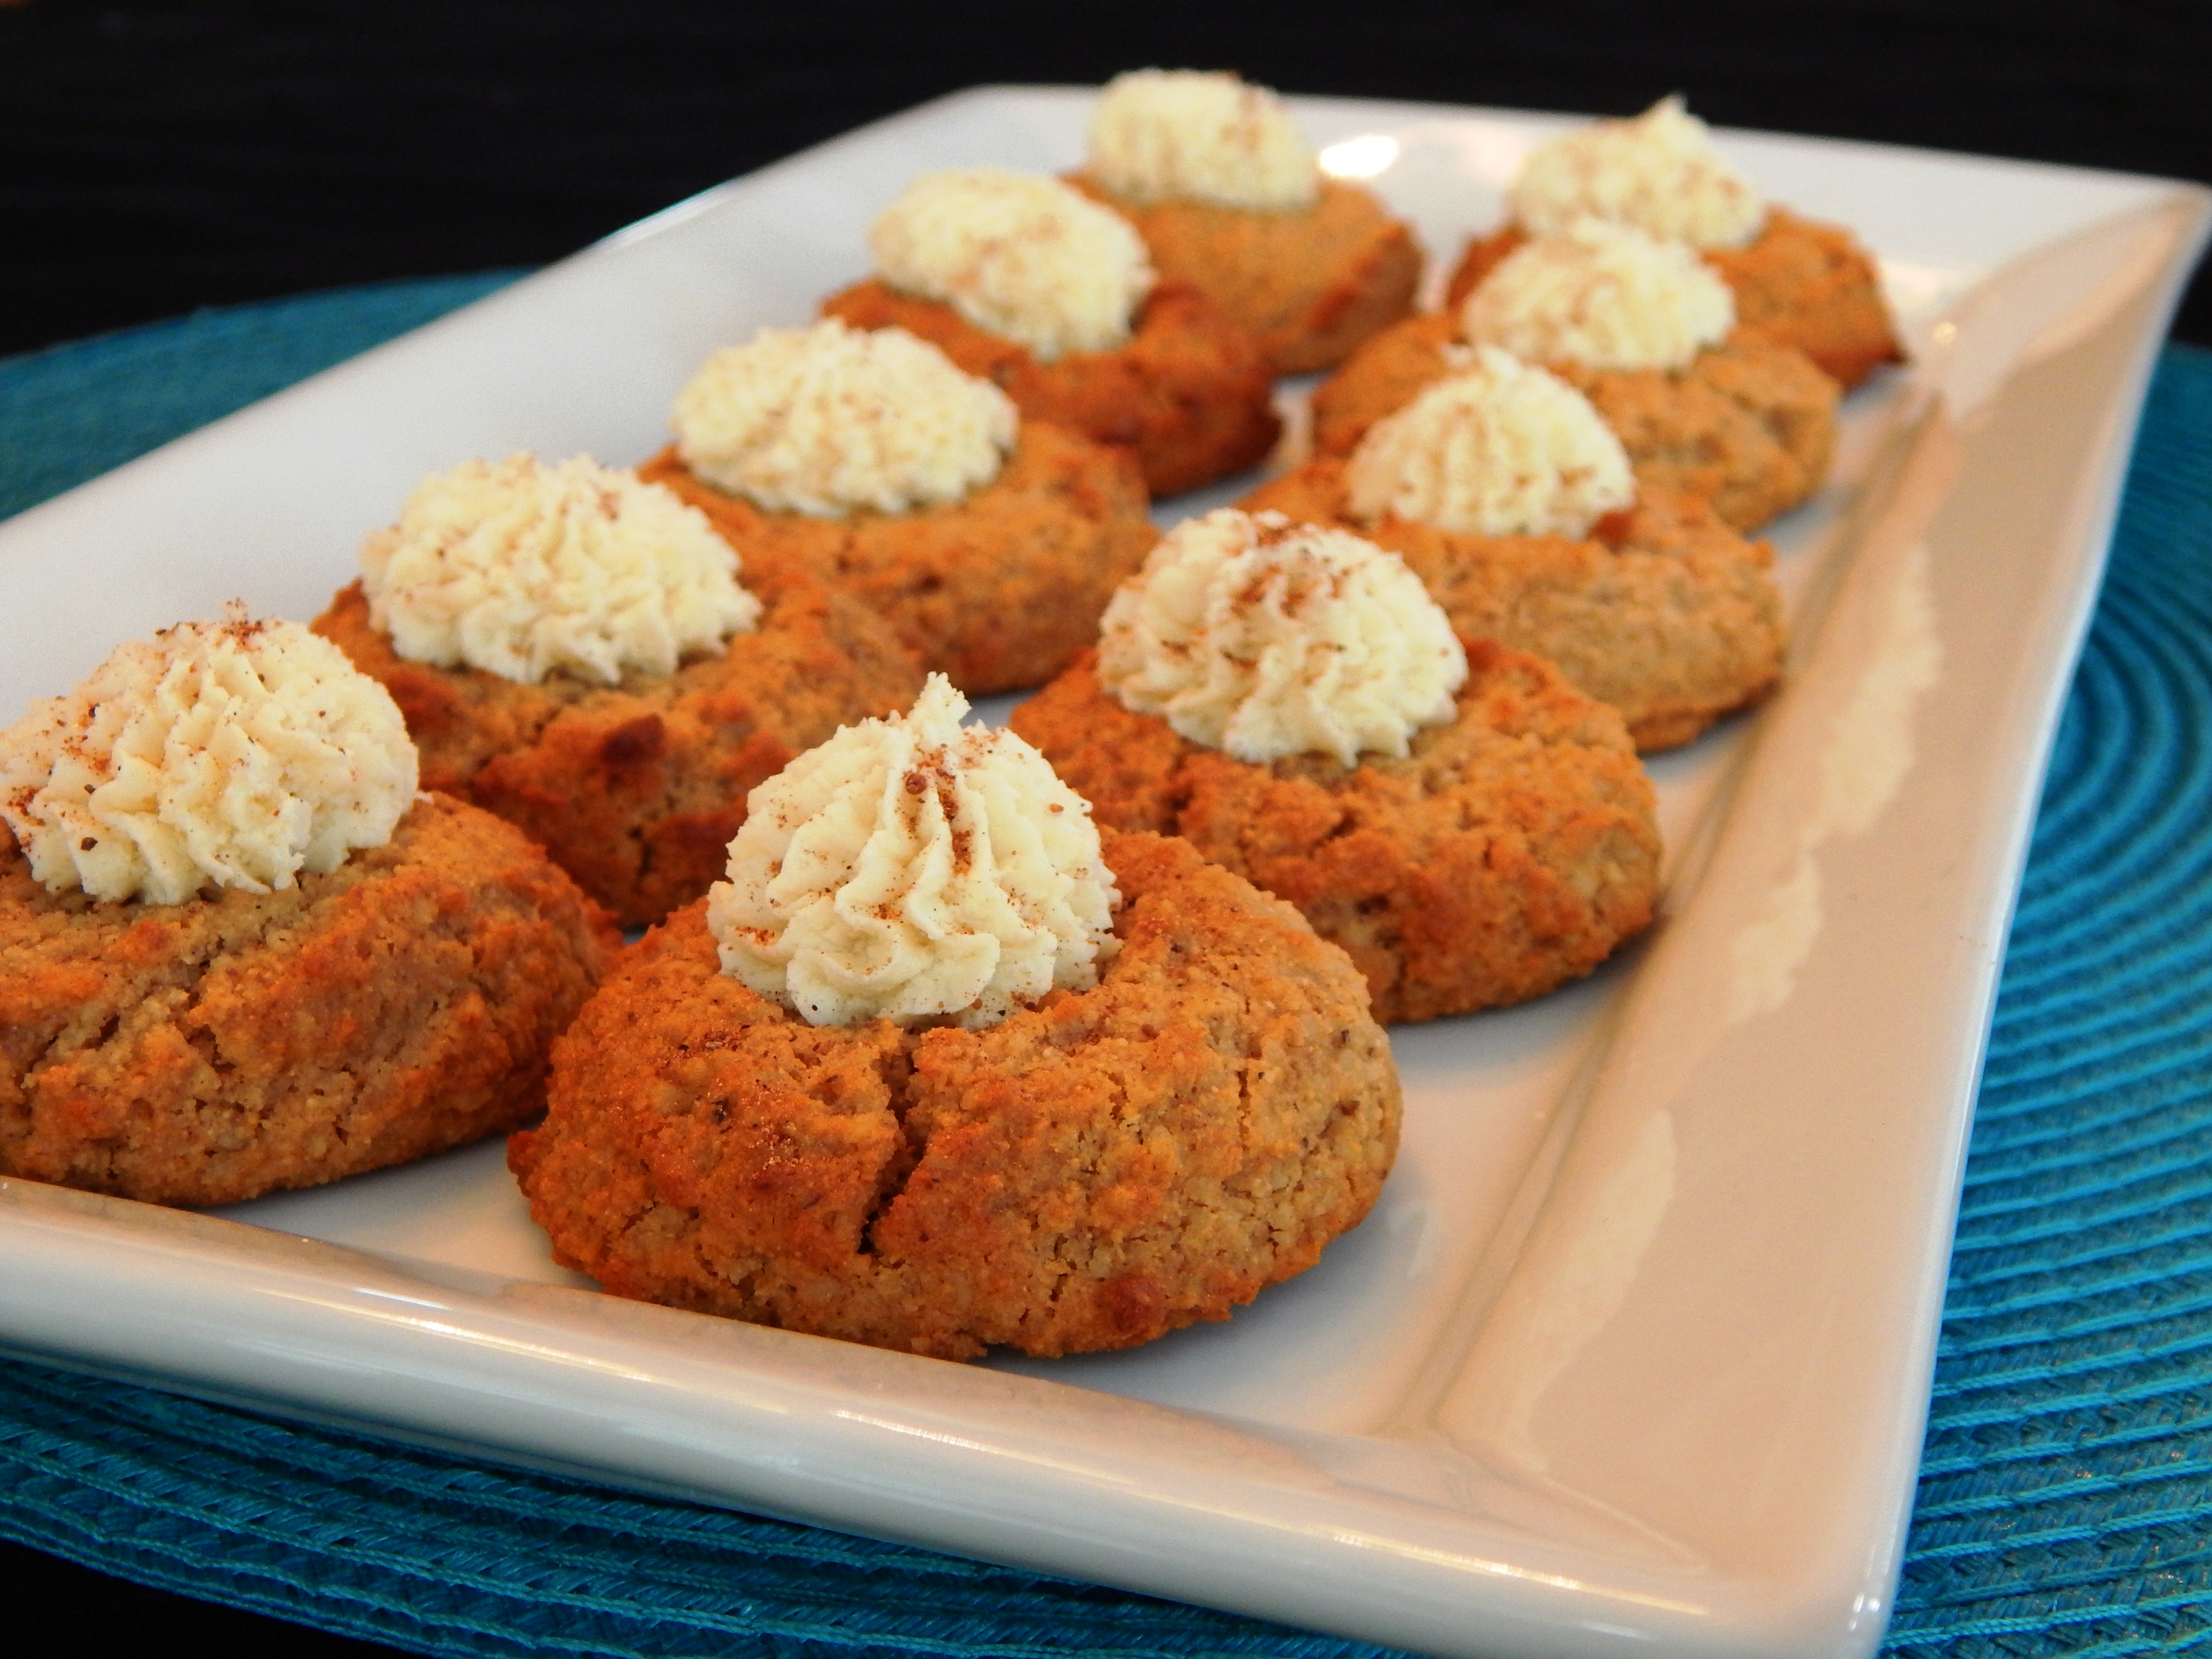
Directions: In a double broiler, melt the cocoa butter. Remove from heat and add into a bowl. With an electric hand held mixer, beat the honey, salt and shortening into the cocoa butter. Add the rum and continue beating until the frosting is solidifying. The cocoa butter will start out clear when hot and become a white consistency as it cools. When it is a good texture for piping, place the frosting in a piping bag with a large star tip and pipe into the center of the cooled cookies. It sets up quickly, so pipe right away. Alternatively, you can scoop the frosting into the middle of the cookies by hand if you don’t feel like piping. Sprinkle each cookie with a dash of nutmeg.

Makes 15 Cookies

Rum Prints

Rum Prints

Quick Zesty Chicken and Carrots

Here come the holidays! I don’t know about you, but there are plenty of days when I am rushing around at dinner time to get something on the table that is nourishing, delicious and fast! This is a very moist and flavorful chicken dish that will have you out of the kitchen in no time. Serve it with a salad on the side.

Quick and Zesty Chicken and Carrots

Ingredients:

8 Boneless, Skinless Chicken Thighs

12 Carrots, peeled and sliced into thin rounds

1/4 Cup Fresh Squeezed Lime Juice

Zest of one Lime

1/4 Cup Garlic Olive Oil, divided

1 Teaspoon Himalayan Pink or Sea Salt

1 Teaspoon Black Pepper

1/2 Teaspoon Ground Chipotle Pepper

1/8 Teaspoon Ground Cayenne Pepper

Preheat Oven 350º degrees. Cut the chicken thighs into quarters. Mix together Salt, Pepper, Chipotle & Cayenne. Heat 2 Tablespoons of Garlic Olive Oil in a large nonstick oven proof skillet over medium high heat. Add the carrots and sautee for 5 minutes until starting to brown. Remove the carrots from the pan and set aside. Add the other two tablespoons of Garlic Olive Oil to the pan maintaining the heat. Sprinkle the chicken with the seasoning and add to the pan. Cook the chicken four minutes without touching it, then flip it over and cook another four minutes. Zest the lime over the chicken, add the carrots back in to the chicken and pour over the lime juice. Toss to coat with the juice and zest and place the pan in the oven for ten minutes until chicken is cooked through. Serve!

4 Servings

Zesty Chicken and Carrots

(See In My Pantry For Ingredient Links)

Eat Your Nutrients!

Eat Your Nutrients!

Classic Anise Biscotti with Pignolis

Anise Biscotti with Pignolis (Pine Nuts) is a classic! Hazelnut Biscotti is another classic cult favorite of biscotti lovers. There are a multitude of variations of biscotti today. But sometimes I really want a pure, unadulterated, classic biscotti. In this recipe the Pignolis give the biscotti great texture and a buttery flavor, and the anise seed is, well, just classic! They are a beautiful cookie!

Classic Pine Nut Biscotti

Classic Anise Biscotti with Pignolis

Classic Anise Biscotti with Pignolis

Preheat your oven 350º degrees. Lay out a parchment lined cookie sheet.

Ingredients:

2 1/2 Cups Superfine Blanched Almond Flour

2 Eggs

1/2 Cup Clear Honey

2 Tablespoons Coconut Flour

1/2 Cup Pignolis (Pine Nuts)

1 Teaspoon Ground Anise

2 Teaspoons Vanilla Extract (SCD Legal)

1/2 Teaspoon Baking Soda

1/4 Teaspoon Himalayan Pink Salt or Sea Salt

In a medium bowl, beat your eggs. Stir in the clear honey and vanilla extract. In a separate bowl with a wire whisk, blend your dry ingredients (Almond Flour, Coconut Flour, Ground Anise, Baking Soda and Salt). Add the wet ingredients to the dry and stir to combine with a rubber spatula. Fold in 1/4 Cup of Pignolis. Turn out on the parchment lined cookie sheet and form into a 12×6″ rectangle. Press the remaining 1/4 cup of Pignolis into the top of the dough. Bake in the 350º oven for 20 minutes. Remove from the oven and cool completely. With a serrated knife, slice the cooled biscotti starting on the short end into 1/2 inch wide diagonal slices. Lay back on the parchment lined cookie sheet, one cut side down and bake for 7 minutes, turn the biscotti over to the other cut side and bake another 7 minutes until golden brown.

Classic Pine Nut Biscotti

Classic Anise BIscotti with Pignolis

You can enjoy these delicious biscotti any time of year when you are in the mood for a classic flavor!

Classic Pine Nut Biscotti

Classic Anise Biscotti with Pignolis

Enjoy your day and keep being awesome!!!!

Eat Your Nutrients!

Eat Your Nutrients!

Bread Stuffing Paleo SCD

Stuffing has always been my favorite part of the Thanksgiving meal since I was a child. I used to be an Organic Artisan Bread Baker and sold my breads to the local co-op. I have had a serious love affair with really good homemade breads. Some of my fondest memories are of my mother’s homemade bread and how it made the kitchen smell. When my Mom went back to work when her children got older, my Pop took over the bread making. He used his own honey from the bees in the back yard to make his bread. Since going strictly Paleo almost three years ago, and then Paleo within an SCD Low FodMap template after discovering I had SIBO, I missed bread. I missed it more at first, and now I only miss it during special occasions when it is more the memories and emotional longing, because I am truly happy and feel amazing with my lifestyle and eating. However, I am making this spectacular stuffing for Thanksgiving using Pumpkin Seed Blender Bread. It is absolutely allowed because the flour is pumpkin seeds! I found the recipe on fellow blogger Danielle of Its a Love/Love Thing’s website that is here. I made a few modifications taking out the sweetness of the bread, which is a very good loaf, and made it savory for use as a stuffing bread to create a stuffing recipe. You can feel truly good about this stuffing. The pumpkin seeds add so much pure nutrition. They are rich in magnesium, zinc (which is important for prostate health), may improve insulin regulation, contain phytoestrogens, tryptophan (so if you are having turkey too, you will get a good amount of that and should sleep like a baby), and healthy fat. But really, it is simply a delicious, traditional stuffing that you will love. No need to tell anyone how good it is for them, unless you want to, because they will “gobble” it up!

Bread Stuffing with Paleo SCD Pumpkin Seed Bread

Bread Stuffing SCD Paleo

Directions:

Make bread as directed on Danielle’s website here omitting the honey, vanilla and cinnamon and adding 1 teaspoon each of thyme and sage and a 1/2 teaspoon of black pepper.

Stuffing Ingredients:

3 Cups Cubed Pumpkin Seed Bread (1/2 inch cubes)

3/4 Cup Finely Diced Fennel Bulb

3 Green Onions, sliced, green parts only

2 Cups Packed Baby Spinach

2 Eggs

1 Cup Chicken or Turkey Broth (homemade if you have it)

2 Tablespoons Olive Oil or Duck Fat

1 Teaspoon Dried Parsley

1 Teaspoon Dried Thyme

1 Teaspoon Dried Sage

1/2 Teaspoon Black Pepper

1/2 Teaspoon Himalayan Pink or Sea Salt

Directions: Grease a small casserole dish, about a quart sized.  Preheat oven 350º degrees. Place your bread cubes in a large bowl and set aside. In a dutch oven or heavy sautee pan add olive oil or duck fat over medium-high heat. Add the diced fennel and green onion, and cook for five minutes until the fennel is tender. Stir in the salt, pepper, thyme, sage and parsley. Add the spinach and stir until wilted.

In a small bowl whisk together the eggs and broth. Fold them into the bread cubes, then add the sauteed vegetable mixture and incorporate that evenly. Pour the stuffing into your casserole dish, spread evenly in the pan and bake for 30 to 40 minutes until internal temperature measures 165º degrees and/or it is set. Mmmmmm, Stuffing!

Serves 4 – 6

(If you are very low FodMap have a smaller serving)

Zucchini Tomato Quiche

Good Morning! Want a yummy, pretty quiche that is easy but looks like it isn’t?  I made this last night for dinner, and it is really good! It comes together fast, and the parsley, sage, rosemary and thyme in the crust is delish! It makes great leftovers also, or served cold for lunches. I used a 12 inch tart pan to make it, but a pie pan would work as well.

Zucchini Tomato Quiche

Zucchini Tomato Quiche

Directions: Preheat your oven 350º degrees. Grease a tart or pie pan lightly with shortening and set aside.

(See In My Pantry Page for Brands I like and are SCD Safe)

Crust Ingredients:

2 1/4 Cups Superfine Almond Flour

2 Tablespoons Organic Palm Shortening

1 Egg

3/4 Teaspoon Himalayan Pink Salt or Sea Salt

1/2 Teaspoon Dried Parsley

1/2 Teaspoon Crushed Rosemary

1/4 Teaspoon Ground Sage

1/4 Teaspoon Ground Thyme

1/4 Teaspoon Black Pepper

For the Crust, in a medium bowl, whisk together the dry ingredients. Melt the palm shortening  and whisk into the almond flour and then the egg. Stir with a fork until crumbly and then press into the bottom of your tart or pie pan. Bake in the oven for 8 minutes, then remove and set aside.

Ingredients for Filling:

4 Cups of Zucchini sliced into thin rounds with a mandolin slicer (about 2 medium zucchini)

9 Cherry Tomatoes

4 Eggs (divided)

1/2 Teaspoon Pink Himalayan or Sea Salt

1/2 Teaspoon Black Pepper

2 Tablespoons Garlic Olive Oil (for the top)

Nutmeg

Directions for filling:

Slice your cherry tomatoes in half. Whisk two eggs in a small bowl, and add 1/4 teaspoon of salt and pepper. Pour the egg mixture on the tart crust spreading evenly, then make concentric overlapping circles with half of the zucchini slices, making a spiral. (See photo) Whisk together the last two eggs with 1/4 teaspoon of salt and pepper. Pour the remaining 2 egg mixture over the zucchini and make sure it is evenly spread. Layer the rest of the zucchini in a spiral again. Brush the top layer of zucchini with 2 tablespoons of garlic olive oil, and top with the cherry tomatoes. Sprinkle with a little, salt, pepper and nutmeg. Bake in the oven for 40 minutes or until eggs are set. If you use a pie pan, it will take about ten minutes longer. Remove from the oven, cool slightly, then serve.


Zucchini Tomato Quiche

Zucchini Tomato Quiche


Eat Your Nutrients!

Eat Your Nutrients!

Homemade Raspberry Vinegar

Raspberry Vinegar is one of my favorite ways to make a salad dressing. It is colorful and is one of my favorite fruits. Store bought raspberry vinegar is not allowed on the SCD diet because of added sugar, but this one is! It is made with real raspberries and red wine vinegar and is simple and fresh tasting with just two ingredients! Raspberries are loaded with Vitamin C and are an excellent source of Flavanoids and other vitamins. So here we go! The color is gorgeous!

Homemade Raspberry Wine Vinegar

Homemade Raspberry Wine Vinegar

Ingredients:

12 ounces of fresh raspberries

1/2 Cup Red Wine Vinegar

Directions:

Place the fresh raspberries half at a time in a fine meshed sieve like this one. Hold the sieve over a bowl and press the raspberries with a spatula releasing the juice into the bowl and keeping the seeds and flesh in the sieve. Discard the seeds and pulp. Whisk in a half cup of Red Wine Vinegar into the raspberry juice (there should be half a cup of juice). Shake and store in the refrigerator to use as needed. That’s it! Now, if you love Raspberry Vinaigrette as much as I do, check out my recipe for Real Raspberry Vinaigrette here.

Eat Your Nutrients!

Eat Your Nutrients!

Real Raspberry Vinaigrette

I have been really missing raspberry vinaigrette for my salads since starting the SCD, Low FodMap Diet.  Here is a recipe for Real Raspberry Vinaigrette that had me wondering why I waited so long to try it. The seeds are removed from the raspberries using a fine meshed sieve to make the raspberry vinegar, recipe here, making the raspberries much easier on the digestion. Raspberries are loaded with Vitamin C and Flavanoids as well as other vitamins. This is a fresh, delicious salad dressing with an extraordinary color. It has good fat and lots of flavor! You will really enjoy this delicious dressing on a variety of salads!

Real Raspberry Vinaigrette

Real Raspberry Vinaigrette

Ingredients:

1/2 Cup Olive Oil

1/2 Cup Homemade Raspberry Wine Vinegar (recipe here)

1/4 Cup Clear Honey

2 teaspoons Djon Mustard (garlic free such as Annie’s)

1/4 teaspoon dried oregano

1/4 teaspoon black pepper

1/4 teaspoon Himalayan Pink Salt

Directions:

In a shaker (I use these and love them!) add all the dressing ingredients and shake well! Store in refrigerator. Makes 1 cup of dressing.

Real Raspberry Vinaigrette

Real Raspberry Vinaigrette


Eat Your Nutrients!

Eat Your Nutrients!

Pumpkin Vanilla Bean Pie (Paleo, SCD, Low FodMap)

You can be proud to bring this Pumpkin Vanilla Bean Pie to any gathering!  My husband, Doug, loves this recipe! It is extra special because of the vanilla bean and light rum in the filling, and the crust is just the right thickness. I played with the recipe quite a lot until I perfected it, and it is a winner!

Festive SCD Paleo Pumpkin Vanilla Bean Tart

Holiday Pumpkin Vanilla Bean Pie (Paleo, SCD, GAPS)

Ingredients:

Crust:

2 1/4 Cups Superfine Almond Flour

3 Tablespoons Organic Shortening

1 Pastured Egg

3/4 Teaspoon Himalayan Pink Salt

Pumpkin Filling:

1 Can SCD Legal Pumpkin

1/2 Cup Clear Honey

1 Vanilla Bean

3 Pastured Eggs

1/2 Cup Full Fat Coconut Milk (No Additives)

2 Tablespoons Light Rum (I used Bacardi)

1 Teaspoon Cinnamon

1 Teaspoon Ginger

1/4 Teaspoon Cloves

1/4 Teaspoon Allspice

1/8 Teaspoon Nutmeg

1/4 Teaspoon Himalayan Pink Salt

Directions:

Preheat your oven 350º degrees.

CRUST:

Grease the insides of a pie pan or 11 inch springform tart pan.  In a medium bowl, add the almond flour and shortening. Work the shortening into the almond flour with a fork and finish off by using your fingers until it is crumbly and well dispersed. Add a lightly whisked egg and the salt and stir with a fork until it forms a ball. Reserve 1/4 cup of the pie crust to decorate the top, and press the rest of the crust evenly onto just the bottom of the pan. Roll the 1/4 cup of crust between two pieces of parchment or plastic wrap to 1/4 inch thickness and cut out shapes of your choice with a small cookie cutter. Place the shapes on a parchment lined baking sheet. Bake the shapes for 5 minutes, the crust for 8 minutes in the oven, remove and cool while you prepare the filling.

FILLING:

Warm the honey in the microwave for 30 seconds in a small bowl. Split the vanilla bean lengthwise and scrape out the seeds with a small spoon. Whisk the vanilla bean seeds into the warmed honey. In a large bowl whisk together your pumpkin and coconut milk, add the honey and vanilla bean seed mixture. Whisk in the eggs and rum until fully incorporated. Finally, whisk in the spices and salt.

Place your pan on a rimmed cookie sheet to protect again spills, and pour the filling into the tart crust. Carefully place in the oven and bake for 45 minutes. Remove from the oven, top with your pie crust cutouts and chill for four hours before serving.

Festive Pumpkin Vanilla Bean Tart (Paleo, SCD)

Holiday Pumpkin Vanilla Bean Pie (Paleo, SCD, GAPS)

Serves 8

A delicious holiday dessert!

Pumpkin Tart

Eat Your Nutrients!

Eat Your Nutrients!

Spicy Zucchini Sticks

Sides are some people’s favorite part of the meal. I like to have a lot of veggie sides for dinner so I can load up on my vegetables and get a variety of nutrients. As an added bonus, there are lots of leftover vegetables for breakfast and lunch, so I am cooking vegetables once a day, but eating them at every meal.

These Spicy Zucchini Sticks are a perfect side for burger or taco night. They are fast and have just the right amount of heat. I am serving them tonight with Messy Jessie’s.

Spicy Zucchini Sticks

Spicy Zucchini Sticks

SPICY ZUCCHINI STICKS

Ingredients:

4 Medium Zucchini

3/4 Cup Superfine Almond Flour

2 Tablespoons Garlic Olive Oil

1 Teaspoon Black Pepper

1/2 Teaspoon Himalayan Pink Salt

1 Teaspoon Smoked Paprika

1/2 Teaspoon Chipotle Powder (No Garlic Added)

1/2 Teaspoon Turmeric

Directions:

Preheat oven 350º degrees. Wash the zucchini and slice into quarters lengthwise. Lay in a single layer on a parchment lined baking sheet, and brush with garlic olive oil. Set aside. In a small bowl mix together the superfine almond flour, black pepper, Himalayan pink salt, smoked paprika, chipotle powder and turmeric. Coat the zucchini sticks with the almond flour mixture by sprinkling over the zucchini and tossing a bit with your hands. Making sure they are in a single layer, bake in your preheated over 35 to 40 minutes until golden brown. They are delicious with SCD Low FodMap BBQ Sauce.

Eat Your Nutrients!

Eat Your Nutrients!

Weeknight Tacos SCD, Low FodMap, Paleo

You don’t have to give up tacos when eating SCD Low FodMap.  Here is a delicious taco that uses butter lettuce “shells”. It is an easy weeknight meal!

SCD Low FodMap Tacos

Weeknight Tacos SCD, Low FodMap, Paleo

Weeknight Tacos, SCD Low FodMap Paleo

Ingredients:

1 Pound of Ground Grassfed Beef

1 Pound of Ground Pork

1 Large Green Bell Pepper

1/2 Cup Green Onion, sliced (green parts only)

2 Tablespoons Garlic Infused Olive Oil

1 Cup Tomato Puree, SCD Legal

1/3 of a Fresh Serrano Chili Pepper, Minced

1 Teaspoon Himalayan Pink Salt

1/2 Teaspoon Black Pepper

1 Tablespoon Ground Cumin

2 Teaspoons Smoked Paprika

1 Teaspoon Ground Ancho Chili Pepper

1 Teaspoon Ground Oregano

1 Teaspoon Ground Chipotle Powder

1/8 Teaspoon Cayanne Pepper

1 Head of washed Butter Lettuce, Cleaned and Separated

Directions:

Finely chop the Green Pepper, slice your green onion tops thinly and mince your Serrano Chili Pepper. Mix the rest of your spices together in a small bowl and set aside. Add 2 Tablespoons of Garlic Olive Oil to a large sautee pan. Turn your burner to medium high, when olive oil is warmed, add your pork and grass fed beef to the pan and sprinkle with the Himalayan Pink Salt and Pepper. Brown for about ten minutes, breaking up the meat, then add both your peppers and the green onion. Continue to cook for another 5 minutes or until tender. Add the seasoning you mixed and set aside to your meat mixture and cook for one minute stirring to coat evenly. Then, add your tomato puree, bring up to a boil.  When it is boiling, reduce heat to low and simmer until reduced and thick.  This takes about 5 minutes. Serve with butter lettuce shells.

Eat Your Nutrients!

Eat Your Nutrients!


1 21 22 23 26