Tag Archives: Dairy Free

DIY Macadamia Nut Milk

Making your own nut milk is a great option if you want to really know what is in your milk, and/or want to avoid additives that prolong the shelf life of store bought dairy alternatives, such as guar gum.

Make Your Own Macadamia Nut Milk

Make Your Own Macadamia Nut Milk

My go to milk that is ready-made has been coconut milk. There are a couple brands that are just coconut extract and water, and that is the kind I buy. But, when I am in the mood for a different flavor, or want to mix it up, I make my own nut milks!

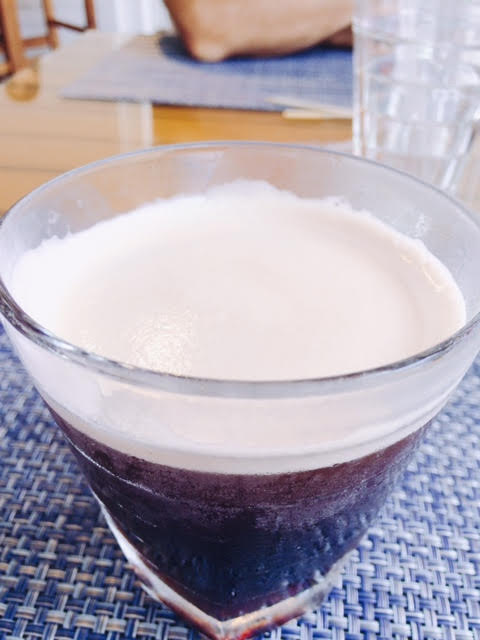
One of the things I really love about Macadamia Nut Milk is not only the flavor, but the really white milk you get from these nuts. They are higher in fat too, so you get a really creamy milk.

I also have a recipe for Toasted Hazelnut-Vanilla Nut Milk here that is yummy and so good in coffee.


Macadamia Nut Milk

Macadamia Nut Milk


Macadamia nuts are pricey, so I just make this milk occasionally. But I enjoy it oh so much when I do!


DIY Macadamia Nut Milk

DIY Macadamia Nut Milk


DIY Macadamia Nut Milk

Ingredients:

1 Cup of Raw Macadamia Nuts

4 Cups of Good Well Water or Filtered Water

a pinch of Sea Salt

1 Teaspoon of Pure Vanilla Extract

Directions: Soak Your Macadamia Nuts in 3 cups of cold water on the counter top at room temperature for two hours. If you are not making your milk right away, you can at this point place the nuts, in the water, in the refrigerator, until you are ready to make the milk for up to 24 hours.

Drain and rinse the macadamia nuts, and place them in a high speed blender. Then add the remaining ingredients. Blend on high for two to three minutes until emulsified.

Get a large bowl, preferably with a pour spout because it’s just less messy :-), and pour the milk through a mesh nut milk bag like this one and into the bowl. Drain the milk by gently squeezing the bag when most of the liquid has passed through to extract all the liquid.

Pour the milk into a sealed container, and refrigerate.

This milk is unsweetened, which is the way I like it. If you like yours sweetened, feel free to add sweetener. If I want a sweet milk, I usually add a touch of honey during the blending stage.


Macadamia Nut Milk

Macadamia Nut Milk

Have a lovely day!

Macadamia Nut Milk - Homemade

Macadamia Nut Milk – Homemade


Macadamia Nut Milk

Macadamia Nut Milk

Eat Your Nutrients!

Eat Your Nutrients!

Harvest Bread (Grain Free, Toastable)

I know Autumn is just around the corner when the cicadas start screaming day and night. School started today! Waaagh! I have mixed emotions about it. We had such a nice Summer, and it seems like Summer just began.

However, I am looking forward to my favorite season and cooler days where I can throw on layers. The cool weather makes me think of different smells in the kitchen like cinnamon, nutmeg and bread baking.

Harvest Bread (Grain Free, Toastable)

Living a healthy life is more than just having everything you put into your mouth be uber healthy. It is also about balance, community, listening to your body, sharing time together over food, relaxation, spirituality, exercise, and fun! These things give us a sense of well being deep in our innermost self.

It is one of the reasons I like to blog treat recipes, like this very delicious and toastable bread that is reminiscent of my days as an artisan bread baker for my local food coop. I have made this seasonal recipe in a grain free version!

It is important if you have digestive challenges, like me, or want to improve your health in other areas, that you eat plenty of cooked and fresh vegetable produce, some fruit, good quality protein and healthy fats. I typically recommend 2/3rds of the plate consist of vegetables. Then there is a place for a piece of this grain free bread. Just don’t eat the whole loaf! Now, my daughters can eat plenty of this bread, and they absolutely love it toasted! I am happy with one thick slice toasted and savored with a cup of coffee or tea.

I purchase my pantry items such as the raisins, nuts, cashew butter, almond flour, coconut flour, baking soda and the apple cider vinegar at Thrive Market online (see link in upper right corner of this page) and saved $1,500.00 on my grocery bill last year. This is my second year as a member. They have thousands of quality food and home care items, and for every membership that is purchased, they give a free one to a needy family. They have a mission to make quality food affordable. Let’s bake bread! 🙂

Harvest Bread Ingredients

Harvest Bread Ingredients


Harvest Bread (Grain Free, Tostable)

Preheat the oven to 300º degrees. Grease a medium to large sized loaf pan with organic shortening, then line it with parchment paper.  I used a pan my children bought for me as a gift when I started eating gluten free. It is a Pullman loaf pan and works well for gluten free breads, but it just makes a nice shape. Any medium to large loaf pan will work! (I left of the lid for this pan.)

Ingredients:

2 1/4 Cups Superfine Almond Flour

3 Tablespoons of Coconut Flour

1 Teaspoon of Sea Salt or Himalayan Pink Salt (my favorite!)

1/2 Teaspoon of Cinnamon

1/4 Teaspoon of Nutmeg

1/4 Teaspoon of Baking Soda

Whisk together the dry ingredients in a separate bowl. In a second bowl with a hand held mixer, blend together:

4 Eggs

1/4 Cup of Cashew Butter

3 Tablespoons of Honey

1 Tablespoon of Apple Cider Vinegar

After blending the eggs, cashew butter, honey and cider vinegar until well combined, add the dry ingredients to the wet and mix until thoroughly incorporated. Then fold in:

1/2 Cup of Raisins

1/2 Cup of Chopped Walnuts

Pour into the prepared loaf pan. Smooth the top with a rubber spatula, and then place in the preheated oven and bake for 45 to 55 minutes until golden brown on the top and hollow sounding when you tap on the bread.

Remove from the oven. Cool for ten minutes in the pan. Then use the overhanging sides of the parchment paper to lift the loaf from the pan. Cool on a wire rack for one hour before slicing.

Baked Harvest Loaf Ready to Remove and Cool

Delicious Harvest Bread (Grain Free)

Eat Your Nutrients!

Eat Your Nutrients!

Grain Free Buffalo Chicken Nuggets

Who likes finger food? Admit it, and find your inner child!

The day to day grind can make us forget life is supposed to be fun along the way. Making chicken nuggets in the oven will not only delight any children in your life, but hopefully you as well!

School is starting soon, and I for one am going to be busier than ever with two daughters in school.  This is a fast and easy weeknight recipe with just a few ingredients, but oh so good!

baked-buffalo-chicken-nuggets

Grain Free Buffalo Chicken Nuggets

Preheat the oven to 400º degrees. Lay out two parchment lined baking sheets with rims.

Ingredients

2 Pounds of Ground Chicken

3/4 Cup of Superfine Almond Flour

1/3 Cup of Buffalo Hot Sauce, plus more for brushing (I used Tessemae’s or you can use 2 Tablespoon’s of Frank’s with 3 Tablespoons of Olive Oil)

1 1/2 Teaspoons of Sea Salt

1/2 Teaspoon of Black Pepper

In a large bowl mix together all the ingredients gently but thoroughly. Over mixing ground meat can make it tough.

With a tablespoon scoop, make mounds of the chicken mixture evenly spaced apart on the two baking sheets. Gently press with your fingers to press them to about 3/4 inch thickness.

Place in the oven for five minutes. Remove the sheets from the oven, and brush them with additional hot sauce. Then return them to the oven for five more minutes. Remove them once again, and flip the nuggets, then brush them again with hot sauce. Bake another seven minutes, or until the center of a nugget tests to 165º degrees.

That’s it! They are ready! If you want to eat them with a fork, I will never tell! 🙂

Grain Free Buffalo Chicken Nuggets

Grain Free Buffalo Chicken Nuggets

Eat Your Nutrients!

Eat Your Nutrients!

Healthier Mocha Frappuccino

It’s hot out there! We are back from Northern Michigan for the Summer, and plopped right into the dog days of August on the East Coast!

Cold blended coffee beverages really cool me down, and who doesn’t love an ice cold creamy drink when it is so hot? I sure do!

Check out my new Rooster! He was a find during my time up north this Summer! I think he is perky! Well he perks me up when I see him. 🙂

Healthier and Delicious Mocha Frappuccino

This recipe for a Healthier Mocha Frappuccino is much easier on the pocket book, you can make it at home, not to mention keeping yourself on track with healthier food choices. It has no refined sugars in it and is sweetened with 3 medjool dates that are softened. They really compliment the raw cacao and coffee to make a creamy, cold, delicious coffee frappuccino. There are just about 300 calories in it (this can vary a bit with the size of your dates) and it is a large, which is about half the calories of what would be in a commercial drink, with better-for-you ingredients. Head on over to Natural Society to read Over Seven Reasons to Eat Dates and why they are good for you. I used organic, fair trade instant coffee, so you don’t have to have a cold pot hanging around the house to make this. It is much more convenient and fresh! This is a reputable brand that I used, and you can get it in caffeinated or decaffeinated.

Healthier Mocha Frappuccino

Ingredients:

3 Softened Medjool Dates (I soak them for 5 minutes in warm water and then remove the pits)

1/4 Cup Full Fat Coconut Milk

1 Tablespoon of Raw Cacao

2 Teaspoons of Organic Instant Coffee Crystals

1 Teaspoon of Pure Vanilla Extract

1 Cup of Crushed Ice

1 Cup of Cold Pure Water

Directions: In a blender (I have made this with my Ninja and also my Vitamix. Any blender will do. Blend the Water and Dates until pureed. Add the remaining ingredients and blend until creamy.

Pour into a large glass and it’s ready to drink! Yummy! Sit down and relax, put your feet up, and savor the moment!

Eat Your Nutrients!

Eat Your Nutrients!


Chocolate Blueberry Ripple Ice Cream Sandwiches (Grain Free)

No ice cream freezer? No problem! This old fashioned Ripple Ice Cream is made in a loaf pan! Then it is pressed between two Grain Free Chocolate Graham Crackers (recipe here!) for a spectacular ice cream sandwich!

The dairy free vanilla ice cream uses a handful of ingredients, and while it has it’s initial freeze, you can whip up the Blueberry Spoon Fruit (recipe here!) for the Ripple!

Chocolate Blueberry Ripple Ice Cream Sandwiches

Chocolate Blueberry Ripple Ice Cream Sandwiches

Chocolate Blueberry Ripple Ice Cream Sandwiches

Ingredients:

1 Batch of Blueberry Ripple Ice Cream

1 Batch of Grain Free Chocolate Grahams (get the recipe here!) 🙂

Directions:

To make the Blueberry Ripple Ice Cream you need:

1 Cup of Full Fat Coconut Milk

3 Tablespoons of Good Honey, warmed

2 Tablespoons of Coconut Oil, melted

1/2 Teaspoon of Vanilla Extract

Whisk the ice cream ingredients together, and pour into a loaf pan. Freeze for 30 minutes. Then remove from the freezer and marble in the Blueberry Spoon Fruit by placing dollops onto the top of the vanilla ice cream and running a knife in swirling motions throughout.

Marbling Blueberry Ripple Ice Cream

Marbling Blueberry Ripple Ice Cream

Place back in the freezer until frozen solid. This will take 2 to 4 hours.

Soften the ice cream, by letting it set at room temperature for approximately ten minutes, until it is scoop-able!

Assembling Chocolate Blueberry Ripple Ice Cream Sandwiches

Assembling Chocolate Blueberry Ripple Ice Cream Sandwiches


Take two grahams per ice cream sandwich, and scoop a ice cream scoop size ball of Blueberry Ripple Ice Cream onto one graham. Place the other graham atop the ice cream, and press gently to squish!

Melty, Cruchy, Gooey!

Melty, Cruchy, Gooey!

Eat right away, or they can be individually wrapped in plastic wrap and frozen to enjoy straight from the freezer. You can stock pile these by making a double batch!

Yield: 5 Ice Cream Sandwiches


Grain Free Chocolate Graham Crackers

Looking for a chocolate graham cracker that is grain free and starch free? I have tested and developed this recipe for you, and after several attempts, I do believe it is perfect! 🙂

They can be used however you like, but my favorite is sandwich style! Look here for my Chocolate Blueberry Ripple Ice Cream Sandwiches! They will wow you! The flavor is amazing! What a lovely ending to a warm Summer’s day!

Grain Free Chocolate Graham Crackers

Grain Free Chocolate Graham Crackers

Grain Free Chocolate Graham Crackers

Preheat your oven to 325º degrees.

Ingredients:

1 1/2 Cups of Superfine Almond Flour

1/4 Cup Raw Cacao Powder

4 Teaspoons of Gelatin like (Thrive Market Brand)

1/2 Teaspoon of Baking Soda

1/4 Teaspoon of Sea Salt

1/4 Cup of Coconut Oil, melted

1/4 Cup Good Honey

1 Tablespoon of Vanilla Extract

Directions: Whisk together the dry ingredients in a large bowl. In a separate bowl, whisk together the wet ingredients. Add the wet ingredients to the dry, and stir vigorously with a fork until completely blended and a ball of dough has formed.

Place the dough onto a large cookie sheet sized piece of parchment paper. Flatten slightly.

Grain Free Graham Cracker Dough Ready to Roll

Grain Free Graham Cracker Dough Ready to Roll

Place a second piece of parchment on top of the dough, and roll out evenly to almost fill the parchment, or the size of your cookie sheet. The dough should be about a half inch thick.

With a pizza cutter, make squares as shown below. Pierce the grahams with a fork’s tines.

Ready to Bake Grain Free Chocolate Graham Crackers

Ready to Bake Grain Free Chocolate Graham Crackers

Bake in the preheated oven for 15 minutes.

Remove from the oven and cool completely. Using a large kitchen knife, cut apart the graham crackers at the scored marks.

Enjoy!

Eat Your Nutrients!

Eat Your Nutrients!

Patriotic Nice Cream Sundae

A cold something something that is creamy and cooling when sliding down sends me into bliss mode on a warm day. I know it does for you too! That’s why ice cream is so, so popular. It reaches the feel good receptors in our brain!

I love making this particular sundae around Independence Day aka July 4th because there are fresh, local, juicy berries at the Farm Market!

This recipe is healthy, cold, creamy, and bursting with berries which are full of antioxidants, vitamin c, fiber and sunshine! If you have been working out like me, there is also a good dose of potassium in the bananas!

Patriotic Nice Cream Sundae

Patriotic Nice Cream Sundae

Patriotic Nice Cream Sundae

You will need a high speed blender to make the Nice Cream, and it is simple and quick!

Ingredients:

Sundae Topping:

1 1/2 Cups of Juicy Strawberries

1 Cup of Juicy Blueberries

Place the washed berries in seperate mixing bowls, and muddle with a potato masher or pastry cutter to release some of the juices and break up the berries a bit.

Nice Cream

3 Bananas, Ripe and Frozen

1 Tablespoon of Honey

2 Teaspoons of Fresh Squeezed Lemon Juice

Blend on high until creamy. You will need a plunger to push down the bananas. Blend just until incorporated!

Layer the Nice Cream and Berries as desired. Eat immediately.

You know what I will be doing at some point this holiday weekend! 😉

Cheers!

Eat Your Nutrients!

Eat Your Nutrients!


Patriotic Nice Cream Sundae

Patriotic Nice Cream Sundae


Funky Monkey Crumb Cake (Microwave Mug Cake)

This mug cake is quick and easy! It has a pretty crumb topping with the crunch of pecans and the decadence of chocolate. It is grain free, moist, cakey and full of flavor!

Funky Monkey Crumb Cake - Paleo

It is so cool to be able to whip up a cake in the microwave! I dunno why I am so fascinated with it. It must be from my Easy Bake Oven days. Gosh! I Loved an Easy Bake Oven. It was on my wish list, but I never received one as a child, but I sure loved going to my friends and using theirs.

Another reason I really like these mug muffins and cakes is you aren’t making a huge dessert cake. It is a guilt free, smaller treat!

This recipe takes just 3 minutes to cook! It pops way up, and I was holding my breath when testing it, because it looked like it was going to overflow in the microwave, but it rises way up and then settles down again, like magic!

It is a really delicious cake!

Funky Monkey Crumb Cake

Ingredients For the Cake:

1 Ripe Banana

1 Egg

¼ Cup Almond Flour

2 Tablespoons of Coconut or Almond    Milk

2 Tablespoons of Dark Chocolate or Chocolate Chips

2 Teaspoons of Honey or Maple Syrup

¼ Teaspoon Cinnamon

¼ Teaspoon of Baking Soda

¼ Teaspoon Vanilla Extract

Pinch of Sea Salt

For Crumb Topping:

2 Tablespoons of Almond Flour

2 Tablespoons of Broken Pecans

2 Tablespoons of Dark Chocolate Pieces of Chocolate Chips

Pinch of Sea Salt

Directions: Puree the banana and egg together by mashing or blending with a hand mixer or small blender like a Ninja. Add the remaining cake ingredients except the chocolate pieces and mix until incorporated. Fold in the chocolate and pour into a individual serving bowl that holds 1 ½ cups like a soup bowl or extra large mug.

Mix the Crumb Topping together and sprinkle on top of the cake batter.

Microwave for 3 minutes. It will puff way up, but should not overflow the dish. Cool Slightly.

Funky Monkey Crumb Cake

Funky Monkey Crumb Cake

Funky Monkey Crumb Cake - Grain Free

Funky Monkey Crumb Cake


Easy Chocolate Mousse for Two

By definition a Mousse is a dessert that incorporates air bubbles to give it a light and airy texture and can range from light and fluffy to creamy and thick.

I was considering calling this mousse Miracle Mousse because there is no cooking and no eggs or dairy in the recipe yet it is thick, creamy and smooth. I whip this decadent dessert up in five minutes flat, at which time it resembles a chocolate syrup. After refrigerating it for 4 hours it thickens and becomes the creamy deliciousness you see below.

Dairy Free Chocolate Mousse

Dairy Free Easy Chocolate Mousse for Two


Raw cacao is my favorite for making chocolate recipes, because it is cold pressed and keeps the live enzymes,  and you can control what sweetener you use. In this case it was raw, local wildflower honey.

Why should you make this mousse?

  1. You Crave Chocolate
  2. You Want to Impress Someone
  3. You Need A Fast Dessert Recipe Because You Are Busy
  4. It Has No Refined Sugar
  5. You Have a Romantic Date
  6. It Has Clean Ingredients
  7. It’s Darn Good!

The recipe serves two! How romantic! 🙂

Easy Chocolate Mousse for Two

Ingredients:

1 1/2 Cups of Full Fat Coconut Milk (see In My Pantry for my favorite brand)

1/4 Cup Raw Cacao Powder

1/4 Cup Raw Local Honey

1/4 Teaspoon of Pure Vanilla Extract

a pinch of sea salt

Directions: Dump all the ingredients in a high speed blender. I used the big cup on my Ninja blender. I have also made it in my Vitamix. It just needs to be high speed to incorporate those air bubbles that makes chocolate mousse…..mousse. 🙂

Pour into two individual ramekins, serving bowls or cups.

Refrigerate for 4 hours and up to two days.

This is a decadent dessert for chocolate fans! Enjoy!

Chocolate Mousse for Two

Easy Chocolate Mousse for Two


Eat Your Nutrients!

Eat Your Nutrients!


Greek Salad with Grilled Skewered Salmon

I just returned from a very relaxing time in South Palm Beach Florida. I was traveling with my husband, Doug, for his President’s Club business/pleasure trip, and we stayed at The Breakers Resort where I found it very easy to eat clean, healthy food much to my delight! We also went snorkeling and saw many colorful fish including Barracuda.

Greek Salad with Skewered Grilled Salmon

Greek Salad with Grilled Skewered Salmon


Greek Salad with Grilled Skewered Salmon

Greek Salad with Grilled Skewered Salmon

One of my favorite restaurants in the resort (they had ten to choose from) was The Ocean House, which was casual dining overlooking one of the pools and the ocean. It has a wrap around porch with seating on the porch in the shade.

The Ocean House Restaurant - Doug

The Ocean House Restaurant – Doug


The Nitrogen Infused Cold Brew Coffee was so creamy and refreshing it was hard to believe that it was just coffee, and the nitrogen imparts a creaminess. See the picture below. It was soooooo good! Wish they had it locally where I live. I could become totally addicted to the stuff. It is so mild and delightful!

Nitrogen Infused Cold Brew Coffee

Nitrogen Infused Cold Brew Coffee


However, the Greek Salad was so delicious, and you had the option of adding Skewered Salmon to the salad (my favorite) or chicken, steak or shrimp. The Salmon was simply grilled with olive oil, salt and pepper and was so tender and flaky. I wanted to recreate the recipe at home.

Throughout the resort, you could also get fresh pressed raw juices that had just a touch of honey in them and were made daily by the staff. My favorite was the green detox and the second runner up was fresh watermelon juice with lime and ginger. Here is a picture of the pineapple coconut water juice I had. I tried them all. 🙂

Fresh Pressed Pineapple Coconut Juice

Fresh Pressed Pineapple Coconut Juice


We walked to beach every morning and saw the beautiful sunrise. There were other sunrise lovers on the beach and locals with their dogs. One dog in particular was hilarious. He was a hot dog dog, more properly called a dachshund, and he was digging for soft shell crabs and eating them. He had a hole dug as deep as he was with just his rear end sticking out. His owner told us he regularly did this and had a love of crab.

Sunrise at Palm Beach

Sunrise at Palm Beach


Waiting for our Guide to go Snorkeling!

Waiting for our Guide to go Snorkeling!


Here is my version of this delicious main course salad! Sadly, I cannot pass on the sun, sand and water to you along with it, but I would if possible!

Greek Salad with Grilled Skewered Salmon

Ingredients for Salad:

4 Cups of Leafy Lettuce

1/2 of a Red Bell Pepper, Diced

1/2 of an English Cucumber, Diced

1/4 Cup Finely Diced Red Onion

1/4 Cup Pitted Kalamata Olives

1/4 Cup Scallions, sliced thinly

Place all the ingredients for the salad in a medium bowl, and set out dinner plates.

Greek Vinaigrette

Ingredients:

1 Garlic Clove, minced or garlic pressed

1/2 Teaspoon of Dried Oregano

1/4 Teaspoon of Dried Parsley

1/2 Teaspoon of Sea Salt

1/4 Teaspoon of Black Pepper

1 Teaspoon of Djon Mustard

2 Tablespoons of White Wine Vinegar

1 Tablespoon of Fresh Squeezed Lemon Juice

1/2 Cup Good Olive Oil

Whisk it all together until emulsified, and set aside.

Grilled Salmon

2 Wild Caught Alaskan Salmon Filets

1/3 Cup Good Olive Oil, plus more for the grill pan

Generous amount of Sea Salt and Black Pepper

6 Bamboo Skewers.

Directions:

Preheat your oven to 350º degrees. Preheat your grill pan on the stove top on medium heat, dry, for five minutes. Slice each salmon filet into three strips. Brush generously all over with olive oil. Then season with salt and pepper. Place a generous additional amount of olive oil on your grill pan, brushing to coat it so the salmon will not stick. Thread the salmon on the skewers. Grill the salmon three minutes, basting with more of the olive oil, then turn for an additional three. Then place the grill pan in the oven and finish off the salmon for five minutes, or until the center has reached 145º degrees. This will happen quickly.

To assemble the salad. Toss the greens and other salad ingredients you prepared previously with a generous amount of Greek Vinaigrette. Divide the greens between two or three plates. Top with the hot salmon skewers!

The Breakers Palm Beach

The Breakers Palm Beach


1 10 11 12 21