Tag Archives: Baking

Chocolate Truffle Cookies Dusted with Cocoa Powder, Gluten Free and Decadent

Chocolate Truffle Cookies Dusted with Cocoa Powder, Gluten Free and Decadent

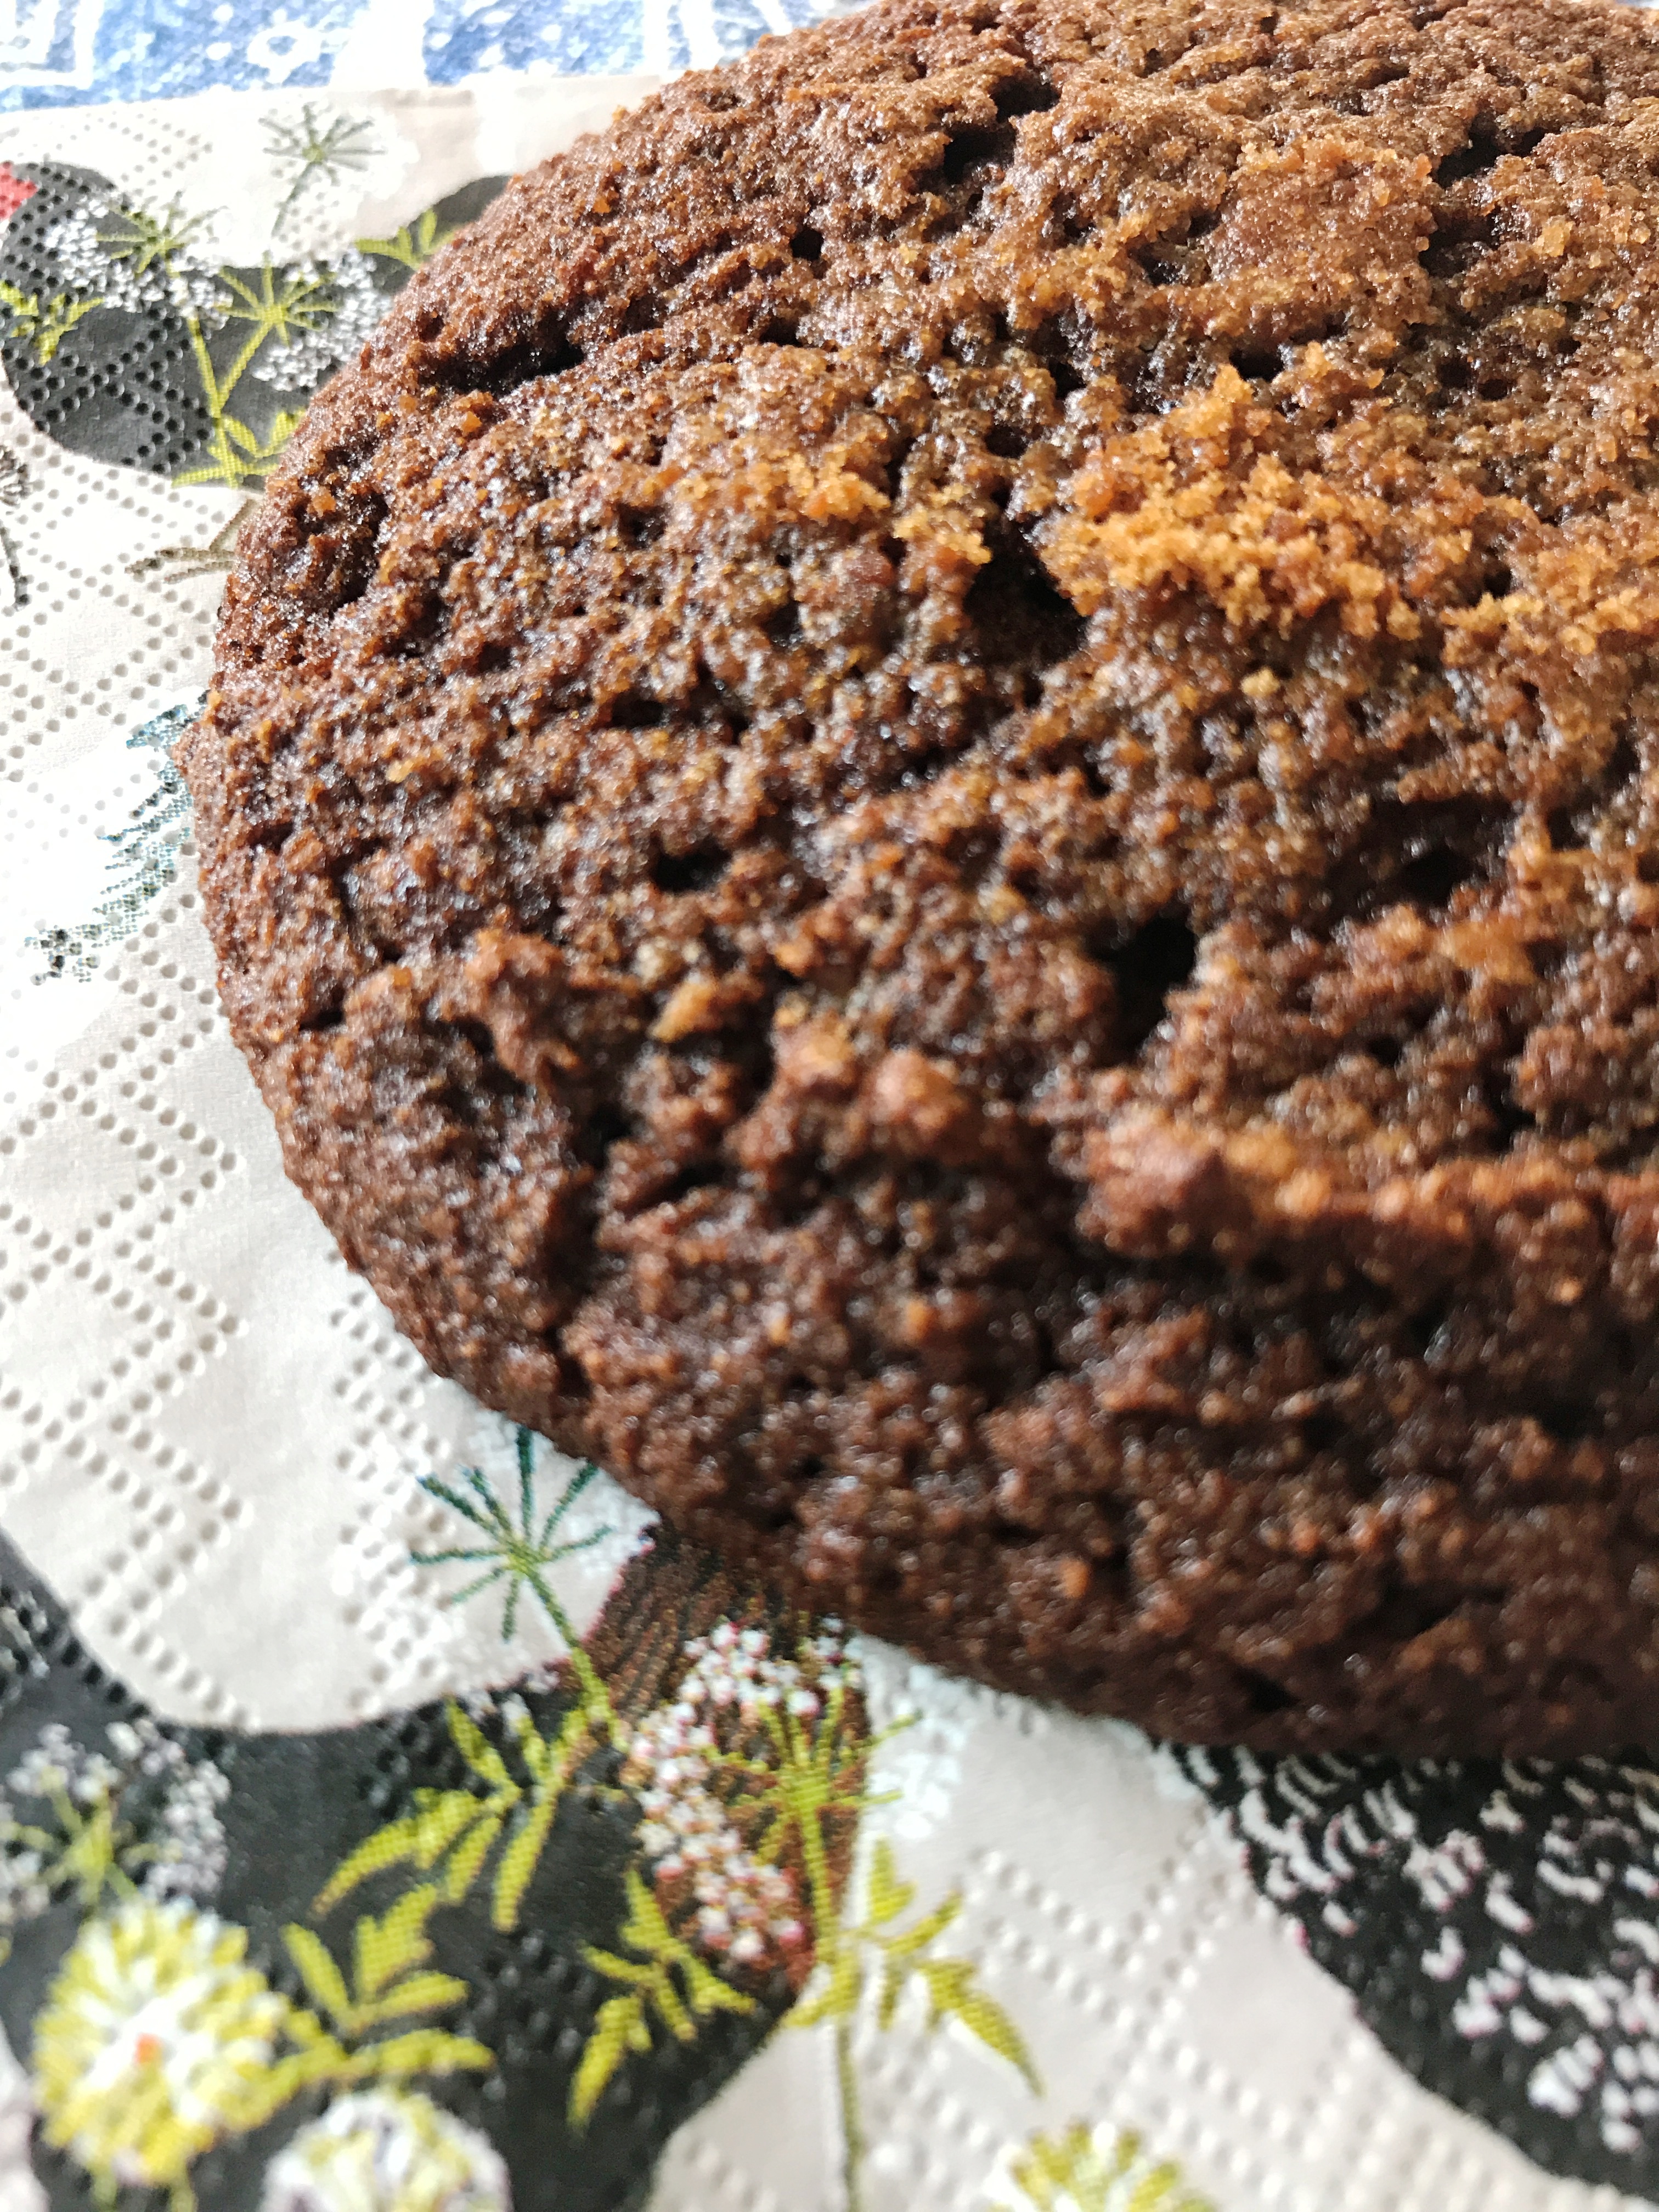
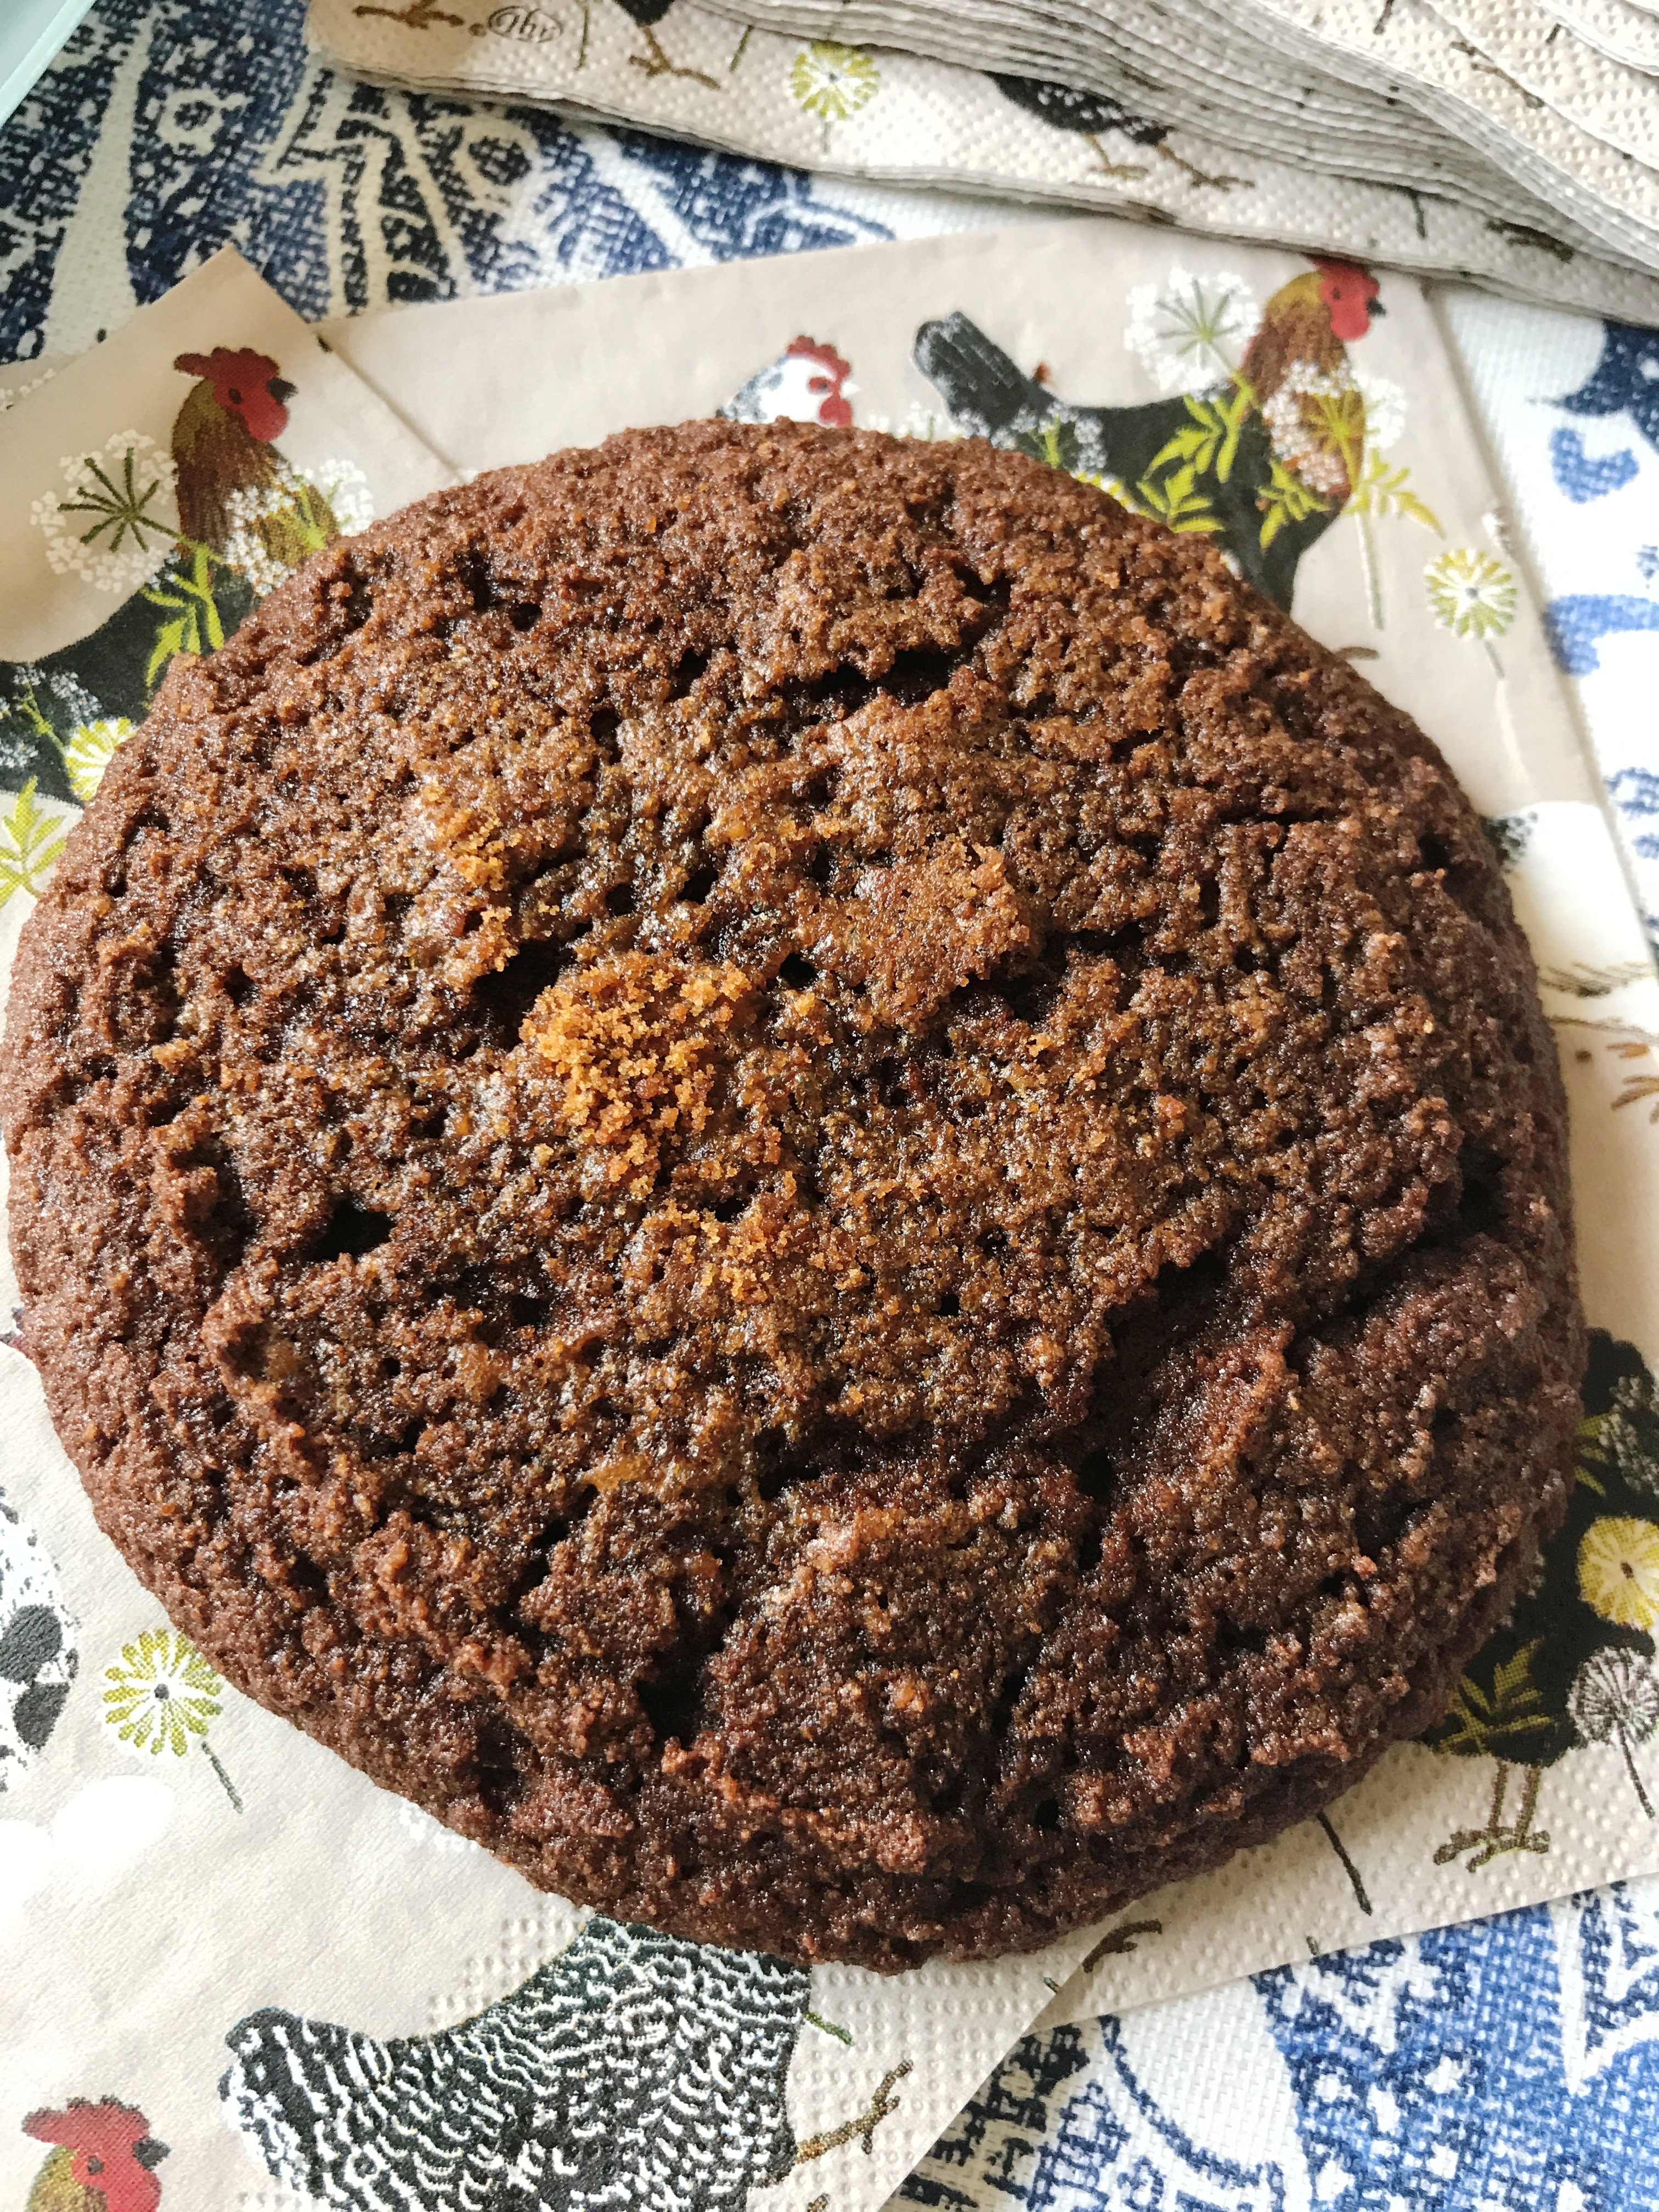
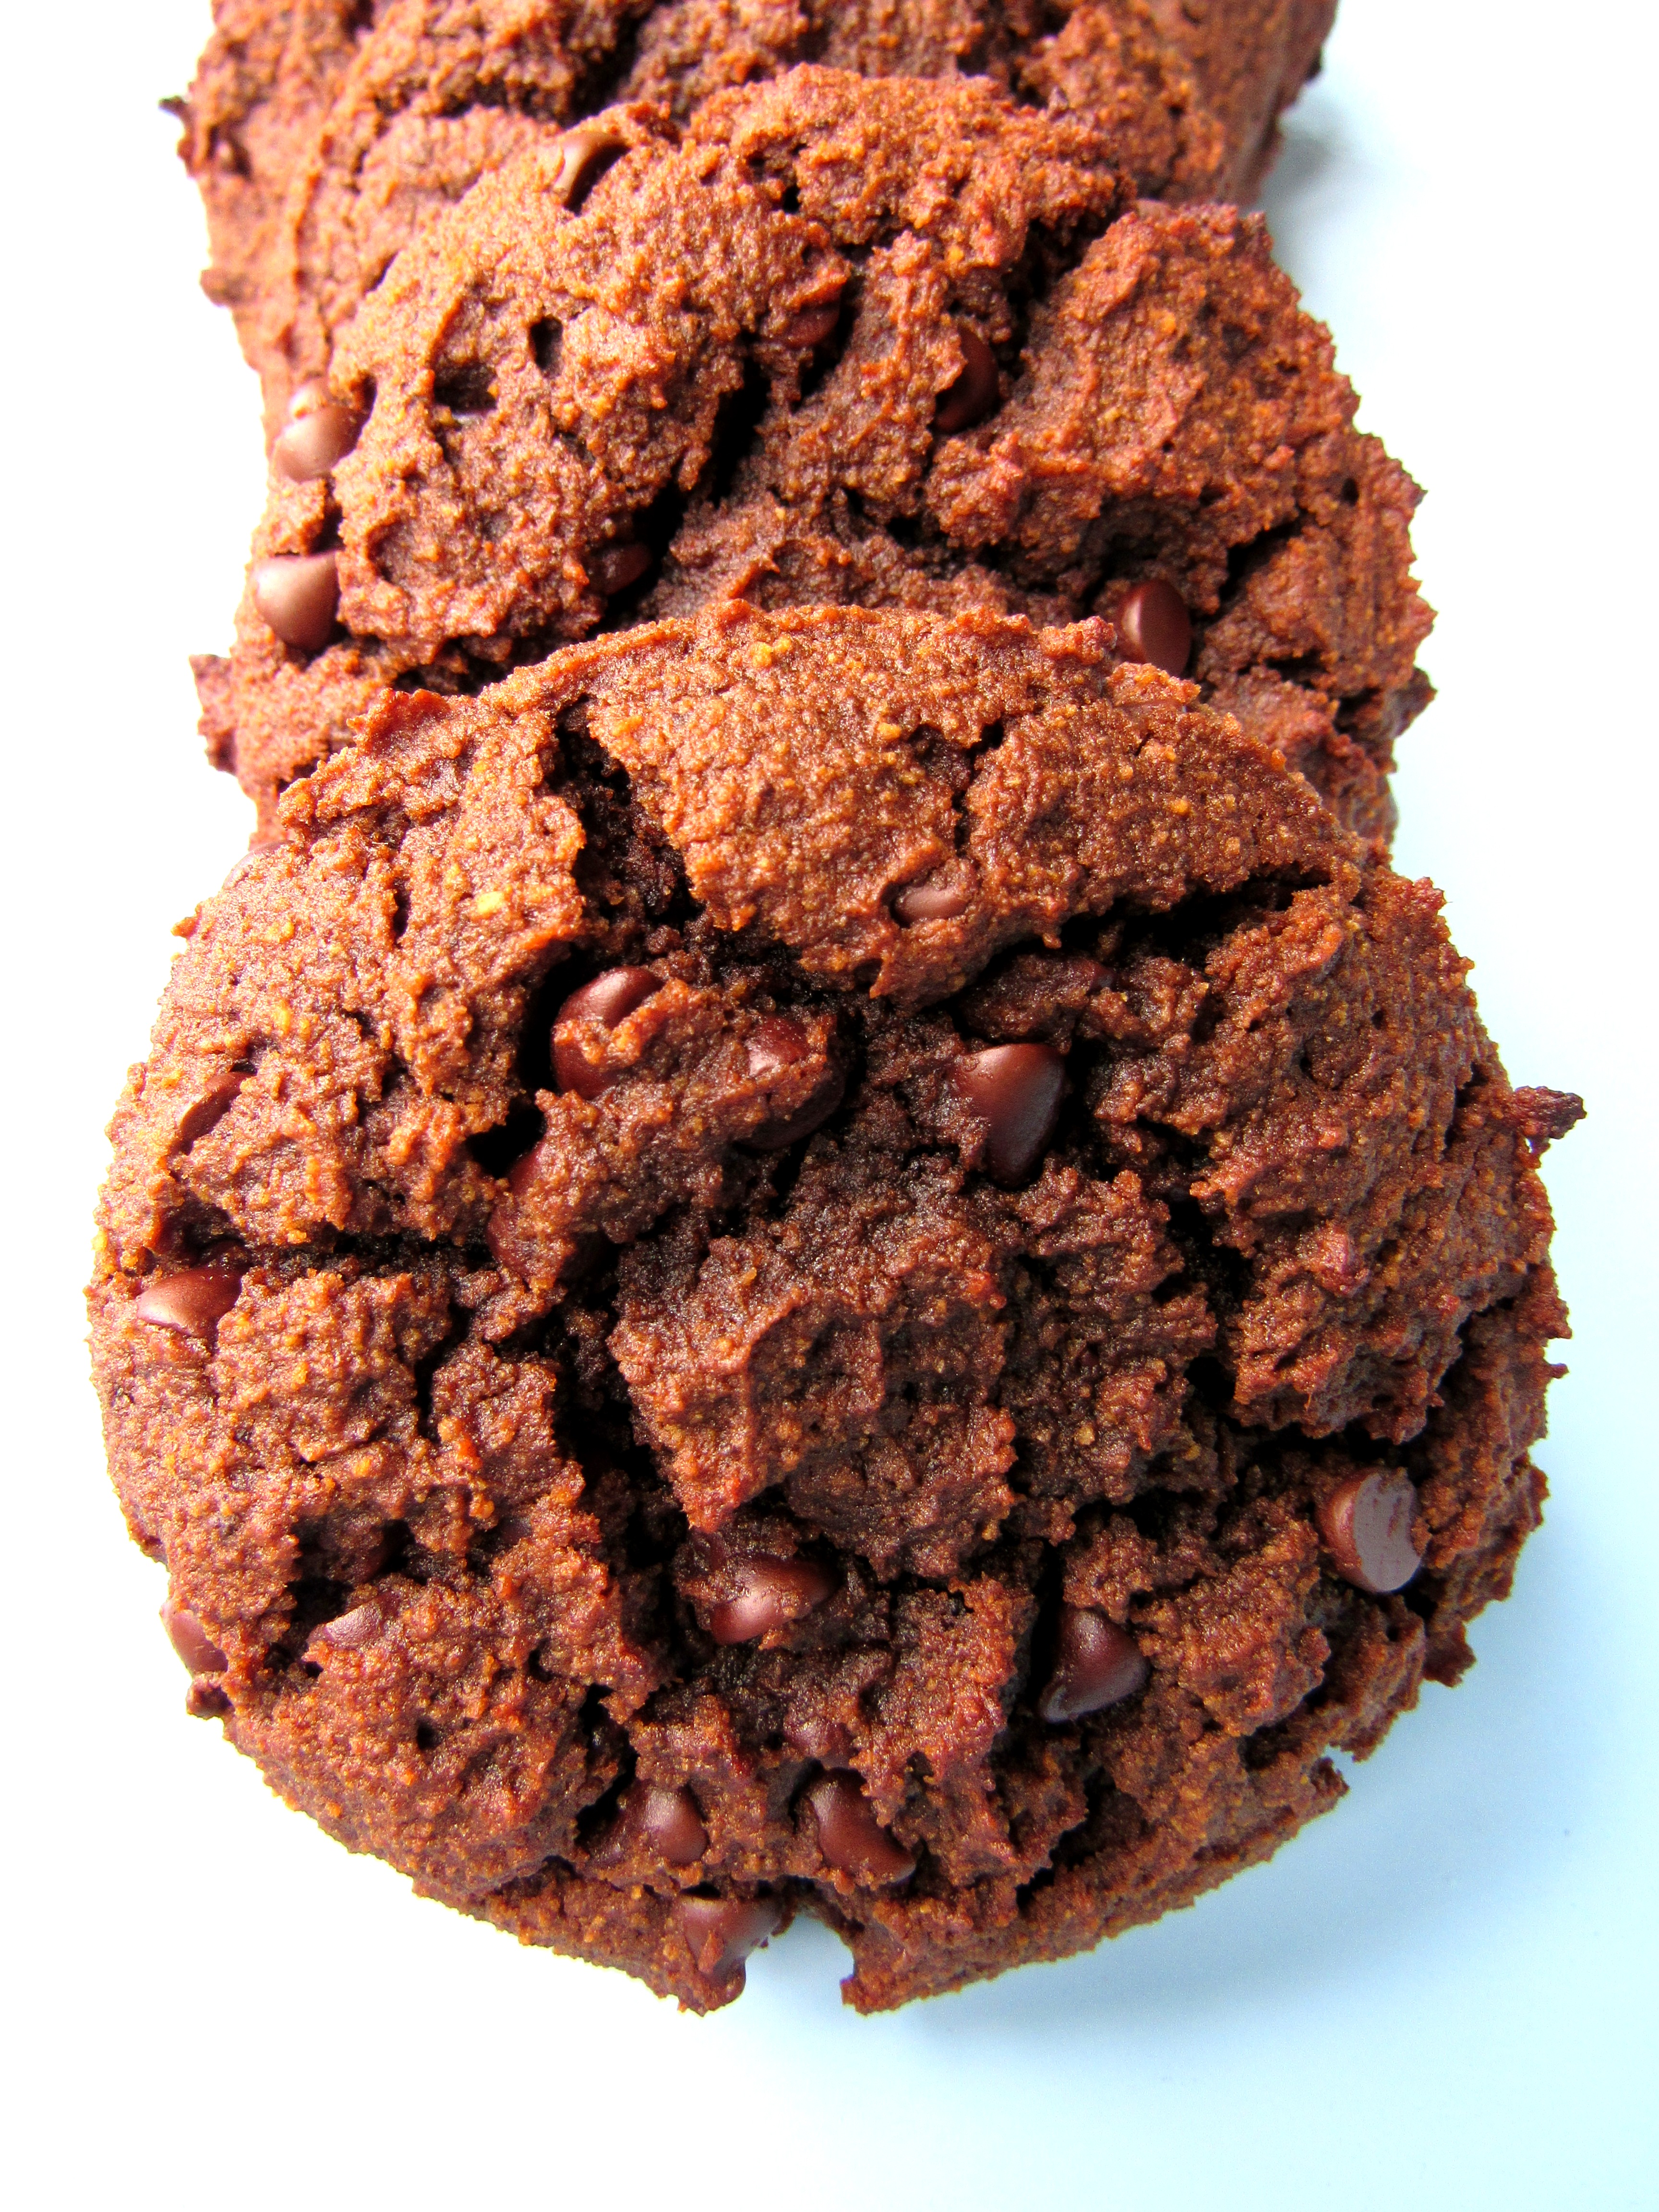
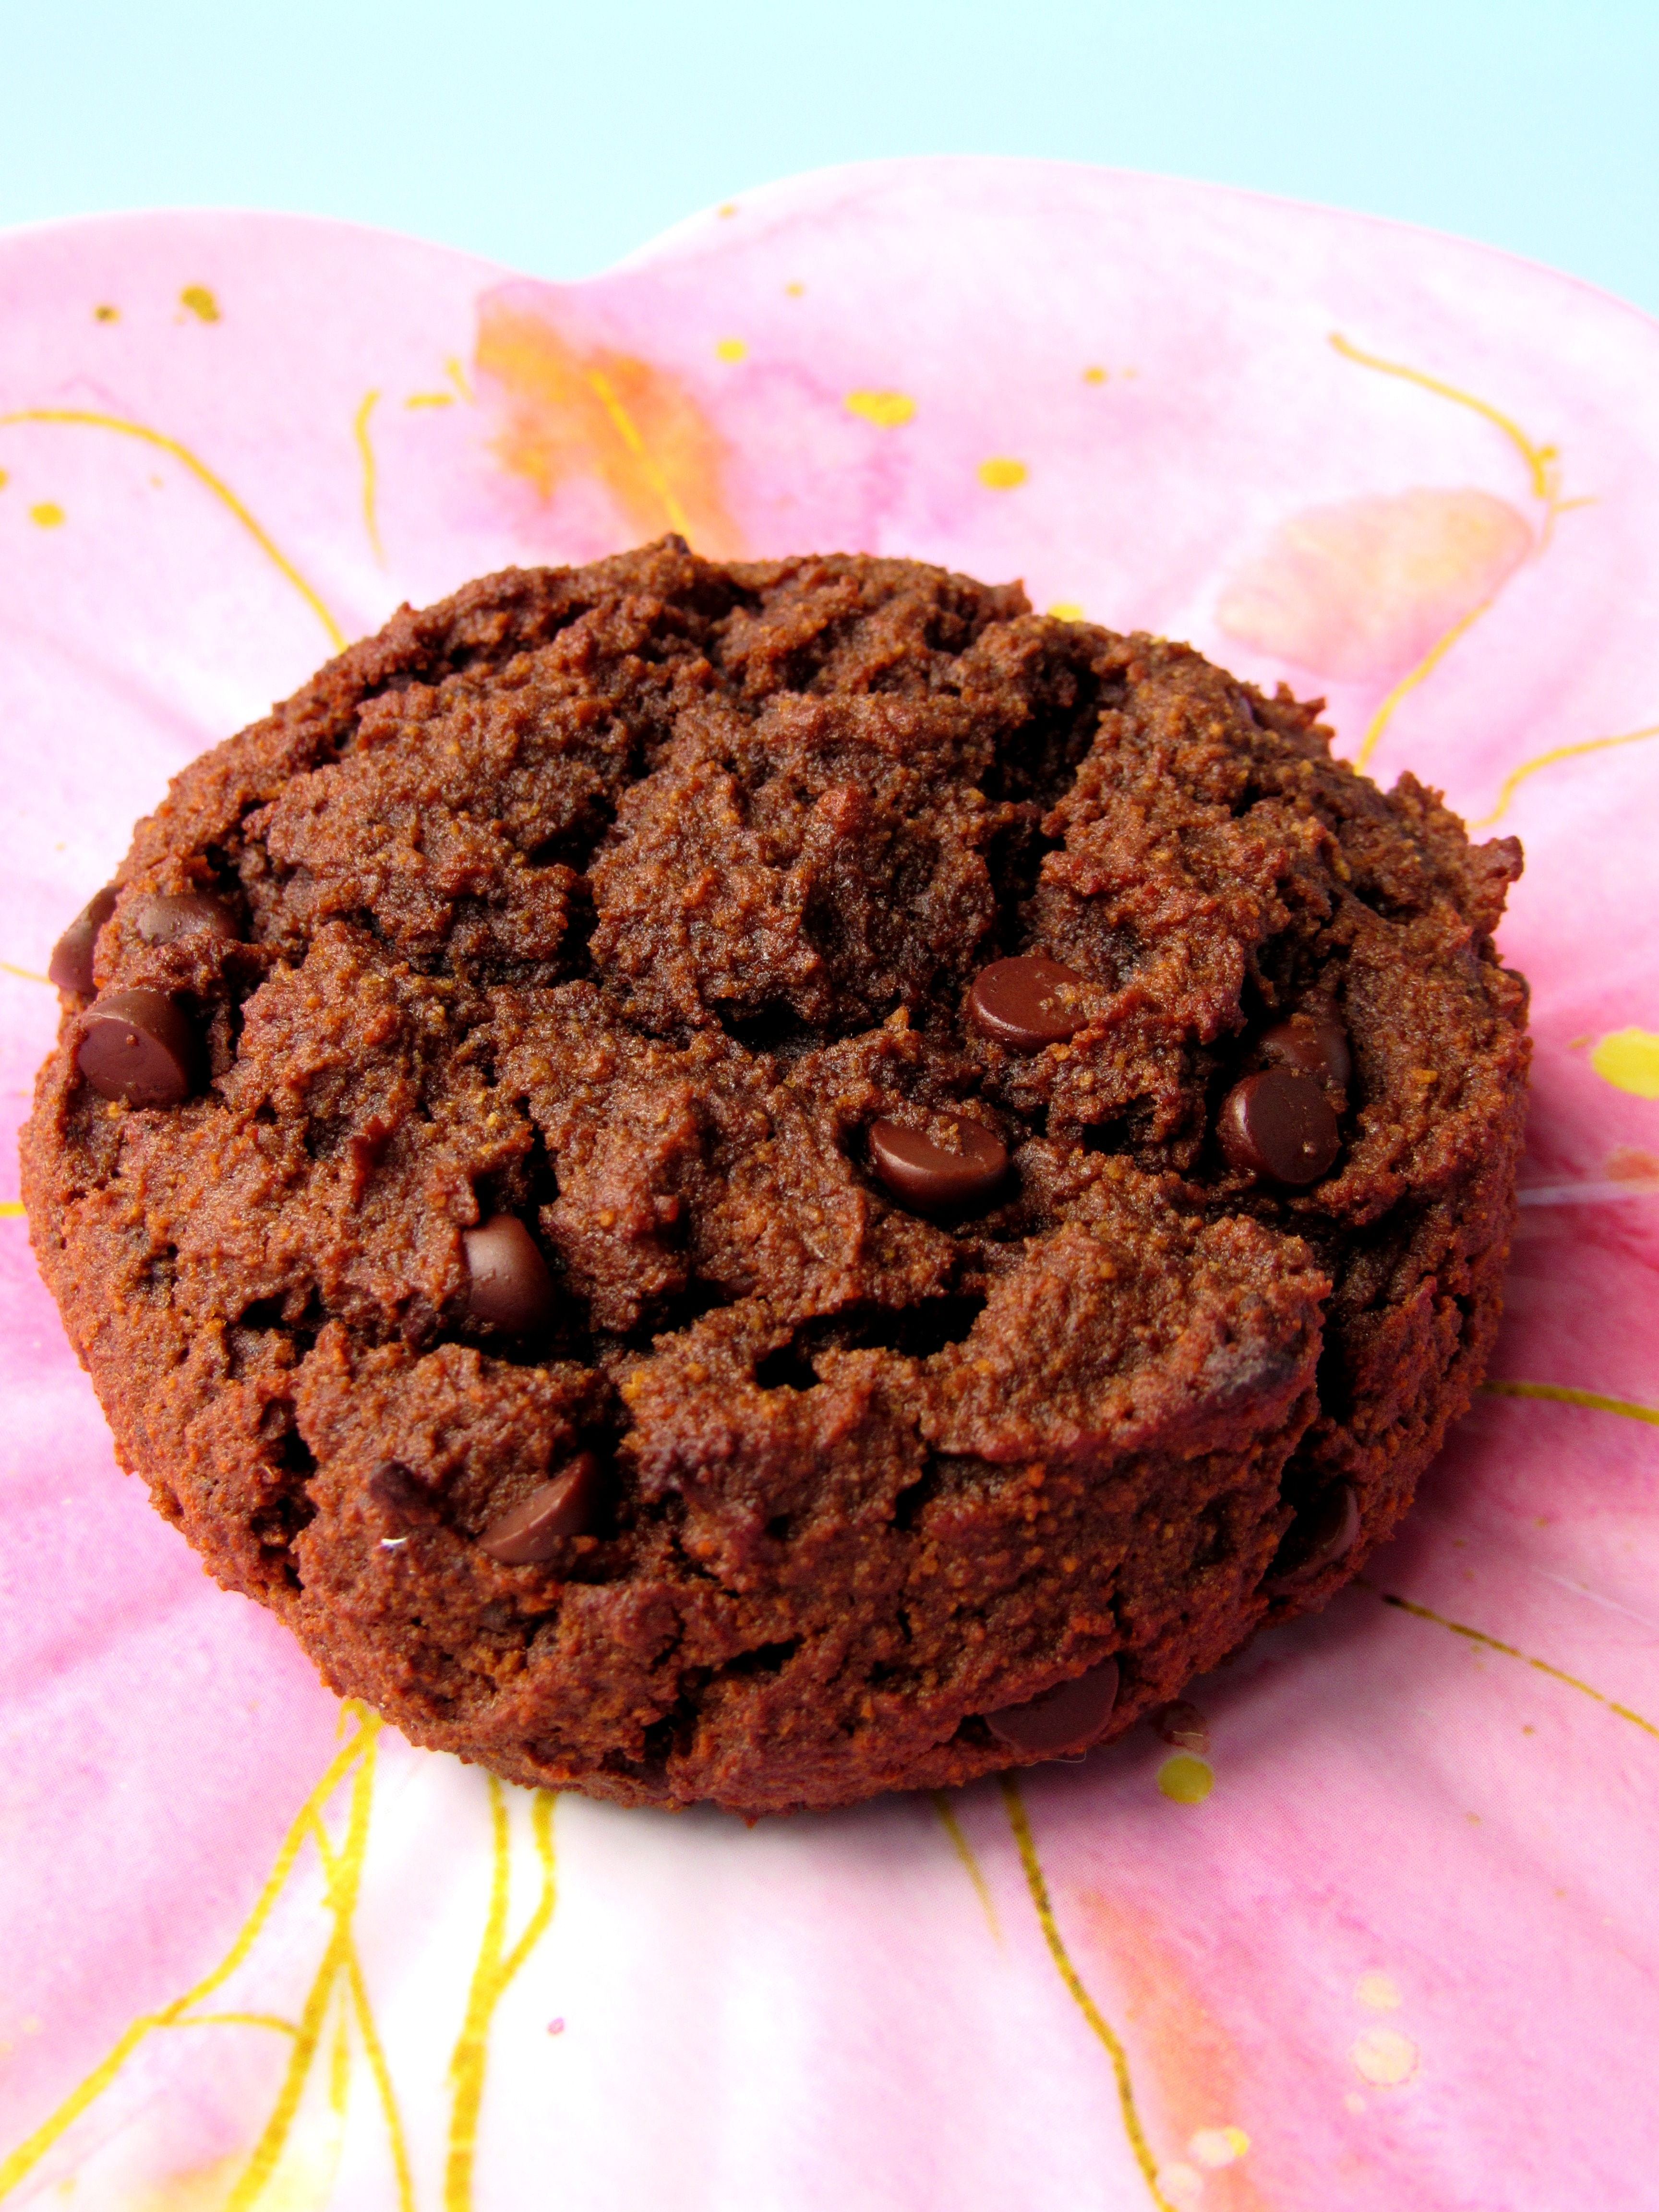
The smell of a rich chocolate cookie baking in the oven is delightful. Pull them out, and let them cool, then sprinkle them with more high fat cocoa powder like my favorite Droste Cocoa Powder. After they cool, and you have dusted them with more heavenly cocoa powder, curl up on the sofa with a hot steamy cup of strong coffee, a couple of these cookies and a good book, and indulge in these buttery, cookie treats. Make sure you have a napkin, because you will be licking cocoa powder off your lips, and it may get on your book without one! 😉 You are sure to get a surge of joy, because chocolate is known for positively impacting mood, specifically dark chocolate with high cocoa content. This is due to the flavonoids and theobromine, which can stimulate the release of endorphins (feel-good chemicals) in the brain. I don’t know if being female makes me love it even more, but I don’t understand how you couldn’t like chocolate. Don’t forget the cozy throw or quilt! I have my own built in water bottle in the form of my delightfully fluffy pug, Ming.

Ming Ming the Pug

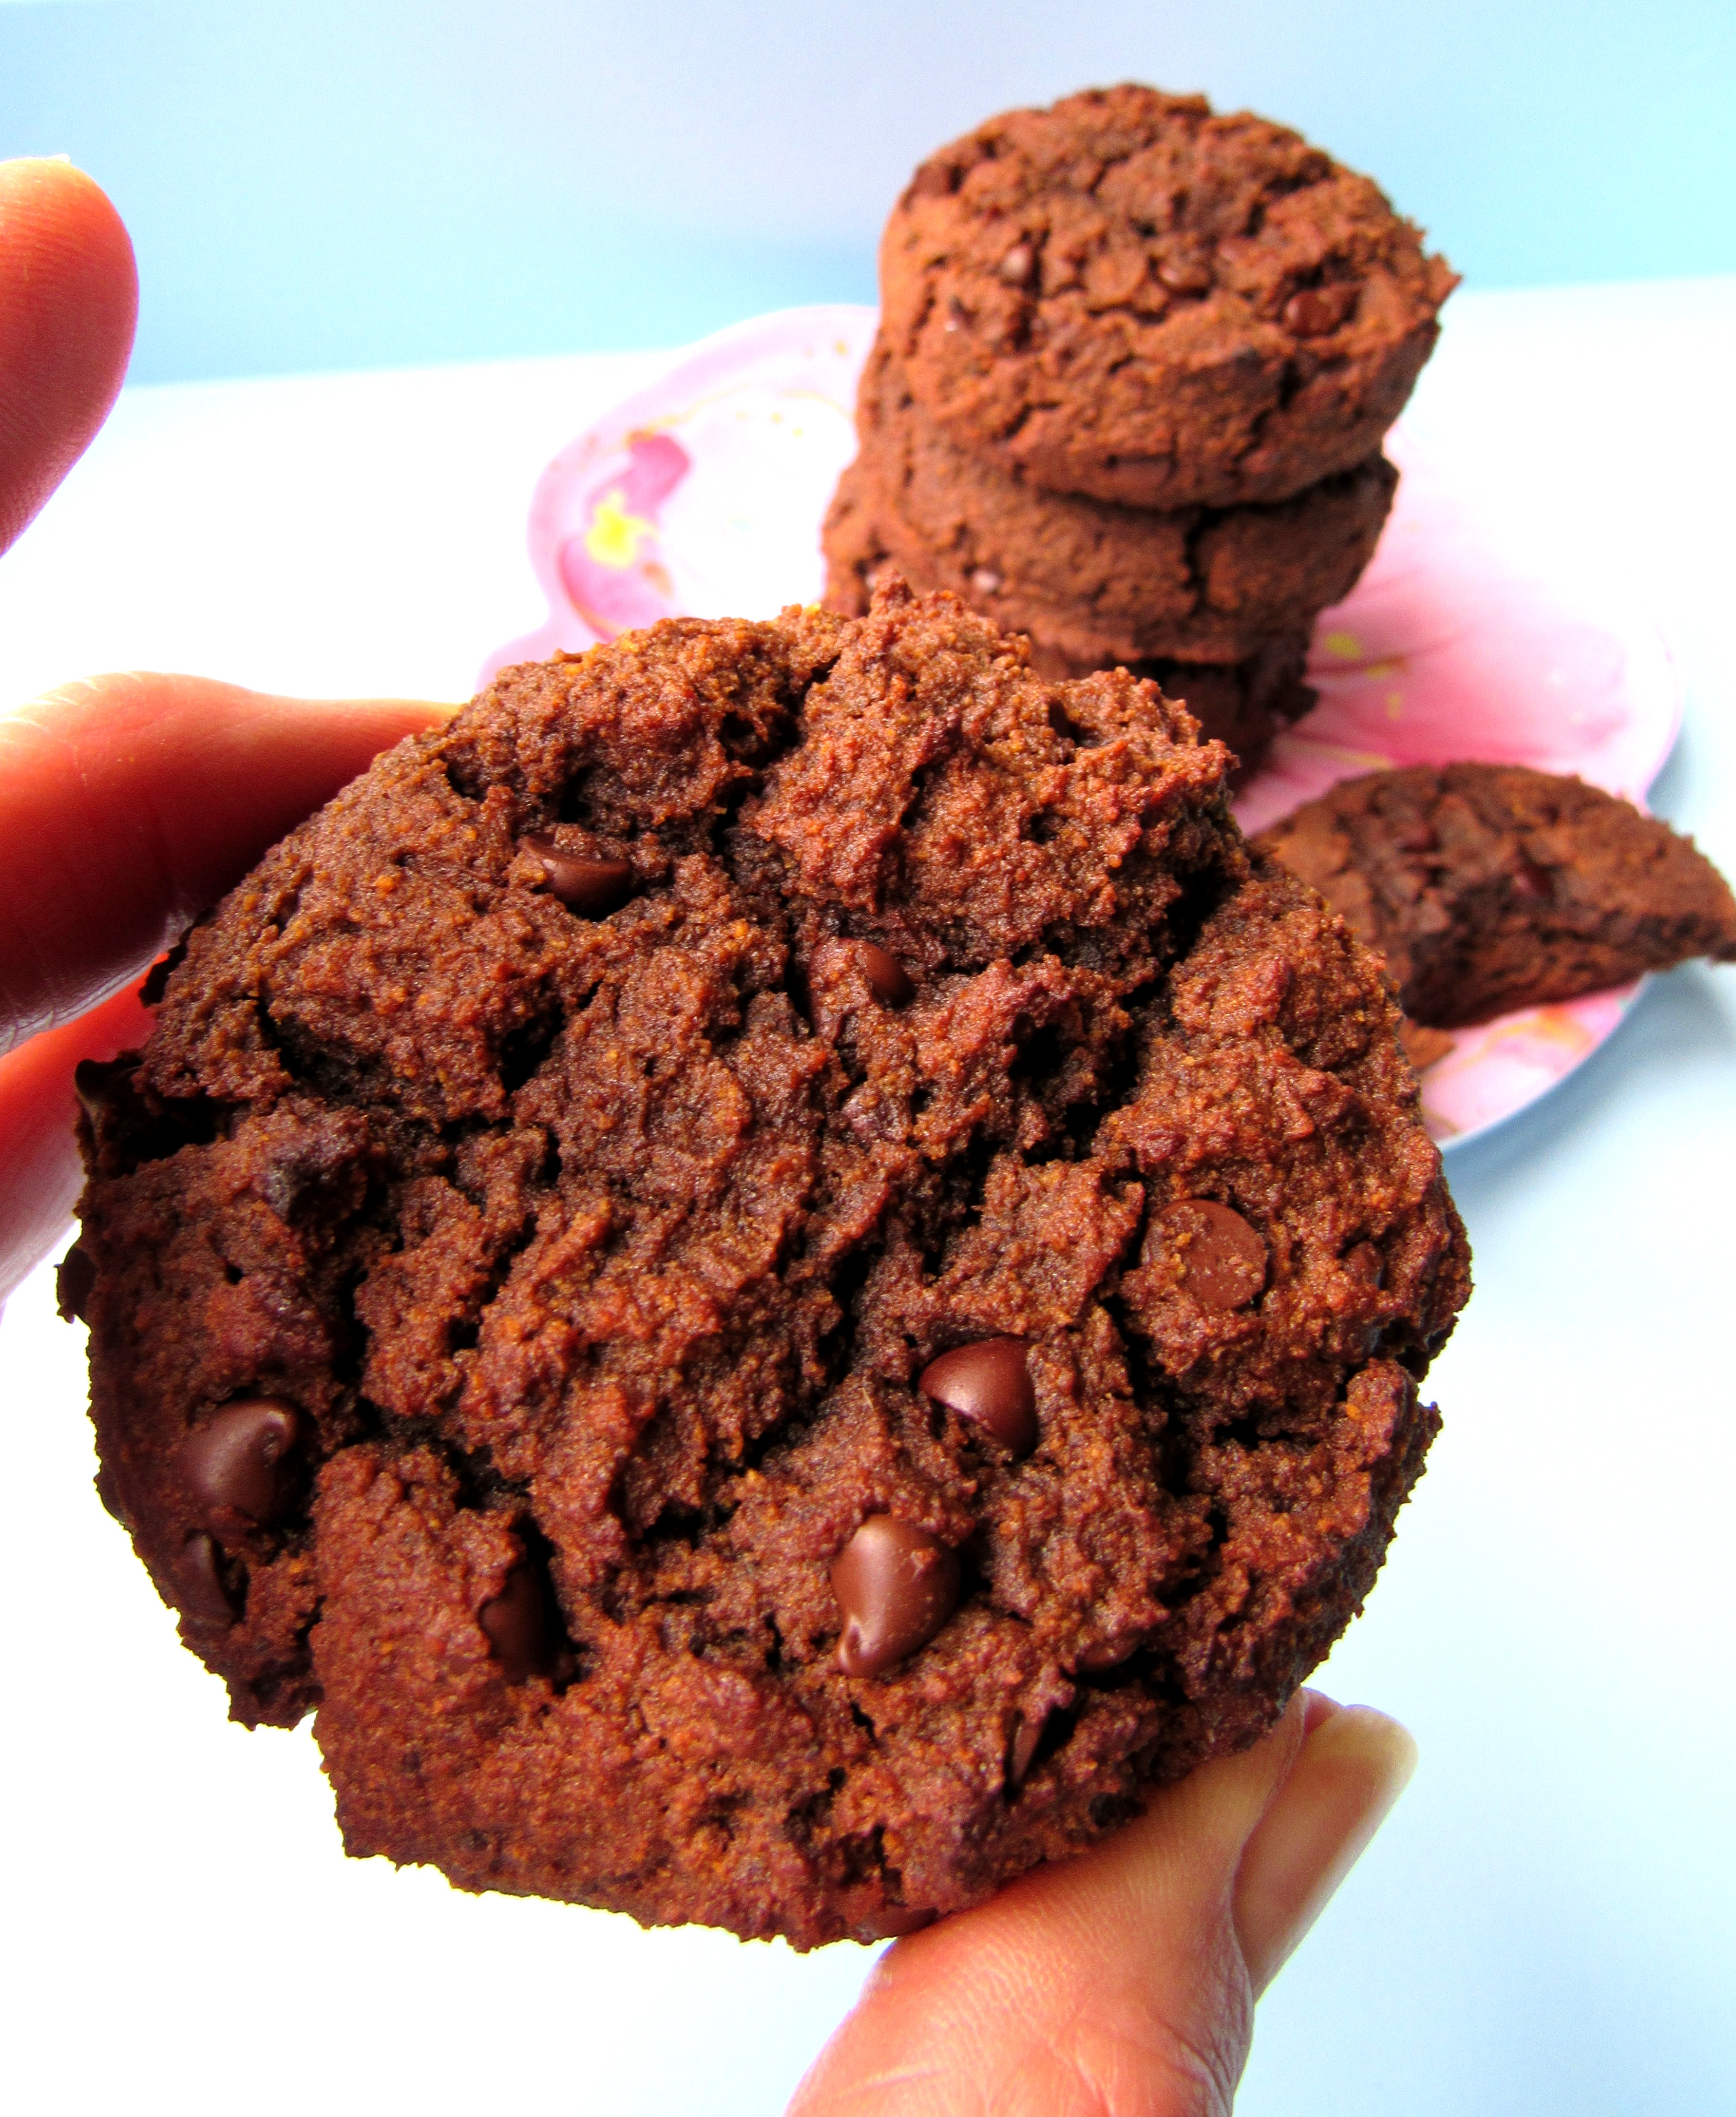
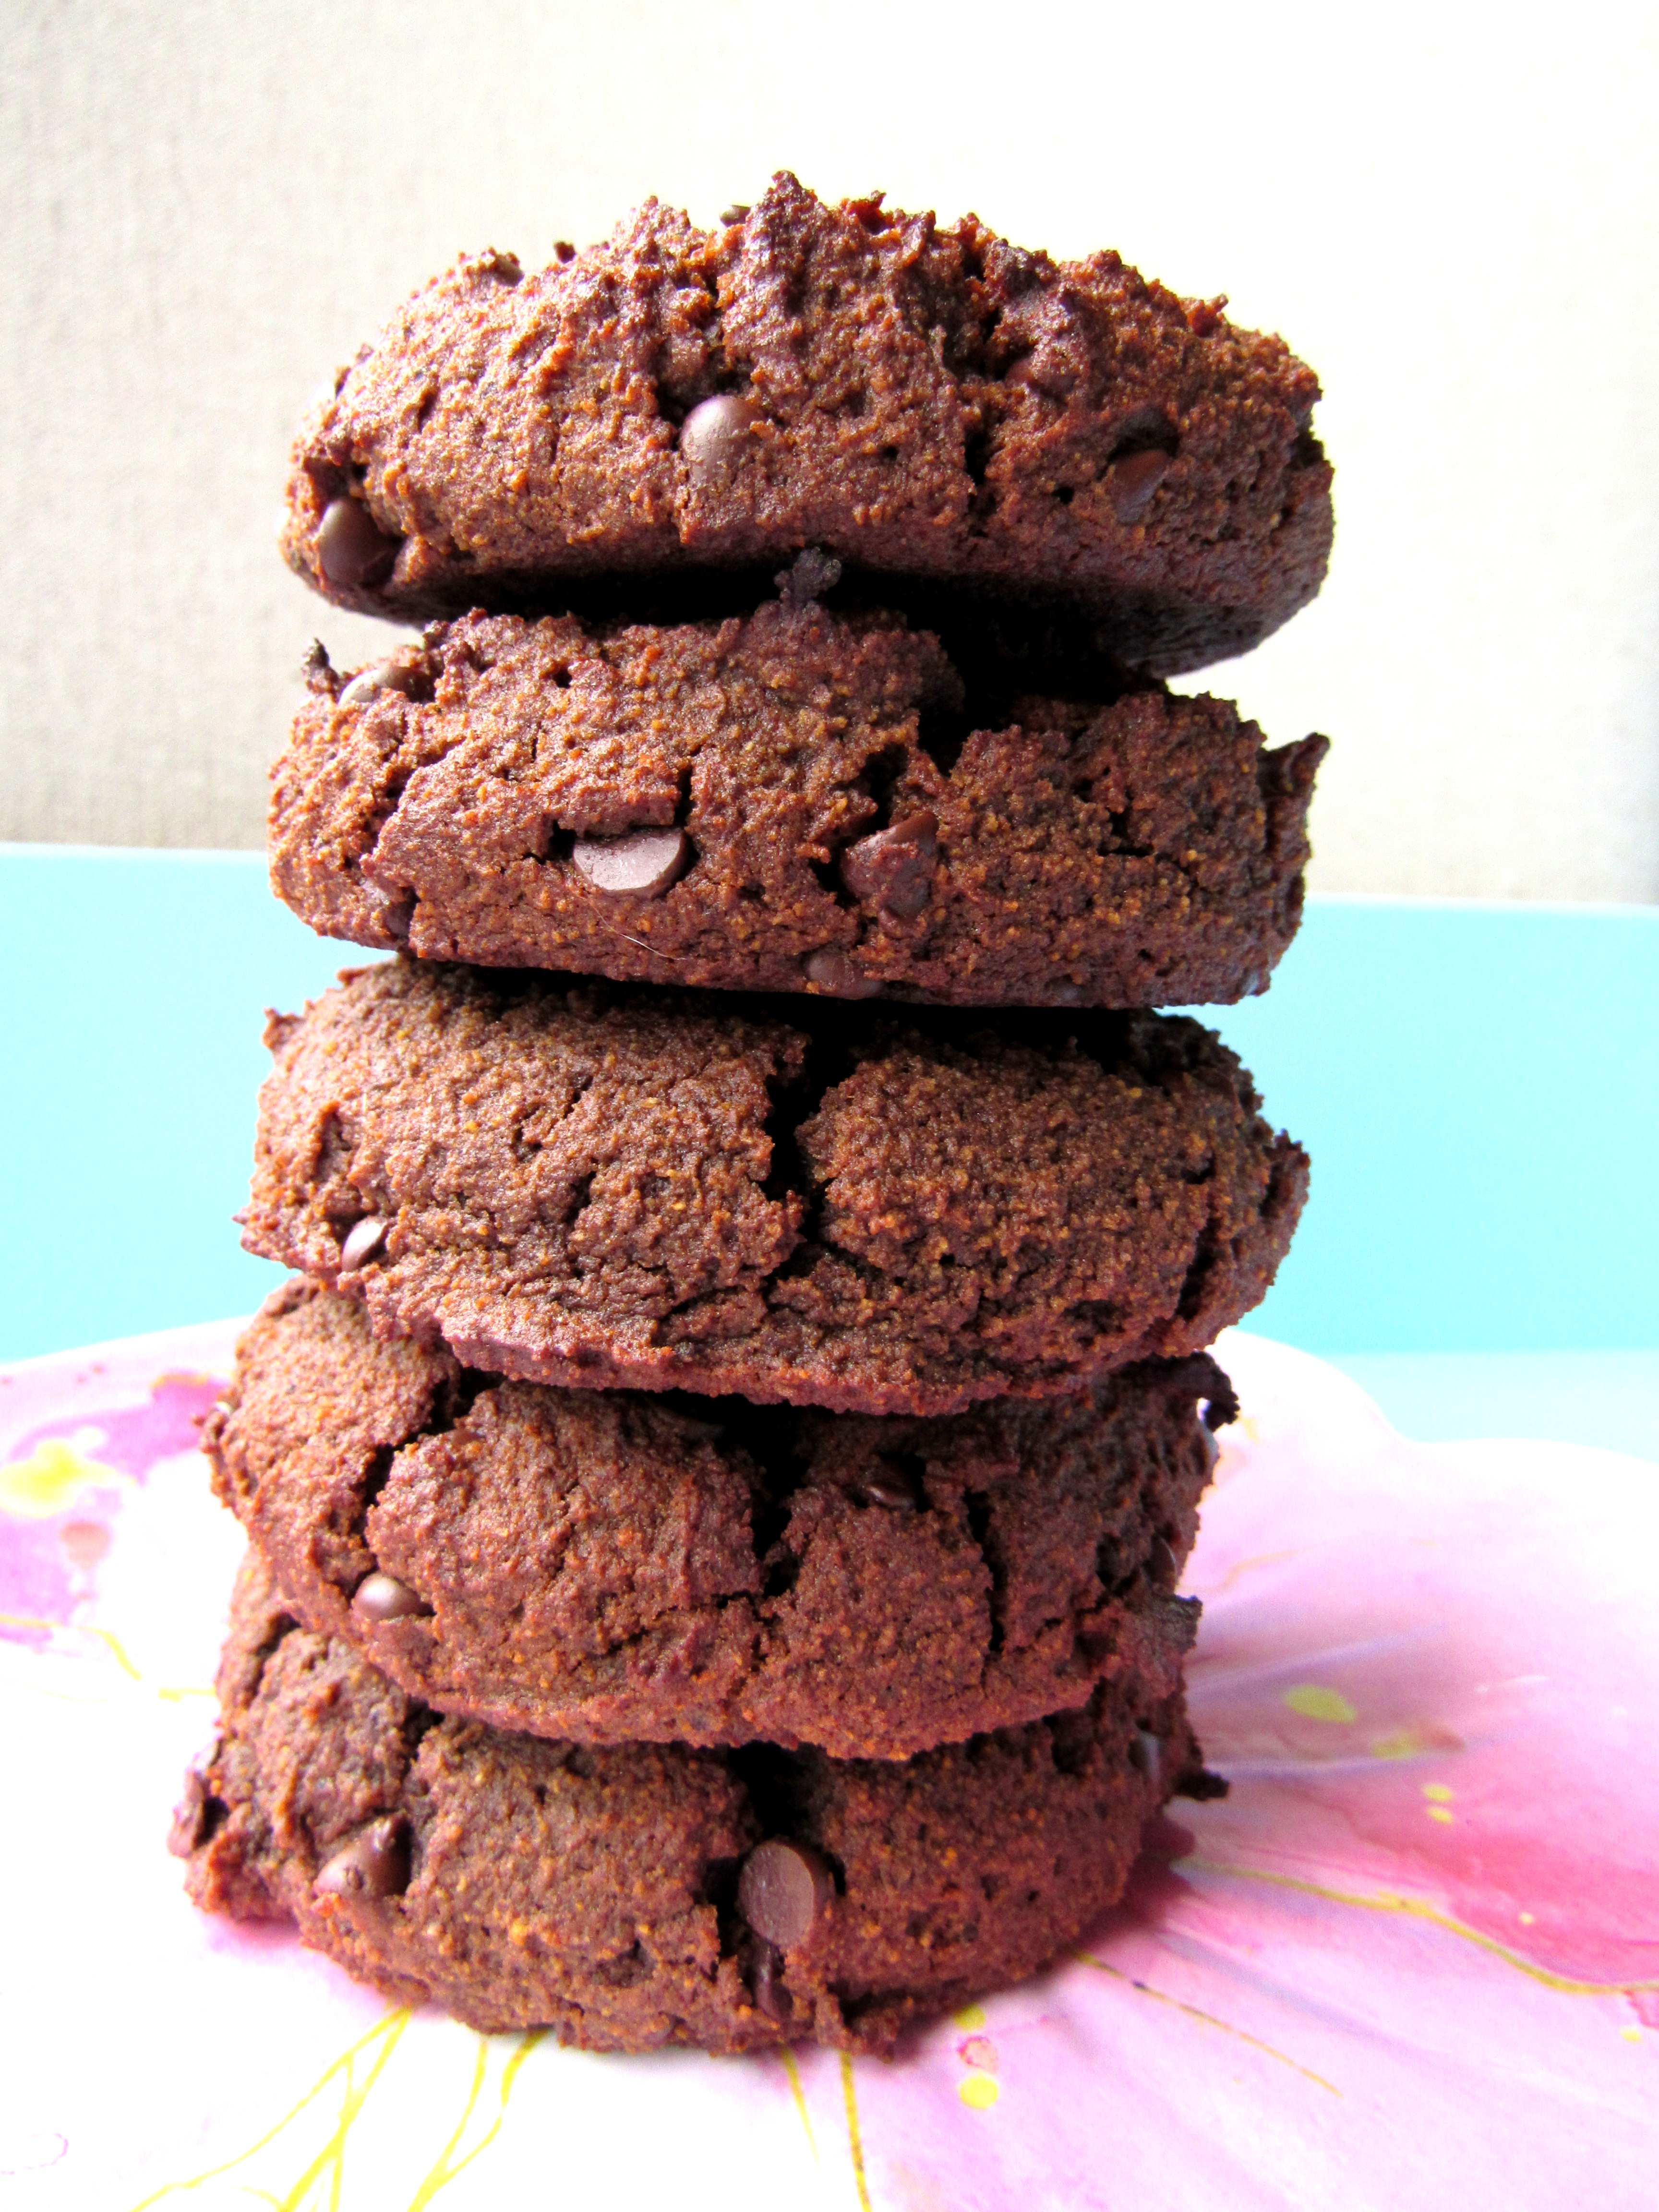
I have made these cookies on repeat, because they are so good and lower in sugar, without sacrificing flavor. The butter to flour ratio is perfection, and they are reminiscent of a decadent, rich chocolate dark chocolate truffle.

Winter is here in breathtaking Northern Michigan. I am delighted to say that the ski hills have opened in November this year, which hasn’t happened in a while because of warmer winters. There is plenty of powder and ski resorts to choose from. I expect the lake to freeze this year, due to the more seasonal weather we are having so far. Last year was a very mild winter and also very dry. This is a photo of my morning walk around the lake. I like to get outside and walk year round as long as the weather permits.

First Snow of the Winter, Up North Michigan

I think I may get a set of snow shoes to try out too. They have come a long way since I’ve last went snow shoeing. They are much smaller and easy to manage. Any advice on how to choose a pair? Coming in after a snowy adventure is a good time for cookies and a warm beverage!

Here is the recipe for my cookies:

Chocolate Truffle Cookies Dusted with Cocoa Powder, Gluten Free and Decadent

2 Cups of Measure for Measure Gluten Free Flour Blend

2 Sticks of Unsalted Butter

1/4 Cup of good quality cocoa powder with higher fat content (I use this.)

1/4 Teaspoon of Salt

1/2 Cup of Maple Sugar

1 Teaspoon of Quality Vanilla Extract

Directions: In a stand mixer or using a hand mixer with a large bowl, beat your butter, sugar and salt together for two minutes until light and fluffy. Add in your vanilla extract, and then in a separate bowl whisk your flour and 1/4 cup of cocoa powder together before adding it to the butter mixture. Mix on low speed until incorporated to prevent a flour mess, and then turn to high just until completely blended. Lay out a parchment lined cookie sheet, and using a tablespoon cookie scoop, scoop the cookies into balls on the cookie sheet. Now, pick up each scoop of dough, and roll it into a nicely shaped ball. Place the cookie sheet in the refrigerator for half of an hour. Meanwhile, preheat your oven to 325 degrees.

After the cookie dough has chilled, bake the cookies in your preheated oven two inches apart on two separate cookie sheets for 20 minutes. Remove the cookies from the oven, and cool completely. Then, dust them with more cocoa powder like shown below before eating.

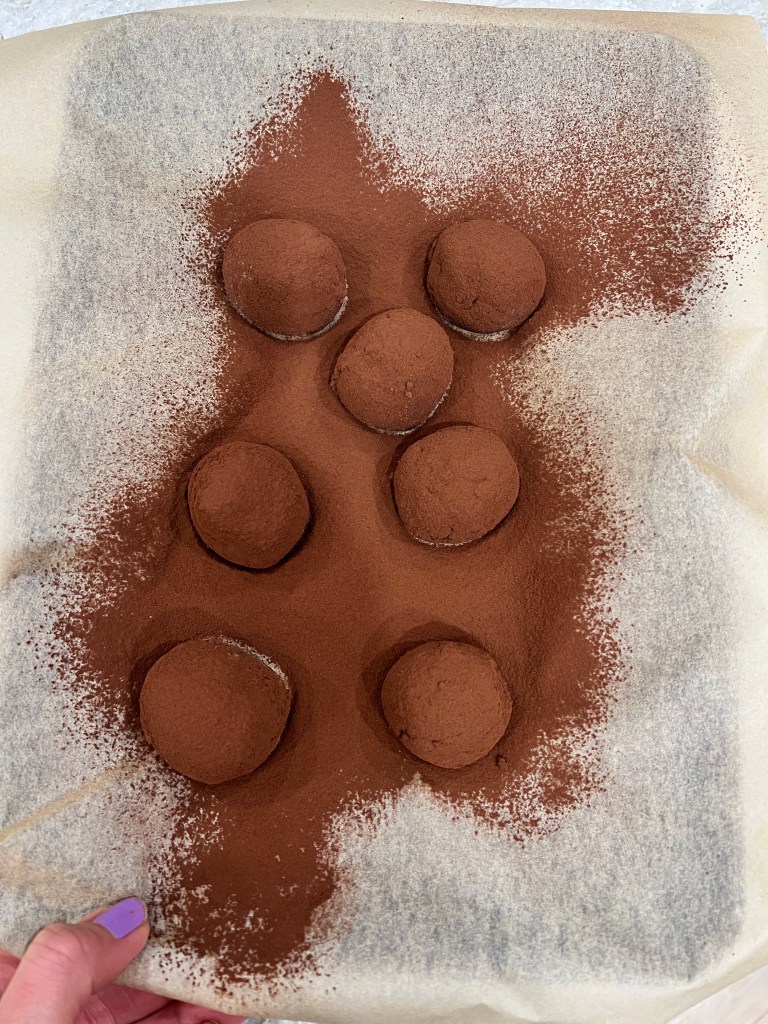
Enjoy! This makes about 2 dozen cookies.

Gluten-Free Chocolate Tahini Truffle Cups You’ll Love

Chocolate Tahini Truffle Cups in Hedgehog Dish

When September comes rolling around, I often find myself craving rich, indulgent treats, especially sweets that remind me of decadent chocolate truffles. I like to think I manage to behave pretty well around sweets. A big part of that self-control comes from my experience with food sensitivities—I’ve learned to be mindful, or else I pay the price later with feeling less than my best. After eliminating the troublesome culprits and getting serious about relearning what works for my body, I began healing my leaky gut. Through lab and genetic testing, I discovered my gluten intolerance. Since then, I’ve been able to reintroduce nearly all food groups—except for gluten. We constantly hear—and deep down, we all know—that too much sugar isn’t doing us any favors. But complete deprivation? That’s not an option for me. These two-bite chocolate cups are the perfect solution when those sweet, chocolatey cravings hit—they satisfy my sweet tooth without overindulging.

Chocolate Tahini Truffle Cups

Keep these delicious, creamy, nutty tasting, melt in your mouth chocolate cups in your freezer. Enjoy Life chocolate chips are my go to since they are so allergen friendly and excellent quality.

Can we talk cute woodland creatures for a minute? Isn’t this the cutest hedgehog dish? I am obsessed with cute hedgehogs and other woodland creature home decor. It’s so cozy, and bringing the nature theme indoors is so relaxing. These hedgehog dishes are so playful. I love their delicate little faces. I was gifted a set of four of these nesting hedgehogs. I love using them for company!

Chocolate Tahini Truffle Cups

1/2 Cup of Tahini (I used this kind)

1 Cup of Chocolate Chips (you can use dark chocolate chips or semi-sweet)

You will need a mini muffin cup pan and approximately 20 mini muffin cup paper liners.

This recipe is Super Easy and much better for you than a store bought nut butter cup! In a double broiler, melt the Tahini and Chocolate Chips together, whisking until all the chocolate is melted. Using a teaspoon cookie scoop or spoons, evenly fill the muffin cup liners about two thirds full. Place the pan in your freezer. These will be solid in about 30 minutes. After they are firm, you can store your Chocolate Tahini Truffle Cups in an airtight container in the freezer. These yummy cups are a great little pick me up! Speaking of pick me ups, self care is huge for well being. When we get busy, run down or overloaded, it can be a recipe for disaster….(pun intended).

Many of you remember Perfectly Posh! Well, this pampering company is back in a BIG way! I couldn’t be happier to have all their natural based, quality bath, body and skincare products back in my life! It’s like a dream come true for many who these products were their go to favorites. They were a big part in reminding me to slow down and take time for self care. They have the best quality products at really good price points. I have a link to them at the top bar of my homepage. They don’t include nasty additives and ingredients, just good clean fun, and you can find a lot of the products rated in EWG Skin Deep! I am a Posh Advocate and am sharing my love of helping people through all areas of well being, in addition to healthy recipes. Perfectly Posh is the absolute BEST pampering company that has amazing products for self care and pampering! We can’t be there for others until we are there for ourselves first. Self Care is not a luxury, not a nice to have. It’s necessary. Self care is an essential daily practice that reminds us that we are alive and that we matter. Every person matters and deserves self care. It’s true you can’t pour from an empty cup, and it’s not just for girly girls. If you shower, Posh is for you! This includes the guys in your life.

Perfectly Posh Because You Deserve Self Care! We All Deserve to be Pampered.

You can find all their products here. I also have started a sample of the month club for free. Each month I send you a fun sample! But, you need to opt in by filling out this form for me.

Have a wonderful day! I hope you make and enjoy this new recipe! I’d love to hear from you in the comments!

Sam

Delicious Gluten Free Cherry Cheesecake Recipe with Lactose Free Cream Cheese

Delicious Gluten Free Cherry Cheesecake with Lactose Free Cream Cheese

Cheesecake. It is a much loved dessert here in America. There are so many variations of cheesecake and toppings. My sister had a gorgeous display of cheesecakes at her wedding when she was married. Of all the kinds of cheesecakes, I think cherry is still the most classic! So, having said that, I have an absolutely delicious gluten free cheesecake recipe for you today using lactose free cream cheese and Greek yogurt with those sensitive to dairy in mind. I made this cheesecake for a Summer picnic recently, and it was a big hit. My mother used to make the most delicious cherry cheesecake when I was a child, and although this is a different recipe, it is light and creamy like the ones I remembered eating as a young girl. One of the reasons I like this recipe so much is it is light and not overly rich. It is super creamy with just the right amount of graham cracker crust. I used frozen sweet cherries to make the topping, and the consistency to spoon on top of the cheesecake was just right. I find that using frozen cherries versus canned gives a much better flavor and texture. I also like that the bake time is quick with very little chance of the top cracking.

Delicious Gluten Free Cherry Cheesecake Recipe with Lactose Free Cream Cheese

In this recipe, I used an 8 inch springform pan, and it serves 8 to 10 people. Let’s make a cheesecake!

Gluten Free Cherry Cheesecake

For the Crust:

1 1/2 Cups of Gluten Free Graham Cracker Crumbs (I used Pamela’s Graham Crackers and made crumbs in my food processor. You could also use a zipper bag and a rolling pin to crush them.) Pre-made Gluten Free Graham Cracker Crumbs works as well.

1/4 Cup of Sugar

6 Tablespoons of Melted Butter

Filling:

2 – 8 ounce tubs of lactose free cream cheese (I used Green Valley from my local grocery store)

2 Large Eggs at room temperature

1/2 Cup of Sugar

1 Teaspoon of Pure Vanilla Extract

Greek Yogurt Topping:

1 Cup of Plain Greek Yogurt

1/4 Cup of Sugar

1 Teaspoon of Pure Vanilla Extract

Sweet Cherry Topping:

14 Ounces of Frozen Sweet Cherries

1/2 Cup of Sugar

2 Tablespoons of Cornstarch dissolved in 2 Tablespoons of Water

1 Tablespoon of Lemon Juice

Directions:

Preheat your oven to 375 degrees F.

Mix your graham cracker crumb ingredients, and press it in the bottom and up the sides of the pan firmly. Set aside.

Now you’ll make the filling. Beat your cream cheese together with the sugar, eggs and vanilla in a medium bowl with electric beaters. Pour the filling into your graham cracker crust. Wrap the bottom of your springform pan with foil, and put it on a rimmed cookie sheet in case of any butter leakage. Bake for 20 minutes.

Remove the cheesecake from the oven, and let it rest for 15 minutes. Meanwhile, turn your oven up to 450 degrees F.

Now we will make the Greek yogurt topping while the cheesecake is cooling, this is the final baking step! While your cheesecake is cooling for 15 minutes, beat together the Greek yogurt topping ingredients, and spread it evenly over the top of the cheesecake. Bake at 450 degrees F. for just 10 minutes. Remove it from the oven, and cool at room temperature. Then, cover and chill in your refrigerator overnight or for 12 hours.

After it has chilled, you are ready for the last step, the cherry topping!

In a medium saucepan, cook the frozen cherries and sugar together until the sugar melts and the cherries thaw and start releasing their juices, stirring slowly and constantly over medium heat. Whisk the cornstarch and water together in a small bowl. Bring the cherry and sugar mixture to a boil and slowly whisk in the cornstarch. Cook until nicely thickened. Last of all, stir in the lemon juice and cook another 30 seconds or until it’s a nice, loose, jammy consistency. Remove from the heat, and cool for ten minutes, stirring occasionally. Spread the cherry topping evenly over the cheesecake with the back of a spoon, and chill for several hours until ready to serve. Remove the ring from the springform pan before serving and place it on a serving tray. This is really pretty on a fancy pedestal serving tray for company! I like to cut the cheesecake with a sharp knife run under hot water for clean slices, wiping the knife in between pieces. It’s so good! Also, if you like blueberries, frozen blueberries would work equally well in this recipe, so feel free to substitute. You could also use regular cream cheese if you are not sensitive to dairy.

I’d love to hear from you in the comments. Also, if you make this recipe, please leave me a review. Thank you! Sam

Gluten Free Apple Bread with Streusel Topping

Apple bread is obviously good all year round, but it is especially enticing during the fall when apples are available locally and the leaves are changing color and crunchy beneath our feet, and we start thinking about bringing out the buffalo plaid, flannel and light scarves and vests when we go outside

I am particularly fond of seasonal food. It gives us a reason to celebrate every season as it comes and goes. This apple cake uses grated apple, so there is apple throughout without the big chunks, and there is a scrumptious streusel topping. I’m telling you the wonderful aroma in the kitchen whilst it is baking will make your family happy with anticipation.

Here’s the recipe:

Gluten Free Apple Bread with Streusel Topping

Preheat your oven to 350 degrees F. Grease a 9 x 5 inch loaf pan well.

Ingredients:

1 3/4 Cup of Gluten Free Flour Blend with Xanthan Gum (I use King Arthur Measure for Measure)

1/2 Cup of Apple Butter

1/2 Cup of Plain Greek Yogurt

3 Large Eggs

1 Cup of Peeled and Grated Apple (about 1 large apple)

1/3 Cup of Cane Sugar

1/4 Cup of Olive Oil

1 1/2 Teaspoons of Baking Powder

1 Teaspoon of Vanilla Extract

1 Teaspoon of Cinnamon

1/8 Teaspoon of Nutmeg

1/2 Teaspoon of Salt

~~~~~~~~~~~~~~~~

For Streusel Topping:

2 Tablespoons of Butter, melted

3 Tablespoons of Gluten Free Flour Blend

1 Tablespoon of Light Brown Sugar

1/8 Teaspoon of Salt

1/2 Teaspoon of Cinnamon

a pinch of Nutmeg

Directions:

Grate your apple and set aside.

Mix together the crumb topping ingredients in a bowl with a fork, and set aside.

In a large mixing bowl beat the eggs, yogurt, apple butter, vanilla, sugar and olive oil.

In a medium bowl, sift together the dry ingredients. Add the dry ingredients to the wet ingredients you just blended. Fold in the grated apple, and then add the batter to your prepared loaf pan. Smooth the batter evenly with a spatula. Sprinkle the top with your streusel mixture. Bake in your preheated oven for 60 to 70 minutes, or until a toothpick inserted in the center comes out clean. Cool on a wire rack for 10 minutes. Then, run a knife around the pan before removing the loaf to cool completely on a cooling rack.

Homemade Maple Pecan Scones, Gluten Free Pastry!

Gluten Free Maple Pecan Scone Recipe
Gluten Free Scones – Baking Love
Maple Pecan Gluten Free Homemade Scones

Changing leaves, cooler weather, cozy sweaters, and this time of year makes me start baking things like these maple pecan scones. They are the perfect bit of sweet with a biscuit texture and buttery maple pecan flavor. It’s just the bit of comfort and homey cheer that says relax and put up your feet for a bit and savor the moment. I personally can’t think of scones without also thinking of a cup of tea to go with it. But that’s entirely up to you and maybe your jam is coffee or just eating it over the kitchen sink. We have family members known to do that….never me. 😉 What is your favorite tea to drink with something like a scone?

In this recipe, I used maple sugar, real butter, some natural maple flavor extract instead of vanilla and toasted pecans. They are a delicious way to treat yourself. A wonderful thing about scones is you can prep them all the way up to the point they are ready to pop into the oven and freeze some for later so you have fresh scones at your fingertips. This has come in very handy for me over the years. This recipe makes 24 scones, so you can bake them all at once, or freeze some for later. Just increase your baking time by about ten minutes from frozen.

Let’s make scones together, shall we?

Maple Pecan Scones, Gluten Free

Preheat your oven to 400 degrees F. and lay out two parchment lined baking sheets.

Ingredients:

3 Cups of Gluten Free Flour Blend with Xanthun Gum (I use Measure for Measure) Scooped and Leveled

2 Sticks of Cold Butter

1 Cup of Coconut Milk or Heavy Cream

4 Large Eggs

1 Cup of Toasted Pecans (toast in the oven for approximately 7 minutes at 350 degrees. Cool and chop)

1/4 Cup of Maple Sugar

1 1/2 Tablespoons of Baking Powder

1 1/2 Teaspoons of Salt

1 Teaspoon of Natural Maple Flavor (it’s gluten free!)

Egg wash (1 egg beaten with 1 Tablespoon of water for brushing the tops)

Directions:

Toast the pecans first at 350 degrees F. for seven minutes. Remove them from the oven and set aside to cool. Now, reset your oven to 400 degrees F. for the scones.

In a food processor with a blade, add your flour, maple sugar, baking powder, and salt. Pulse until combined. Cut the cold butter into chunks and add it to your food processor. Pulse the processor until you have fine pea size crumbs. Whisk together in a separate bowl the coconut milk or heavy cream, eggs, and maple extract. Add the beaten egg mixture to the flour mixture and pulse until combined evenly. You will need to remove the top a couple of times to scrape the sides. Dump the mixture into a mixing bowl and fold in the pecans evenly. Dump the scone dough onto a floured surface, and roll out until it is a 12 inch by 8 inch rectangle and the scones are 1 1/2 inches thick. Cut the dough into 12 squares with a sharp knife. Wipe the knife as you go if you get dough stuck to it for a cleaner cut. Now cut your twelve squares into triangles by cutting them in half on an angle. Place the scones on two baking trays spaced evenly about two inches apart. Brush the scones with egg wash and sprinkle with some additional maple sugar or cane sugar.

Bake in your preheated 400 degree F. oven for 16 minutes until golden brown on the edges. Cool.

These are delightful, and I hope you love the recipe! Happy baking!!

Best Grain Free Graham Cracker’s Ever!


The Best Graham Crackers Paleo Egg Free

Oh my goodness, do I love a good, crunchy graham cracker! Since going gluten free and mostly grain free, a good graham with clean ingredients has been hard to find, and the other recipes I have tried either fall apart, don’t taste amazing or are too soft and wouldn’t hold up to toppings or s’mores.

The Best Grain Free Grahams Ever!

These I literally had to put out of my sight in order to keep myself from munching on them every time I came into the kitchen. If you are a fan of the Sandlot Movie, like I am, (It’s an all time family favorite), you know Smalls would never settle for a whimpy gram to stuff his face. Watch the scene here:

https://www.youtube.com/watch?v=XlddDZkkxCc

These grahams are delicious in every way……texture, flavor, sturdiness….. and you can make them any size you want. They also happen to be egg free. I have been testing them for several months, and never was completely satisfied until this week when I was in a hurry and whipped together some while making dinner on a busy night, because we needed some Grahams in the house. They turned out great! Since I wasn’t actually in “testing” mode, I didn’t write it down until after they were done, and turned out so well. So, the next day, I retested them with honey instead of maple syrup. They turned out tasty with the honey, but you have to watch them carefully so they don’t burn. I again tested them using maple syrup, and they were s’more worthy! The maple syrup version is my favorite. It gives the grahams a true graham flavor and doesn’t over brown. These graham crackers can be enjoyed year-round. They are great for packing in lunches sandwiched with some nut butter and good quality fruit spread, and they are so, so s’more worthy! So campfire season, watch out, because Everyone should have good grahams!

Everyone Deserves a Good Graham

The Best Grain Free Graham Crackers Ever!

Preheat your oven to 350° degrees F.

Ingredients:

1 Cup of Coconut Flour (I used this brand) scooped and leveled

2 Teaspoons of Ground Cinnamon

2 Tablespoons of Ground Flax Seed

2 Tablespoons of Grass Fed Gelatin (I used Vital Proteins)

1/2 Teaspoon of Baking Soda

1/4 Teaspoon of Sea Salt

1/2 Cup of Avocado Oil (it is heart healthy and has high smoke point)

1/4 Cup of Pure Maple Syrup (You can substitute honey for SCD compliant, but watch carefully to prevent over browning)

4 Teaspoons of Pure Vanilla Extract

1/2 Teaspoon of Lemon Juice

Directions:

In a medium bowl, whisk together the coconut flour, cinnamon, flax and baking soda. Then, in another bowl, whisk together the liquid ingredients which are vanilla, avocado oil, maple syrup and lemon juice. Add the liquid to the dry ingredients, and beat with a hand held mixer for one minute. Sprinkle the gelatin over the top, and beat again until it is completely incorporated.

Form the dough into a ball, and place between two sheets of parchment paper. Flatten the ball with your hands, starting to form a rectangle. With a rolling pin, roll the dough out into a rectangle to fit a cookie sheet pan. The parchment paper should still be sandwiching the dough. This prevents your rolling pin from sticking. The dough should be about 1/4″ thick. Remove the top piece of parchment. With a fork’s tines, poke holes all over the dough, then use a pizza wheel to score vertical and horizontal lines making the graham crackers the size you like. Place the parchment with the rolled out grahams onto a cookie sheet. Bake in the oven for 8 to 10 minutes. They don’t take long. I recommend checking at eight minutes. When the edges are starting to turn golden brown, they are done. Remove them from the oven and cool completely on the cookie sheet before breaking them apart at the score marks.

How do you like to eat your grahams?

web-site-chractor-color-corrected


Holiday Eggnog Thumbprint Cookies – Paleo – Nut and Egg Free

Delicious Paleo Eggnog Cookies (1)

I started loving Eggnog when I was around 12. It seems to me that either you love eggnog, or you hate it. I think maybe it has something to do with the nutmeg, but I’m really not sure why. To me it is a creamy delicious holiday drink to be partaken of while decorating the tree or on Christmas Eve hopefully spiked with rum. 🙂

Here is a recipe for Eggnog Cookies that you can make quite easily. They are pretty, and there is no piping involved, so you can leave your decorating bag in the cupboard for another time. I used mace when making these cookies. Mace is the lacy outside of the nutmeg shell, and nutmeg is the seed inside. Mace is slightly more pungent than nutmeg, and both work beautifully in this cookie, so use what you like.

These cookies are grain, dairy, egg and nut free, and a great cookie to make when you have friends and family with food sensitivities and allergies like myself.

Eggnog Cookies - Egg, Nut and Dairy Free (2)

Holiday Eggnog Thumbprint Cookies

Preheat the oven to 350º degrees F. Lay out a parchment lined cookie sheet.

Ingredients:

1/2 Cup of Coconut Flour

1/4 Cup of Coconut Butter

1/4 Cup of Maple Syrup

1/4 Cup of Olive Oil

1/2 Cup of Full Fat Coconut Milk

1 Tablespoon of Gelatin (I use this kind)

1 Tablespoon of White Rum

1 Teaspoon of Pure Vanilla Extract

1/4 Teaspoon of Baking Soda

1/4 Teaspoon of Sea Salt

1/4 Teaspoon of Mace or Nutmeg

16 Teaspoons of  Coconut Butter for the Thumbprints after baking.

Directions:

Whisk together the Coconut Flour, Baking Soda, Sea Salt, Mace and Gelatin in a mixing  bowl. In another medium microwave safe bowl, add the coconut butter, maple syrup, olive oil, vanilla and rum. Warm the liquid mixture in the microwave for 30 seconds, then with a hand held electric mixer, beat until smooth and creamy. If the coconut butter isn’t softened enough, microwave another 30 seconds. Add the liquid mixture to the dry and beat with your electric mixture until you get a soft crumb consistency. This next step will activate the gelatin and make a natural egg replacement. Place the coconut milk in a microwave safe glass measure. Microwave to a boil, but be careful not to boil it over. This is different depending on the power of your microwave, but about one minute to one minute thirty seconds. You can also do this on your stove top. Now with your mixer running, pour in the coconut milk, beating as you go until the milk is all incorporated, and you have a nice dough. With a tablespoon scoop, scoop the cookie dough onto your parchment lined cookie sheet. Press a thumbprint into the center of each cookie, and bake for 10 to 12 minutes until just turning golden brown on the edges. Remove from the oven. Melt 16 teaspoons of Coconut Butter in the microwave, and with a teaspoon, pour the coconut butter one teaspoon each into the indentations of the cookies while they are still warm. Sprinkle with a little additional mace or nutmeg. Cool completely.

Makes 16 cookies


Holiday Eggnog Cookies - Nut and Egg Free


Farmhouse Jumbo Molasses Cookies

Molasses has such an earthy, rich flavor, and it has vitamins and minerals in it unlike it’s refined sugar counterpart. I revamped this old family favorite to make it refined sugar free and grain free and bring you a bit of the old fashioned farmhouse feel. The flavor is outstanding in this soft cookie with cinnamon, ginger and cloves! I have tested it on 1-year-olds, teens, and my hubby and tweaked them four times before getting them how I wanted them.

Farmhouse Jumbo Molasses Cookies made with Coconut Flour

Farmhouse Jumbo Molasses Cookies – Grain Free, Refined Sugar Free, Paleo

Here is an article about some of the benefits of blackstrap molasses from Natural Living Ideas – 10 Blackstrap Molasses Benefits That Will Convince You To Get A Jar.

Farmhouse Jumbo Molasses Cookies

Makes 7 – 8 Jumbo Cookies

Preheat the oven to 350º degrees. Line two cookie sheets with parchment paper.

Ingredients:

3 Eggs

1/4 Cup of Blackstrap Molasses (I use this kind)

1/4 Cup of Pure Maple Syrup

1/4 Cup of Coconut Oil (soft but not melted)

1/2 Cup of Coconut Flour

1/2 Teaspoon of Pure Vanilla Extract

1/2 Teaspoon of Cider Vinegar

1 Teaspoon of Baking Soda

1/4 Teaspoon of Sea Salt

1 Teaspoon of Cinnamon

1 Teaspoon of Ginger

1/2 Teaspoon of Cloves

4 Teaspoons of Coconut Sugar for the tops of the Cookies

Directions:

In a large bowl with a hand held electric mixer, cream together the eggs and coconut oil. Add the molasses, maple syrup, and vanilla extract. Beat until creamy and combined. In a separate bowl, whisk together the dry ingredients except the coconut sugar. Add half the dry ingredients to the wet and mix until combined. Add the second half of the flour mixture and beat for one minute. Add the apple cider vinegar. This will activate the baking soda. Beat for approximately 30 seconds. Set the cookie dough aside for five minutes and grab the coconut sugar. This allows the coconut flour to absorb the wet ingredients. With a large muffin sized scoop or a 1/4 cup measure, scoop balls of cookie dough onto your parchment lined cookie sheets, spacing them three inches apart. Sprinkle each cookie with 1/2 teaspoon of coconut sugar. With three fingers, gently press down on the cookies to flatten evenly. See photo below. The coconut sugar keeps the dough from sticking to your hands when you press, and it adds a nice crunch to the top.

Pressing Farmhouse Jumbo Molasses Cookies

Bake in your preheated oven for 13 to 15 Minutes just until set. If you over bake them, they will not be as moist as they could be, and who doesn’t like a moist cookie?

Farmhouse Jumbo Molasses Cookies - Gluten Free

Farmhouse Jumbo Molasses Cookies – Gluten Free, Grain Free

Remove the cookies from the oven and cool on the cookie sheets.

Farmhouse Jumbo Molasses Cookies - Dairy and Gluten Free

Farmhouse Jumbo Molasses Cookies – Dairy and Gluten Free Made with Coconut Flour

These keep at room temperature for three days, and they freeze exceptionally well!

Enjoy!

Eat Your Nutrients!


Double Chocolate Bakery Style Cookies

Double Chocolate Cookies - Coconut Flour Baking

We talked about getting in your vegetables, which is so important to our overall health! Community and celebrations are equally important and a key factor that Octogenarians living in the Blue Zones of the world all have in common. Celebrations invariably have food, including sweet choices. Balance is key and not diving in face first into a whole batch. Believe me, I’ve been there! Think college years! I myself love a delicious treat that is full of healthier ingredients! So, here is one we enjoy here at my home that I am proud to bring to any gathering!

Double Chocolate Cookies Date Sweetened Coconut Flour

This Double Chocolate Jumbo cookie recipe is a healthier version of a coffee shop cookie, but just as delicious, with less guilt, and more benefits! I used a date paste I made myself with just pureed dates. You can easily make a batch and keep it on hand in the refrigerator, or make just enough for this recipe. It takes very little time! There are local pastured eggs in these beauties, Enjoy Life chocolate chips (here) which are dairy and soy free, raw cacao and heart healthy olive oil. Let’s bake!

Jumbo Double Chocolate Grain Free Cookies

These are perfect for a picnic or while sitting in the park waiting for the Fireworks!

Double Chocolate Jumbo Cookies with Coconut Flour

Double Chocolate Bakery Style Cookies

Preheat your oven to 350º degrees.

Date Paste Directions:

Soak 1 1/2 cups of Medjool Dates in hot water for five to ten minutes until soft. Drain and remove the pits. Blend in a blender with 1/2 cup of hot water. That’s it! Date Paste. You will use 1/2 cup in this recipe. The rest lasts a long time in the refrigerator, or you can freeze it or make just enough for these cookies.

Ingredients:

1/2 Cup of Date Paste

1/2 Cup of Olive Oil

1/3 Cup of Coconut Flour

1/4 Cup of Raw Cacao Powder (here)

2 Pastured Eggs

1 Tablespoon of Grass Fed Collagen (optional here)

1 Teaspoon of Pure Vanilla Extract

1/2 Teaspoon of Baking Soda

1/4 Teaspoon of Sea Salt

1/2 Cup of Enjoy Life Mini Chocolate Chips (here)

Directions:

With a handheld electric mixer, cream the olive oil and date paste. Add the vanilla and the eggs, one at a time, blending after each addition. In a separate bowl, sift together with a wire whisk the coconut flour, raw cacao powder, salt, baking soda and gelatin. Add it to the date and egg mixture, and blend thoroughly. Fold in the mini chocolate chips, then let sit for five minutes. The coconut flour will thicken up the batter. Scoop the dough onto a large parchment lined cookie sheet with a muffin sized scoop, spacing the cookies evenly into 8. Flatten slightly with a fork so the tops are even. Bake for 15 minutes.

Remove from the oven and cool on the cookie sheet for ten minutes. Mmmmmm!

Enjoy your day!

Double Chocolate Cookies Grain Free and Yummy

Coconut Flour Orange Quick Bread or Muffins

I am enjoying the Chocolate Chip Banana Muffins I shared so much that I decided to make an Orange Muffin version that can also be made into a loaf, because I like choices!  These healthy muffins are fantastic because the texture is fine and moist and without the grains and refined carbs. When baking with coconut flour, recipes require more liquid, because coconut flour is highly absorbent. So eggs are perfect, because they give the muffins protein and healthy fat from the yolks. Eggs in baking are great for leavening and texture as well.

Coconut Flour Orange Muffins

Coconut Flour Orange Muffins

The orange zest really bumps up the orange flavor, and fresh squeezed orange juice is used to enhance the texture, flavor and brightness of the muffin. I find muffins so cheery when I sit down to relax and read about something exciting like travel or planning a new garden! Hmmmmmm, not sure why, but it puts me in my happy place! 🙂 So here is a photo of the loaf, and keep scrolling for another muffin picture and the recipe!

Coconut Flour Orange Quick Bread

Coconut Flour Orange Quick Bread


Coconut Flour Orange Muffins

Coconut Flour Orange Muffins


Coconut Flour Orange Quick Bread or Muffins

Preheat the oven to 325º degrees F. Set out a 12 cup muffin pan, or medium loaf pan if making the bread. Line the muffin pan with muffin papers, and if making the loaf, grease the pan and line it with parchment paper.

Ingredients:

6 Eggs

2 Bananas (ripe with some black spots)

1/2 Cup of Coconut Flour

1/3 Cup of Olive Oil (or Coconut Oil)

1/4 Cup of Collagen (optional but great for hair, skin, nails and digestion)

1/4 Cup of Fresh Squeezed Orange Juice

2 Tablespoons of Honey

1 Tablespoon of Orange Zest (make sure you have a fantastic peel for the most flavor)

1/2 Teaspoon of Vanilla Extract

1/2 Teaspoon of Baking Soda

1/4 Teaspoon of Sea Salt

If making the loaf – Thin Orange Slices including the peel, halved.

Directions: In a food processor, blend the bananas and eggs until no chunks remain and you have a creamy yellow mixture. Add the remaining ingredients, and process for two minutes. Scraping the sides of the processor once. Let the batter sit for 5 minutes. Scoop the batter into 12 muffin cups, or pour into your prepared loaf pan. If making the loaf, add the orange slices on the top decoratively. (See photo)

Bake in your preheated oven for 35 minutes if you are making the muffins, or until the tops spring back when lightly touched with your finger. For the loaf, bake for 65 to 70 minutes until a toothpick inserted in the center comes out clean. Remove from the oven and cool five minutes before removing the muffins or loaf from their pans to cool completely. Well, you can eat a warm muffin, but please cool the loaf completely…..it’s the baker in me. Add some decorative zested orange to the tops of your muffins if desired.

Happy Muffining! I know that’s not a word, but I like it!

Eat Your Nutrients!

Eat Your Nutrients!