Blueberry Spoon Fruit (Date Sweetened)

Making Spoon fruit is a delicious way to use Summer’s fruit bounty! It is a technique that purees and reduces the fruit on the stove top, without added thickeners or refined sugar, to a jammy consistency.

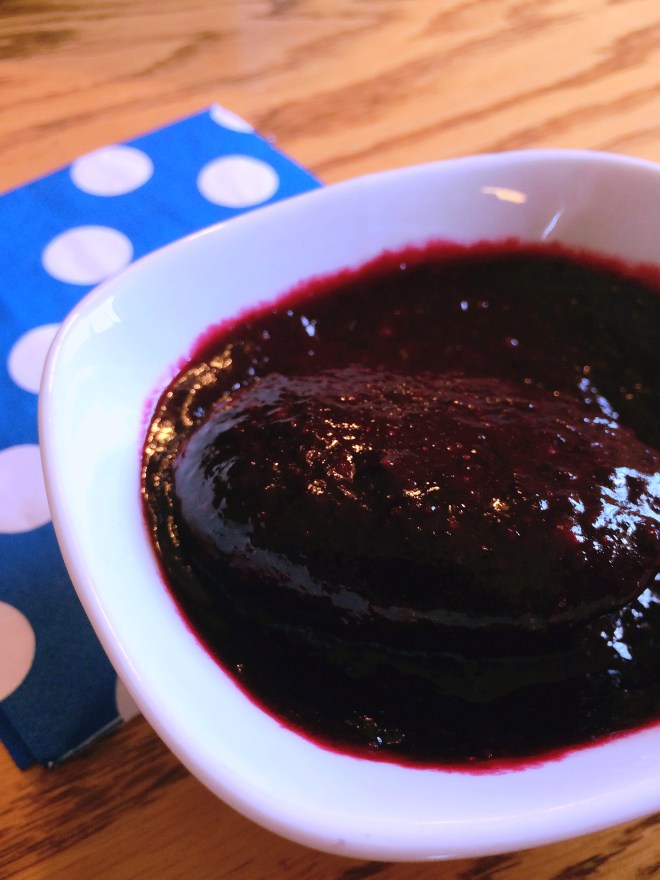
For this luscious Blueberry Spoon Fruit, I used dates and a bit of fresh lemon juice, along with wild blueberries.

I use this spoon fruit in my Chocolate Blueberry Ripple Ice Cream Sandwiches.

Simple is often the best!

Blueberry Spoon Fruit

Blueberry Spoon Fruit


Blueberry Spoon Fruit

Ingredients:

1 Cup Blueberries

1/4 Cup of Pitted Dates (Roughly Chopped)

2 Tablespoons of Fresh Lemon Juice

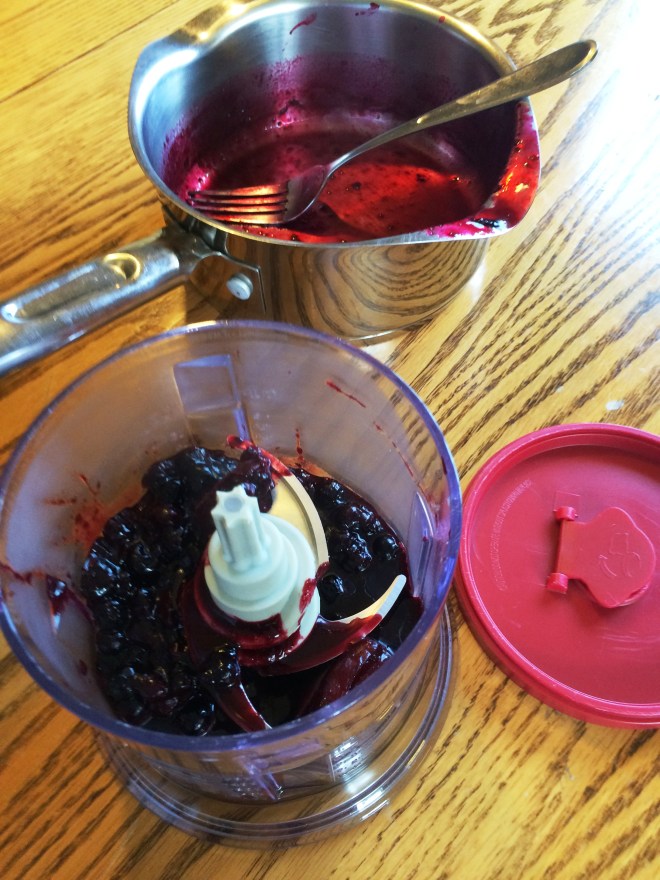
Directions: In a small saucepan, bring the berry mixture to a boil, and simmer for ten minutes on low, stirring occasionally. Add mixture to a blender (I used a small Ninja) and puree.

Making Blueberry Spoon Fruit

Making Blueberry Spoon Fruit

Yield: approximately 3/4 cup

Date Sweetened Blueberry Spoon Fruit

Date Sweetened Blueberry Spoon Fruit

Eat Your Nutrients!

Eat Your Nutrients!

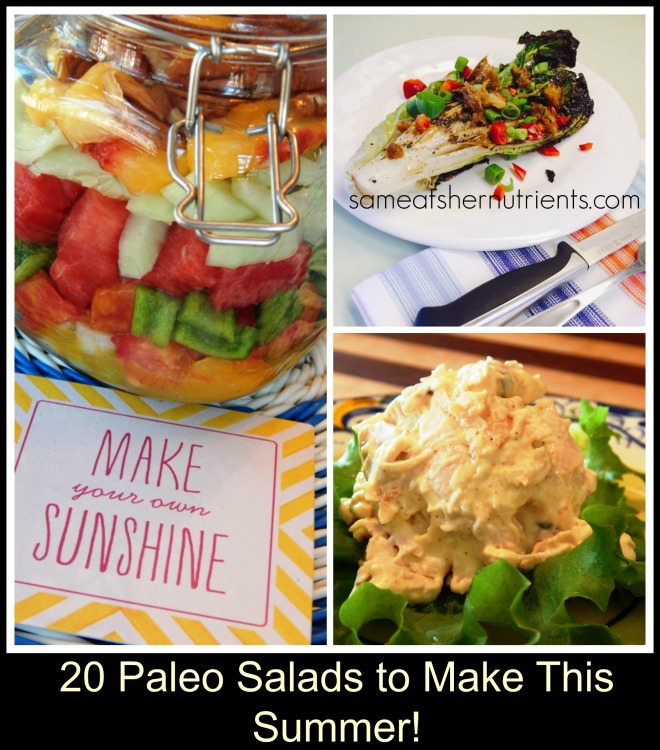
20 Paleo Salads to Make This Summer!

20 Paleo Salads To Make This Summer!

Looking to shake up your salads? I have you covered with 20 delicious recipes that I rounded up for you so you don’t have to! Lighter Fare is very appealing in the warmer months of Summer. The Farm Markets are bursting with peak-season produce chocked full of abundant nutrients.

Enjoy these 20 Paleo Summer Salad recipes by some wonderful bloggers. Mix it up! The fleeting availability of Summer fruit and vegetables make it an exciting time for salads. Make the most of the season!

Bacon Date Fennel Salad with Grilled Peaches from Savory Lotus

Low FodMap Seven Layer Salad from A Girl Worth Saving

Broccoli Salad with Crispy Bacon from Paleo Grubs

Paleo Steak Salad with Coconut Pan Fried-Peaches by Paleo Magazine

Tangled Thai Salad by Danielle Walker

Summer Peach and Berry Fruit Salad by Me 🙂

Paleo Detox Salad from Fed & Fit

Hot Cranberry Spinach Salad from The Paleo Mom

Warm Taco Style Salad from The Healthy Foodie

Bistro Lemon Chicken Dinner Salad by Me 🙂

Tarragon Chicken Salad with Asparagus, Strawberries and Djon Vinaigrette from The Thin Twin

Easy Turkey and Bacon Club Salad from Diane Sanfilippo of Balanced Bites

Italian Chopped Salad from Paleo Hope and Autoimmune Disease

Strawberry and Macadamia Nut Chicken Salad from Girl Meets Paleo

Chicken and Cabbage Salad with Almond Butter Dressing from Paleo Leap

Endive, Radicchio and Apple Salad with Porkitos and Hazelnuts by Nom Nom Paleo

Cape Cod Chopped Salad by Barefoot Contessa via Food Network (Cheese Optional)

Deli Chicken Salad by Sam

Peachy Jar Salad with Ginger Vinaigrette by Sam

Spiralized Golden Beet Salad by Sam

Grilled Romaine Salad

It’s grilling season! Grilling embodies so much more than food. In means hanging out in the backyard, more leisurely laid back moments, friends and family, children having the opportunity to have less structure to their day and time to daydream, warm weather, and parties!

Today I am sharing a new recipe for Grilled Romaine Salad. To make this salad you wash and halve Romaine Lettuce and brush it with Olive Oil, Salt and Pepper. Grilling gives the salad a mild, smokey flavor and also tenderizes the lettuce. I topped it simply with precooked bacon, and some chopped red pepper and scallions. Then I drizzled it with a zippy red wine vinaigrette! Here’s the recipe!

Grilled Romaine Salad

Grilled Romaine Salad – sameatshernutrients.com

Grilled Romaine Salad

Ingredients:

2 Heads of Romaine, washed and halved lengthwise

Good Olive Oil

Sea Salt

Black Pepper

1/2 Cup of Cooked, Crumbled Bacon

1 Diced Red Pepper

3 Scallions, Sliced

Red Wine Vinaigrette:

1/2 Cup Good Olive Oil

1/4 Cup Red Wine Vinegar

1 Tablespoon of Djon Mustard

1 Teaspoon Honey

1/2 Teaspoon of Sea Salt

1/4 Teaspoon of Black Pepper

Whisk the dressing together until emulsified.

Preheat your grill, then turn down to medium-high. Brush your halved Romaine generously with Olive Oil, then sprinkle with Sea Salt and Black Pepper as desired.

Ready for the Grill

Ready for the Grill

Place the Romaine cut side down on your grill, close the lid and grill 3 to 5 minutes until there are nice grill lines on your Romaine and it is to your satisfaction. It will be slightly wilted.

Remove from the grill and plate your Romaine. Sprinkle with Scallions, Red Bell Pepper and Bacon Crumbles. Drizzle with the Red Wine Vinaigrette and additional Sea Salt and Pepper if desired. Serve warm.

Serves 4

Grilled Romaine Salad with Red Wine Vinaigrette

Grilled Romaine Salad with Red Wine Vinaigrette

Eat Your Nutrients!

Eat Your Nutrients!

Patriotic Nice Cream Sundae

A cold something something that is creamy and cooling when sliding down sends me into bliss mode on a warm day. I know it does for you too! That’s why ice cream is so, so popular. It reaches the feel good receptors in our brain!

I love making this particular sundae around Independence Day aka July 4th because there are fresh, local, juicy berries at the Farm Market!

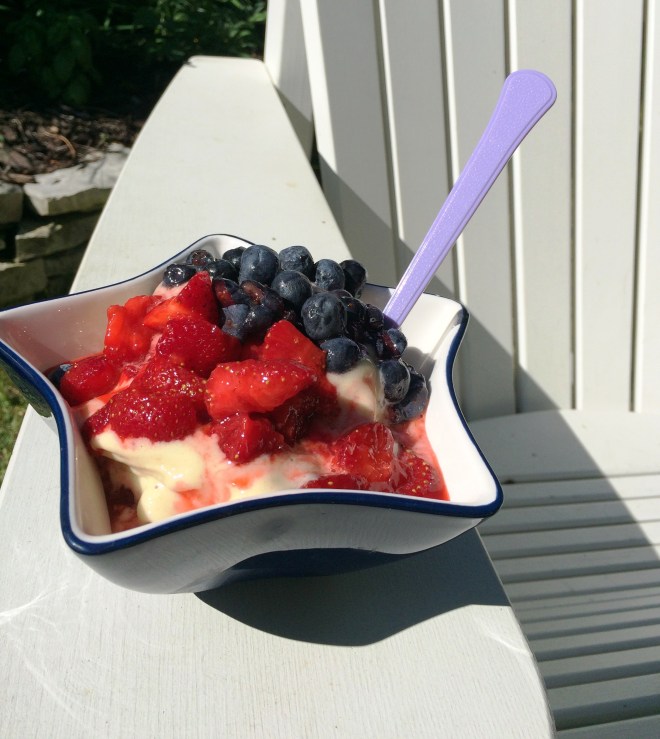
This recipe is healthy, cold, creamy, and bursting with berries which are full of antioxidants, vitamin c, fiber and sunshine! If you have been working out like me, there is also a good dose of potassium in the bananas!

Patriotic Nice Cream Sundae

Patriotic Nice Cream Sundae

Patriotic Nice Cream Sundae

You will need a high speed blender to make the Nice Cream, and it is simple and quick!

Ingredients:

Sundae Topping:

1 1/2 Cups of Juicy Strawberries

1 Cup of Juicy Blueberries

Place the washed berries in seperate mixing bowls, and muddle with a potato masher or pastry cutter to release some of the juices and break up the berries a bit.

Nice Cream

3 Bananas, Ripe and Frozen

1 Tablespoon of Honey

2 Teaspoons of Fresh Squeezed Lemon Juice

Blend on high until creamy. You will need a plunger to push down the bananas. Blend just until incorporated!

Layer the Nice Cream and Berries as desired. Eat immediately.

You know what I will be doing at some point this holiday weekend! 😉

Cheers!

Eat Your Nutrients!

Eat Your Nutrients!


Patriotic Nice Cream Sundae

Patriotic Nice Cream Sundae


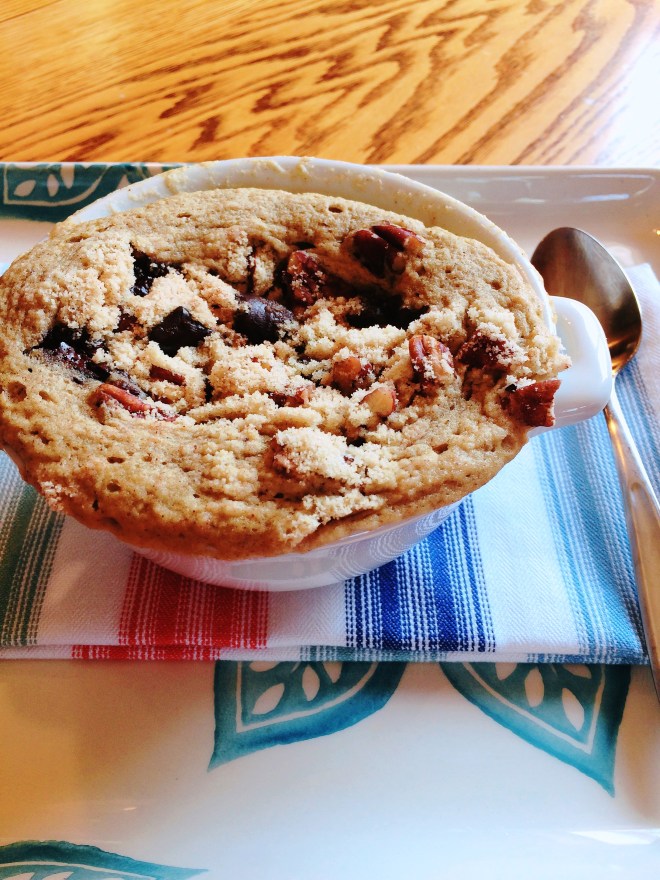
Funky Monkey Crumb Cake (Microwave Mug Cake)

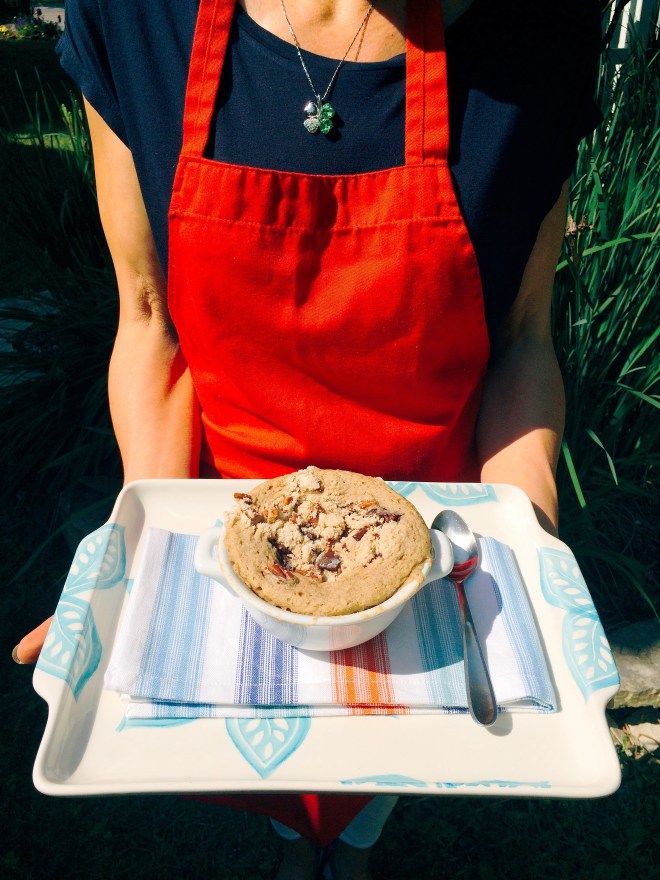
This mug cake is quick and easy! It has a pretty crumb topping with the crunch of pecans and the decadence of chocolate. It is grain free, moist, cakey and full of flavor!

Funky Monkey Crumb Cake - Paleo

It is so cool to be able to whip up a cake in the microwave! I dunno why I am so fascinated with it. It must be from my Easy Bake Oven days. Gosh! I Loved an Easy Bake Oven. It was on my wish list, but I never received one as a child, but I sure loved going to my friends and using theirs.

Another reason I really like these mug muffins and cakes is you aren’t making a huge dessert cake. It is a guilt free, smaller treat!

This recipe takes just 3 minutes to cook! It pops way up, and I was holding my breath when testing it, because it looked like it was going to overflow in the microwave, but it rises way up and then settles down again, like magic!

It is a really delicious cake!

Funky Monkey Crumb Cake

Ingredients For the Cake:

1 Ripe Banana

1 Egg

¼ Cup Almond Flour

2 Tablespoons of Coconut or Almond    Milk

2 Tablespoons of Dark Chocolate or Chocolate Chips

2 Teaspoons of Honey or Maple Syrup

¼ Teaspoon Cinnamon

¼ Teaspoon of Baking Soda

¼ Teaspoon Vanilla Extract

Pinch of Sea Salt

For Crumb Topping:

2 Tablespoons of Almond Flour

2 Tablespoons of Broken Pecans

2 Tablespoons of Dark Chocolate Pieces of Chocolate Chips

Pinch of Sea Salt

Directions: Puree the banana and egg together by mashing or blending with a hand mixer or small blender like a Ninja. Add the remaining cake ingredients except the chocolate pieces and mix until incorporated. Fold in the chocolate and pour into a individual serving bowl that holds 1 ½ cups like a soup bowl or extra large mug.

Mix the Crumb Topping together and sprinkle on top of the cake batter.

Microwave for 3 minutes. It will puff way up, but should not overflow the dish. Cool Slightly.

Funky Monkey Crumb Cake

Funky Monkey Crumb Cake

Funky Monkey Crumb Cake - Grain Free

Funky Monkey Crumb Cake


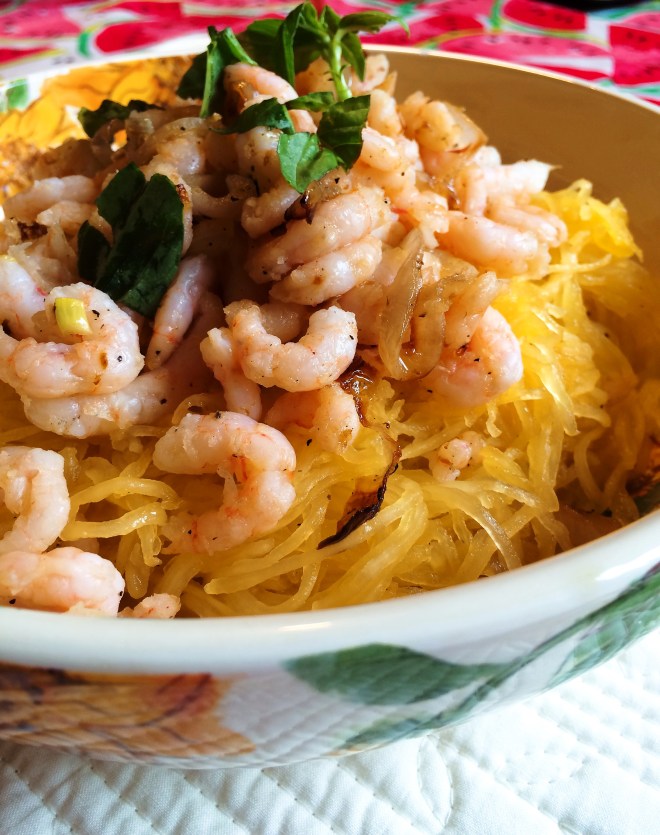
Shrimp and Shallots Bowl with Spaghetti Squash Noodles

Shrimp and Shallot Bowl with Spaghetti Squash Noodles

Shrimp and Shallot Bowl with Spaghetti Squash Noodles

Recipes that are simple and delicious are exactly what I am looking for in the Summertime when there are more hours of daylight to be enjoyed.

Yesterday I started off with a quick 20 minute workout using resistance bands that made me feel energized and ready for the day. I had a green smoothie for breakfast and my go to Matcha Green Tea Latte

We are in Northern Michigan for a few months, where there is 40 minutes more of daylight up here than in Maryland, and we are trying to enjoy every minute! My daughters and I went to a local coffee shop where they are having a fierce Summer competition of a card game called Quiddler. They keep score of every game to have a grand champ score at Summer’s end!
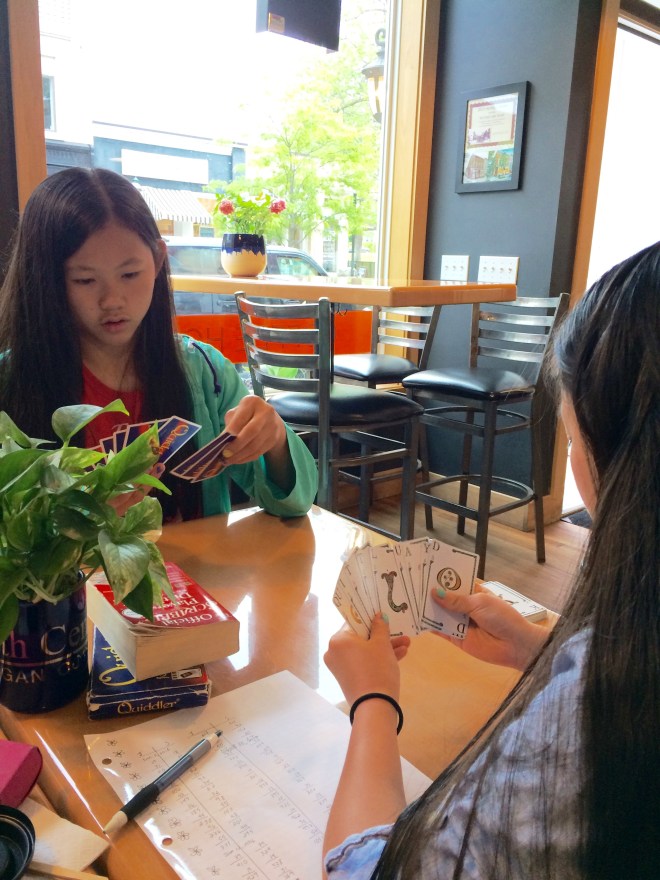
Fierce Quiddler Competition

Fierce Quiddler Competition

After lunch we went to the beach, and for dinner I made this new recipe that was blog worthy using Shrimp and Caramelized Shallots over Oven Roasted Spaghetti Squash. The citrus flavors really complimented the dish! I liked how the orange juice in the “noodles” melded with the lemon in the shrimp in each bite!
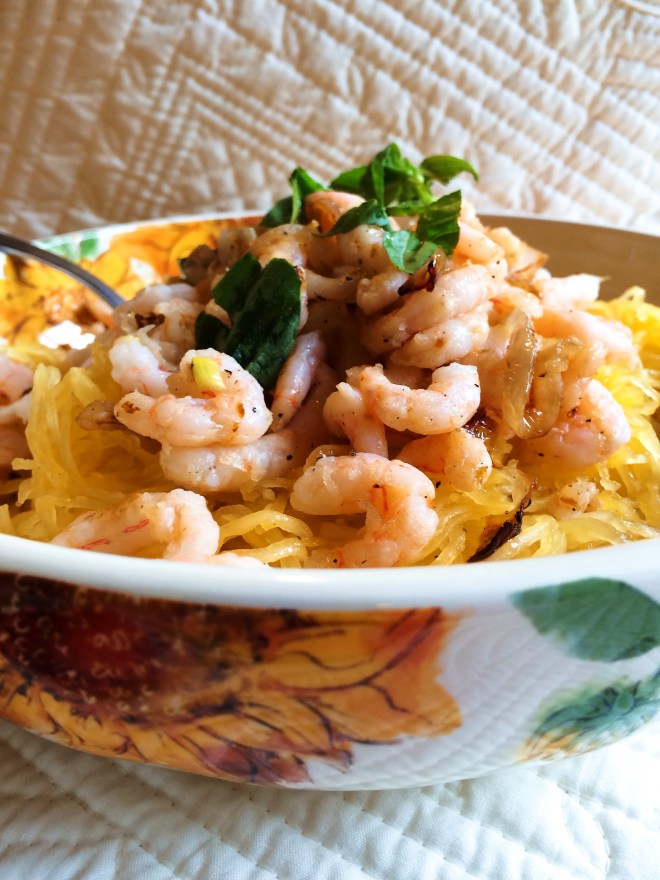
Shrimp and Shallot Bowl

Shrimp and Shallot Bowl


Shrimp and Shallot Bowl with Spaghetti Squash Noodles

Ingredients:

1 Pound of Baby Baby Shrimp

1 Large Shallot or a Few Small (1/4 Cup) thinly sliced

2 Tablespoons of Olive Oil

2 Cloves of Garlic, minced

Zest of one Lemon

1/8 Teaspoon of Sea Salt

1/8 Teaspoon of Black Pepper


for Noodles:

1 Medium Spaghetti Squash (halved lengthwise and seeds removed)

Juice from one Orange

1 Tablespoon of Olive Oil

Sea Salt and Pepper to Taste

Fresh Basil

Directions:

Preheat the oven to 400º degrees. Lay the prepared squash on a baking sheet lined with parchment. Sprinkle with Sea Salt and Pepper and place face down and bake for 40 minutes, or until tender.  Flip over to cool slightly while you make the Shrimp. Wash and Tear about a quarter cup of fresh Basil and set aside.

For Shrimp – in a large pan on the stove top, add the olive oil, and heat over medium high heat to warm. Add the shallots, garlic and lemon zest. Sprinkle with Sea Salt and Pepper, and cook until the Shallot starts to brown and caramelize. Add the shrimp, and cook quickly over high heat until pink.

Set aside and cover to keep warm while you use a fork to shred the Spaghetti Squash into a mixing bowl. Add the Olive Oil, Orange Juice, and Sea Salt and Pepper to taste to the squash noodles. Toss it all together.

Mound the Squash Noodles into three personal sized bowls. Top with the Shrimp and Shallots, and sprinkle with Fresh Basil!

You are ready to eat! 🙂 Grab a fork!

After dinner we hiked our favorite trail with our two pugs, Ming and Lily.
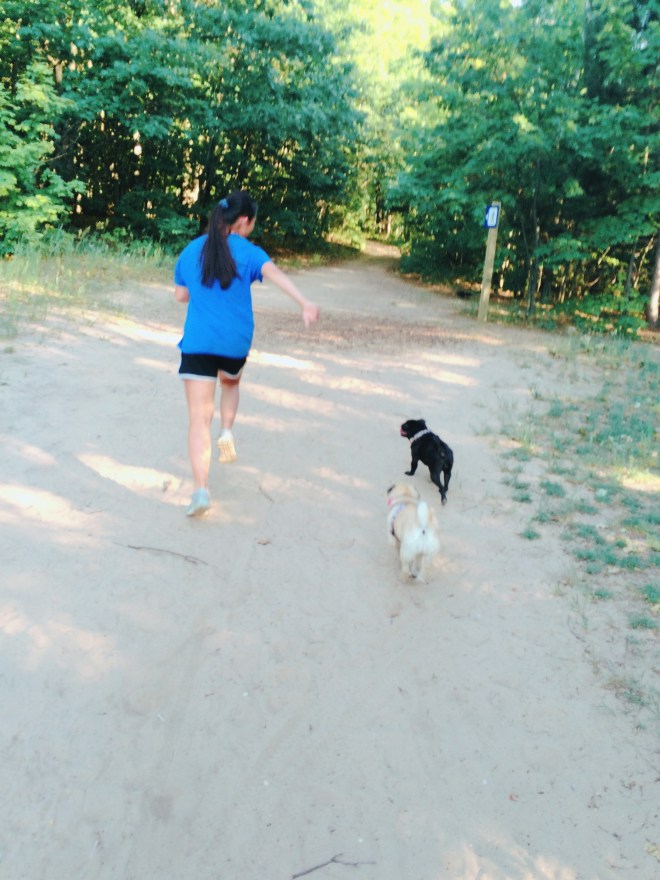
Walking with Pugs

Walking with Pugs


I hope you are enjoying your Summer! What are some of your favorite activities and food?

Eat Your Nutrients!

Eat Your Nutrients!


Cherry Lemon Biscotti

Delicious Cherry Lemon Biscotti

Delicious Cherry Lemon Biscotti

Good Morning Everyone! I am so happy Summer is here! It is so relaxing having the kids out of school and having extended hours of daylight! We are spending time in Northern Michigan this Summer, and it is staying light until ten p.m. I love this time of year! I get so much fresh air because I am outdoors a lot more!

This is the Cherry Capital of the world, so what better time to make some Cherry Lemon Biscotti cookies to dunk in a cup of delicious coffee or tea?

Grain Free Cherry Lemon Biscotti Cookies

Grain Free Cherry Lemon Biscotti Cookies

Here’s the recipe!

Cherry Lemon Biscotti

Preheat your oven to 350º degrees. Lay out a parchment lined cookie sheet.

Ingredients:

2 1/2 Cups Superfine Almond Flour

1 Tablespoon of Coconut Flour

Zest of 1 Lemon

1/2 Teaspoon of Baking Soda

1/4 Teaspoon of Sea Salt

2 Pastured Eggs

1/3 Cup Good Honey

1 Tablespoon of Fresh Lemon Juice

1 Teaspoon of Pure Vanilla Extract

1/3 Cup of Dried Tart Cherries

Directions:

Sift together your dry ingredients in a medium to large bowl. In a separate bowl with an electric hand-held mixer, blend your wet ingredients. (The cherries are last, so don’t add them yet). Add the wet ingredients to the dry and mix with your mixer until fully smooth and incorporated. With a spatula, fold in the cherries evenly. Mound the dough onto your prepared, parchment lined baking sheet. With wet hands, form the dough into a 1 1/2 inch high rectangle like this:

Biscotti Ready for first bake!

Biscotti Ready for first bake!

It looks fancy with the cookie cutter design on the top, but it disappeared during baking, so no need to do this! 🙂

Bake for 20 minutes until golden brown. Remove from the oven and cool for 30 minutes on the cookie sheet.

With a serrated bread knife slice the biscotti on a diagonal, starting at a short corner. Make the slices approximately an inch thick. If some fall apart or break, at this point you can pat them back together. Lay cut side down back on the cookie sheet. Bake for seven minutes on one side, then remove from the oven and flip them to the other cut side and bake 5 more minutes. Remove from the oven and cool completely.

Enjoy these sweet and tart lovelies!

Cherry Lemon Grain Free Biscotti

Cherry Lemon Grain Free Biscotti

I couldn’t resist adding a picture of me with my daughters this Summer, and also a picture of my Ming Ming enjoying a Summer Evening! Blessing to you! Have fun!

My Two Youngest Daughters and I

My Two Youngest Daughters and I

Ming Ming enjoy Summer!

Ming Ming enjoying Summer!

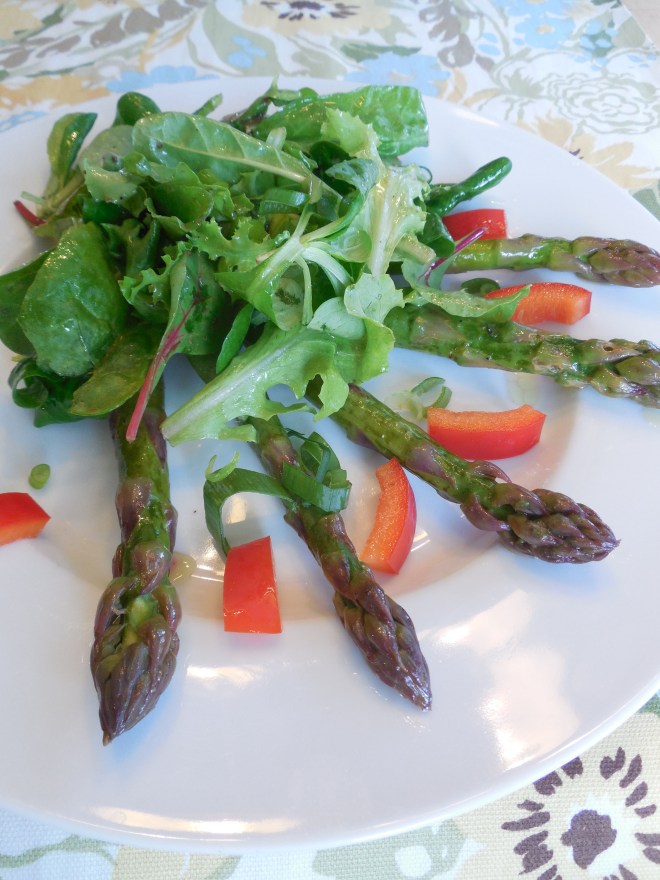
French Asparagus Salad

It’s Asparagus Season! After my trip to Florida this month, I came home and recreated a salad I had while dining at a French restaurant, Bistro Chez Jean-Pierre, in Palm Beach. They made the salad on the fly, just for me, when I told them of my food intolerances. The asparagus was crisp tender, and the leafy greens tossed in a vinaigrette where perfect with it. They also brought out a beautiful bowl of fresh berries for me for dessert.

Spring and Summer are the easiest times to eat local, seasonal food, and I like to take advantage of the Farmer’s Markets for sure! Research has proven that nutrients are the most plentiful in produce when it has just been harvested. After it has traveled to the store and sat on the shelves for several days, the nutrient content lessens day by day. (You can read more about this here).


Asparagus Salad

French Asparagus Salad


It is such a pretty salad! I hope you give it a try and also take advantage of all the beautiful, locally grown food this time of year. Your body will love you for it!

French Asparagus Salad

Ingredients:

10 Asparagus Spears, Snapped at the ends to remove tough portion

2 Cups of Fresh Leafy Salad Greens (You Choose)

1/2 of a Red Bell Pepper, Diced

2 Tablespoons of Sliced Green Onion

Vinaigrette

Ingredients:

1 garlic clove, minced

1 Teaspoon of Djon Mustard

1/2 Teaspoon of Dried Oregano

1/2 Teaspoon of Sea Salt

1/4 Teaspoon of Dried Parsley

1/4 Teaspoon of Black Pepper

1 Tablespoon of Fresh Squeezed Lemon Juice

2 Tablespoons of White Wine Vinegar

1/2 Cup Good Olive Oil

Directions: Whisk the dressing together until emulsified. Refrigerate any leftovers.

To make the salad, steam the asparagus for six minutes until fork tender but not mushy. Immediately move while it is hot to a shallow bowl, and toss with 2 Tablespoons of the vinaigrette. Let this sit for ten minutes to marinate.

Place the two cups of leafy greens in another bowl, and toss with a generous amount of vinaigrette. Arrange the asparagus on two plates evenly in a fan. Add the diced red pepper artfully. Then mound the leafy greens at the end of the spears. Sprinkle with scallions and a little additional salt and pepper.

It is ready to serve!

Eat Your Nutrients!

Eat Your Nutrients!


Easy Chocolate Mousse for Two

By definition a Mousse is a dessert that incorporates air bubbles to give it a light and airy texture and can range from light and fluffy to creamy and thick.

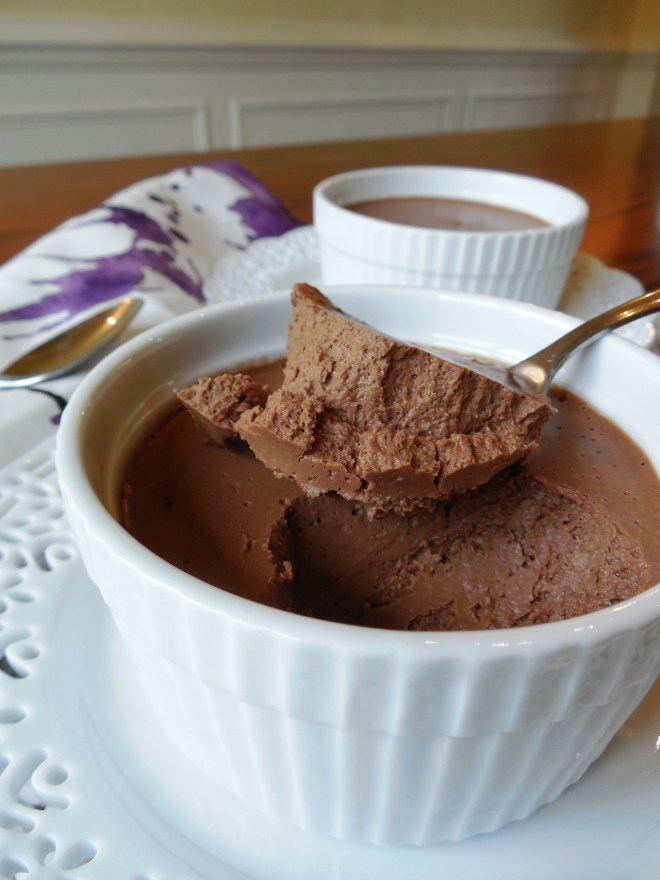
I was considering calling this mousse Miracle Mousse because there is no cooking and no eggs or dairy in the recipe yet it is thick, creamy and smooth. I whip this decadent dessert up in five minutes flat, at which time it resembles a chocolate syrup. After refrigerating it for 4 hours it thickens and becomes the creamy deliciousness you see below.

Dairy Free Chocolate Mousse

Dairy Free Easy Chocolate Mousse for Two


Raw cacao is my favorite for making chocolate recipes, because it is cold pressed and keeps the live enzymes,  and you can control what sweetener you use. In this case it was raw, local wildflower honey.

Why should you make this mousse?

  1. You Crave Chocolate
  2. You Want to Impress Someone
  3. You Need A Fast Dessert Recipe Because You Are Busy
  4. It Has No Refined Sugar
  5. You Have a Romantic Date
  6. It Has Clean Ingredients
  7. It’s Darn Good!

The recipe serves two! How romantic! 🙂

Easy Chocolate Mousse for Two

Ingredients:

1 1/2 Cups of Full Fat Coconut Milk (see In My Pantry for my favorite brand)

1/4 Cup Raw Cacao Powder

1/4 Cup Raw Local Honey

1/4 Teaspoon of Pure Vanilla Extract

a pinch of sea salt

Directions: Dump all the ingredients in a high speed blender. I used the big cup on my Ninja blender. I have also made it in my Vitamix. It just needs to be high speed to incorporate those air bubbles that makes chocolate mousse…..mousse. 🙂

Pour into two individual ramekins, serving bowls or cups.

Refrigerate for 4 hours and up to two days.

This is a decadent dessert for chocolate fans! Enjoy!

Chocolate Mousse for Two

Easy Chocolate Mousse for Two


Eat Your Nutrients!

Eat Your Nutrients!


1 25 26 27 48