Home

Instant Pot Chuck Roast

Instant Pot Chuck Roast

Instant Chuck (in the Instant Pot)

An Instant Pot is an incredibly fast way to cook when you are busy and don’t have a lot of time to spend in the kitchen.  Making a pot roast takes time in the oven, about three to four hours to get it fork tender, but with an instant pot you can be ready to eat in about an hour. That is total cooking time, not total time you have to be in the kitchen. Once you get it going, you can walk away. Love it!

I added plenty of vegetable sides to make a healthy dinner. The bed of cabbage soaked up all the juices, and we had carrots and broccoli as well. You choose! 🙂

Instant Pot Chuck Roast

Ingredients:

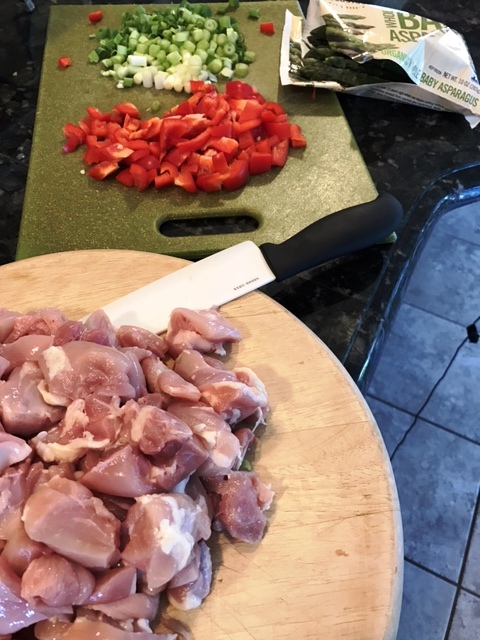
3 lb. Chuck Roast (cubed into 1 1/2″ chunks)

1 Cup of Broth

1/2 Cup of Fresh Squeezed Orange Juice

1/2 Cup of Coconut Aminos here

2 Leeks, Sliced into rounds

3 Tablespoons of Umami Blend (recipe here)

2 Tablespoons of Honey

1 Tablespoon of Minced Fresh Ginger

cutting-chuck-roast-for-instant-pot

Directions: Cube the Chuck after you have seasoned both sides with Umami Herb Blend. Put the Beef into the instant pot. Whisk together the orange juice, coconut aminos, broth, honey and ginger. Pour over the beef and add the leeks. Place the top on your instant pot and seal the steam valve at the top. Press the Meat/Stew selection, and you are done. The chuck will cook for 35 minutes, then do a cool down. Release the steam valve, and after the steam is released, remove the top and that’s it! You have a delicious, fork tender roast in a third of the time!

chuck-roast-instant-pot


instant-pot-with-chuck-roast


chuck-roast-and-leeks-in-instant-pot


instant-pot-chuck-roast

Eat Your Nutrients!

Eat Your Nutrients!

*Affiliate Link – I receive a small commission when you purchase products I recommend through my Amazon links. I use these products myself and never recommend anything I haven’t tried and use regularly. The small commission helps me keep my blog up, so if you have enjoyed my posts and recipes, I appreciate your support. You don’t pay any extra for your products. Thank you.🙂

Umami Herb Blend

umami-herb-blend

Here is a versatile seasoning you can make yourself that is delicious with meat or vegetables! The truffle salt takes the blend over the top in my opinion. 🙂

I mix it in my mortar and pestle (here).

Umami Herb Blend

1 Tablespoon of Truffle Salt (here)

1 Tablespoon of Dried Basil

1 Tablespoon of Dried Parsley

2 Teaspoons of Dried Oregano

1 Teaspoon of Dried Onion Powder

1 Teaspoon of Dried Garlic Powder

Directions: Place the ingredients in a mortar and pestle, and grind. Alternatively, you can use a coffee grinder.

It is ready to use and season with ease while you are in the kitchen.

*Affiliate Link – I receive a small commission when you purchase products I recommend through my Amazon links. I use these products myself and never recommend anything I haven’t tried and use regularly. The small commission helps me keep my blog up, so if you have enjoyed my posts and recipes, I appreciate your support. You don’t pay any extra for your products. Thank you.🙂


Grain Free Popovers Three Ways

Popovers go great with saucy winter meals, because they soak up juices! They are also great for breakfast, or stuffed with sandwich ingredients. I love their airy, fluffy texture. So today I came up with three more variations (Pecorino, Garlic and Onion, or Plain) you can make in addition to my original recipe for Italian Bacon Popovers which you can find here.

Grain Free Popovers Two Ways!

Grain Free Popovers Three Ways!


I was thrilled to discover recently that I am doing well with some kinds of dairy, so I added a dairy version of the popovers….Sheep milk cheese! Did you know that the delicious Italian Pecorino cheese is made from sheep’s milk? It is a well known delicious hard cheese that you grate, and I added it to one of my popover recipes with yum-yum results! If you aren’t partaking in dairy, no worries there are plain ones that are very versatile and classic, or try the garlic and onion and also the Italian Bacon ones on the blog which are dairy free as well!

Grain Free Popovers

Grain Free Popovers


Grain Free Popovers Two Ways!

Grain Free Popovers Three Ways!


Grain Free Popovers Three Ways

Ingredients for Popovers:

4 Eggs

1/2 Cup of Coconut Milk

2 Tablespoons of Coconut Flour

1 Teaspoon of Sea Salt

(1/4 Teaspoon each of Garlic Powder and Onion Powder for Garlic and Onion)

(1/2 Cup of Grated Pecorino Cheese for Pecorino Cheese Popovers)

Olive Oil for Cups

Directions: Preheat your oven 400º degrees. Using a muffin pan or popover pan here, pour 1/2 teaspoon of oil into the bottom of each cup. Each batch makes six popovers, so put oil in six cups. In a medium bowl, whisk together the eggs, coconut milk, coconut flour, and sea salt. Add in the variation you would like. Scoop with a muffin scoop into the cups you have added the olive oil to. Bake for 30 to 35 minutes or until golden brown. They will sink some naturally as you remove them from the oven. I carefully remove them from the pan by running a knife around the edges and gently scooping them out with a spoon. You will have some residue left in the pan.

*cheese and plain popovers are low fodmap

*Affiliate Link – I receive a small commission when you purchase products I recommend through my Amazon links. I use these products myself and never recommend anything I haven’t tried and use regularly. The small commission helps me keep my blog up, so if you have enjoyed my posts and recipes, I appreciate your support. You don’t pay any extra for your products. Thank you.🙂

Eat Your Nutrients!

Eat Your Nutrients!

Easy Coconut Milk Whipped Cream Five Ways!

Whipped Cream is one of the great pleasure of life! Gosh, I have missed my coffee shop beverages with all that delicious whip on top after going dairy free! Just before Thanksgiving, I finally purchased my own professional whipped cream dispenser, and I am so glad I did. I have been enjoying whip on my Matcha Latte’s I make at home, and Coffee, and also whipped topping for dessert on Thanksgiving. I am having a blast with it! Look at the gorgeous ways you can use it! You can also use a hand held mixer to make this whipped cream. Make sure your coconut milk is very cold.

chocolate-cherry-coconut-milk-whipped-cream

So, I have five variations of whip to share with you today, and it is super easy! Here’s how!

a-medley-of-coconut-milk-whipped-creams

easy-coconut-milk-whipped-topping-5-ways

Directions to make Coconut Milk Whipped Cream:

Refrigerate a can of full fat coconut milk for a minimum of four hours so it is nice and chilled. This is the brand I recommend. Pour the coconut milk into a bowl with a pour spout, and whisk it until it is creamy and blended well. (If you are making it with a hand held mixer, scoop of the coconut cream and reserve the coconut water in the bottom for another use.) Add it to your Stainless Steel Whipped Cream Dispenser. You can get it here for a good price. You will also need the cartridges to charge your dispenser here. Screw the top onto the dispenser, and add the decorator tip. Charge it as directed with one charger. You will hear the air dispelling into the whipped cream in the can. Now shake it up. I found shaking it thoroughly and more than you think you need yields the best whip, so I shake my can up and down about 50 times. It’s a good arm workout too. 🙂

It’s ready to use. The five variations are easy and delightful! Another super fun thing to do is give company a choice of what variation they want to have because it is not incorporated into the whip itself.

Cacao Dusted Whip!

Cacao Dusted Whip!

  1. Sprinkle with a dusting of cinnamon
  2. Sprinkle with a dusting of raw cacao (substitute carob powder for AIP Paleo)
  3. Sprinkle with freeze dried Just Cherries. They are freeze dried and so crush beautifully. (here)
  4. Chocolate Cherry Whip! Sprinkle on a dusting of raw cacao and some crushed cherries!
  5. Whip it up with plain whip! Equally delicious.

If you would like your whipped cream sweetened, add in two tablespoons of organic powdered sugar and beat first with an electric mixer before pouring it into the dispenser.

Let me know what your favorite way to have your whip is! Share with me in the comments below, and also, has this inspired you to try different whip flavors of your own?

cocao-dusted-coconut-milk-whipped-cream

*Affiliate Link – I receive a small commission when you purchase products I recommend through my Amazon links. I use these products myself and never recommend anything I haven’t tried and use regularly. The small commission helps me keep my blog up, so if you have enjoyed my posts and recipes, I appreciate your support. You don’t pay any extra for your products. Thank you. 🙂

One More Chance on an Instant Pot for Half Price Cyber Monday on Amazon!

I don’t want you to miss this sale if you have been eyeing an Instant Pot. I received mine yesterday from Amazon’s Black Friday sale and made a delicious chicken thigh recipe in it with just 11 minutes cooking time. I just started using it, but already love it! If you haven’t heard of them, they are multi-function. I sauteed my chicken thighs in it last night, then pressure cooked them, took them out and reduced the sauce all in the same pot. They are a rice cooker, yogurt maker, pressure cooker, steamer, slow cooker, warmer and you can use it for sauteing.

Here’s the link to get it for just $68.95 today. They are regularly $119.95.

Happy Cyber Monday!

Sam

Eat Your Nutrients!

Eat Your Nutrients!

Paleo Mandarin Orange Chicken Stir-Fry

Stir-Fry is great, because it is a one dish meal full of vegetables (my favorite) and a savory sauce!

mandarin-orange-chicken-stir-fry


Here is my Paleo version of a Mandarin Chicken Stir-Fry that is super delicious! The chicken is very juicy and tender, because I used my favorite part of the bird, thighs! I had mine as is, no rice needed, but feel free to add some hot jasmine rice if you like. I added a leafy green salad on the side, because I am a leafy greens gal! 🙂

Grab your wok! A large shallow pan will do if you don’t have a wok!

mandarin-orange-chicken

Paleo Mandarin Orange Chicken Stir-Fry

Ingredients:

2 1/2 Pounds of Boneless Chicken Thighs (cut into bite size pieces)

10 oz. of Frozen Baby Asparagus Spears (I used Woodstock brand)

1 Organic Red Bell Pepper (Diced)

5 Green Scallions (green tops only if Low Fodmap) (Thinly sliced)

1 10 oz. Can of Mandarin Oranges (I use Native Forest Here)

1/2 Cup of Coconut Aminos (Here is the brand I use)

2 Tablespoons of Garlic Infused Olive Oil (feel free to use 2 cloves of garlic and regular olive oil)

2 Tablespoons of Honey

1 Tablespoon of Plain Olive Oil

1 Tablespoon of Ginger Juice (I use this kind)

1 1/2 Teaspoons of Sea Salt or Himalayan Pink Salt

1/2 Teaspoon of Black Pepper

Prepping Mandarin Orange Chicken Stir Fry

Prepping Mandarin Orange Chicken Stir-Fry

Directions:

In a medium bowl whisk together the coconut aminos, honey and ginger juice. Drain the oranges and set aside.

Heat your wok over high heat. Add two tablespoons of Garlic Infused Olive Oil. Add the chicken thighs, and 1 teaspoon of salt, 1/2 teaspoon of pepper. Stir-fry until the chicken is almost done. Put the chicken in a bowl, and set aside.

Add one tablespoon of regular olive oil to the wok. Then add the asparagus. Stir-fry for two minutes. Add the red peppers and remaining 1/2 teaspoon of sea salt. Stir-fry two more minutes, then add in the scallions.

Asparagus and Red Peppers

Asparagus and Red Peppers

Add the chicken back to the pan, and pour over the sauce. Gently stir in the mandarin oranges. Cover and simmer for five minutes, or until the asparagus is tender.

Mandarin Orange Chicken Stir Fry Gluten Free, Paleo

mandarin-orange-chicken-paleo

Serve it up! Yum!

Eat Your Nutrients!

Eat Your Nutrients!


Rum Raisin Ice Cream (Dairy Free)

For all those of you who have been missing Rum Raisin Ice Cream, here is a clean ingredient recipe! Rum Raisin Ice Cream was one of my favorites when I was a teenager. It is a classic flavor and perfect anytime of year, but I really like it in the Autumn. The rum flavor and raisins remind me of my Grandmother’s Plum Pudding with Hard Sauce she always made for the holidays with her recipe from “the old country”, as she used to say. She meant England. She had a very old recipe from my Great, Great, Great Grandmother that I want to try and revamp into a gluten free version. But for now, ice cream!

Rum Raisin Bowl of Dairy Free Ice Cream

Rum Raisin Bowl of Dairy Free Ice Cream


This is a simple and delicious recipe of this classic that is dairy and egg free! If you are low fodmap, you can substitute currants for the raisins, and it will be simply delicious!

Rum Raisin Ice Cream (Dairy Free)

Rum Raisin Ice Cream (Dairy Free)


Now for the recipe!

Rum Raisin Ice Cream (Dairy Free)

Ingredients:

2 Cans of Coconut Milk (Full Fat)

1/2 Cup of Honey (use Clover Honey if Low FodMap)

1/2 Cup of Raisins (substitute currants if making Low FodMap)

1/4 Cup of Gelatin (Collagen not the Thickening Kind Here great for your hair, skin, nails and tummy)

2 Tablespoons of White Rum

1 Teaspoon of Vanilla Extract

1/8 Teaspoon of Himalayan Pink Salt or Sea Salt

Whisk all the ingredients together except the raisins. Stir in the raisins. Refrigerate for 4 hours to let the raisins plump and absorb some of the flavors and get the mixture chilled. Churn in an ice cream maker. Serve!

One of the things I like about adding rum to a non-dairy ice cream is, if you have leftovers and freeze them, the ice cream is easy to scoop right from the freezer.

8 Servings

Eat Your Nutrients!

Eat Your Nutrients!


Blueberry Frozen Yogurt (Made with Sheep’s Milk Yogurt)

I feel like I just won a prize! I recently found plain Sheep’s Milk yogurt at my local food co-op. Sheep’s Milk Yogurt is easily digestible, similar to goat’s milk, and many who don’t tolerate dairy in the form of cow’s milk or goat’s milk, can tolerate sheep’s milk, as it is very close to human breast milk. Sheep’s milk has a very high fat content naturally, so it is super creamy and requires no thickner’s or stabilizers. Another bonus if you are not a goat’s dairy fan because of the stronger flavor, sheep’s milk is very mild tasting. There are a lot of nutritional benefits to sheep’s milk and it has been consumed by humans for thousands of years. Read more about it here!

blueberry-frozen-yogurt-paleo-friendly

I am so thrilled about finding this yogurt that I actually tolerate very well, and tastes amazing! I want to eat it every day. I like to have it with a touch of honey and fruit, and even plain. Plus, it works great in savory dips and sauces.

black-sheep-yogurt

But today, I am using it to make a frozen yogurt  with only 4 ingredients, and it is super delicious! Before I forget, here is the brand I found that is made in New York State. It is called Black Sheep Yogurt by Old Chatham Sheep Herding Creamery. If you can’t find a good Sheep’s Milk Yogurt where you are, you can buy this brand online and have it shipped directly to you.

blueberry-frozen-yogurt-recipe-honey-sweetened-sheeps-milk-yogurt

Blueberry Frozen Yogurt

Ingredients:

1 16 oz. container of Plain Yogurt (I used Sheep’s Milk)

1/2 Cup of Frozen Blueberries

1/4 Cup of Honey

2 Teaspoons of Fresh Squeezed Lemon Juice

Directions:

Place everything but the yogurt in a small saucepan, and warm together stirring constantly over medium heat to just warm. The honey should be dissolved and the blueberries warmed.

Put the yogurt into a medium bowl. Pour the berries over the top and whisk together.

Making Blueberry Frozen Yogurt with Sheep's Milk Yogurt

Making Blueberry Frozen Yogurt with Sheep’s Milk Yogurt

Put directly into an ice cream maker, and churn until done. This takes approximately 30 minutes depending on your machine.

That’s it! So super easy and sooooooo good!

Enjoy the day!!!!!

Eat Your Nutrients!

Eat Your Nutrients!


Frosted Jackolantern Pumpkin Cookies

What kids doesn’t like a cute jackolantern pumpkin cookie this time of year! Especially if it is frosted! This honey of a cookie is thick and soft with just the right amount of pumpkin flavor.

Gluten Free/Grain Free Frosted Jackolantern Pumpkin Cookies

Gluten Free/Grain Free Frosted Jackolantern Pumpkin Cookies

You will need a handmixer and a cookie scoop for this easy recipe……no rolling involved.

Frosted Jackolantern Pumpkin Cookies

Frosted Jackolantern Pumpkin Cookies

Directions:

Preheat your oven to 350º degrees F.

Lay out a parchment lined cookie sheet.

Ingredients:

1 3/4 Cups Superfine Almond Flour

2 Tablespoons Coconut Flour

1/2 Teaspoon Baking Soda

1/4 Teaspoon Himalayan Pink Salt

1 Teaspoon Pumpkin Pie Spice

1/3 Cup Pumpkin Puree, SCD Legal

1 Egg

3 Tablespoons Clear Honey

1 Teaspoon pure Vanilla Extract

Directions: In a medium bowl, whisk together the first five dry ingredients. In a separate small bowl, with a hand held electric mixer, mix the wet ingredients together….the pumpkin puree, egg, honey and vanilla extract.

Add the wet ingredients to the dry ingredients, and mix until fully incorporated. With a 1/2 cup ice cream or cookie scoop, scoop the cookies onto your prepared cookie sheet. There should be six even sized scoops. Now, flatten into 3/4 inch thick circles with your hand, and then pinch the tops, patting and pinching to make the stem.

Bake in your preheated oven for 16 – 20 minutes, rotating the pan end to end after ten minutes. Keep an eye on them the last five minutes. The edges should be starting to brown, but not the centers.

Remove from the oven and cool completely while you make the frosting.

For the frosting:

Ingredients:

3 Tablespoons of Organic Shortening

3 Tablespoons of Honey

1 Tablespoon of Cacao Powder

In a small bowl with a hand held electric mixer, blend the shortening and honey together until it is whipped nicely.

Take a plastic sandwich bag and snip off one end. Insert a metal round piping tip into the snipped end. Scoop out two tablespoons of the white frosting from your bowl, and place it in the snipped bag. Twist the top moving the icing toward the piping tip. Set aside.

To the remaining frosting still in the bowl, add one tablespoon of cocao powder. Blend with your electric mixer.

Spread the chocolate frosting onto each cookie evenly, except the stems. Pipe the frosting on for the eyes and mouth.

It makes six large cookies. Yes, I know the picture shows five cookies. That’s because I ate one! 🙂

Happy Halloween! Boo!

Frosted Jackolantern Pumpkin Cookie - Grain Free

Frosted Jackolantern Pumpkin Cookie – Grain Free

Hearty Baked Chicken and Sausage with Mushrooms

hearty-chicken-and-sausage

A Hearty Chicken and Sausage bake is a real crowd pleaser! We recently had the family doing some hard work here around the house, and they have been coming in at dinnertime ravenous! I have been calling them “a bunch of cavemen” 🙂 because they have been devouring the protein part of the meal. Have you every had cravings for protein?

chicken-and-sausages

Well, I’m a firm believer in listening to your body, so I made this Hearty Chicken and Sausage Bake for dinner, because all that use of muscle was creating a serious craving around here.


hearty-chicken-and-sasage-dinner

Hearty Chicken and Sausage with Mushrooms

Preheat the oven to 375º degrees.

Ingredients:

2 1/2 Pounds of Bone In ChickenThighs

12 oz. of Fully Cooked Sausage Cut in Half on a Diagonal (I used gluten free Applegate Chicken and Apple)

1 Can of White Button Mushrooms

1 Large Yellow Onion, quartered and sliced

2 Tablespoons of Olive Oil

2 Cloves of Garlic, Minced (or substitute 1 Garlic Olive Oil for the Olive Oil above)

1 Teaspoon of Sea Salt

1/2 Teaspoon of Black Pepper

Sauce:

1 1/2 Teaspoons Dried Basil

1 Teaspoon Dried Tarragon

1 Teaspoon of Sea Salt

1/2 Teaspoon of Black Pepper

1/2 Teaspoon of Dried Oregano

1/2 Teaspoon of Dried Thyme

1/4 Teaspoon Crushed Rosemary

1/4 Teaspoon of Red Pepper Flakes

2 Tablespoon of Fresh Squeezed Lemon Juice

1 Tablespoon of Apple Cider Vinegar

2 Tablespoons of Olive Oil

Whisk the Sauce ingredients together and set aside.

In a large dutch oven, or an oven safe saute pan that you can cover with foil, pour the olive oil and garlic if using. Season the chicken with salt and pepper while warming the oil in the pan over medium-high heat. Add the chicken, and brown on both sides for about 5 minutes each side. Add the sausages, tucking them in around the chicken. Sprinkle the mushrooms and onion on top.

Drizzle with the previously prepared sauce. Cover and bake in your preheated oven for 40 minutes.

This can be served with hot jasmine white rice and vegetables.

Eat Your Nutrients!

Eat Your Nutrients!

1 18 19 20 39