Lamb/Beef

Easy Compounded Fresh Basil Garlic Butter

Basil is an amazing herb. It is like sunshine in a plant, the flavor of it is beautiful and mild enough to eat the leaves tossed in a salad. It is my favorite fresh herb. I have a very large plant that keeps giving and giving, and it is more difficult to find after summer in large bunches. You can’t do a whole lot with a little plastic container that you find at the grocery store. I start craving fresh basil mid-winter after the crunchy autumn maple and oak leaves are covered by white snow, and my fresh basil has long been killed by frost. Up here in Northern Michigan that is about January.

I like to go to my local food coop to find large bunches when it’s too cold to grow it outdoors myself so I can make and freeze pesto. I also have grown it indoors in the wintertime with an Aerogarden Hydroponic System that is tabletop sized. This year, I have been making a compound butter with my fresh basil and freezing it into tablespoon sized cubes to keep the fresh basil flavors going in my kitchen long after Summer is gone.

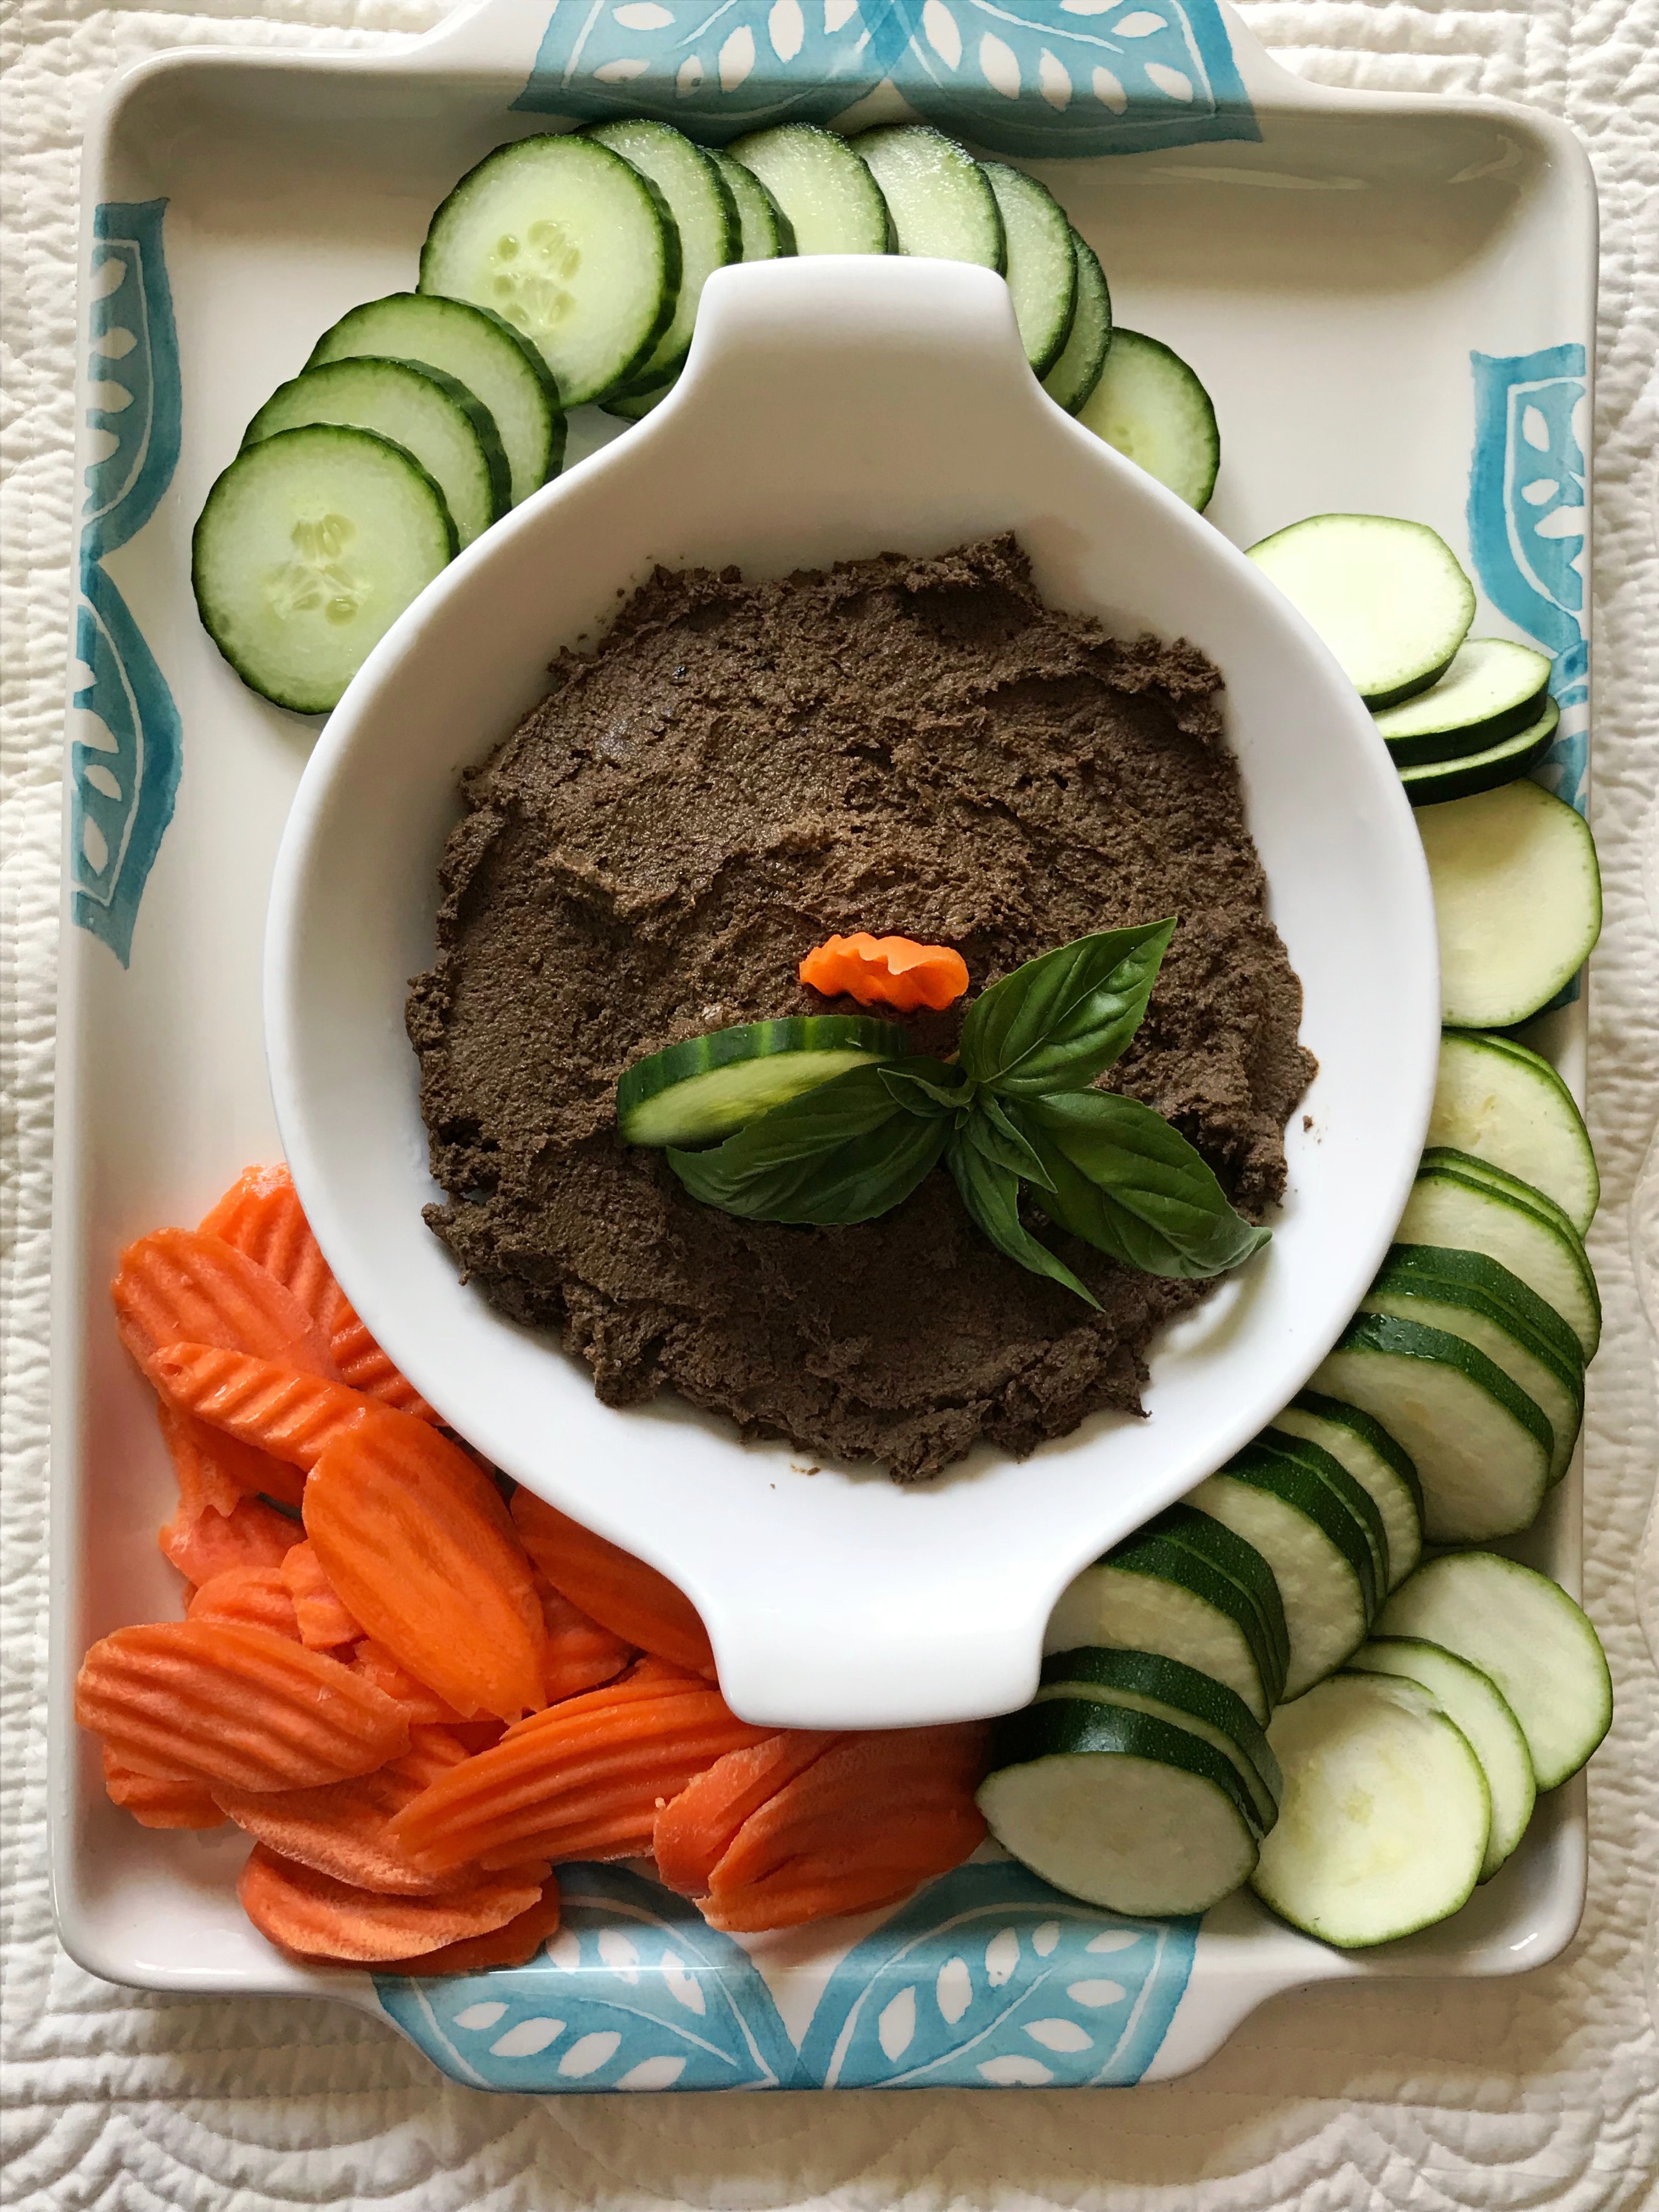
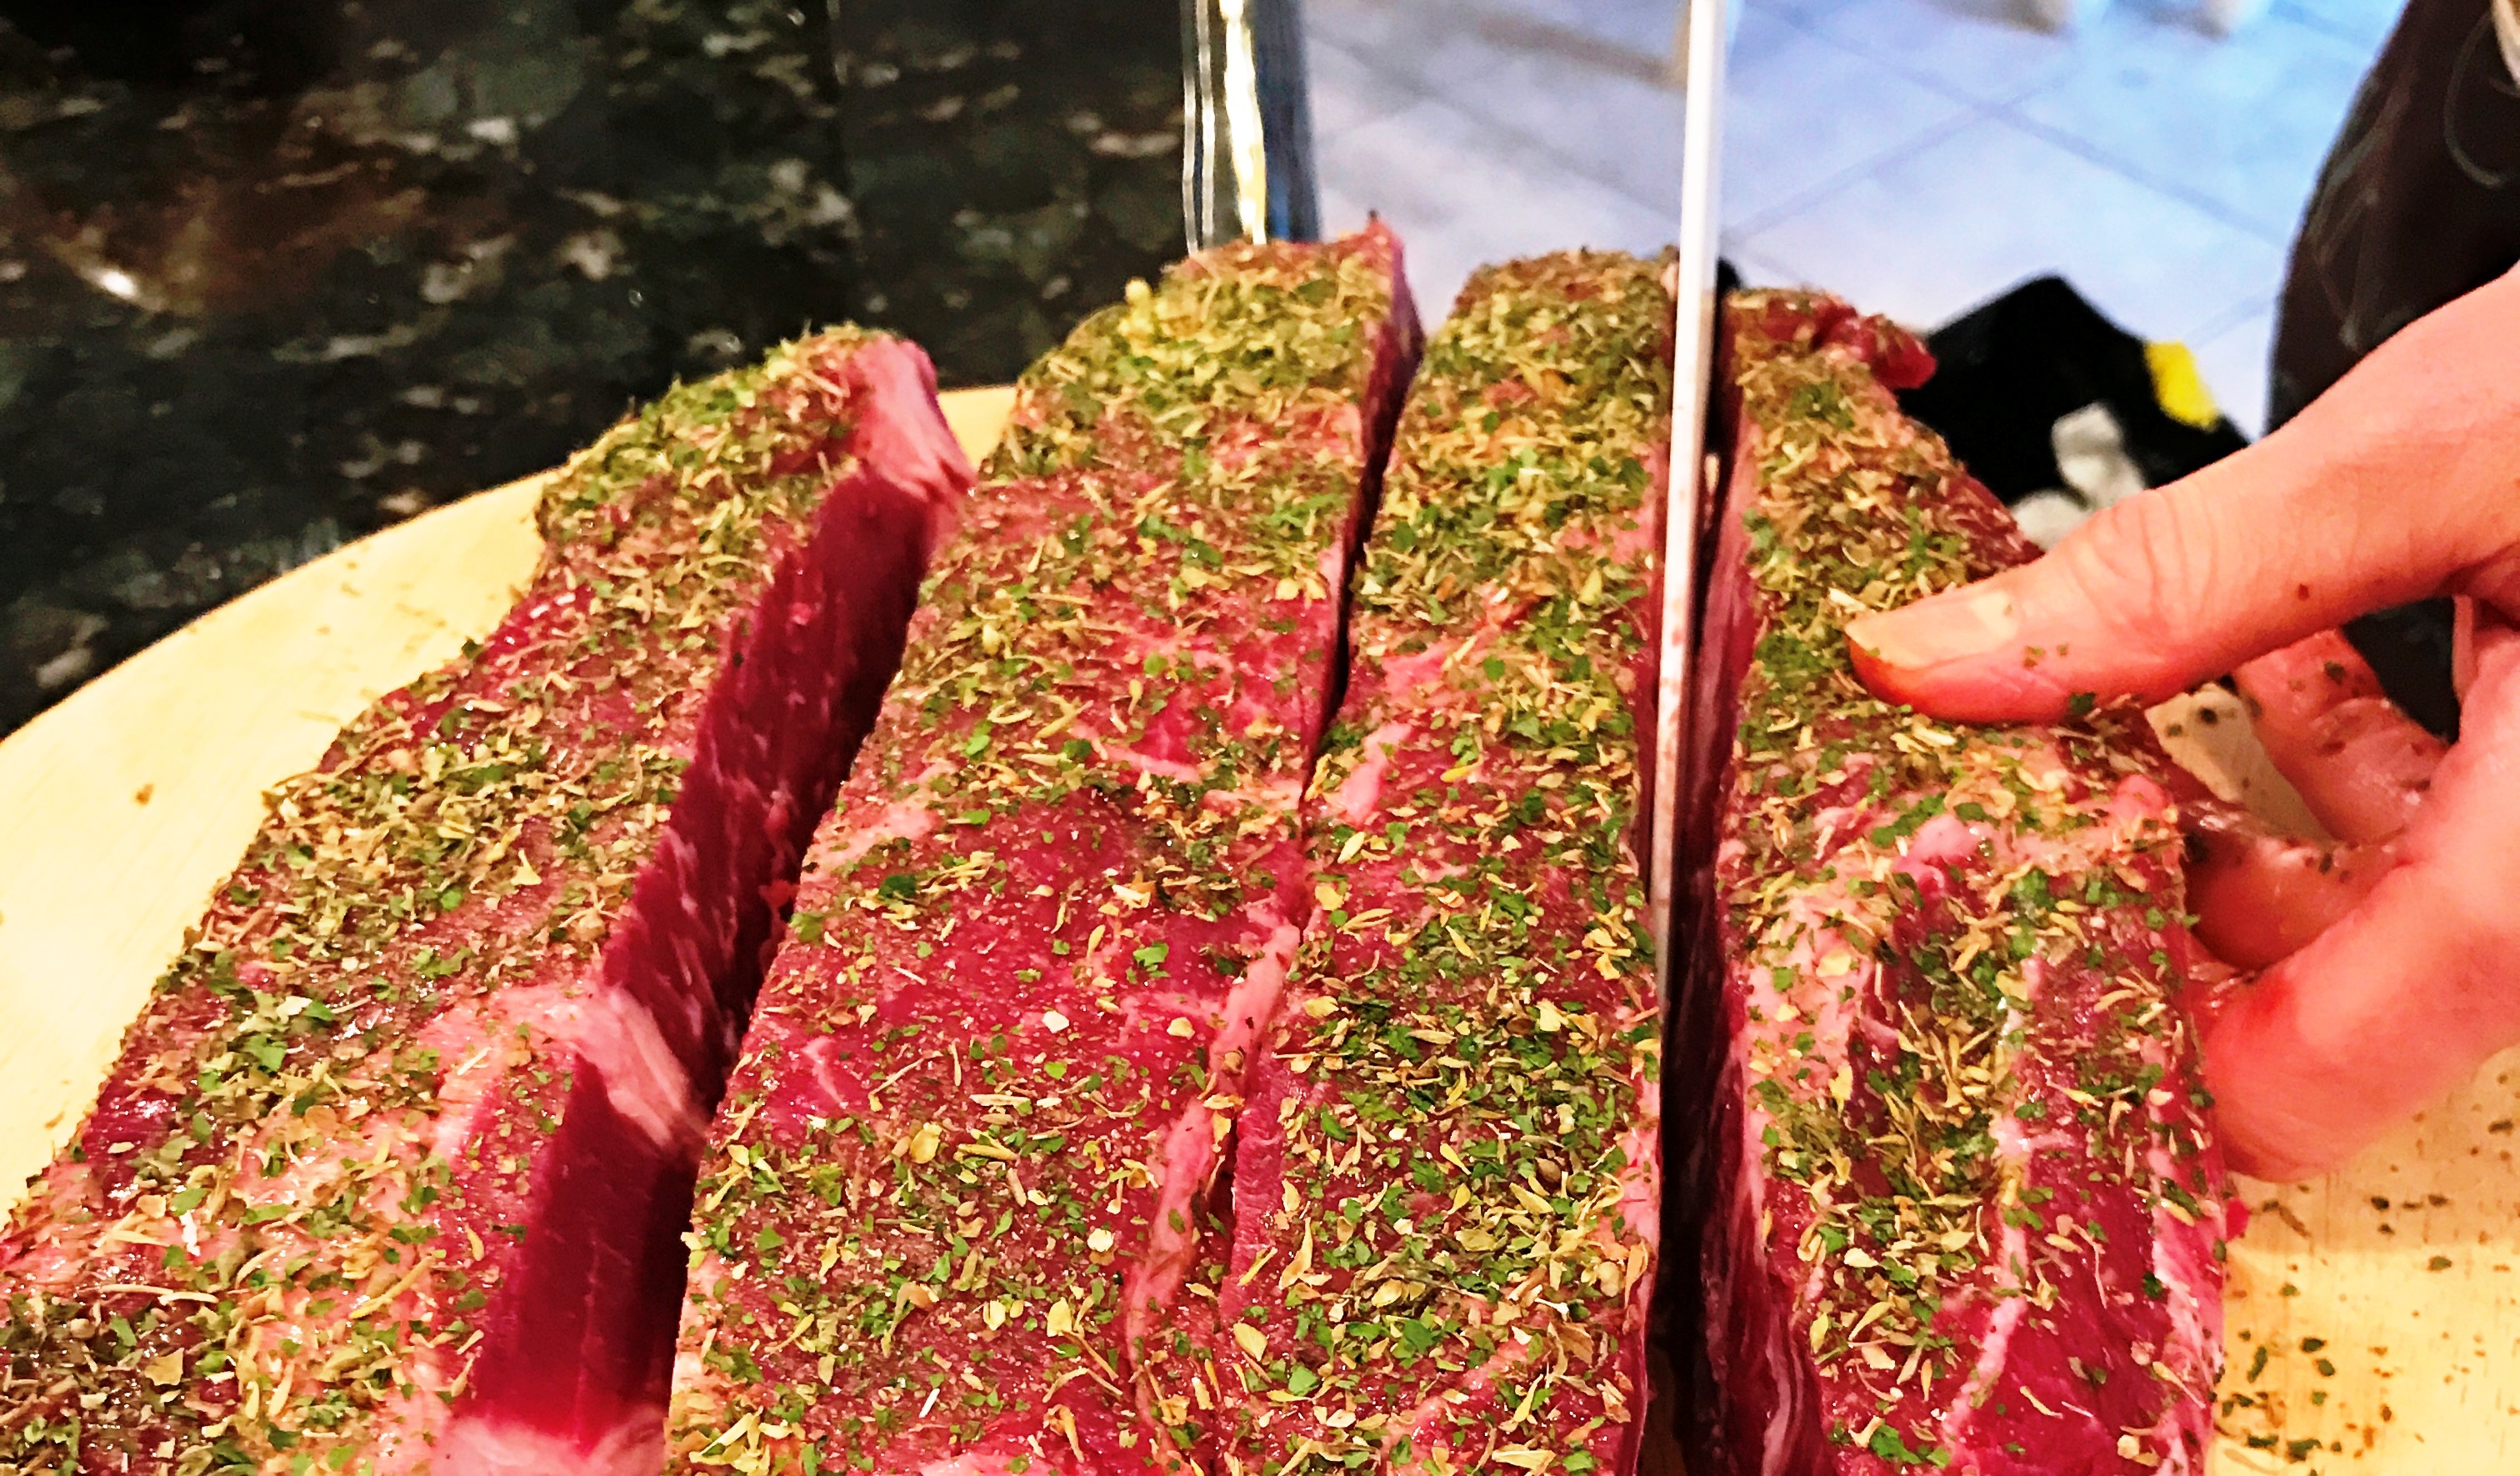
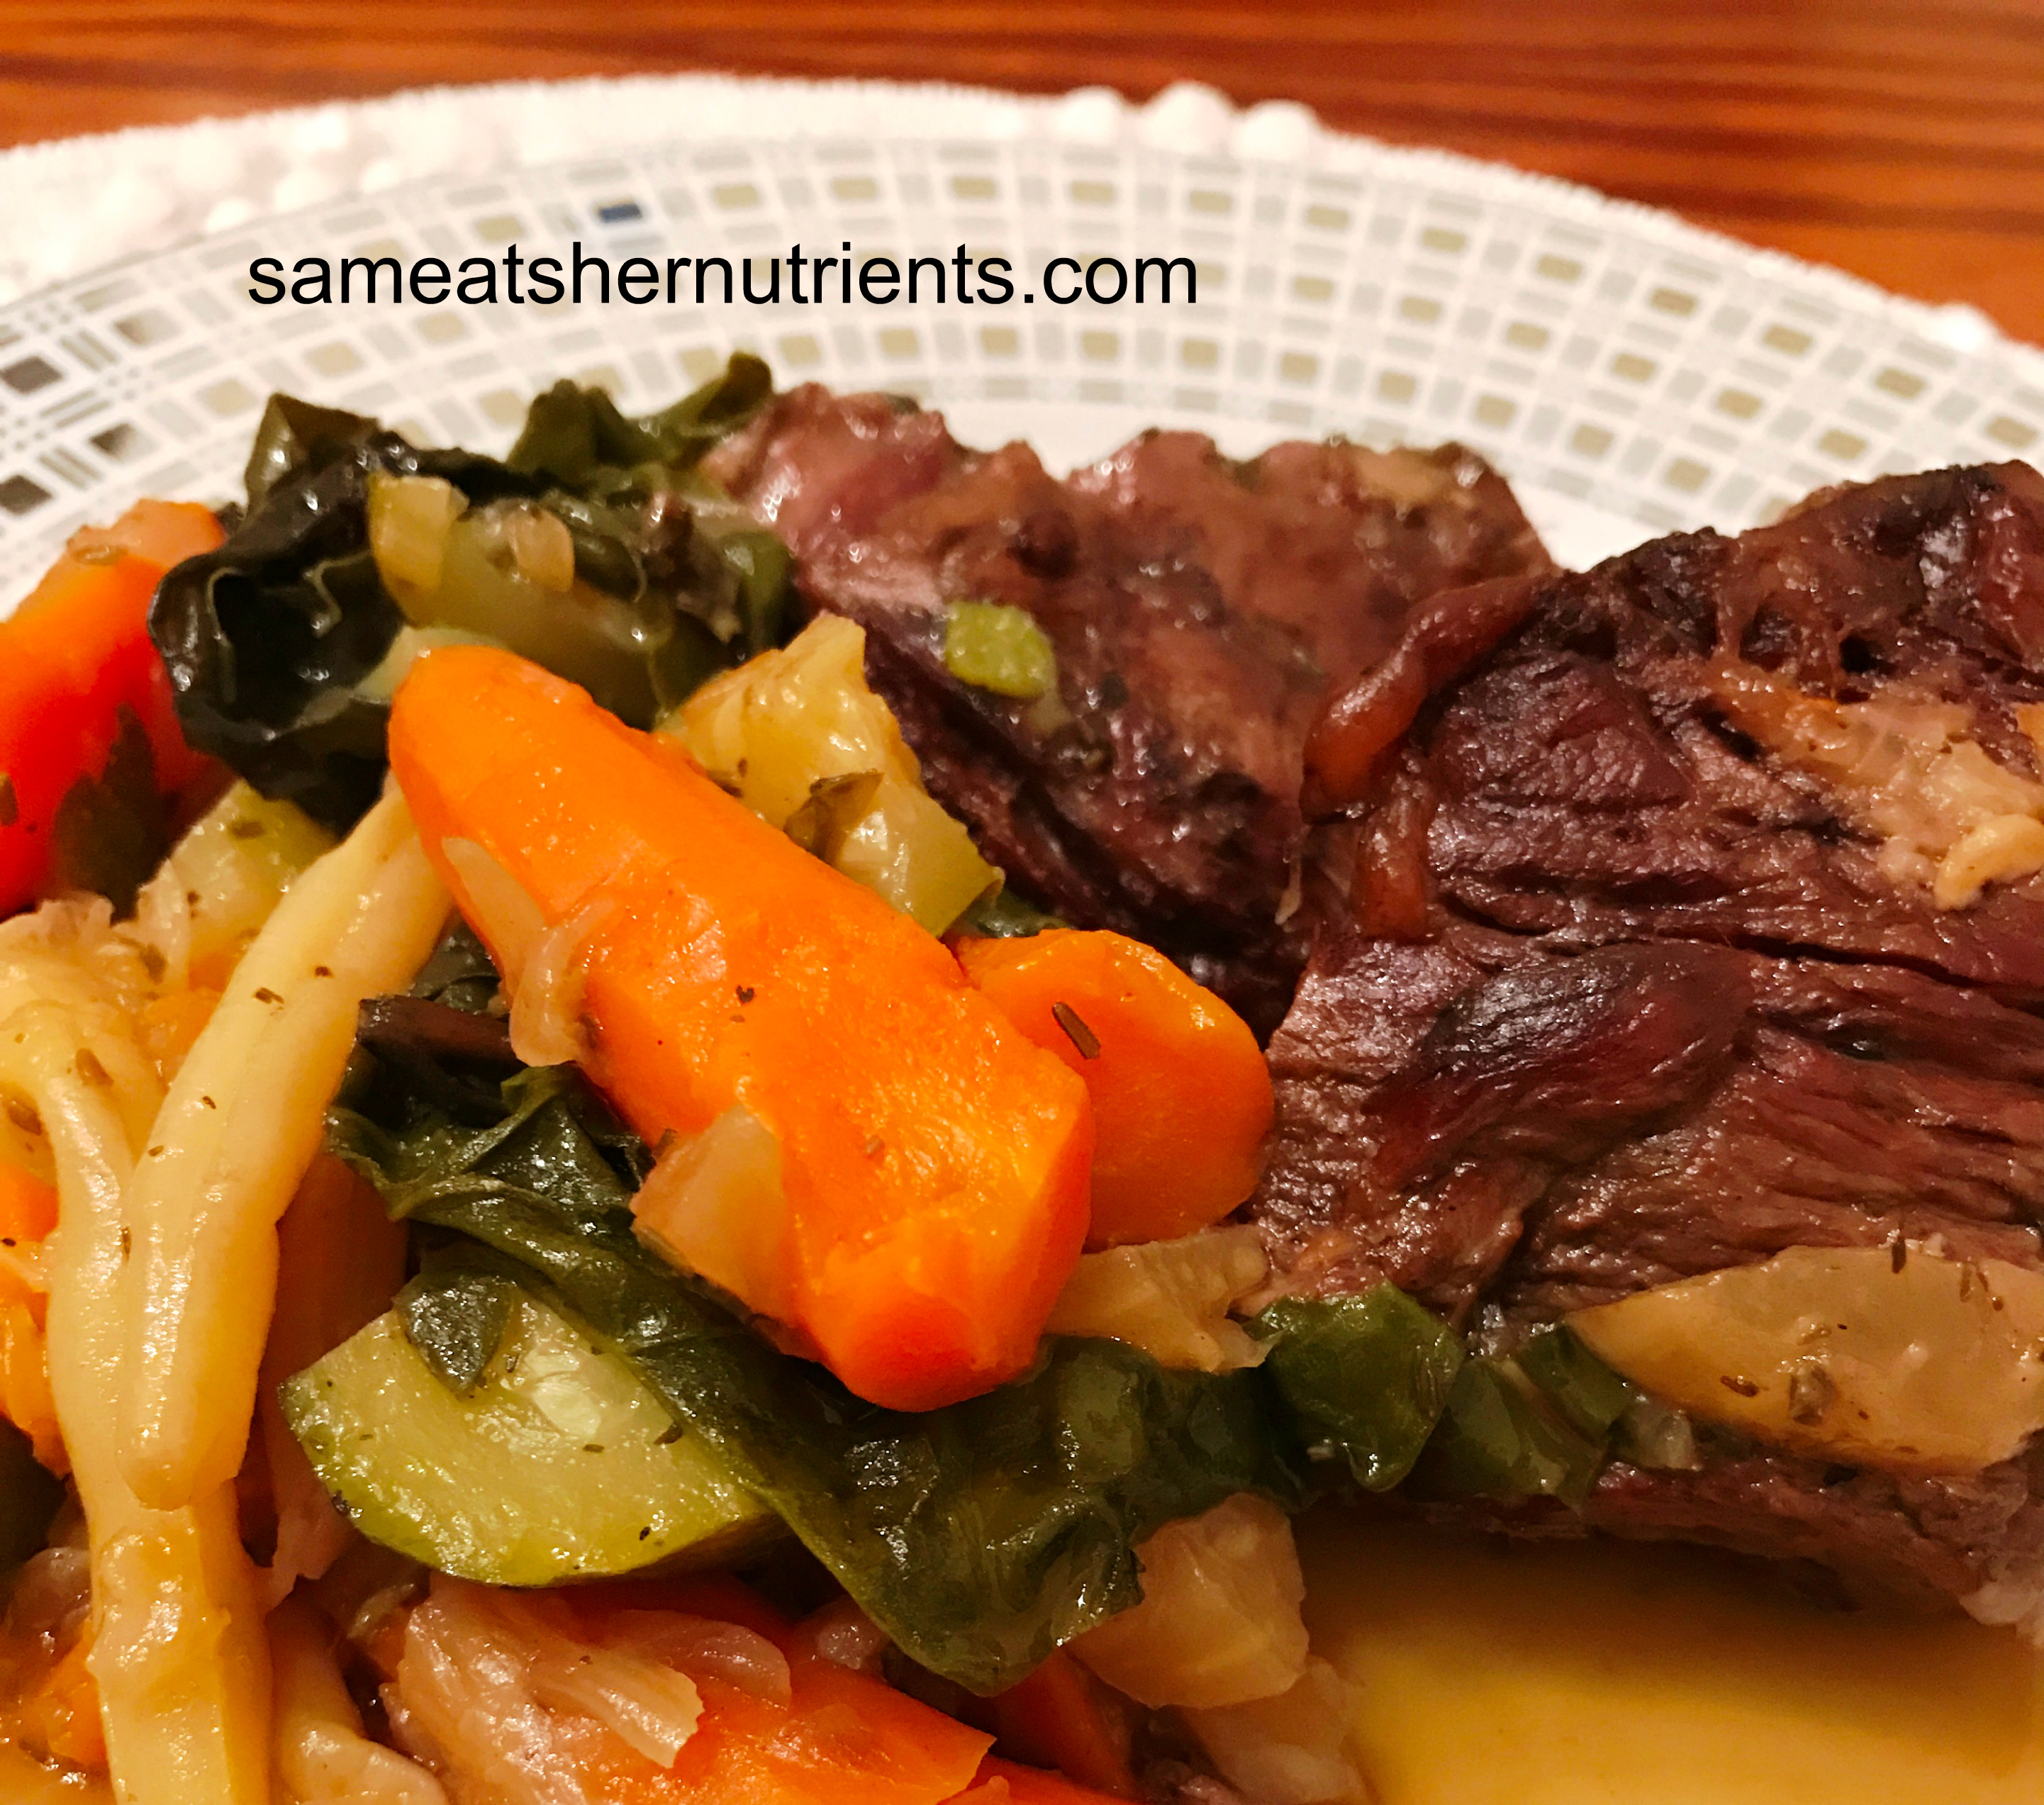
Here is my easy and incredibly delicious recipe to add pops of flavor to vegetables, proteins like steak, eggs, and meatballs, pasta, and breads. I like to use this butter 50/50 with a drizzle of olive oil and a pat of this compounded butter over steamed vegetables. Try it with steamed Brussels sprouts! It’s delicious. For even more salty savory flavor, grate some fresh Parmesan over them too. Top a steak cooked on a Blackstone grill with this butter for a restaurant quality T-Bone or New York Strip. A cast iron pan stove top to oven works well also. I also like to use it for spiralized zoodles, and add it to halved baked squash fresh from the oven with a drizzle of honey. It’s excellent on beets, broccoli, carrots and potatoes. Here is my recipe:

Easy Compounded Fresh Basil Garlic Butter

2 Cups of Fresh Basil Leaves

1 Pound of high fat butter like Plugra or Kerrygold (cubed) You can use salted or unsalted.

2 Tablespoons of Garlic Infused Olive Oil

1 Teaspoon of Salt

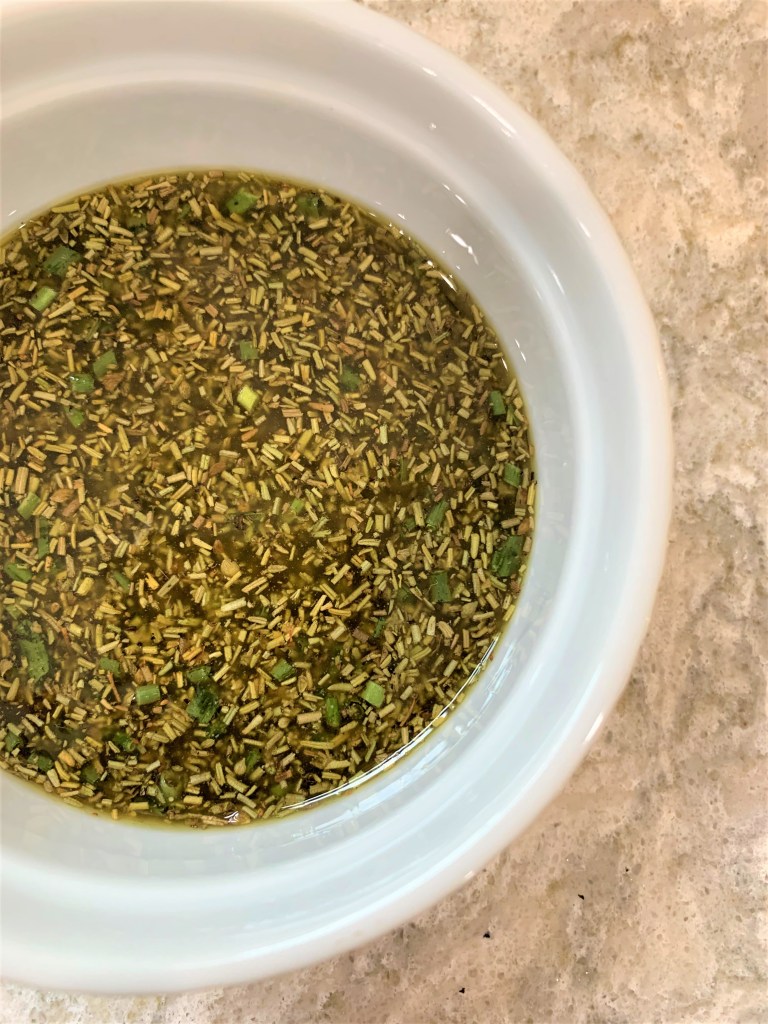
In a food processor, add the fresh basil leaves and pulse until they are finely chopped. When the basil has been finely chopped, add in the remaining ingredients, and pulse in your food processor until it is blended and incorporated. You will have to stop the processor and scrape down the sides a couple of times. Lay out a parchment lined baking sheet and scrape your compounded basil garlic butter onto the sheet. Using an offset spatula, form the butter into a square block, and place it in the freezer overnight. The next day lay the frozen butter onto a cutting board and cut into 32 squares. Place your butter pats into a zipped freezer bag or sealed container, and keep them in the freezer. Use as needed!

Basil Garlic Compounded Butter on Gluten Free Bread Ready to Broil

Let me know how you like to use this butter. I’d also love to hear what your favorite fresh herb is and how you use it.

Fresh Tomato Spaghetti Sauce: A Versatile and Delicious Recipe

Hello! Can you believe how fast Summer went by? We still have plenty of gorgeous weather coming our way in September, and my tomato plants are producing like they are on steroids. I made the most delicious spaghetti sauce with them, and I wanted to share the recipe, because it is incredibly delicious, and a great way to take advantage of all the benefits tomatoes offer and use the bounty of fresh tomatoes. Fresh tomatoes are delicious, but when you are growing them, they are quite a bit like zucchini in their abundance when they start ripening. I don’t like to waste food, and the tomatoes need a good recipe. Now I’m a girl who loves a yummy sauce not just for pasta and spaghetti, this sauce is so good over vegetables, lentils, polenta, zoodles, and more. I have two options for you too. You can make it meatless, or as a last step in the recipe, you can add ground pork, sausage, beef, chicken or turkey.

Fresh Tomato Spaghetti Sauce: A Versatile and Delicious Recipe

In this recipe I removed the skins from the tomatoes, but left the seeds. I have a variety of tomatoes, and you use what you have. If you don’t grow your own garden, you can get fresh tomatoes at a local farmers market and produce stands. Trust me, it’s worth it.

I’d love to hear what fresh produce you have enjoyed most over the last few months in the comments. It has been a very busy season here, and the Summer was wonderful and fleeting. I tried to soak up as much outdoor activities and sunshine as possible. My son got married in August, and I had the pleasure of being in the company of my grandchildren quite a bit while they were off school. This included taking my granddaughter to swim lessons at the lake two days a week in the mornings. and taking all three of them boating and swimming. We’ve had lots of beach time and backyard BBQ’s, and I’m not quite ready to give it up! I will also be sharing this month another new recipe for a compounded butter using fresh basil that is a smart time saver that bumps up the zing factor. It is freezable into tablespoon pats! A delicious flavor boost!

So, enough gabbing, here is my recipe for Spaghetti Sauce using fresh tomatoes! But first here’s a photo of the sauce adding a combination of ground pork and beef. The hands on time for this sauce is about 45 minutes. It simmers for a few hours, and you just need to stir it a few times.

Fresh Tomato Spaghetti Sauce: A Versatile and Delicious Recipe

Spaghetti Sauce Using Fresh Tomatoes

Ingredients:

3 Pounds of Fresh Tomatoes

5 Cloves of Garlic (Peeled and Smashed) Low FodMap Option substitute 3 Tablespoons of Garlic Infused Olive Oil)

2 Tablespoons of Olive Oil (if you are making Low FodMap, this would be part of the garlic oil above.)

8 Ounces of Tomato Paste (I like this organic brand.)

4 Cups of Water

1 Tablespoon of Dried Parsley

1 Tablespoon of Dried Oregano

1 Teaspoon of Dried Basil

1 Bay Leaf

2 Teaspoons of Salt of Choice (I used Himalayan Pink Salt here. I like that you get trace minerals in this salt)

Ground Pepper to taste.

To begin this recipe we need peeled tomatoes. It is very easy to do with a pot of boiling water. The skins slip right off after plunging them in the water for 3 minutes. Bring a large stock pot up to a rolling boil. Add a tablespoon of salt. Now, carefully add half of your tomatoes into the boiling water and set a timer for 3 minutes (Alexa is my best friend). After the time is up, remove the tomatoes to a bowl with a mesh strainer and cool slightly. Meanwhile, add the remaining tomatoes to the boiling pot and set a timer. When the tomatoes are cool enough to handle, slip off the skins using a knife when necessary for the little bits that stick and remove the core. Slice the tomatoes in half. There is not a lot of chopping here. They will deconstruct with the cooking….easy! After all the tomatoes are peeled and halved. Prepare a large saucepan (I love my Martha Stewart Red Dutch Oven. It is heavy and built for a long simmer.)

Add the olive oil to the Dutch oven, and turn the burner on medium high. Peel and smash your garlic cloves. Leave them whole. They will infuse the sauce as it simmers. Add them to the just hot oil and cook until they are fragrant, about one minute. Now, add in your prepared tomatoes and the rest of the ingredients, including the tomato paste and 4 cups of water. Bring the sauce to a boil, then turn it to a low simmer and simmer uncovered for 2 to 3 1/2 hours. When the sauce is getting to be a nice thick consistency, it is ready. Taste it for salt and pepper. If you want to add ground meat, now is the time to saute your meat of choice and add it to the sauce. It is ready to serve over anything you want. It is so delicious! Enjoy. It’s a very good thing!

Italian Marinated Steak, Gluten Free, Low FodMap, AIP Paleo

Grilling season is here, and this marinated steak is a great way to kick off the season. A marinade tenderizes your steak and adds a ton of flavor and can be used for any cut. I have made this with flat irons and filet mignon. Both were delicious!

Italian Marinated and Grilled Steak

For meal prep, I like to grill double the steak we will need for dinner and use the leftover steak to thinly slice for a main dish salad and lunches the next day.

Italian Steak Marinade

As always, garlic infused olive oil is incredible and I always have it on hand. If you are eating low fodmap, this is crucial for getting that wonderful garlic flavor in all your recipes!

This marinade has a delicious blend of dried chives, rosemary and oregano in it. The black pepper is optional and should be omitted if you are on an AIP protocol currently. The acid used in the marinade is red wine vinegar for the zing! Rosemary is great to use when grilling, because it helps block HCA’s – carcinogens from grilling and cooking at high temperatures.

Make sure you give the steak time to marinade. I like at least four hours. You can do eight and even overnight.

Italian Marinated Steak

Ingredients:

1 1/2 pounds of steak. This is approximately 4 flat irons or 2 Filet Mignons. But use your favorite or budget friendly cut!

For the marinade:

2 Tablespoons of Garlic infused Olive Oil

2 Tablespoons of Olive Oil

2 Tablespoons of Red Wine Vinegar

1 Tablespoon of Dried Chives

2 Teaspoons of Crushed Rosemary

1 Teaspoon of Oregano

1 Teaspoon of Salt

1/2 Teaspoon of Black Pepper (Omit if following AIP)

Directions: Whisk together the marinade ingredients. Place the steak in a shallow glass dish, pour the marinade over the steak, and coat completely. Cover and place your marinating steak into the refrigerator for at least 4 hours and up to overnight, flipping once.

When you are ready to grill, remove the steak from the marinade and put them on a platter for 30 minutes before grilling.

Steak is a great source of B12 vitamins, and leftover steak is wonderful for topping a lunch salad with the next day.

Beef Liver Pate

Is liver my favorite? No. But the benefits of grass fed liver cannot be ignored, and my favorite way to eat it is a pate, which is quite delicious. Those who try it unknowingly, for instance on a platter of cheese, crackers and dips, have been known to say “Mmmm! What is this?” Yes, it’s perfectly true!

I remember a similar experience with squash substituted for pumpkin in pie. When I was a child, we would play with our neighbors outdoors almost daily all Summer long. One of my friends swore up and down that he thought squash was disgusting and never to be touched with a ten foot pole! Until one day he tried My Mother’s “pumpkin” pie which she had made with winter squash from our garden. He said “Man, this is the best pumpkin pie I have ever had!” I couldn’t wait to tell him, with relish, that it was squash! Beef liver is a nutritional powerhouse packed with vitamins. It is a powerful superfood and has been included in traditional diets for thousands of years. Liver is the best source of B12. It is also high in active Vitamin A (retinol) that our bodies don’t have to convert like we do plant based Vitamin A (carotenoids). Liver is also high in Iron, B6, Folate, Biotin, and small amounts of copper, chromium and selenium.

I have flavored this pate with herbs, spices and aged balsamic. It is anything but plain. I used US Wellness Meats Grass Fed Beef Liver in this recipe. You can also find good grass fed beef liver locally at Farm Markets or from your local Farmer.

Beef Liver Pate

Beef Liver Pate

Ingredients: 1 lb. of Grass Fed Beef Liver, sliced

2 Cups of Chopped Red Onion

1/4 Cup of Aged Balsamic Vinegar

2 Tablespoons of Olive Oil

1 Tablespoon of Dried Rosemary

1 Tablespoon of Dried Marjoram

1 Tablespoon of Dried Thyme

1 Tablespoon of Turmeric Powder

1 Tablespoon of Apple Cider Vinegar

1/2 Teaspoon of Garlic Powder

1/2 Teaspoon of Sea Salt

1/2 Teaspoon of Dried Lemon Peel

Directions: In 1 Tablespoon of Olive Oil, Sautee the Beef Liver sprinkled with 1/2 teaspoon of sea salt over medium high heat.  Cook on one side for five minutes, then flip the liver and cook on the other side until it is cooked through.

Remove the liver from the pan and set aside. Add the other tablespoon of olive oil to the pan and the chopped red onion. Cook until tender. Sprinkle the rosemary, marjoram, thyme, garlic powder, turmeric, and lemon peel over the onions. Then, cook, stirring until the herbs, spices and onions are fragrant. Add the apple cider vinegar to the pan and deglaze, scraping all the brown bits off the bottom. Add the 1/4 cup of aged balsamic and stir and cook for 30 seconds.

In a food processor, add the cooked liver and the onion mixture. Process until you have a smooth spread, being sure to scrape down the sides a few times. Put your pate in a pretty serving dish, and refrigerate until thoroughly chilled. Before serving, add a pretty spring of fresh herbs to the top like parsley or basil.

Nutrient Dense Superfood, Beef Liver Pate


Butternut Squash Lasagna

butternut-squash-lasagna-with-a-fork

A piping hot casserole is on the top of my list in the colder months! Intuitively we want to have warmer, heavier foods during the winter season. When you get in tune with your body’s signals, it tells you what it needs. If you think about it, we naturally want to eat with the seasons when we are really in tune with ourselves.

One of the tips I learned in Health Coaching school was to eat until I was 80 percent full, and it is really effective. I feel great when I don’t eat until I am completely stuffed and have had enough to feel satiated and comfortable. This way of eating keeps weight pretty much the same without having to restrict calories. I really dislike restriction of food, I am a foodie, but I love feeling great in my clothes! Don’t deprive me! 🙂 So, eating nutrient rich food is not only great for you, it avoids dieting and keeps the body fed and full of energy.  I prefer “crowding out” which simply means, eating more real food so you don’t have room for the opposite. When you are eating healthy, whole foods made into scrumptious dishes like this casserole, you don’t crave junk. All my recipes have health benefits, even the sweet ones! One of the things I tell and have proven to my clients is, when they give their taste buds time to change, by taking out processed food for a few months, when they go back to eating them, they will taste artificial and too sweet or chemically. They actually will prefer the real stuff! You can eat food that isn’t just good for you, but is also just G-O-O-D!

Getting back to the scrumptious lasagna though, this Butternut Squash Lasagna uses thin sliced butternut as the noodles and is hearty and flavorful with a nice caramelized top! There are lots of nutritious dried herbs and one of my favorite flavor additions, chopped fennel!

butternut-squash-lasagna

Butternut Squash Lasagna

Preheat your oven to 375º degrees. You can assemble this dish in advance and refrigerate it covered until you are ready to bake it!

Ingredients:

1 Butternut Squash (Medium to Large)

1 Pound of Grass Fed Ground Beef

1 Pound of Ground Pork

1 Fennel Bulb (medium sized, diced)

1 Cup of Sliced Scallions

1 Jar of Strained Organic Tomatoes (24 oz.), or Tomato Puree (I like this brand)

2 Tablespoons of Garlic Olive Oil (or 2 TBS of Regular EVOO plus 3 minced garlic cloves)

1 Tablespoon of Olive Oil

1 Teaspoon of Dried Parsley

1 Teaspoon of Dried Basil

1 Teaspoon of Dried Oregano

1/2 Teaspoon of Dried Marjoram

1/2 Teaspoon of Dried Thyme

1/4 Teaspoon of Dried Rosemary

1 1/2 Teaspoons of Sea Salt (or Himalayan Pink my personal favorite)

Directions:
Peel the butternut squash. Divide the peeled whole squash in half lengthwise and remove the seeds. Laying the two squash halves flat side down on a cutting board, cut it into 1/2 inch slices so they form half moon shapes perfect for layering as noodles. Set aside.

In a large skillet, add 2 Tablespoons of Garlic Olive Oil (or your olive oil and fresh minced garlic) over medium high heat. Add your ground beef, pork and 1/2 teaspoon of sea salt, and brown. When almost brown, but still a little pink, add the diced fennel, scallions, dried herbs and another 1/2 teaspoon of salt. Keep browning until the fennel is tender, about five minutes. Drain off the excess fat. Add the crushed tomatoes, and thoroughly combine with the meat and herbs bring it to a simmer. Remove from the heat and set aside.

In a large bowl, toss your butternut squash slices with 1 Tablespoon of Olive Oil and 1/2 teaspoon of sea salt.

Coat a 14″ x 10″ inch casserole dish (approximate size) with olive oil. Add a single layer of butternut squash, filling in the gaps as well as you can, it doesn’t have to be perfectly covered. Add 1/3 of the meat mixture. Add another layer of butternut squash and another 1/3 of the meat mixture. Add the final layer of butternut squash, and finish with the last 1/3 of the meat mixture.

Cover with aluminum foil, and bake in the oven for 1 hour. Remove the foil, and bake another 15 to 30 minutes, or until the top is browned and caramelized and the squash is really tender.

Remove from the oven, and let it sit ten minutes before serving!

*Optional Pecorino cheese grated on the top. It is a delicious Italian cheese made from sheep’s milk.

Like all lasagna, this is even better leftover!

Eat Your Nutrients!

Eat Your Nutrients!

Instant Pot Chuck Roast

Instant Pot Chuck Roast

Instant Chuck (in the Instant Pot)

An Instant Pot is an incredibly fast way to cook when you are busy and don’t have a lot of time to spend in the kitchen.  Making a pot roast takes time in the oven, about three to four hours to get it fork tender, but with an instant pot you can be ready to eat in about an hour. That is total cooking time, not total time you have to be in the kitchen. Once you get it going, you can walk away. Love it!

I added plenty of vegetable sides to make a healthy dinner. The bed of cabbage soaked up all the juices, and we had carrots and broccoli as well. You choose! 🙂

Instant Pot Chuck Roast

Ingredients:

3 lb. Chuck Roast (cubed into 1 1/2″ chunks)

1 Cup of Broth

1/2 Cup of Fresh Squeezed Orange Juice

1/2 Cup of Coconut Aminos here

2 Leeks, Sliced into rounds

3 Tablespoons of Umami Blend (recipe here)

2 Tablespoons of Honey

1 Tablespoon of Minced Fresh Ginger

cutting-chuck-roast-for-instant-pot

Directions: Cube the Chuck after you have seasoned both sides with Umami Herb Blend. Put the Beef into the instant pot. Whisk together the orange juice, coconut aminos, broth, honey and ginger. Pour over the beef and add the leeks. Place the top on your instant pot and seal the steam valve at the top. Press the Meat/Stew selection, and you are done. The chuck will cook for 35 minutes, then do a cool down. Release the steam valve, and after the steam is released, remove the top and that’s it! You have a delicious, fork tender roast in a third of the time!

chuck-roast-instant-pot


instant-pot-with-chuck-roast


chuck-roast-and-leeks-in-instant-pot


instant-pot-chuck-roast

Eat Your Nutrients!

Eat Your Nutrients!

*Affiliate Link – I receive a small commission when you purchase products I recommend through my Amazon links. I use these products myself and never recommend anything I haven’t tried and use regularly. The small commission helps me keep my blog up, so if you have enjoyed my posts and recipes, I appreciate your support. You don’t pay any extra for your products. Thank you.🙂

Oven Chuck Roast with Vegetables

Hungry for a delicious pot of tender chuck roast with loads of warming vegetables? I have a recipe that will warm you up body and soul. 🙂 There is plenty of juices and tender loads of nutritious vegetables.

Oven Chuck Roast with Vegetables

Oven Chuck Roast with Vegetables


This was perfect last night after spending a few hours outside stringing holiday lights. I love being outdoors in the winter months in the brisk air. Most of the time I am moving my body a little more than I was yesterday. Yes, there were lights that didn’t work, and lights where half the string worked. Thankfully we had plenty to spare, and had strings that were working well! What happens, I wonder, to the lights that were working fine when you put them in the box and the next year are not functioning? It has been an ongoing mystery that people write about and include in movies, because many can relate.


Oven Chuck Roast with Vegetables

I have included Fennel, Onions, Carrots, Swiss Chard, Zucchini and Yellow Beans in this Roast along with a splash of fresh squeezed orange juice and savory Rosemary and Thyme. I think you will love it! No dried out roast here!

Oven Chuck Roast with Vegetables in Pot from the Oven

Oven Chuck Roast with Vegetables in Pot from the Oven


Oven Chuck Roast with Vegetables

Ingredients:

1 Three Pound Chuck Roast

1 Fennel Bulb (diced)

1 Yellow Onion (diced)  (substitute green scallions if Low FodMap)

5 Carrots (peeled and coarsely chopped)

1 Bunch of Swiss Chard (stems stripped and coarsely chopped)

3 Zucchini (about 2 cups halved lengthwise and sliced)

2 Cups of Fresh Yellow or Green Beans

6 Cups of Broth (this is approximate depending on your pot)

1/2 Cup of Fresh Squeezed Orange Juice

2 Tablespoons of Garlic Olive Oil (you may substitute 3 cloves of fresh garlic)

2 Tablespoons of Olive Oil

1 Tablespoon of Apple Cider Vinegar

2 Teaspoons of Crushed Rosemary

1 Teaspoon of Thyme

1 1/2 Teaspoons of Sea Salt

Directions: Preheat your oven to 350º degrees. You will use a large dutch oven with a lid. Salt your chuck roast all over with 1 1/2 teaspoons of sea salt. In your pan, heat the garlic olive oil over medium high heat just until warm. Add the chuck roast and brown 5 minutes each side. Remove the chuck roast from the pan and set aside. Add 2 tablespoons of olive oil to the pan and add the diced fennel and onion, and sautee for 5 minutes. Stir in Carrots, Green Beans, Orange Juice, Apple Cider Vinegar, Rosemary and Thyme. Add the chuck roast to the top and pour over broth until it reaches the top of the roast. Bring the ingredients to a boil, then cover the pan with a lid and place into your preheated oven for 3 hours. At the end of three hours, remove the pan from the oven and add the Zucchini and Chard, tucking it down around the roast. Lift the roast out of the pan if needed and set it back on top of the vegetables. Bake another hour. Then remove it from the oven and it is ready!

Eat Your Nutrients!

Eat Your Nutrients!

Hearty and Nourishing Vegetable Bison Soup

Winter storm Jonas is bearing down upon us here on the East Coast, and I decided there is never a more perfect time for making a big pot of hearty, nourishing soup! I wanted one that was easy to digest, nutritious, low in fodmaps, and tasty!

Hearty and Nourishing Vegetable Bison Soup

Hearty and Nourishing Vegetable Bison Soup


Put some favorite tunes on and lets get chopping. The vegetable prep is the longest part of making this soup, but it doesn’t have to be boring! Here’s the recipe!

Hearty and Nourishing Vegetable Bison Soup

2 Pounds of Ground Bison

3 Slices of No Sugar Added Bacon

4 Cups of Broth, Beef, Chicken or Vegetable

6 Endive, washed and sliced

2 Cups Carrots, peeled and sliced

6 Scallions, green parts only sliced

3 Small Zucchini, diced

1 Fennel Bulb, washed and diced

1/4 Cup Dry White Wine, optional

2 Tablespoons of Garlic Infused Olive Oil

2 1/2 Teaspoons of Sea Salt or Himalayan Pink Salt, divided

1 1/2 Teaspoons Black Pepper, divided

1 Teaspoon Dried Parsley

1 Teaspoon Dried Tarragon

1 Teaspoon Dried Chives

1/4 Teaspoon Dried Dill

2 Tablespoons Fresh Lemon Juice, added before serving

Hearty and Nourishing Vegetable Bison Soup

Hearty and Nourishing Vegetable Bison Soup


Directions:

In a large sautee pan, cook your bacon until crisp, then drain on paper towel and set aside to cool. Drain off the extra bacon grease in the pan, and add your ground bison to the same pan. Add the salt and pepper, and cook over medium high heat until brown and crumbly, stirring often. Meanwhile prepare your vegetables by peeling and dicing them.

Add the cooked beef to a large stock pot, and crumble the cooled bacon on top. Dry the sautee pan the beef was in with paper towel, then return it to your burner, and add 2 tablespoons of garlic infused olive oil. Heat over medium high heat, and add your vegetables. Sprinkle the vegetables with an additional teaspoon of salt and a 1/4 teaspoon of pepper. Cook the vegetables until the endive has wilted and the vegetables are just beginning to soften. Add the white wine and cook for one minute.

While the vegetables are cooking, add the dried herbs to the bison in the stock pot. Add the wilted vegetables to the stock pot on top of the bison and herbs. Pour in 4 Cups of broth. Bring to a boil, then reduce the heat and simmer on low for 40 minutes.

This makes a large pot of hearty, satisfying soup for a cold winters day, and it feels good in your belly, warming you from the inside out! Enjoy!

Hearty and Nourishing Vegetable Bison Soup

Hearty and Nourishing Vegetable Bison Soup


Beef Paprikash on Spaghetti Squash Noodles with Sliced Avocado

If you are looking for a hearty meal to put on the table that you don’t have to slave over, is inexpensive, and lower carbohydrate, try a plate of Beef Paprikash! The Spaghetti Squash noodles are low carb. and hold all the juices, and the avocado goes well with the spicy beef sauce. It is delish!

This recipe uses a slow cooker, so it can be prepped the day before or in the morning, and then you can walk away until it is time to eat. I added some smoked paprika to the beef sauce to give it a smokey flavor that veers slightly away from the traditional recipe, and it is dairy free!  It is the perfect cool weather meal that will leave you satisfied and nourished without adding to your waistline.

Beef Paprikash on Spagehtti Squash Noodles with Avocado

Beef Paprikash on Spagehtti Squash Noodles with Avocado

Beef Paprikash on Spaghetti Squash Noodles with Sliced Avocado

Ingredients:

1 Two Pound Chuck Roast

2 Tablespoons of Tapioca Flour*

1 1/2 Teaspoon of Himalayan Pink Salt or Sea Salt

2 Teaspoons of Black Pepper

2 Tablespoons of Extra Virgin Olive Oil

———————————————–

1 Large Yellow Onion

2 Red Bell Peppers, Large Diced

4 Cloves of Minced Garlic (or 2 Tablespoons of Garlic Infused Olive Oil if you are eating Low FodMap)

1 Cup of Beef Broth

1/4 Cup Tomato Paste

1 Tablespoon of Paprika

1 Tablespoon of Smoked Paprika

1 1/2 Teaspoons of Caraway Seeds, crushed

1 Teaspoon of Dried Parsley

1 Teaspoon of Dried Dill

1 Teaspoon of Fish Sauce

1/2 Cup Full Fat Coconut Milk, added before serving

——————————————————–

1 Medium Spaghetti Squash

2 Ripe Avocados*

Beef Paprikash on Spaghetti Squash Noodles with Avocado

Beef Paprikash on Spaghetti Squash Noodles with Avocado

Directions: With paper towel, pat the chuck roast dry. Mix the Tapioca Flour, Salt and Pepper together with a whisk, and season the Chuck Roast. In a large heavy pan over medium high heat, add your olive oil, and brown the chuck roast for 5 minutes  and then flip it over and brown it on the other side for 5 more minutes.

Meanwhile, slice the onion and dice the peppers, and place in the bottom of a large slow cooker. Whisk together the spices, tomato paste, broth, garlic, and fish sauce. When beef is browned, place it on top of the sliced onions in the crockpot. Pour the sauce over the top. Cook on low covered for 8 hours in the crockpot. Remove the Beef from the crockpot after 8 hours and shred it with two forks. Add it back to the sauce and stir in 1/2 cup coconut milk right before serving.

For the “noodles”, one hour before serving, preheat your oven to 375º degrees. Slice a medium sized spaghetti squash in half, and remove the seeds. Season the inside with salt and pepper. Place in a baking pan cut side down with 1/2 cup of water. Bake for one hour. Right before serving, remove from the oven, and cool for about ten minutes so it is easy to handle. (It should pierce easily with a knife.) Flip the squash over and run a fork along the inside of the squash, making noodles.

Slice two ripe avocados to serve with the dish.

Serve the saucy Beef Paprikash over the “noodles” and place the avocado on the side like the picture above.

Beef Paprikash on Spagehtti Squash Noodles

Beef Paprikash on Spaghetti Squash Noodles

*Omit if you are eating Low FodMap

Eat Your Nutrients!

Eat Your Nutrients!

Delicious Italian Mini Meatloaves and Make Your Own Sunshine

After spending a glorious few days in the sunny San Diego area, we flew home this weekend to Maryland returning to rain and cold due to the effects of a tropical storm. It was a drastic transition from warm sunny beaches and green juice available everywhere you looked!

So, what’s a girl to do? I find great benefit in eating with the seasons, and meatloaf seemed like the perfect comfort food for a cold rainy evening.  I wanted one that was gluten and grain free, dairy free and low fodmap, but utterly delicious and flavorful! I really don’t like to settle. 🙂

Here is my recipe for mini meatloaves that will definitely hit the spot and remind you of your childhood.

I incorporated some finely chopped carrots and spinach in the meatloaf to boost the nutritional value and combined a mixture of grass fed beef and turkey.

Delicious Italian Mini Meatloaves

Delicious Italian Mini Meatloaves


This meatloaf is my way of bringing the sunshine home! Other ways I like to do this is with warm hugs, a cheerful welcoming smile, reading a great book, and green juicing!

What’s your perfect way to bring your own sunshine when life delivers lemons? What do you do?

Italian Mini Meatloaves:

Ingredients:

1 pound ground grass fed beef

1 pound ground pastured turkey 92% lean

3 large organic carrots, peeled

2 cups organic packed baby spinach (5 oz.)

1/2 Cup Superfine Almond Flour

2 Tablespoons Garlic Olive Oil

3/4 Cup Organic Tomato Paste (I used Bionaturae .7 oz jar) divided

1 tsp. Himalayan Pink Salt or Sea Salt

1/2 tsp. black pepper

1/2 teaspoon each of dried organic thyme, basil, parsley and oregano

Directions:

Preheat your oven to 375º degrees. Lay out a rimmed baking sheet and line it with parchment paper or lightly grease it.

In a food processor, add the peeled carrots, sliced into chunks, and process until finely chopped. Add to a large bowl. Add the spinach to the food processor and pulse until finely chopped. Add this to the large bowl also. Add the ground meat and remaining ingredients and 1/4 cup of tomato paste. Mix with your hands until thoroughly incorporated.

Divide the meatloaf mixture into 8 equal  sizes, and make a ball of each with your hands. Set the balls onto the lined baking sheet, and pat into the shape of a mini meatloaf.

Now the ketchup topping:

Ingredients:

1/2 cup organic tomato paste

1/4 teaspoon Himalayan Pink Salt or Sea Salt

1/4 teaspoon Black Pepper

1 teaspoon cider vinegar

Mix the topping ingredients together in a small bowl. Divide evenly over the tops of the mini meatloaves and spread.

Bake the mini meatloaves in the oven for approximately 20 to 25 minutes until the internal temperature reaches 165º degrees.

These meatloaves are full of flavor and hidden veggies!

Here are some photos of our trip to sunny San Diego!

La Jolla, California

A Beautiful Sunset!

last dinner san diego

Del Mar, California. Dinner at L’Auberge.

12032061_1139001589446748_5471667177988736768_n

The beautiful coastline! We walked the beach every morning!

12079693_1139001529446754_4742822986375353196_n

The majestic Pacific Ocean!