Chicken

Chicken and Broccoli Casserole {Gluten Free – Paleo}

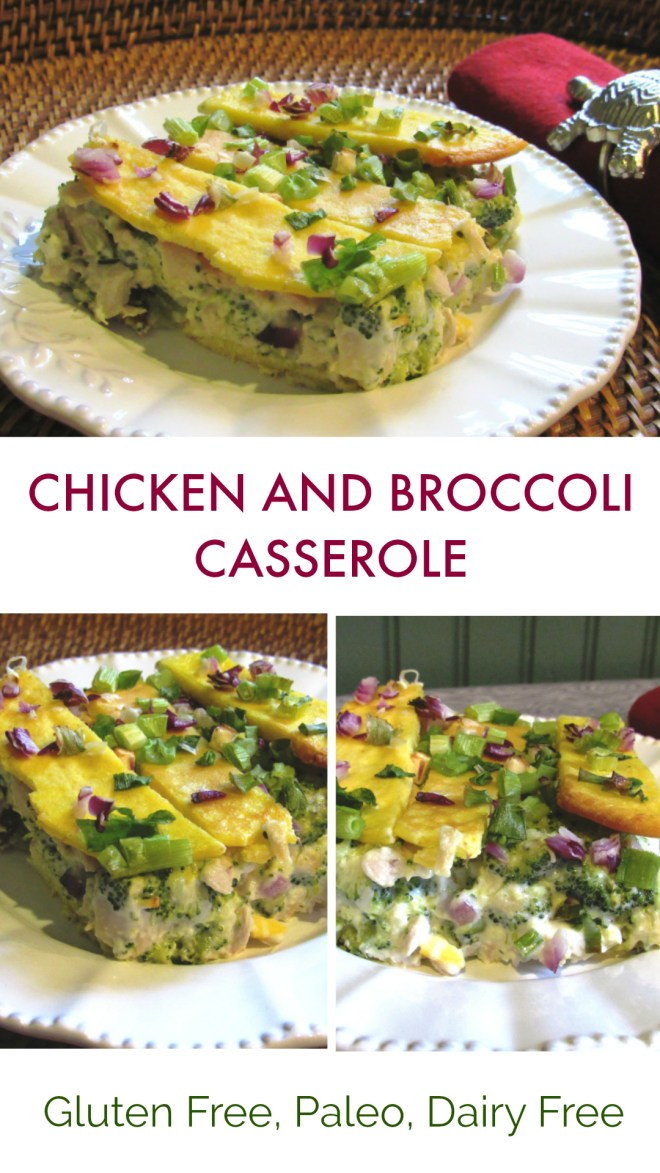
Casseroles became popular in the 1950’s, and although I wasn’t around then, they are still a very versatile and popular one dish meal worthy of the table today. I have created a healthy version of one of my favorites!

Chicken and Broccoli Casserole {Gluten Free - Paleo}

Chicken and Broccoli Casserole {Gluten Free – Paleo}

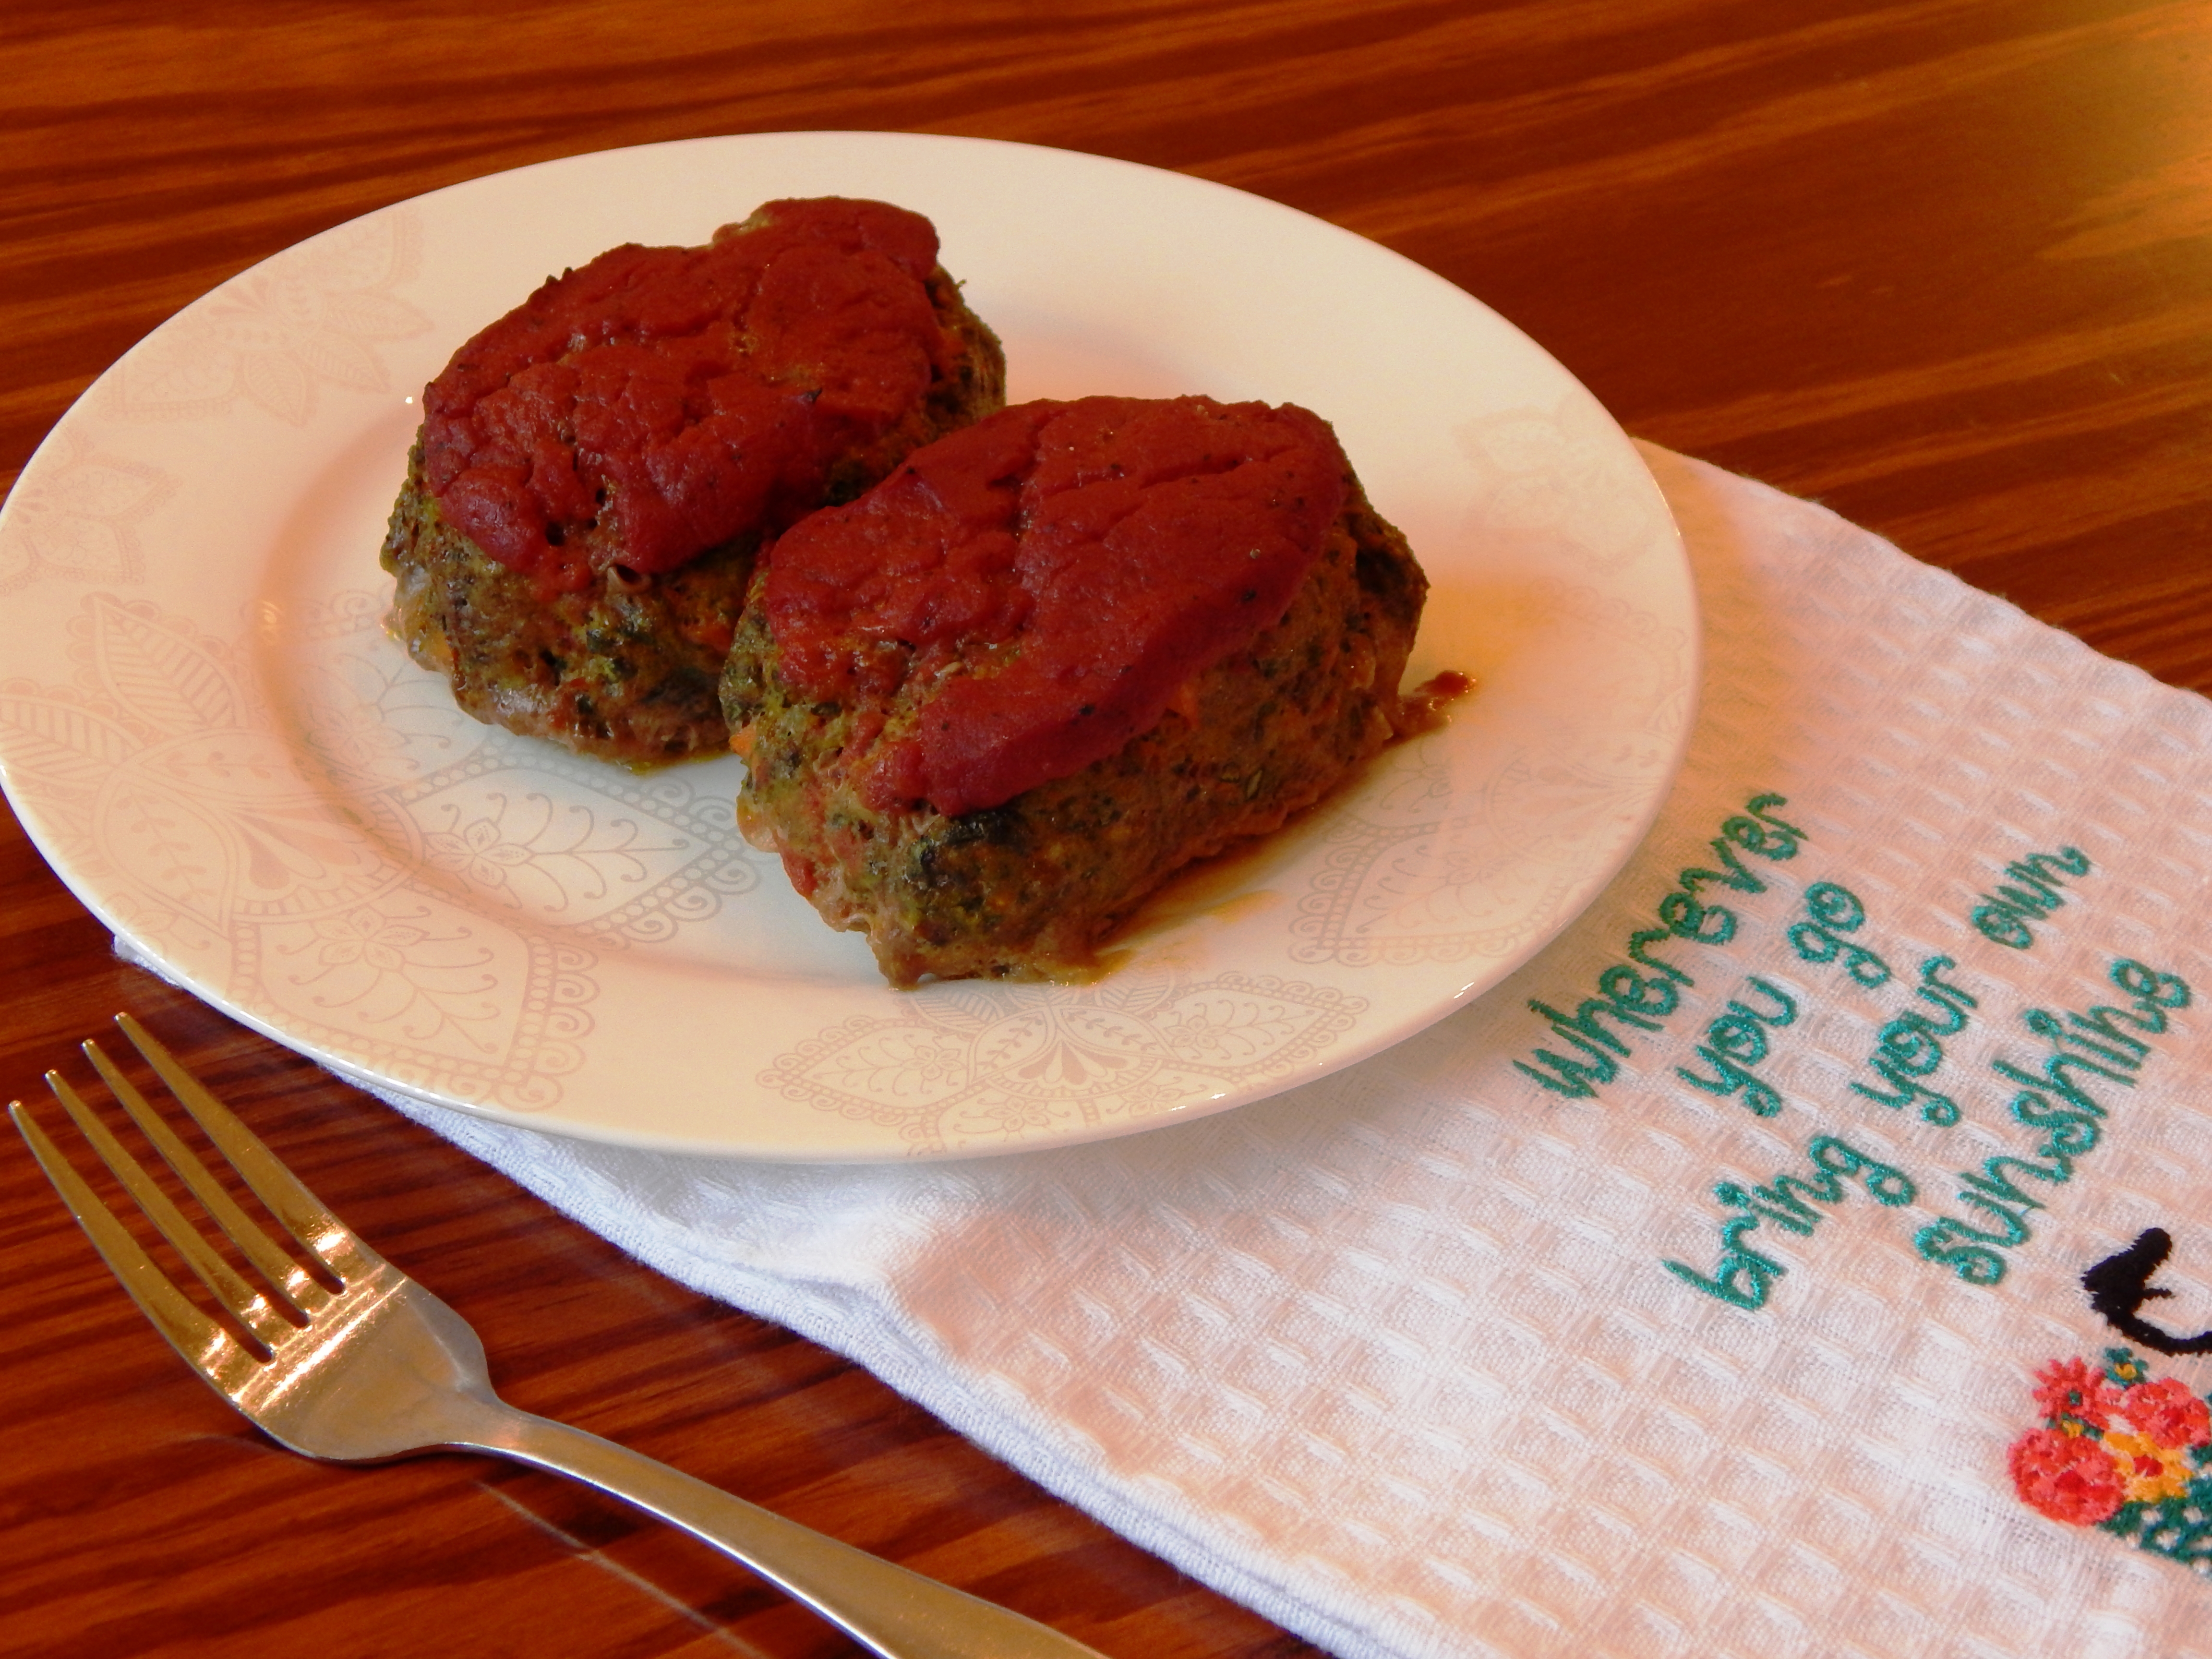
A good casserole should be moist, tasty and have all the components for a one dish meal.  I have been making this casserole recently on a weekly basis. My kids love it! It is really, really good leftover, and great as a packed work lunch.

I used dried tarragon in the filling, which is so good with chicken! A good quality mayonnaise and eggs bind the filling together with the chicken and broccoli. I made coconut flour crepes to layer between the creamy chicken filling. I have made the casserole and baked it right away, and I have also assembled it and refrigerated it for up to a day before baking.

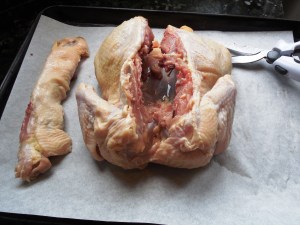
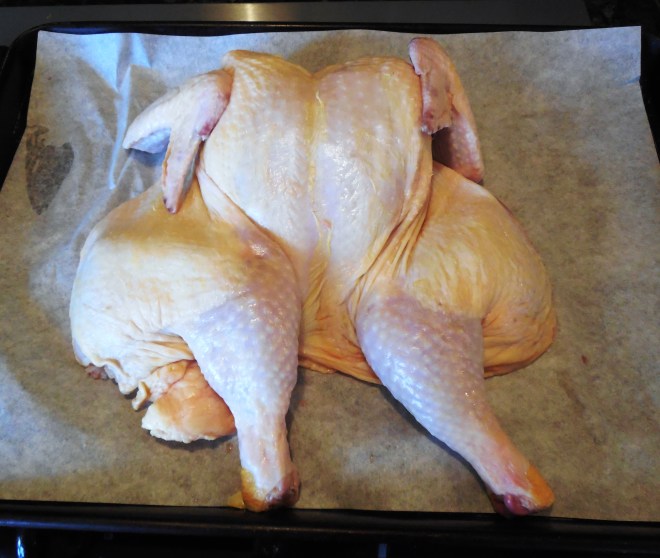
If you like the idea of batch cooking, their are options for cooking the chicken! I like to cook two whole chickens and use one for dinner one night, and shred or chop the other one to use in this casserole. If you use all chicken breasts, the same theory saves time! When you roast the breasts, I highly recommend bone-in, skin on for the moistest chicken breast!

Let’s make a piping hot casserole!

Chicken and Broccoli Casserole {Gluten Free – Paleo}

Ingredients:

4 Cups of Cooked, Diced Chicken

3 Cups of Steamed Broccoli (chopped)

1 1/4 Cups of Good Mayo (I use Primal Kitchen Mayo, it is so good and healthy – here)

3/4 Cup of Full Fat Coconut Milk (my favorite additive-free brand)

2 Eggs

1 Teaspoon of Dried Tarragon

1/2 Teaspoon of Sea Salt or Himalayan Pink

1/2 Teaspoon of Onion Powder

For the filling, whisk together the Mayonnaise, Coconut Milk, Eggs, Tarragon, Salt and Onion Powder. Add in the cooled chopped chicken and chopped broccoli. Place in the refrigerator while you make the crepes.

Crepes

1 Cup of Full Fat Coconut Milk

8 Eggs

1/4 Cup of Coconut Flour

2 Tablespoons of Lemon Juice (I like fresh squeezed)

2 Tablespoons of Olive Oil

1 Teaspoon of Sea Salt

Topping

1/2 Cup of Chopped Red Onion

1/2 Cup of Sliced Green Onion

Directions: Preheat a large non-stick electric griddle to 350º degrees. (A stove top non-stick pan will work too, just make sure your heat is set at medium). Whisk together the crepe ingredients. Whisk until there are no lumps! This is a good time to develop those arm muscles! Let the batter sit for 5 minutes to thicken slightly. Using a 1/4 cup measuring scoop, ladle the batter onto your preheated griddle, and cook until very lightly brown, flip and repeat, just like a pancake. You should have about eight crepes. Cool them on a wire rack. Then, cut them into 1 inch strips.

Preheat your oven to 350º degrees. Grease a 14″ x 10″ casserole with olive oil (size is approximate). Line the bottom of the casserole with 1/2 of the crepe strips. You will not have the bottom perfectly covered, and it is okay. Add the chicken and broccoli filling. Spread the filling evenly. Top with the remaining crepe strips. With a pastry brush, lightly brush on additional olive oil, just onto the strips. Sprinkle with diced red onion and sliced scallions.

Bake for 30 minutes in your preheated oven. Remove the casserole from the oven and cool ten minutes before digging in. Enjoy!

*This casserole can be easily modified to Low FodMap by omitting the red onion and onion powder. Just add more scallions. It is delicious that way as well.

Healthy Chicken and Broccoli Casserole

Healthy Chicken and Broccoli Casserole

Chicken and Broccoli Casserole {Gluten Free - Paleo}

Chicken and Broccoli Casserole {Gluten Free – Paleo}

*Affiliate Link – I receive a very small commission (cents) when you purchase products I recommend through my Amazon links. I use these products myself and never recommend anything I haven’t tried and use regularly. The small commission helps me keep my blog up, so if you have enjoyed my posts and recipes, I appreciate your support. You don’t pay any extra for your products. Thank you.🙂

chicken and broccoli casserole. this casserole is a creamy, grain free, hot casseerole you can assemble in advance and bake later.

Eat Your Nutrients!

Eat Your Nutrients!


Orange Tarragon Chicken with Caramelized Pears

Tarragon imparts sweetness to sauteed pears. This chicken dish comes together quickly and tastes elegant.

orange-tarragon-chicken-and-caramelized-pears-plated

I received a fruit and nut gift basket this week as a gift, and it included organic pears which are delicious just plain when perfectly ripe…..so good! When you slice and cook them in some olive oil and add onions, they are divine, soft, savory and sweet. Then add some juicy chicken thighs, and you have a fantastic main dish!

Orange Tarragon Chicken with Caramelized Pears

Preheat oven 375º degrees.

Ingredients:

8 boneless chicken thighs

1 Ripe Pear, cored and sliced (it doesn’t need to be really ripe, but soft)

1 Yellow Onion, diced

Zest and Juice of Two Oranges

3 Tablespoons of Olive Oil

2 1/2 Teaspoons of Tarragon

1 1/2 Teaspoons of Herbamare Sea Salt Seasoning (this kind)

Directions: In a large oven proof skillet, add 2 tablespoons of olive oil and heat over medium high heat until warm. Add the pears and onion to the olive oil in the skillet, then sprinkle with 1/2 teaspoon of Herbamare and 1 teaspoon of tarragon. Cook for 5 to 10 minutes stirring occasionally until the pears and onion are soft and starting to caramelize.

pears-onion-tarragon-in-olive-oil

Meanwhile, cut each boneless chicken thigh into quarters and sprinkle with the remaining 1 1/2 teaspoons of tarragon and 1 teaspoon of Herbamare seasoning salt.

Remove the caramelized pear and onion from the pan and set aside. Add the last tablespoon of olive oil, and then the seasoned chicken. Sprinkle the orange zest onto the chicken. Sautee for 4 minutes then flip the chicken and cook for 4 more minutes. Add the orange juice to the pan and cook for 1 minute to reduce the juice. Stir in the pear and onion mixture. Place the pan in the oven for ten minutes.

Remove from the oven and serve and enjoy!

orange-tarragon-chicken-and-caramelized-pears

Eat Your Nutrients!

Eat Your Nutrients!


*Affiliate Link – I receive a small commission when you purchase products I recommend through my Amazon links. I use these products myself and never recommend anything I haven’t tried and use regularly. The small commission helps me keep my blog up, so if you have enjoyed my posts and recipes, I appreciate your support. You don’t pay any extra for your products. Thank you.🙂


Paleo Mandarin Orange Chicken Stir-Fry

Stir-Fry is great, because it is a one dish meal full of vegetables (my favorite) and a savory sauce!

mandarin-orange-chicken-stir-fry


Here is my Paleo version of a Mandarin Chicken Stir-Fry that is super delicious! The chicken is very juicy and tender, because I used my favorite part of the bird, thighs! I had mine as is, no rice needed, but feel free to add some hot jasmine rice if you like. I added a leafy green salad on the side, because I am a leafy greens gal! 🙂

Grab your wok! A large shallow pan will do if you don’t have a wok!

mandarin-orange-chicken

Paleo Mandarin Orange Chicken Stir-Fry

Ingredients:

2 1/2 Pounds of Boneless Chicken Thighs (cut into bite size pieces)

10 oz. of Frozen Baby Asparagus Spears (I used Woodstock brand)

1 Organic Red Bell Pepper (Diced)

5 Green Scallions (green tops only if Low Fodmap) (Thinly sliced)

1 10 oz. Can of Mandarin Oranges (I use Native Forest Here)

1/2 Cup of Coconut Aminos (Here is the brand I use)

2 Tablespoons of Garlic Infused Olive Oil (feel free to use 2 cloves of garlic and regular olive oil)

2 Tablespoons of Honey

1 Tablespoon of Plain Olive Oil

1 Tablespoon of Ginger Juice (I use this kind)

1 1/2 Teaspoons of Sea Salt or Himalayan Pink Salt

1/2 Teaspoon of Black Pepper

Prepping Mandarin Orange Chicken Stir Fry

Prepping Mandarin Orange Chicken Stir-Fry

Directions:

In a medium bowl whisk together the coconut aminos, honey and ginger juice. Drain the oranges and set aside.

Heat your wok over high heat. Add two tablespoons of Garlic Infused Olive Oil. Add the chicken thighs, and 1 teaspoon of salt, 1/2 teaspoon of pepper. Stir-fry until the chicken is almost done. Put the chicken in a bowl, and set aside.

Add one tablespoon of regular olive oil to the wok. Then add the asparagus. Stir-fry for two minutes. Add the red peppers and remaining 1/2 teaspoon of sea salt. Stir-fry two more minutes, then add in the scallions.

Asparagus and Red Peppers

Asparagus and Red Peppers

Add the chicken back to the pan, and pour over the sauce. Gently stir in the mandarin oranges. Cover and simmer for five minutes, or until the asparagus is tender.

Mandarin Orange Chicken Stir Fry Gluten Free, Paleo

mandarin-orange-chicken-paleo

Serve it up! Yum!

Eat Your Nutrients!

Eat Your Nutrients!


Hearty Baked Chicken and Sausage with Mushrooms

hearty-chicken-and-sausage

A Hearty Chicken and Sausage bake is a real crowd pleaser! We recently had the family doing some hard work here around the house, and they have been coming in at dinnertime ravenous! I have been calling them “a bunch of cavemen” 🙂 because they have been devouring the protein part of the meal. Have you every had cravings for protein?

chicken-and-sausages

Well, I’m a firm believer in listening to your body, so I made this Hearty Chicken and Sausage Bake for dinner, because all that use of muscle was creating a serious craving around here.


hearty-chicken-and-sasage-dinner

Hearty Chicken and Sausage with Mushrooms

Preheat the oven to 375º degrees.

Ingredients:

2 1/2 Pounds of Bone In ChickenThighs

12 oz. of Fully Cooked Sausage Cut in Half on a Diagonal (I used gluten free Applegate Chicken and Apple)

1 Can of White Button Mushrooms

1 Large Yellow Onion, quartered and sliced

2 Tablespoons of Olive Oil

2 Cloves of Garlic, Minced (or substitute 1 Garlic Olive Oil for the Olive Oil above)

1 Teaspoon of Sea Salt

1/2 Teaspoon of Black Pepper

Sauce:

1 1/2 Teaspoons Dried Basil

1 Teaspoon Dried Tarragon

1 Teaspoon of Sea Salt

1/2 Teaspoon of Black Pepper

1/2 Teaspoon of Dried Oregano

1/2 Teaspoon of Dried Thyme

1/4 Teaspoon Crushed Rosemary

1/4 Teaspoon of Red Pepper Flakes

2 Tablespoon of Fresh Squeezed Lemon Juice

1 Tablespoon of Apple Cider Vinegar

2 Tablespoons of Olive Oil

Whisk the Sauce ingredients together and set aside.

In a large dutch oven, or an oven safe saute pan that you can cover with foil, pour the olive oil and garlic if using. Season the chicken with salt and pepper while warming the oil in the pan over medium-high heat. Add the chicken, and brown on both sides for about 5 minutes each side. Add the sausages, tucking them in around the chicken. Sprinkle the mushrooms and onion on top.

Drizzle with the previously prepared sauce. Cover and bake in your preheated oven for 40 minutes.

This can be served with hot jasmine white rice and vegetables.

Eat Your Nutrients!

Eat Your Nutrients!

Sticky Asian Chicken Drumsticks

These drumsticks are the perfect party food, kid friendly, and you can also substitute wings for Super Bowl Sunday!

We are cooking more Asian food the past couple weeks here at home with the Autumn Moon Festival coming up September 15th. Last year after having a fun dinner at our house, we lit Sky Lanterns outside, and it was a lot of fun!

If you are new to the blog, I have two Chinese daughters, and we have had so much fun celebrating their heritage with some of the special occasions celebrated in China since they were babies.

Asian Sticky Chicken Drumsticks

Sticky Asian Chicken Drumsticks


Today, I have a recipe for you for Sticky Asian Chicken Drumsticks! They are kid friendly, as all finger foods tend to be! 🙂 I found the inspiration for these in my many Asian cookbooks I have collected. We served them recently with Asian Cabbage Salad with Cashews, Hot Jasmine Rice, and for the rest of the family who can have them, some gluten free egg rolls from Feel Good Foods that I buy at the market for in the freezer section.

Sticky Asian Chicken Drumsticks

One of the nice things about this recipe, is the marinade! You make it and add the drumsticks. Then you let it refrigerate at least two hours and up to 24 hours. You have flexibility!

Ingredients:

2 1/2 Pounds Chicken Drumsticks (This was 10)

Marinade

1/2 Cup of Green Scallions (sliced)

1/4 Cup Olive Oil

2 Tablespoons of Garlic Olive Oil (or 2 more of Olive Oil and 2 Cloves of Minced Garlic)

1/4 Cup Honey (the sticky part)

2 Tablespoons of Coconut Aminos (this is a soy sauce substitute)

1 Tablespoon of Chili Powder

1 Tablespoon of Ground Ginger

1 Teaspoon of Sea Salt

1/2 Teaspoon of Ground Coriander

1/4 Teaspoon of Red Pepper Flakes

1/8 Teaspoon of Ground White Pepper

Zest of 2 Limes

Whisk together the marinade ingredients. Add the drumsticks to a baking pan, and coat them all over with the marinade. Cover and refrigerate for 2 to 24 hours.


Sticky Asian Chicken Drumsticks

Sticky Asian Chicken Drumsticks


When ready to cook the drumsticks, Preheat the oven to 350º degrees. Then, heat a large oven safe pan over high heat. Add 2 tablespoons of olive oil to the pan, then the drumsticks taken from the marinade. Brown on each side for approximately 3 minutes. Pour the marinade from the chicken over the chicken you browned, and bake in the oven for 30 minutes, turning after 15 minutes.  Bake until the center of the drumsticks reach 165º degrees.

Plate the drumsticks, and drizzle additional sauce from the pan over them at your discretion. 🙂

Eat Your Nutrients!

Eat Your Nutrients!


Grain Free Buffalo Chicken Nuggets

Who likes finger food? Admit it, and find your inner child!

The day to day grind can make us forget life is supposed to be fun along the way. Making chicken nuggets in the oven will not only delight any children in your life, but hopefully you as well!

School is starting soon, and I for one am going to be busier than ever with two daughters in school.  This is a fast and easy weeknight recipe with just a few ingredients, but oh so good!

baked-buffalo-chicken-nuggets

Grain Free Buffalo Chicken Nuggets

Preheat the oven to 400º degrees. Lay out two parchment lined baking sheets with rims.

Ingredients

2 Pounds of Ground Chicken

3/4 Cup of Superfine Almond Flour

1/3 Cup of Buffalo Hot Sauce, plus more for brushing (I used Tessemae’s or you can use 2 Tablespoon’s of Frank’s with 3 Tablespoons of Olive Oil)

1 1/2 Teaspoons of Sea Salt

1/2 Teaspoon of Black Pepper

In a large bowl mix together all the ingredients gently but thoroughly. Over mixing ground meat can make it tough.

With a tablespoon scoop, make mounds of the chicken mixture evenly spaced apart on the two baking sheets. Gently press with your fingers to press them to about 3/4 inch thickness.

Place in the oven for five minutes. Remove the sheets from the oven, and brush them with additional hot sauce. Then return them to the oven for five more minutes. Remove them once again, and flip the nuggets, then brush them again with hot sauce. Bake another seven minutes, or until the center of a nugget tests to 165º degrees.

That’s it! They are ready! If you want to eat them with a fork, I will never tell! 🙂

Grain Free Buffalo Chicken Nuggets

Grain Free Buffalo Chicken Nuggets

Eat Your Nutrients!

Eat Your Nutrients!

Bistro Lemon Chicken Dinner Salad

If I go several days without a salad, I start having salad withdrawals. Salads are like a surprise grab bag, there is so much variety.  I never get bored with them. If you find them boring, maybe you are eating the same old one every day. One of the best things about salads is they can be an eclectic blend of different ingredients that go well together. The possibilities are vast.

One of my favorite establishments to eat in is a bistro. Bistros have an innovative, electric kind of happy buzz about them. The food isn’t fussy, but it is creative and pretty, and the ones I’ve been to have several kinds of freshly made enticing salads to choose from and many healthy options.


Bistro Lemon Chicken Salad

Bistro Lemon Chicken Dinner Salad


Here’s a Bistro Lemon Chicken Dinner Salad recipe you can make at home.

Bistro Lemon Chicken Salad

Bistro Lemon Chicken Dinner Salad


Bistro Lemon Chicken Dinner Salad

Ingredients:

4 Boneless Chicken Breasts

8 Cups Mixed Baby Romaine Lettuce

1 Can Mandarin Oranges in Their Own Juice (I Used Native Forest Brand)

1/3 Cup of Raw Sliced Almonds (Omit for AIP)

1/4 Cup Fruit Sweetened Dried Cranberries

3 Scallions, sliced

For the Marinade:

Zest of 1 Lemon

1/4 Cup Olive Oil

1 Tablespoon Honey

2 Cloves of Minced Garlic

1 Teaspoon Dried Oregano

1 Teaspoon Dried Tarragon

1/2 Teaspoon of Sea Salt

1/4 Teaspoon of Black Pepper (Omit for AIP)

The Dressing:

1/4 Cup of Good Olive Oil

2 Tablespoons of Fresh Squeezed Lemon Juice

2 Teaspoons of Honey

1/2 Teaspoon of Sea Salt

1/4 Teaspoon of Black Pepper (Omit for AIP)

Directions:

Preheat the Oven to 400º degrees. Place the chicken breasts on a baking sheet and brush all over top and bottom with the marinade. Bake in the preheated oven for 30 minutes or until the chicken is browning and has reached 165º degrees. Remove the breasts from the oven and let sit at least 15 minutes to retain their juice and cool.

Chicken Roasted for Salad

Now you can assemble the salad. Slice the chicken breasts thinly.

Sliced Lemon Chicken Breasts

Layer the romaine, chicken, oranges, almonds, cranberries and scallions in a large bowl. Whisk the salad dressing ingredients together and pour over the salad. Toss until well coated.

Bistro Lemon Chicken Dinner Salad

Bistro Lemon Chicken Dinner Salad

Bistro Lemon Chicken Dinner Salad is Gluten Free, Paleo, and a Big Salad. It is perfect for making ahead and having leftovers to pack for lunches on busy workweeks.

Makes 4 Large Dinner Salads

Eat Your Nutrients!

Eat Your Nutrients!


Spatchcocked Rosemary Lime Roasted Chicken

Spatchcocked chicken is a pretty way to cook a whole chicken, but even better is, it is moister everywhere, and you won’t dry out the breast while waiting for the slower thighs to be cooked through.

Spatchcocked Rosemary Lime Chicken

Spatchcocked Rosemary Lime Roasted Chicken


Although to the eye, the chicken looks fancy and difficult, it really isn’t at all.  I like to prepare my chicken several hours before roasting it, and put in in the refrigerator uncovered so it can rest in the rub right on the baking sheet and absorb the flavors. This also allows the skin to dry out when exposed to air, so it is extra crispy!!!

Spatchcocked Rosemary Lime Roasted Chicken

Ingredients:

1 – 5 to 6 pound whole chicken

Zest of 2 Limes

3 Tablespoons of Olive Oil

1 Tablespoon of Sea Salt

1/2 Teaspoon of Black Pepper

1 1/4 Teaspoon of Crushed Rosemary

1 1/2 Teaspoon Ground Ginger

Directions: Mix the olive oil and seasonings together for your Rosemary Lime Rub and set aside.

Now let’s spatchcock the chicken. It takes a little elbow grease, but trust me, it is easier than it looks! Much easier than cutting up a whole chicken! You will need a sharp knife or poultry scissors.

Remove Backbone

Place the chicken on a prepared baking sheet. Turn the chicken over onto its back, and starting on one side of the back bone, cute through the back. Now, do the same thing on the other side, and remove the backbone completely from the chicken. (You can use the backbone and giblets to make stock.)

Backbone Removed

That was the most difficult part. Turn the chicken over so the breasts face up, and with the palms of your hands, flatten the chicken by pressing on the breast area and splaying out the legs. It should look like this.

Spatchcocked Whole Chicken

Rub the chicken all over front and back with the Rosemary Lime Rub.


Place the chicken uncovered in the refrigerator a few hours, or as long as overnight. This step before roasting makes the chicken skin very crispy! You can skip it if you don’t have time, or you want chicken right away.

When you are ready to roast your chicken, Preheat the oven to 325º degrees and roast the chicken for one hour.

Test the thigh to make sure it has reached 165º degrees. Remove from the oven, and let the chicken sit for ten minutes to retain the juices before carving.

Enjoy this juicy recipe!

Eat Your Nutrients!

Eat Your Nutrients!


Delicious Italian Mini Meatloaves and Make Your Own Sunshine

After spending a glorious few days in the sunny San Diego area, we flew home this weekend to Maryland returning to rain and cold due to the effects of a tropical storm. It was a drastic transition from warm sunny beaches and green juice available everywhere you looked!

So, what’s a girl to do? I find great benefit in eating with the seasons, and meatloaf seemed like the perfect comfort food for a cold rainy evening.  I wanted one that was gluten and grain free, dairy free and low fodmap, but utterly delicious and flavorful! I really don’t like to settle. 🙂

Here is my recipe for mini meatloaves that will definitely hit the spot and remind you of your childhood.

I incorporated some finely chopped carrots and spinach in the meatloaf to boost the nutritional value and combined a mixture of grass fed beef and turkey.

Delicious Italian Mini Meatloaves

Delicious Italian Mini Meatloaves


This meatloaf is my way of bringing the sunshine home! Other ways I like to do this is with warm hugs, a cheerful welcoming smile, reading a great book, and green juicing!

What’s your perfect way to bring your own sunshine when life delivers lemons? What do you do?

Italian Mini Meatloaves:

Ingredients:

1 pound ground grass fed beef

1 pound ground pastured turkey 92% lean

3 large organic carrots, peeled

2 cups organic packed baby spinach (5 oz.)

1/2 Cup Superfine Almond Flour

2 Tablespoons Garlic Olive Oil

3/4 Cup Organic Tomato Paste (I used Bionaturae .7 oz jar) divided

1 tsp. Himalayan Pink Salt or Sea Salt

1/2 tsp. black pepper

1/2 teaspoon each of dried organic thyme, basil, parsley and oregano

Directions:

Preheat your oven to 375º degrees. Lay out a rimmed baking sheet and line it with parchment paper or lightly grease it.

In a food processor, add the peeled carrots, sliced into chunks, and process until finely chopped. Add to a large bowl. Add the spinach to the food processor and pulse until finely chopped. Add this to the large bowl also. Add the ground meat and remaining ingredients and 1/4 cup of tomato paste. Mix with your hands until thoroughly incorporated.

Divide the meatloaf mixture into 8 equal  sizes, and make a ball of each with your hands. Set the balls onto the lined baking sheet, and pat into the shape of a mini meatloaf.

Now the ketchup topping:

Ingredients:

1/2 cup organic tomato paste

1/4 teaspoon Himalayan Pink Salt or Sea Salt

1/4 teaspoon Black Pepper

1 teaspoon cider vinegar

Mix the topping ingredients together in a small bowl. Divide evenly over the tops of the mini meatloaves and spread.

Bake the mini meatloaves in the oven for approximately 20 to 25 minutes until the internal temperature reaches 165º degrees.

These meatloaves are full of flavor and hidden veggies!

Here are some photos of our trip to sunny San Diego!

La Jolla, California

A Beautiful Sunset!

last dinner san diego

Del Mar, California. Dinner at L’Auberge.

12032061_1139001589446748_5471667177988736768_n

The beautiful coastline! We walked the beach every morning!

12079693_1139001529446754_4742822986375353196_n

The majestic Pacific Ocean!


Cocktail Meatballs with Honey Orange BBQ Sauce (Low FodMap, Paleo, Gluten Free)

I have a brand new, Low FodMap, absolutely delicious barbecue sauce that I have been making a lot! It is so good! You can use it for all your barbecue favorites! Today I paired it with a new cocktail meatball recipe I served recently at a potluck I hosted here at my house. I doubled the recipe, and they all disappeared fast, plus I received requests for the recipe! I am so excited to share it here with you today, and for all my loyal low fodmap followers, it is completely low fodmap! You are going to love this recipe!

cocktail meatball collage

The meatballs are moist and are made with ground pork and turkey. You can make a large batch of the barbecue sauce and freeze half of it to pull out of the freezer for later. (Cook once, eat twice convenience!) I like to double the recipe for four jars of sauce and freeze three to pull out as needed.

Cocktail Meatballs with Honey Orange BBQ Sauce

Cocktail Meatballs with Honey Orange BBQ Sauce

Honey Orange Barbecue Sauce (Low FodMap)

Ingredients:

26 Oz. Jar of Tomato Puree

Juice and Zest of Two Oranges

1/2 Cup Clear Honey

1/2 Cup Apple Cider Vinegar

1/4 Cup Dried Currants

1 Bunch Green Onions, sliced  (green parts only for Low FodMap)

1 Tablespoon Garlic Infused Olive Oil

2 Teaspoons of Himalayan Pink Salt or Sea Salt

1 Teaspoon Fish Sauce (like Red Boat with No Added Ingredients)

1 Teaspoon Habanero Sauce (I use this brand)

1 Teaspoon Chili Powder (gluten free no additives like Spicely)

1/2 Teaspoon Black Pepper

Directions: Place all ingredients in a medium sauce pot. Bring to a boil, then turn down to a very low simmer. Simmer on the stovetop for 30 to 40 minutes until the sauce is reduced by half. If you are doubling the recipe, it will take a little longer. Cool sauce for 30 minutes, then puree it until smooth in a blender. It is ready! Pour it into glass jars for later use, freeze half, serve it right now!

Cocktail Meatballs with Honey Orange BBQ Sauce

Cocktail Meatballs with Honey Orange BBQ Sauce

Cocktail Meatballs (Paleo, Gluten Free, Low FodMap)

Preheat your oven to 350º degrees. I like to use a large oven safe non-stick pan to go from stove top to oven.  nonstick double griddle. If you do not have one, line a cookie sheet with parchment.

Ingredients:

1 Pound of Ground Pork

1 Pound of Ground Turkey

1/2 Cup Peeled Carrots

1 Bunch of Green Onion (green parts only for low fodmap)

4 Tablespoons of Olive Oil, divided

2 Tablespoons Fresh Dill, Minced

2 Tablespoons Fresh Basil, Minced

2 Tablespoons Fresh Cilantro, Minced

1 Tablespoon Coconut Aminos

1 Teaspoon Habanero Sauce (find it here)

1 Teaspoon Himalayan Pink Salt or Sea Salt

1 Teaspoon Ground Black Pepper

Directions: Place the green onion and carrot in a small food processor and process until finely chopped. Place the remaining ingredients in a large mixing bowl. Add all the ingredients to the bowl (just two tablespoons of the olive oil, reserving the other two tablespoons for browning the meatballs). Add the green onion and carrot and thoroughly mix the meatball ingredients with your hands.

Using a tablespoon cookie scoop, scoop uniform sized scoops of meatballs. You will have approximately 40. Once they are all scooped, form them into smooth balls with your hands.

Now, warm the remaining two tablespoons of olive oil over medium-high heat on the stove top in your oven safe pan. When the oil sizzles when a meatball is added, add all the meatballs to the pan. Brown for three minutes, turn gently, and brown another two to three minutes. They will still be pink in the middle. Now transfer the meatballs to the oven, and bake for 7 to 10 minutes until the internal temperature reaches 165º degrees. Keep a close eye on them so they don’t overcook and stay as moist as possible!

Remove from the oven and insert toothpicks for easy eating, and serve with the barbecue sauce!

Makes 40 Cocktail Sized Meatballs

If you love this recipe, please comment below and share it with friends by hitting the Pinning, Tweeting or Facebook buttons!

Cocktail Meatballs with Honey Orange BBQ Sauce

Cocktail Meatballs with Honey Orange BBQ Sauce

Cocktail Meatballs with Honey Orange BBQ Sauce

Cocktail Meatballs with Honey Orange BBQ Sauce

Like to see a new recipe that is low fodmap or Paleo? Let me know what you’d like.

Game Day Cocktail Meatballs

Eat Your Nutrients!

Eat Your Nutrients!