Tag Archives: Grain Free

Gluten-Free Chocolate Tahini Truffle Cups You’ll Love

Chocolate Tahini Truffle Cups in Hedgehog Dish

When September comes rolling around, I often find myself craving rich, indulgent treats, especially sweets that remind me of decadent chocolate truffles. I like to think I manage to behave pretty well around sweets. A big part of that self-control comes from my experience with food sensitivities—I’ve learned to be mindful, or else I pay the price later with feeling less than my best. After eliminating the troublesome culprits and getting serious about relearning what works for my body, I began healing my leaky gut. Through lab and genetic testing, I discovered my gluten intolerance. Since then, I’ve been able to reintroduce nearly all food groups—except for gluten. We constantly hear—and deep down, we all know—that too much sugar isn’t doing us any favors. But complete deprivation? That’s not an option for me. These two-bite chocolate cups are the perfect solution when those sweet, chocolatey cravings hit—they satisfy my sweet tooth without overindulging.

Chocolate Tahini Truffle Cups

Keep these delicious, creamy, nutty tasting, melt in your mouth chocolate cups in your freezer. Enjoy Life chocolate chips are my go to since they are so allergen friendly and excellent quality.

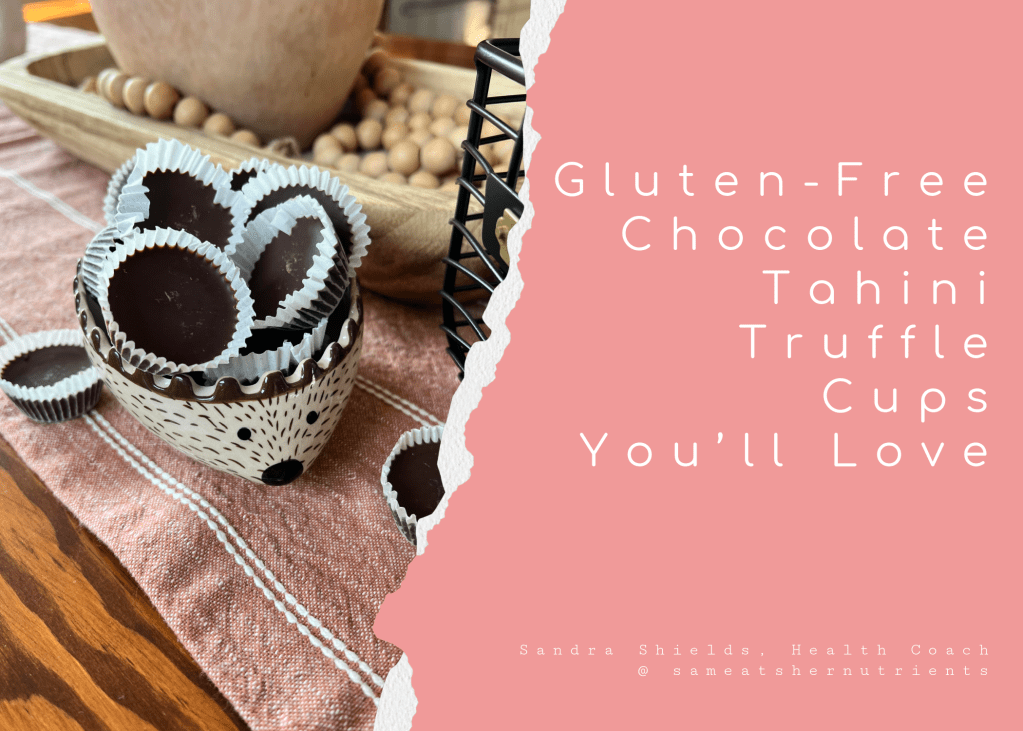
Can we talk cute woodland creatures for a minute? Isn’t this the cutest hedgehog dish? I am obsessed with cute hedgehogs and other woodland creature home decor. It’s so cozy, and bringing the nature theme indoors is so relaxing. These hedgehog dishes are so playful. I love their delicate little faces. I was gifted a set of four of these nesting hedgehogs. I love using them for company!

Chocolate Tahini Truffle Cups

1/2 Cup of Tahini (I used this kind)

1 Cup of Chocolate Chips (you can use dark chocolate chips or semi-sweet)

You will need a mini muffin cup pan and approximately 20 mini muffin cup paper liners.

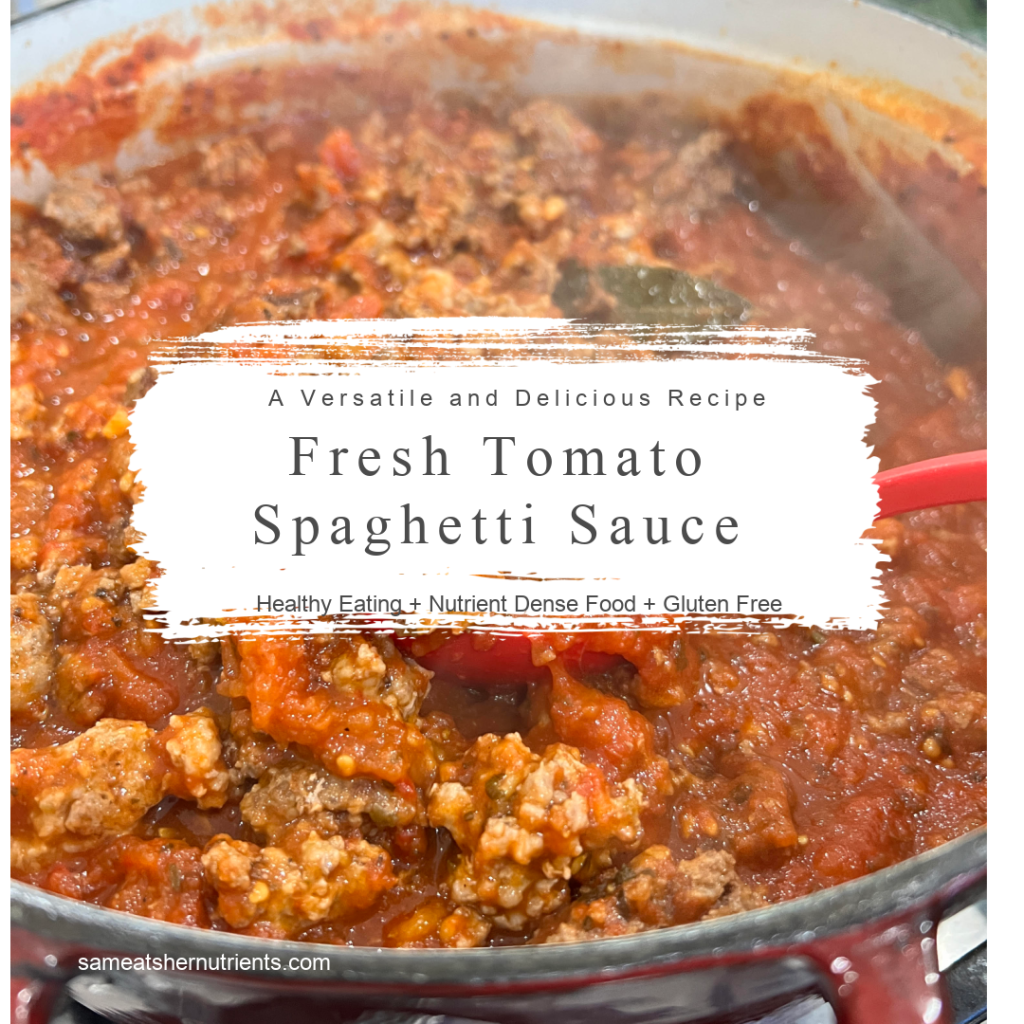
This recipe is Super Easy and much better for you than a store bought nut butter cup! In a double broiler, melt the Tahini and Chocolate Chips together, whisking until all the chocolate is melted. Using a teaspoon cookie scoop or spoons, evenly fill the muffin cup liners about two thirds full. Place the pan in your freezer. These will be solid in about 30 minutes. After they are firm, you can store your Chocolate Tahini Truffle Cups in an airtight container in the freezer. These yummy cups are a great little pick me up! Speaking of pick me ups, self care is huge for well being. When we get busy, run down or overloaded, it can be a recipe for disaster….(pun intended).

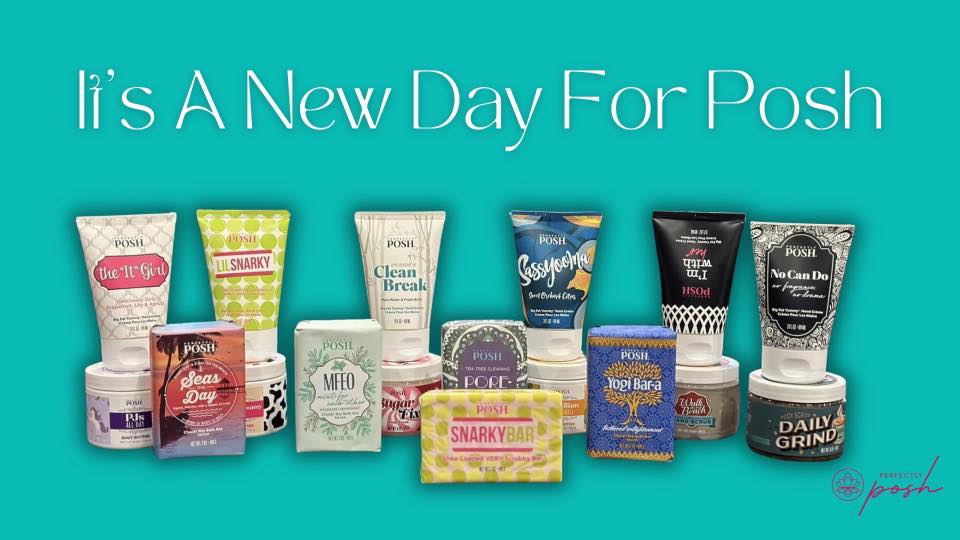
Many of you remember Perfectly Posh! Well, this pampering company is back in a BIG way! I couldn’t be happier to have all their natural based, quality bath, body and skincare products back in my life! It’s like a dream come true for many who these products were their go to favorites. They were a big part in reminding me to slow down and take time for self care. They have the best quality products at really good price points. I have a link to them at the top bar of my homepage. They don’t include nasty additives and ingredients, just good clean fun, and you can find a lot of the products rated in EWG Skin Deep! I am a Posh Advocate and am sharing my love of helping people through all areas of well being, in addition to healthy recipes. Perfectly Posh is the absolute BEST pampering company that has amazing products for self care and pampering! We can’t be there for others until we are there for ourselves first. Self Care is not a luxury, not a nice to have. It’s necessary. Self care is an essential daily practice that reminds us that we are alive and that we matter. Every person matters and deserves self care. It’s true you can’t pour from an empty cup, and it’s not just for girly girls. If you shower, Posh is for you! This includes the guys in your life.

Perfectly Posh Because You Deserve Self Care! We All Deserve to be Pampered.

You can find all their products here. I also have started a sample of the month club for free. Each month I send you a fun sample! But, you need to opt in by filling out this form for me.

Have a wonderful day! I hope you make and enjoy this new recipe! I’d love to hear from you in the comments!

Sam

Fresh Tomato Spaghetti Sauce: A Versatile and Delicious Recipe

Hello! Can you believe how fast Summer went by? We still have plenty of gorgeous weather coming our way in September, and my tomato plants are producing like they are on steroids. I made the most delicious spaghetti sauce with them, and I wanted to share the recipe, because it is incredibly delicious, and a great way to take advantage of all the benefits tomatoes offer and use the bounty of fresh tomatoes. Fresh tomatoes are delicious, but when you are growing them, they are quite a bit like zucchini in their abundance when they start ripening. I don’t like to waste food, and the tomatoes need a good recipe. Now I’m a girl who loves a yummy sauce not just for pasta and spaghetti, this sauce is so good over vegetables, lentils, polenta, zoodles, and more. I have two options for you too. You can make it meatless, or as a last step in the recipe, you can add ground pork, sausage, beef, chicken or turkey.

Fresh Tomato Spaghetti Sauce: A Versatile and Delicious Recipe

In this recipe I removed the skins from the tomatoes, but left the seeds. I have a variety of tomatoes, and you use what you have. If you don’t grow your own garden, you can get fresh tomatoes at a local farmers market and produce stands. Trust me, it’s worth it.

I’d love to hear what fresh produce you have enjoyed most over the last few months in the comments. It has been a very busy season here, and the Summer was wonderful and fleeting. I tried to soak up as much outdoor activities and sunshine as possible. My son got married in August, and I had the pleasure of being in the company of my grandchildren quite a bit while they were off school. This included taking my granddaughter to swim lessons at the lake two days a week in the mornings. and taking all three of them boating and swimming. We’ve had lots of beach time and backyard BBQ’s, and I’m not quite ready to give it up! I will also be sharing this month another new recipe for a compounded butter using fresh basil that is a smart time saver that bumps up the zing factor. It is freezable into tablespoon pats! A delicious flavor boost!

So, enough gabbing, here is my recipe for Spaghetti Sauce using fresh tomatoes! But first here’s a photo of the sauce adding a combination of ground pork and beef. The hands on time for this sauce is about 45 minutes. It simmers for a few hours, and you just need to stir it a few times.

Fresh Tomato Spaghetti Sauce: A Versatile and Delicious Recipe

Spaghetti Sauce Using Fresh Tomatoes

Ingredients:

3 Pounds of Fresh Tomatoes

5 Cloves of Garlic (Peeled and Smashed) Low FodMap Option substitute 3 Tablespoons of Garlic Infused Olive Oil)

2 Tablespoons of Olive Oil (if you are making Low FodMap, this would be part of the garlic oil above.)

8 Ounces of Tomato Paste (I like this organic brand.)

4 Cups of Water

1 Tablespoon of Dried Parsley

1 Tablespoon of Dried Oregano

1 Teaspoon of Dried Basil

1 Bay Leaf

2 Teaspoons of Salt of Choice (I used Himalayan Pink Salt here. I like that you get trace minerals in this salt)

Ground Pepper to taste.

To begin this recipe we need peeled tomatoes. It is very easy to do with a pot of boiling water. The skins slip right off after plunging them in the water for 3 minutes. Bring a large stock pot up to a rolling boil. Add a tablespoon of salt. Now, carefully add half of your tomatoes into the boiling water and set a timer for 3 minutes (Alexa is my best friend). After the time is up, remove the tomatoes to a bowl with a mesh strainer and cool slightly. Meanwhile, add the remaining tomatoes to the boiling pot and set a timer. When the tomatoes are cool enough to handle, slip off the skins using a knife when necessary for the little bits that stick and remove the core. Slice the tomatoes in half. There is not a lot of chopping here. They will deconstruct with the cooking….easy! After all the tomatoes are peeled and halved. Prepare a large saucepan (I love my Martha Stewart Red Dutch Oven. It is heavy and built for a long simmer.)

Add the olive oil to the Dutch oven, and turn the burner on medium high. Peel and smash your garlic cloves. Leave them whole. They will infuse the sauce as it simmers. Add them to the just hot oil and cook until they are fragrant, about one minute. Now, add in your prepared tomatoes and the rest of the ingredients, including the tomato paste and 4 cups of water. Bring the sauce to a boil, then turn it to a low simmer and simmer uncovered for 2 to 3 1/2 hours. When the sauce is getting to be a nice thick consistency, it is ready. Taste it for salt and pepper. If you want to add ground meat, now is the time to saute your meat of choice and add it to the sauce. It is ready to serve over anything you want. It is so delicious! Enjoy. It’s a very good thing!

Buffalo Chicken Tostadas, Gluten and Grain Free

Buffalo Chicken Tostadas, Gluten and Grain Free

Buffalo Chicken dishes are a huge fan favorite, and I can say I crave buffalo chicken! When I recently had a company I was unaware of offer to send me samples of their gluten and grain free Rise & Puff Tortillas with only 5 clean ingredients (cassava flour, tapioca flour, pure avocado oil, honey and sea salt) and no preservatives, I said yes, and started brainstorming a delicious recipe to make with them. These are the Rise & Puff Award Winning Tortillas with no added gums and quality ingredients that tasted delicious.

The sky is the limit with these tortillas, and I am so excited to find one on the market that toasted up nicely and remains flexible for folding, or you can toast it longer and it becomes crispy!

Let’s go! This Buffalo Chicken Tostada recipe has shaved purple cabbage and yellow onion for crunch, and Greek yogurt, a healthier alternative to sour cream, and creamy delicious avocado! I always feel like I’ve hit the jackpot when an avocado is perfectly ripe! You are going to love the homemade buffalo sauce that is bursting with flavor, and I used boneless chicken thighs, which are very tender and don’t dry out.

Buffalo Chicken Tostadas, Gluten and Grain Free

The buffalo chicken is made in a skillet on the stovetop, then you simply toast the tostadas in a pan and assemble them. I love that you can make the buffalo chicken in advance and reheat it when you want to make them. I am all about time saving and ease! It’s a crazy busy world, and this makes it easier to make them quickly with low stress when you have hungry people to feed, including yours truly. Nothing worse than a hangry cook! These are also great to have on hand in the fridge for breakfast tostadas with eggs, taco night, and quesadillas. There are a lot of recipe ideas on their website as well if you’d like more inspiration.

Buffalo Chicken Tostadas, Gluten and Grain Free

This recipe makes 6 to 8 tostadas.

Ingredients:

To Cook the Chicken:

2 Pounds of Boneless, Skinless Chicken Thighs

1 1/2 Tablespoons of Olive Oil

1 Teaspoon of Sea Salt

1/4 Teaspoon of Black Pepper

In a large skillet add 1 1/2 tablespoons of olive oil, and brown the chicken thighs on each side sprinkling with the salt and pepper. They do not need to be cooked in the center. They will cook as the sauce simmers.

For the Buffalo Sauce:

In a medium bowl, whisk together:

1/3 Cup of Franks Hot Sauce

1/4 Cup of Pure Honey

1/4 Cup of Ghee

2 Tablespoons of Coconut Aminos

1 Tablespoon of Garlic Infused Olive Oil or 1/2 Teaspoon of Garlic Powder

1/2 Teaspoon of Salt

1/2 Teaspoon of Black Pepper

To assemble you will need:

1 Package of Rise & Puff Tortillas

Thinly Shaved Red Cabbage

Thinly Sliced Yellow Onion

1 Ripe Avocado, Sliced

Plain Greek Yogurt

Directions:

After you have browned the chicken on both sides and whisked together the sauce ingredients in a bowl, pour the sauce over the chicken in the skillet. Bring the chicken and sauce to a boil, then reduce the heat and simmer with the lid 3/4 on, so the steam escapes, for 20 minutes, or until the chicken is fork tender. Remove the lid and continue to cook on medium heat until the sauce has evaporated a good bit and is thick. Remove the chicken from the sauce onto a cutting board, and shred or chop. Add the chicken back to the skillet. Now you are ready to toast your tostadas and assemble. In a hot skillet with a little bit of olive oil (I used a coated cast iron skillet) toast the tortillas for 15 second per side, or until they have bubbled and browned. (see the photo)

Remove them from the skilled and assemble the tortillas by adding buffalo chicken to the bottom, following by shaved red cabbage, onion, avocado and Greek yogurt. Sprinkle with additional salt and pepper if desired. Enjoy!

I always love to hear from you! Leave a comment for me.

Buffalo Chicken and Ranch Oven Hashbrowns

The official days of Fall are almost here, and it is September, even though it has been pretty darn hot and humid, even up here in Northern Michigan! But that hasn’t stopped me from decorating my home for fall and dreaming up some new recipes for the crisp days coming when the football games start, kids are back to school, it gets more hectic, and we start craving hearty foods and always lots of flavor!

I don’t know about you, but I love a good hashbrown. But, they take so long to make and can be tricky on the stovetop, and by tricky, I mean, you can’t walk away from them. Buffalo chicken, potatoes and ranch all are crave worthy ingredients, and I thought, why not make a recipe using all these delicious foods that I can make quickly. Let’s face it, we are almost all juggling so much nowadays. Some days I feel like my whole day is a race, yet I am responsible for feeding an equally busy, hungry family, and I still want them to tell me how yummy it is. I have never been a “Grab it and Growl person”. My husband had that a lot growing up, and no disrespect to any loving mom. We all want good things for our children. I’m just an overachiever in that department and always have been having been trained by a mom who did mostly scratch cooking.

This recipe uses real food ingredients, and I added a shortcut! You can use a store bought quality rotisserie chicken as an option. (Make sure it’s gluten free if you are eating g/f.) They are very easy to find anymore, and it makes this recipe super quick. Also, if you have an Instant Pot, you can cook a whole seasoned yourself chicken in there during the day and have it ready and warm at dinner and just need to take it off the bone. Or…… cook the chicken the day before, debone and shred it for making this recipe the next day. Didn’t I tell you I have options for ya? I get it! Some days are crazy. I’m right there with you. But, there is nothing better on a crazy day than to make this feel good recipe! I even had leftovers for lunch the next day.

Let’s make Buffalo Chicken and Ranch Oven Hashbrowns!!

Buffalo Chicken and Ranch Oven Hashbrowns

Ingredients:

1 Whole Roasted Chicken, deboned and shredded (however you like to make it. Mine was in the Instant Pot seasoned with salt and pepper)

2 Pounds of Frozen Hashbrowns (I use Cascadian Farms 1 lb bags. I order from Thrive Market here.)

1 Medium Chopped Yellow Onion (omit if Low FodMap and substitute 1 Tablespoon of Garlic Olive Oil for 1 Tablespoon of Ghee)

4 ounces of Romano Cheese, shredded finely

4 Ounces of Asiago Cheese, shredded finely

3 Tablespoons of Butter or Ghee

1/2 Teaspoon of Onion Powder (omit if Low FodMap)

1/2 Teaspoon of Sea Salt

1/2 Teaspoon of Black Pepper

For the Sauce:

1/4 Cup of Frank’s Hot Sauce

4 Tablespoons of Butter or Ghee

1 Tablespoon of Apple Cider Vinegar

4 Tablespoons of Honey

I use my recipe for Won’t Miss a Think Ranch here. Make this or use your favorite clean ranch dressing.

Fresh minced parsley and basil for the top (optional) plus more hot sauce to drizzle on top if you like extra heat.

Directions:

Shred your chicken. Melt the buffalo sauce ingredients in a saucepan, and pour over the chicken and toss to coat it evenly. Set aside.

Preheat your oven to 400 degrees F. Let’s make the easy, crispy and absolutely delicious sheet pan hashbrowns in the oven. I’m getting excited now! 😉 In a large bowl, break up the frozen hash browns with your hands. If they are really frozen, you can use a meat pounder. Isn’t it convenient these are made from frozen and you don’t have to thaw them first? I love that for convenience. Add 3 Tablespoons of melted butter to the hashbrowns along with a medium chopped onion, the onion powder, Romano and Asiago cheeses, salt and pepper. Toss to coat thoroughly. Lay out a large rimmed baking sheet, grease it lightly and then lay a piece of parchment paper on top. Pour your hashbrowns onto the sheet pan and press them firmly down in one even layer. Bake the hashbrowns on the top shelf of your oven for 40 minutes until golden brown with crispy edges. Make sure to check them after 35 minutes as every oven is slightly different. You can make just the hashbrowns too!

When the hashbrowns are golden brown and crispy, pull them out of the oven. Make sure your buffalo chicken is still warm. If not, reheat it in the microwave. Now, dollop the shredded buffalo chicken on top the the hashbrowns as shown, drizzle with ranch and sprinkle with fresh minced parsley and basil and extra hot sauce if desired.

Take it to the table and serve it cut into squares with a large spatula! Can I say yum? It’s so good. I like to serve it with more veggies on the side and a leafy green salad.

Crustless Quiche Florentine (Spinach Quiche)

Ahhhhh! Spring has arrived in Northern Michigan! or has it? That is always the big question Up North. But oh the beauty of it when it does. Spring up here is fickle. We had glorious days last week with the daffodils blooming and the sunshine so warm on your skin. The weather was nice enough for a picnic outside, and I actually put out my repurposed, hand painted ladder back chair I am using this summer for garden decor with a pot of daffodils. Later I will replace them with petunias. See photo down below. But the snow this morning! It was just a skiff and will be melted by noon.

Nice weather always makes me crave a good quiche! This is a new recipe I have written for Quiche Florentine. It is so light and fluffy, and it popped up in the oven and browned beautifully. I used baby spinach and a good aged cheddar with plenty of pastured local eggs. It is delicious, and I am so glad there is a piece left for me for lunch today!

Crustless Quiche Florentine (SCD, Low FodMap, Grain Free)

Crustless Quiche Lorraine

Preheat your oven to 375 Degrees F.

Ingredients:

10 Ounces of Baby Spinach, sauteed in olive oil and sprinkled in salt

12 Pastured Eggs

4 oz. of aged cheddar cheese, shredded

1/2 Cup of Coconut Milk

2 Teaspoons of Dried Chives

1/2 Teaspoon of Salt

1/4 Teaspoon of Pepper

a pinch of Nutmeg

Directions: Grease a deep dish pie pan.

Sautee the spinach in a separate pan with a tablespoon of garlic olive oil, set aside.

Whisk the eggs with the coconut milk, salt, pepper, nutmeg and chives. Fold in the cheese. Pour the egg mixture into your prepared deep dish pie pan. Now, take the cooked spinach and using tongs, place it artfully on top of the egg mixture. Place the pan in your preheated 375 degree F. oven for 40 minutes on the middle shelf until the eggs are set and the top is puffed up. The casserole should register 165 degrees F. in the center. Cool ten minutes before slicing.

Let me show you it sliced!

Crustless Quiche Florentine

The quiche is SCD Legal, Gluten Free, Grain Free and just delicious, real food ingredients.

This is the chair I repurposed for my garden this summer. What do you think? I found it at a consignment shop where I live and had a hole cut in the base and then primed and painted it in whimsical colors with flowers. We get quite a bit of foot traffic by our house in the spring and summer, so I thought it would be enjoyed by the passerby.

Repurposed Garden Decor Chair

At the end of a long, productive day, I like to take a little me time to unwind, and one of my favorite ways to do that is by reading a good book. I recently discovered Viola Shipmen! I was browsing a local bookstore and found a signed copy of The Heirloom Garden. Oh my gosh! Don’t you get so excited when you find an undiscovered to you new author whose books thoroughly suck you in with strong female characters? Now I am reading The Summer Cottage by Viola Shipmen and have more to look forward to after that, with a new one coming out this Summer.

I find a great way for winding down is a good book and a soak in the tub. I’m using Lemongrass Spa’s new Rejuvenate Bath Soak, the luscious Lemon Sorbet body polish and Cactus & Guava body wash. Lots of lovely aromatherapy! 😃

Good Books and Warm Baths

So how have you been doing? Leave me a comment below on your favorite Spring food. Here’s to a wonderful Spring!

Sandra

Chicken Enchilada Casserole (Grain Free, Healthy, Low Carb & Delicious) Benefits of Houseplants in your Home, and Non Toxic Living

We are well into January, and I have to say I like the thought that the days are getting longer now! In fact, I find I have been using some of my Summer mugs, because they feel so bright and cheerful.

I am a lover of enchiladas and eating healthy. I think it is great to focus on foods that feed your body, mind and soul that are good for you and taste incredible, keeping in mind that if you have been eating a lot of processed and fast foods, taste buds need time to adjust to less salt and sugar. This is also a low carb recipe, so if you have been fighting belly fat, this is a wonderful casserole that tastes even better the next day.

Chicken Enchilada Casserole (Grain Free, Healthy and Delicious)
Delicious Grain Free Chicken Enchilada Casserole

Chicken Enchilada Casserole (Grain Free, Healthy and Low Carb)

Ingredients:

3 lbs. of Boneless Skinless Chicken Thighs

Two Large Bunches of Swiss Chard, stems stripped, washed and roughly chopped and dried

5 oz. of Spinach

2 1/2 Cups of Carrots (peeled, chopped and steamed. You can also use baby carrots and skip the peeling)

1 Cup of Good Salsa (I used Green Mountain Gringo. You choose the heat based on your preference)

1 Cup of Plain Greek Yogurt

1 Cup of Aged Cheddar Cheese, shredded (about 4 ounces)

1/4 Cup of Chicken or Bone Broth

1 Tablespoon of Garlic Olive Oil (I like and use this brand)

1 Teaspoon of Salt, Divided plus some for sprinkling

1/2 Teaspoon of Black Pepper, Divided plus some for sprinkling

Directions:

Preheat your oven to 400 degrees F.

Lay the chicken thighs onto a baking sheet and brush lightly with olive oil. Then, sprinkle with salt and pepper, and roast in the oven for 35 minutes. Set aside to cool.

Meanwhile, steam your carrots either on the stovetop or following the directions of your instant pot. Once the carrots are steamed, set them aside to cool slightly before pureeing. Once the carrots have cooled so they are not steaming hot, place them in a food processor along with 1/2 cup of salsa, 1 Tablespoon of garlic olive oil, 1/4 cup of broth, 1/4 teaspoon of salt and 1/4 teaspoon of pepper.

Sautee the spinach with a drizzle of olive oil and a sprinkle of salt and pepper. Chop the spinach.

Chop your chicken into small bite sized pieces and place it in a large mixing bowl. Add 1/2 cup of salsa to the bowl with the chicken along with 1 cup of Greek yogurt, 1/2 cup of shredded cheddar cheese, the chopped, cooked spinach, 3/4 teaspoon of salt and 1/4 teaspoon of pepper.

Grease a large 15 by 10 inch casserole with olive oil. Now the easy and magical assembly. I was impressed with how well Swiss chard bakes in a casserole. Layer half the chopped Swiss chard evenly in the bottom of the casserole. Add your prepared chicken filling. Top with the remaining chopped Swiss chard. Now spread your carrot mixture evenly onto the top of the Swiss chard, covering it as evenly as possible. Sprinkle on the remaining 1/2 cup of shredded cheddar cheese. Sprinkle on a little extra black pepper.

Bake uncovered in your 400 degree F. oven for 35 minutes until the cheese is browned and the casserole is bubbly!

Yummy!!!

Today is National Houseplant Appreciate Day! Houseplants are a wonderful way to bring nature and it’s health benefits indoors. We spend so much time indoors, me too, even thought I love to exercise outdoors, garden and be outdoors, we still as humans spend the majority of time indoors. With all the inanimate objects in our homes like furniture, electronics, etc. it can feel good and benefit us to incorporate living plants in our rooms. They create a restorative atmosphere, are always changing and growing and can decrease stress and increase happiness. There are some beautiful plants out there, and some that are low maintenance and good if you have a black thumb.

The Benefits of Houseplants

Houseplants can improve air quality in your space, increase a sense of wellbeing, and give your eyes a much needed break from screens and help you relax and improve mental fatigue. They also can be a great addition to add beauty. It is important if you have small children or pets that you do your research and choose plants that are safe for them and also it is important to know if you have allergies or asthma, choose allergen friendly plants like cactus and succulents. Overwatering can cause mold growth, so read and make sure you know the water needs of your plants. I like to choose ones that need water once a week maximum. I also like to wipe my leaves with a damp cloth to keep them clean.

Houseplants in your home can add serenity and beauty

I am always striving for having the cleanest non-toxic living habits as possible. I want my home to be toxin free, my lawn and my skincare. That’s why I love Beautycounter so much. They are leading us to cleaner, safer beauty for all, and it doesn’t hurt that their skincare and makeup is high performing and really works. Here’s a few facts about them. I used them for a good five years before becoming a consultant, because I loved their mission and the changes they were making with beauty laws, not to mention being in love with their skin care products. They have an in house team of scientists and toxicologists, and they test for trace contaminants throughout the manufacturing process! Did you know lipsticks commonly contain lead? Yikes! The skincare regimens are fantastic, and I am obsessed with their Vitamin C Serum!

Beautycounter Clean Fact. They have in house scientists and toxicologists and are changing beauty products for the better.
Beautycounter Clean Fact. The products are obsessively tested for trace contaminants you don’t want on your body or in your bloodstream.

Drop me a line. I love to hear from you! I hope you have a great day!

Chicken Enchilada Casserole, Gluten Free, Grain Free, Low Carb

My first introduction to chicken enchilada casserole was in high school when I went over to my friend Kristy’s house, and her mom made it for dinner. I was also taught how to properly eat a whole artichoke at that time. Amazing! The casserole was absolutely delicious, and I took the recipe home with me and gave it to my mom to make (who was an excellent cook) as well.

At that time I didn’t have a clue what gluten, gluten sensitivity or celiac was. We tried to eat healthy, and also had our share of Oreos and Nutter Butters in the cookie drawer, and it being the 70’s, I was envious of the kids who got to eat tv dinners. Ha! I completely didn’t know how lucky I was to have a mom who cooked most everything from scratch and fed us plenty of garden vegetables that my dad (Pop) grew with his very capable hands, lovingly adding compost, leaves and other garden amenities every year to make the soil fertile and very black.

But I digress, this is about Chicken Enchilada Casserole that is something to brag about and be appreciated by those who partake of it. This casserole is a healthy version of a casserole I loved that also happens to be gluten and grain free. A little secret…cashew based sauces are a creamy alternative to cream cheese.

Chicken Enchilada Casserole

Ingredients:

8 cups of chopped, cooked bone in chicken thighs

1 Cup of Gluten Free Enchilada Sauce (I used this brand)

2 Tablespoons of Chopped Green Chilies (I used a gluten free brand from the grocery store)

1 Tablespoon of Taco Seasoning (I used this brand which is gluten free and no fillers and delicious)

1 Cup of Shredded Sharp Cheddar Cheese (for the top)

1 Cup of Plain Greek Yogurt

Salt and Pepper for the Chicken to Taste

My Recipe for Dairy “Cheese” Sauce here:

Dairy Free Cheese Sauce:

1 Cup of Raw Cashews soaked in 4 cups of water for 4 hours, then rinsed and drained)

1 Red Bell Pepper, seeded

1/4 Cup of Fresh Squeezed Lemon Juice

1 Tablespoon of Nutritional Yeast

1 Teaspoon of Ground Tumeric

1/2 Teaspoon of Onion Powder

1/4 Teaspoon of Salt

Directions:

Soak your cashews. You can also do this in the refrigerator overnight.

Preheat your oven to 400 degrees F. Lay out your bone in skin on chicken thighs in a single layer. Sprinkle with salt and pepper, and roast in the oven for 40 minutes. Remove the chicken from the oven and set aside to cool.

Reduce the oven temperature to 350 degrees F.

While the chicken cools a little, drain and rinse your soaked cashews. Blend up your sauce using the soaked cashews (we soak them to soften them and get them really, really creamy).

In a high speed blender, add the cashews and all the Cheese Sauce ingredients, and using your plunger blend it on high until it is completely combined and very creamy.

Remove the bones from the thighs, and chop them into bite sized pieces. Put them in a big mixing bowl, and add in your cashew cheese sauce you just blended and the rest of the ingredients except the shredded sharp cheddar cheese, and combine using a rubber spatula. Grease a large casserole dish, and put your chicken enchilada mixture in to the dish. Spread evenly.

Sprinkle the shredded sharp cheddar cheese on top, and bake for 30 minutes until the sides are bubbly. If you’d like, you can refrigerate it to bake later, just increase the baking time to 45 minutes.

Enjoy!

Delicious Four Ingredient Date Balls!

Delicious Date Balls with Four Ingredients. Sweet, Crunchy and Yummy!

I have been finding myself eating a handful of pecans and banana chips and a large date or two as an afternoon or evening snack lately, so that got me thinking about making this combination into a date ball. It’s a simple three ingredient snack that is healthy and delicious with a delightful combination of sweet and crunchy, just how I like it. I love the sugariness of the dates with their deep brown sugar like flavor, and the crunch of the pecans with their sweet buttery taste, and the unsweetened banana chips are perfect for crushing and rolling the date balls in for a subtle, crunchy coating.

Ingredients:

1 Cup of Pitted Medjool Dates

1 Cup of Pecans

4 Teaspoons of Tahini or Almond Butter

1/3 Cup of Unsweetened Banana Chips

Directions:

Pulse the banana chips in a food processor until they are fine crumbs. remove then and put them in a small bowl and set aside. Pulse the pecans in the food processor until ground. Place the pecans in a medium bowl. Add the dates to the food processor, and process until finely chopped. Add the pecans back to the food processor along with the tahini or almond butter, and pulse until it sticks together and is blended. Roll the date mixture into balls and roll them in the ground banana chips. Serve and store any extras in the refrigerator for a healthy snack!

Makes a dozen or so date balls.

Four Ingredient Date Balls that are sweet, crunchy and a perfect healthy pop in snack!
Easy, Delicious four ingredient date balls!

When I am baking and making sweet snacks I like to use natural sweeteners. Here is a handy guide to using them in place of cane sugar.

Pin for later! Delicious, Healthy Snack!

Mediterranean Chicken Salad

Mediterranean Chicken Salad

There are so many varieties to chicken salad, and I love a good chicken salad recipe! It seems like every time I make one it is gobbled up to the point people are fighting over the last of it. Maybe I don’t make it often enough.

If you ask me, “Do we need another chicken salad recipe?”, it is a resounding “yes!”. Variety is important, and this Chicken Salad is very colorful! After all, we eat with our eyes first! The wonderful thing about this chicken salad is it is Mediterranean! Mmmm! So much flavor, and one of the healthiest ways to eat in the world. It has sundried tomato bruschetta, fresh basil (my favorite fresh herb), delicious roasted red peppers, black olives and the tang of red wine vinegar. It also has the crunch from fresh celery, and two kinds of onion flavor…..green onions and chives! You will need a whole roasted chicken, and I am totally all for a good store bought rotisserie chicken if you are tight on time. There are so many good ones, and many of them are gluten free. If you are making the chicken at home, you can oven roast it or use an instant pot to cook it. Another good trick of mine is to roast two chickens at once. One is for dinner that night, and I make the other one into chicken salad. It’s a time saver and smart cooking!

Chicken salad is such a great lunch option in my opinion. You can heap it over a salad, one of my favorite ways to eat it, make a sandwich, or serve it alongside something else. For dinner, I like to pull it out of the refrigerator after having made it earlier in the day, and then make some sides to go with it. It makes an easy dinner night that everyone here really loves. Did I mention Make Your Own Wrap night? That’s another winner. Just put out the wraps, the chicken salad and some toppings and sauces. People can make it their own. Another great thing about this recipe is, it is just as delicious, if not better, the next day with all the flavors melding. I do hope you will try this recipe, Let me know what you think!

Mediterranean Chicken Salad

Ingredients:

1 Whole Cooked Chicken, deboned, skin off and chopped

3/4 Cup of Sliced Black Olives

1/2 Cup of Sundried Tomato Bruschetta

1/2 cup of Fresh Basil, torn

1/2 cup of Sliced Green Onion (aka scallions)

1/3 Cup of Mediterranean Organic Roasted Red Peppers, diced

2 Stalks of Fresh Celery, diced and you can include the leaves too

1/3 Cup of Chopped Pecans or you can use Pine Nuts

1/4 Teaspoon of Salt

1/2 Teaspoon of Black Pepper

1 Tablespoon of Chives (fresh or dried)

1/2 Teaspoon of Dried Oregano

1/3 Cup of Olive Oil

2 Tablespoons of Red Wine Vinegar

Directions: Whisk together the olive oil, red wine vinegar, salt, pepper, chives and oregano to make your dressing. Place all the other ingredients into a large bowl after chopping and prepping them as directed above, and then pour over the dressing and toss thoroughly. Store in the refrigerator until ready to serve.

I hope you love this recipe as much as I do! I’d love to hear from you.

Turkey Roulade, SCD, Low FodMap and Grain Free

Turkey Roulade, SCD, Low FodMap and Grain Free

This is a delicious way to make a boneless turkey breast that is a little bit fancy, but quite simple really.

This recipe uses a low fodmap pesto – here and some aged cheese grated over the pesto before rolling it up. It is then skewered and rubbed with melted ghee, rosemary, salt and pepper before roasting. This is also exceptional the next day served chilled. You can slice it very thin after chilling, and it is delicious on salads!

Turkey Roulade

Ingredients:

1 approximately 4 pound boneless turkey breast

1/4 cup of pesto (here’s my low fodmap recipe)

1/2 cup of packed shredded aged cheese like Parmigiano Reggiano or an aged Romano

2 Tablespoons of crushed dried rosemary

2 Tablespoons of ghee

salt and pepper to taste

Skewers like kabob skewers

Directions:

Butterfly the boneless turkey breast so it lies in a flat rectangle. Leave the skin attached. Place the turkey on a cookie sheet, and pound it with a meat mallet until it is in a rectangle about 14 by 8 inches.

With the skin side down, spread the turkey with the pesto and shredded cheese. Starting at a short side, roll the turkey up into a tight roll. Take your kabob skewers and poke them through the turkey roast starting at the seam and all the way through to hold your spiral together.

Now, melt the ghee and stir in the rosemary, salt and pepper. Brush the melted ghee mixture all over the roast. Place the turkey roast in a roasting pan, skin side up, and roast at 350 degrees F. for 1 1/2 to 2 hours depending on the weight of the roast or until the internal temperature measures 365 degrees F. Remove the roulade from the oven and let set 15 minutes before carving into slices. Enjoy and happy eating!

1 2 14