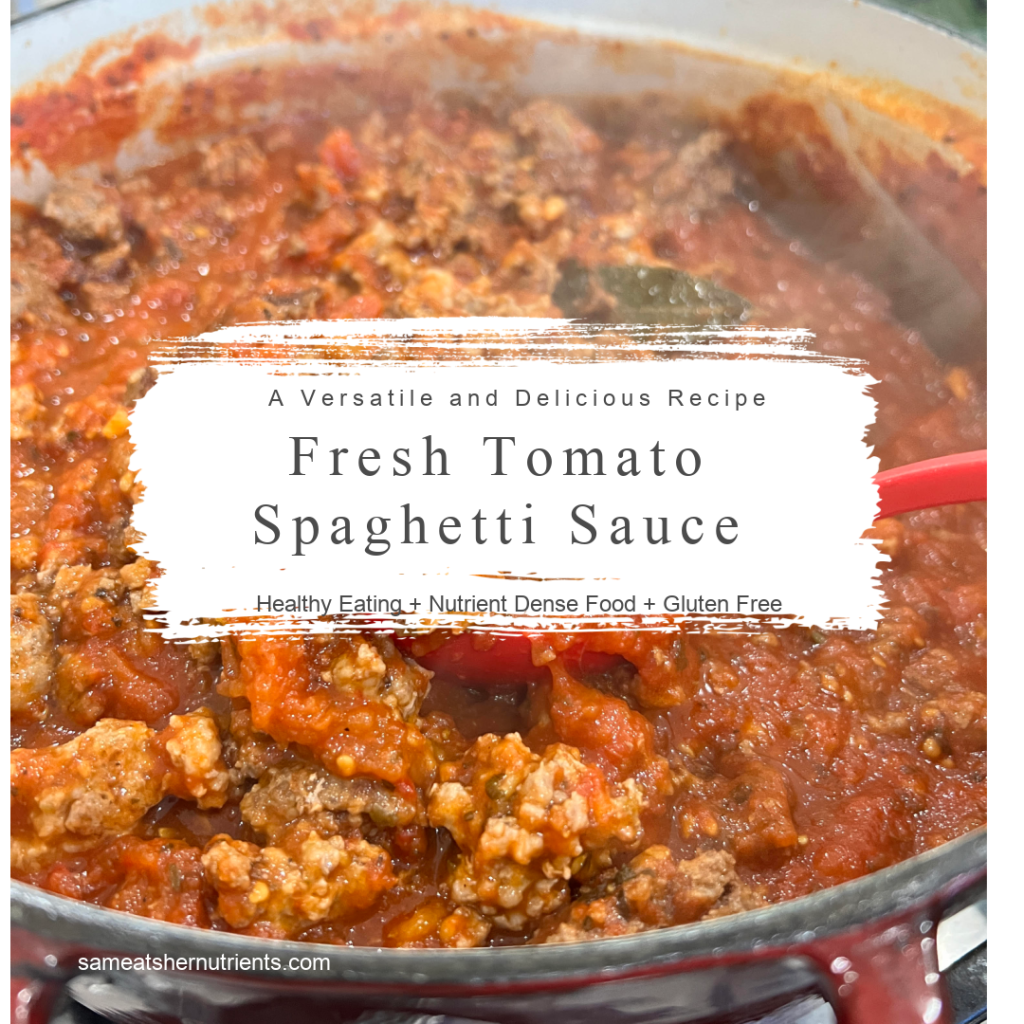
Hello! Can you believe how fast Summer went by? We still have plenty of gorgeous weather coming our way in September, and my tomato plants are producing like they are on steroids. I made the most delicious spaghetti sauce with them, and I wanted to share the recipe, because it is incredibly delicious, and a great way to take advantage of all the benefits tomatoes offer and use the bounty of fresh tomatoes. Fresh tomatoes are delicious, but when you are growing them, they are quite a bit like zucchini in their abundance when they start ripening. I don’t like to waste food, and the tomatoes need a good recipe. Now I’m a girl who loves a yummy sauce not just for pasta and spaghetti, this sauce is so good over vegetables, lentils, polenta, zoodles, and more. I have two options for you too. You can make it meatless, or as a last step in the recipe, you can add ground pork, sausage, beef, chicken or turkey.

In this recipe I removed the skins from the tomatoes, but left the seeds. I have a variety of tomatoes, and you use what you have. If you don’t grow your own garden, you can get fresh tomatoes at a local farmers market and produce stands. Trust me, it’s worth it.
I’d love to hear what fresh produce you have enjoyed most over the last few months in the comments. It has been a very busy season here, and the Summer was wonderful and fleeting. I tried to soak up as much outdoor activities and sunshine as possible. My son got married in August, and I had the pleasure of being in the company of my grandchildren quite a bit while they were off school. This included taking my granddaughter to swim lessons at the lake two days a week in the mornings. and taking all three of them boating and swimming. We’ve had lots of beach time and backyard BBQ’s, and I’m not quite ready to give it up! I will also be sharing this month another new recipe for a compounded butter using fresh basil that is a smart time saver that bumps up the zing factor. It is freezable into tablespoon pats! A delicious flavor boost!
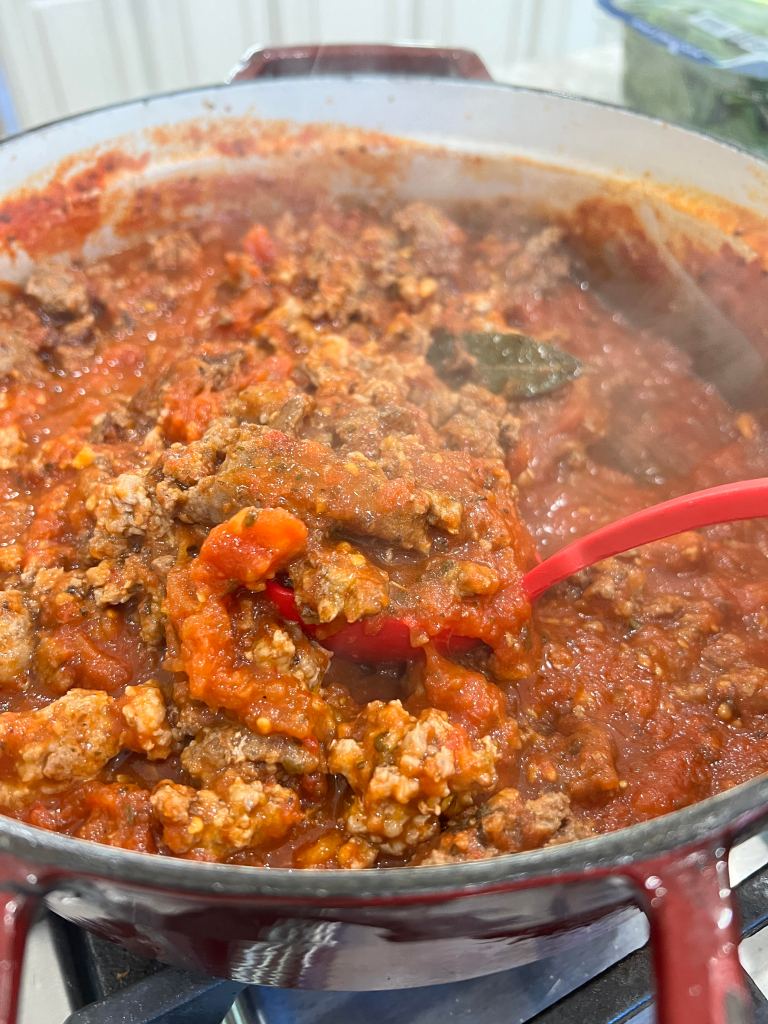
So, enough gabbing, here is my recipe for Spaghetti Sauce using fresh tomatoes! But first here’s a photo of the sauce adding a combination of ground pork and beef. The hands on time for this sauce is about 45 minutes. It simmers for a few hours, and you just need to stir it a few times.
Spaghetti Sauce Using Fresh Tomatoes
Ingredients:
3 Pounds of Fresh Tomatoes
5 Cloves of Garlic (Peeled and Smashed) Low FodMap Option substitute 3 Tablespoons of Garlic Infused Olive Oil)
2 Tablespoons of Olive Oil (if you are making Low FodMap, this would be part of the garlic oil above.)
8 Ounces of Tomato Paste (I like this organic brand.)
4 Cups of Water
1 Tablespoon of Dried Parsley
1 Tablespoon of Dried Oregano
1 Teaspoon of Dried Basil
1 Bay Leaf
2 Teaspoons of Salt of Choice (I used Himalayan Pink Salt here. I like that you get trace minerals in this salt)
Ground Pepper to taste.
To begin this recipe we need peeled tomatoes. It is very easy to do with a pot of boiling water. The skins slip right off after plunging them in the water for 3 minutes. Bring a large stock pot up to a rolling boil. Add a tablespoon of salt. Now, carefully add half of your tomatoes into the boiling water and set a timer for 3 minutes (Alexa is my best friend). After the time is up, remove the tomatoes to a bowl with a mesh strainer and cool slightly. Meanwhile, add the remaining tomatoes to the boiling pot and set a timer. When the tomatoes are cool enough to handle, slip off the skins using a knife when necessary for the little bits that stick and remove the core. Slice the tomatoes in half. There is not a lot of chopping here. They will deconstruct with the cooking….easy! After all the tomatoes are peeled and halved. Prepare a large saucepan (I love my Martha Stewart Red Dutch Oven. It is heavy and built for a long simmer.)
Add the olive oil to the Dutch oven, and turn the burner on medium high. Peel and smash your garlic cloves. Leave them whole. They will infuse the sauce as it simmers. Add them to the just hot oil and cook until they are fragrant, about one minute. Now, add in your prepared tomatoes and the rest of the ingredients, including the tomato paste and 4 cups of water. Bring the sauce to a boil, then turn it to a low simmer and simmer uncovered for 2 to 3 1/2 hours. When the sauce is getting to be a nice thick consistency, it is ready. Taste it for salt and pepper. If you want to add ground meat, now is the time to saute your meat of choice and add it to the sauce. It is ready to serve over anything you want. It is so delicious! Enjoy. It’s a very good thing!


Recent Comments