Home

Chicken Enchilada Casserole (Grain Free, Healthy, Low Carb & Delicious) Benefits of Houseplants in your Home, and Non Toxic Living

We are well into January, and I have to say I like the thought that the days are getting longer now! In fact, I find I have been using some of my Summer mugs, because they feel so bright and cheerful.

I am a lover of enchiladas and eating healthy. I think it is great to focus on foods that feed your body, mind and soul that are good for you and taste incredible, keeping in mind that if you have been eating a lot of processed and fast foods, taste buds need time to adjust to less salt and sugar. This is also a low carb recipe, so if you have been fighting belly fat, this is a wonderful casserole that tastes even better the next day.

Chicken Enchilada Casserole (Grain Free, Healthy and Delicious)
Delicious Grain Free Chicken Enchilada Casserole

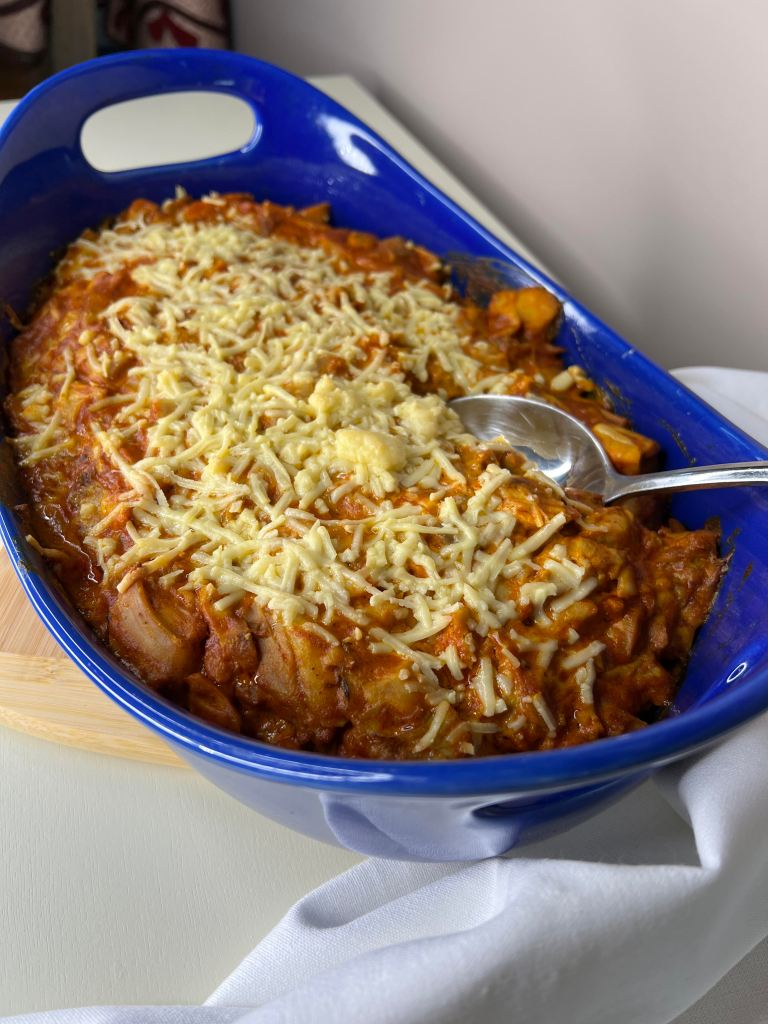
Chicken Enchilada Casserole (Grain Free, Healthy and Low Carb)
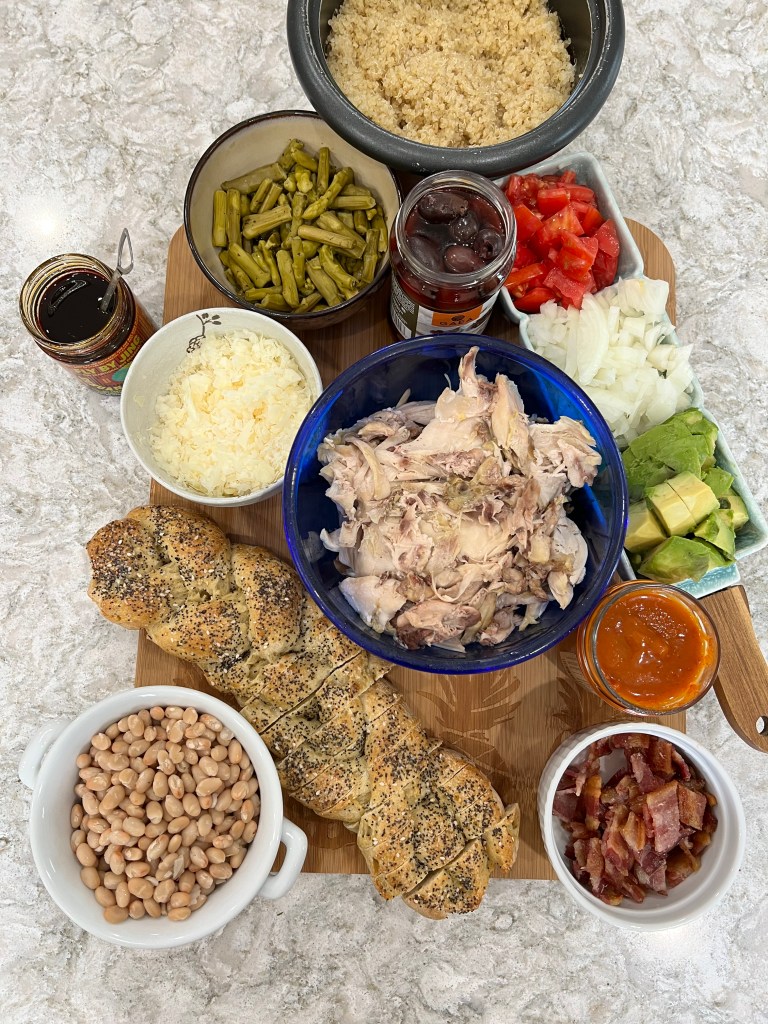
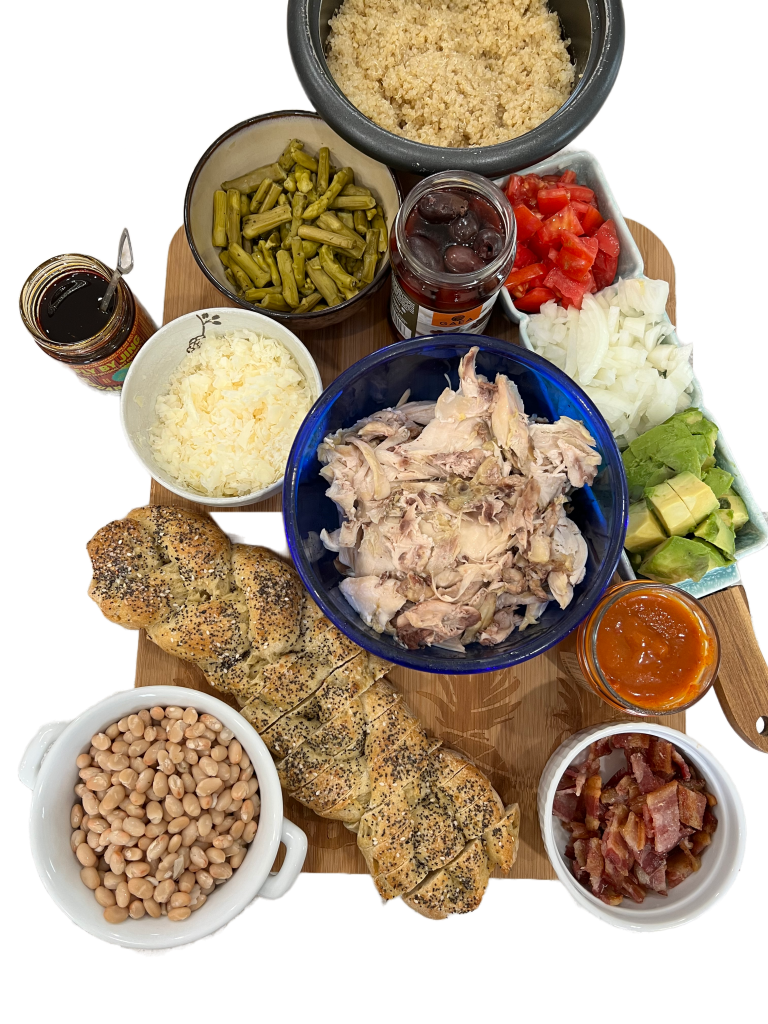
Ingredients:

3 lbs. of Boneless Skinless Chicken Thighs

Two Large Bunches of Swiss Chard, stems stripped, washed and roughly chopped and dried

5 oz. of Spinach

2 1/2 Cups of Carrots (peeled, chopped and steamed. You can also use baby carrots and skip the peeling)

1 Cup of Good Salsa (I used Green Mountain Gringo. You choose the heat based on your preference)

1 Cup of Plain Greek Yogurt

1 Cup of Aged Cheddar Cheese, shredded (about 4 ounces)

1/4 Cup of Chicken or Bone Broth

1 Tablespoon of Garlic Olive Oil (I like and use this brand)

1 Teaspoon of Salt, Divided plus some for sprinkling

1/2 Teaspoon of Black Pepper, Divided plus some for sprinkling

Directions:

Preheat your oven to 400 degrees F.

Lay the chicken thighs onto a baking sheet and brush lightly with olive oil. Then, sprinkle with salt and pepper, and roast in the oven for 35 minutes. Set aside to cool.

Meanwhile, steam your carrots either on the stovetop or following the directions of your instant pot. Once the carrots are steamed, set them aside to cool slightly before pureeing. Once the carrots have cooled so they are not steaming hot, place them in a food processor along with 1/2 cup of salsa, 1 Tablespoon of garlic olive oil, 1/4 cup of broth, 1/4 teaspoon of salt and 1/4 teaspoon of pepper.

Sautee the spinach with a drizzle of olive oil and a sprinkle of salt and pepper. Chop the spinach.

Chop your chicken into small bite sized pieces and place it in a large mixing bowl. Add 1/2 cup of salsa to the bowl with the chicken along with 1 cup of Greek yogurt, 1/2 cup of shredded cheddar cheese, the chopped, cooked spinach, 3/4 teaspoon of salt and 1/4 teaspoon of pepper.

Grease a large 15 by 10 inch casserole with olive oil. Now the easy and magical assembly. I was impressed with how well Swiss chard bakes in a casserole. Layer half the chopped Swiss chard evenly in the bottom of the casserole. Add your prepared chicken filling. Top with the remaining chopped Swiss chard. Now spread your carrot mixture evenly onto the top of the Swiss chard, covering it as evenly as possible. Sprinkle on the remaining 1/2 cup of shredded cheddar cheese. Sprinkle on a little extra black pepper.

Bake uncovered in your 400 degree F. oven for 35 minutes until the cheese is browned and the casserole is bubbly!

Yummy!!!

Today is National Houseplant Appreciate Day! Houseplants are a wonderful way to bring nature and it’s health benefits indoors. We spend so much time indoors, me too, even thought I love to exercise outdoors, garden and be outdoors, we still as humans spend the majority of time indoors. With all the inanimate objects in our homes like furniture, electronics, etc. it can feel good and benefit us to incorporate living plants in our rooms. They create a restorative atmosphere, are always changing and growing and can decrease stress and increase happiness. There are some beautiful plants out there, and some that are low maintenance and good if you have a black thumb.

The Benefits of Houseplants

Houseplants can improve air quality in your space, increase a sense of wellbeing, and give your eyes a much needed break from screens and help you relax and improve mental fatigue. They also can be a great addition to add beauty. It is important if you have small children or pets that you do your research and choose plants that are safe for them and also it is important to know if you have allergies or asthma, choose allergen friendly plants like cactus and succulents. Overwatering can cause mold growth, so read and make sure you know the water needs of your plants. I like to choose ones that need water once a week maximum. I also like to wipe my leaves with a damp cloth to keep them clean.

Houseplants in your home can add serenity and beauty

I am always striving for having the cleanest non-toxic living habits as possible. I want my home to be toxin free, my lawn and my skincare. That’s why I love Beautycounter so much. They are leading us to cleaner, safer beauty for all, and it doesn’t hurt that their skincare and makeup is high performing and really works. Here’s a few facts about them. I used them for a good five years before becoming a consultant, because I loved their mission and the changes they were making with beauty laws, not to mention being in love with their skin care products. They have an in house team of scientists and toxicologists, and they test for trace contaminants throughout the manufacturing process! Did you know lipsticks commonly contain lead? Yikes! The skincare regimens are fantastic, and I am obsessed with their Vitamin C Serum!

Beautycounter Clean Fact. They have in house scientists and toxicologists and are changing beauty products for the better.
Beautycounter Clean Fact. The products are obsessively tested for trace contaminants you don’t want on your body or in your bloodstream.

Drop me a line. I love to hear from you! I hope you have a great day!

Delicious Spiralized Antipasto Zoodles Salad, Winter Health Tips, and Clean Skincare

Winter Health Tips, Spiralized Antipasto Health Zoodles Salad and Safer Skincare

Happy New Year friends!! The days are getting longer, and I am craving fresh, delicious, food that makes me feel good because of all the nutrients in it! This Spiralized Antipasto Zoodles Salad is full of all the flavor, is low in carbs and it’s fun to make…..because….zoodles are just so fun!

Spiralized Antipasto Zoodles Salad

First off if you don’t already have a spiralizer, it is affordable! and a great investment in your kitchen accessories. I use my spiralizer frequently and is as necessary to my kitchen as a food processor and blender. This is my favorite spiralizer of the three I have tried. This one suctions to the countertop and makes a wonderful variety of spiralized shapes, and I have had it 5 years and it is still going strong. Oh, and this is a no cook recipe!

Delicious Spiralized Antipasto Zoodles Salad

Ingredients:

5 medium to small zucchini, spiralized (I used the FS Blade on my spiralizer)

1 Teaspoon of Salt to draw moisture out of the zucchini (see directions)

3 oz. of Sopressata, diced (I used Culinary Tours gluten free brand.) You can also use thin sliced Salami

1/4 cup of Fresh Basil, torn

3 Green Onions (scallions), sliced

Sliced Black Olives (I used a 3.8 oz. can)

1/4 cup of Roasted Red Peppers, diced

1/4 cup of oil packed Sundried Tomatoes, finely diced I use Mediterranean Brand Organic Sundried Tomatoes In Olive Oil

Dressing:

3 Tablespoons of Garlic Infused Olive Oil

3 Tablespoons of Red Wine Vinegar

2 Tablespoons of Good Olive Oil

1 Tablespoon of Fresh Lemon Juice

1 Teaspoon of Nutritional Yeast (adds umami and a cheesy flavor)

1/4 Teaspoon of dried Oregano

1/4 Teaspoon of dried Parsley

1/4 Teaspoon of Salt

1/4 Teaspoon of Black Pepper

Whisk all the dressing ingredients together in a bowl until emulsified.

Directions: Spiralize your zucchini. Spiralizing really magnifies the amount of zucchini. Look!

Making Zoodles with a Spiralizer

Place the spiralized zucchini in a colander over a bowl, and toss the zucchini in the teaspoon of salt. Let sit over the bowl for 30 minutes. The zucchini will release some juices. This helps prevent the salad from being watery. Zucchini has a lot of water in it. After 30 minutes, take a large serving spoon or rubber spatula and press the zucchini in the colander firmly to release more of the liquid. Now, we are ready to make the rest of the salad! Let’s go!

It really is just assembly at this point and so easy! Put your zoodles in a large bowl. Add the rest of the chopped, sliced and diced ingredients. Whisk up your delicious dressing, and pour it over everything. Grab you salad tongues and toss thoroughly, but gently. It’s ready to eat, or you can store it in the refrigerator until you are ready to serve it. It will just increase in flavor.

This Spiralized Antipasto Zoodles Salad is a wonderful addition to any meal or a delicious lunch. It’s pretty, fun, and healthy and good for you!

Now, here’s some health tips to get your through the winter months! Since the days are colder and darker, it is important to implement mindful self care for yourself.

Winter Health Tips

Which of these have you already implemented and which ones are you going to add? Please reach out to me with any questions. I love to hear from you.

As far as the sunscreen in the winter goes, are you choosing a safe sunscreen? It defeats the purpose of protecting your skin if you are putting chemicals on that absorb into your bloodstream. I recommend Beautycounter safer sunscreen with non-nano zinc. It is the safest out there and also reef friendly. My family and I have been using it for 9 years now, almost as long as Beautycounter has been making safer skincare products. They celebrate their ten year anniversary in March, and I love their mission and the high quality and safety of their products. If you want to know more or go see all the safer skincare, makeup and family care they have, here is the link. I have been a consultant with them for almost four years now after using their products for several years before, and they are a highly reputable company that is changing laws for safer skincare and beauty for all, have a strong recycling and sustainability mission, and their skincare is high quality.

https://beautycounter.com/sandrashields

Getting through winter requires maintaining all areas of our health. This time of year we can get restless and tired of the constant darkness and cold. Many people suffer from seasonal affective disorder (SAD) which lasts through the winter months. Try these 12 health tips to help get your through the winter.

Enjoy the salad recipe! I plan on making this on a weekly rotation, wearing my sunscreen, and implementing winter health tips!

Healthy Chocolate Avocado Date Sweetened Pudding

There is not many who don’t like a sweet treat, but sugar can be very addicting and not good for our health. A whole foods diet rich in plants, healthy fats like olive oil, avocado, nuts, seeds and good sources of protein is very beneficial to our bodies and promotes health. This chocolate pudding satisfies my sweet tooth, and I know it is good for me. It is guilt free, creamy and chocolatey! It is sweetened with whole dates which are a natural whole food, plant based sweetener that contains the health benefits of antioxidants and minerals, and has creamy avocado that is full of healthy PUFA’s…..the good fat, raw cocoa powder that is a great source of antioxidants and a mood elevator (good for winter blues!), coconut milk for a creamy non-dairy pudding. If you want a touch more sweetness, a little bit of pure monk fruit can be added, but less sweetness in desserts is an acquired taste, so if you already are eating less sugar, you may not need it.

Here is to the healthiest you in 2023. I wish you a healthy, happy, bountiful new year and will be sharing other health promoting recipes and tips throughout the coming year!

Healthy Chocolate Avocado Date Sweetened Pudding

Ingredients:

2 Cups of Ripe Avocado, cubed

1/2 Cup of Full Fat Coconut Milk

6 Medjool Dates soaked in hot water for five minutes to soften and then pitted, Joolies are my favorite!

1/4 Cup of Raw Cocoa Powder

1 Teaspoon of Vanilla Extract

1/8 teaspoon of pure Monk Fruit I use this brand

a pinch of Sea Salt

Cocoa Nibs (optional)

Blend all the ingredients in a high speed blender until completely smooth. Spoon into 4 serving dishes, sprinkle with cocoa nibs and eat immediately or keep it in the refrigerator for up to two days. Enjoy!! I always love to hear from you!

Chicken Enchilada Casserole, Gluten Free, Grain Free, Low Carb

My first introduction to chicken enchilada casserole was in high school when I went over to my friend Kristy’s house, and her mom made it for dinner. I was also taught how to properly eat a whole artichoke at that time. Amazing! The casserole was absolutely delicious, and I took the recipe home with me and gave it to my mom to make (who was an excellent cook) as well.

At that time I didn’t have a clue what gluten, gluten sensitivity or celiac was. We tried to eat healthy, and also had our share of Oreos and Nutter Butters in the cookie drawer, and it being the 70’s, I was envious of the kids who got to eat tv dinners. Ha! I completely didn’t know how lucky I was to have a mom who cooked most everything from scratch and fed us plenty of garden vegetables that my dad (Pop) grew with his very capable hands, lovingly adding compost, leaves and other garden amenities every year to make the soil fertile and very black.

But I digress, this is about Chicken Enchilada Casserole that is something to brag about and be appreciated by those who partake of it. This casserole is a healthy version of a casserole I loved that also happens to be gluten and grain free. A little secret…cashew based sauces are a creamy alternative to cream cheese.

Chicken Enchilada Casserole

Ingredients:

8 cups of chopped, cooked bone in chicken thighs

1 Cup of Gluten Free Enchilada Sauce (I used this brand)

2 Tablespoons of Chopped Green Chilies (I used a gluten free brand from the grocery store)

1 Tablespoon of Taco Seasoning (I used this brand which is gluten free and no fillers and delicious)

1 Cup of Shredded Sharp Cheddar Cheese (for the top)

1 Cup of Plain Greek Yogurt

Salt and Pepper for the Chicken to Taste

My Recipe for Dairy “Cheese” Sauce here:

Dairy Free Cheese Sauce:

1 Cup of Raw Cashews soaked in 4 cups of water for 4 hours, then rinsed and drained)

1 Red Bell Pepper, seeded

1/4 Cup of Fresh Squeezed Lemon Juice

1 Tablespoon of Nutritional Yeast

1 Teaspoon of Ground Tumeric

1/2 Teaspoon of Onion Powder

1/4 Teaspoon of Salt

Directions:

Soak your cashews. You can also do this in the refrigerator overnight.

Preheat your oven to 400 degrees F. Lay out your bone in skin on chicken thighs in a single layer. Sprinkle with salt and pepper, and roast in the oven for 40 minutes. Remove the chicken from the oven and set aside to cool.

Reduce the oven temperature to 350 degrees F.

While the chicken cools a little, drain and rinse your soaked cashews. Blend up your sauce using the soaked cashews (we soak them to soften them and get them really, really creamy).

In a high speed blender, add the cashews and all the Cheese Sauce ingredients, and using your plunger blend it on high until it is completely combined and very creamy.

Remove the bones from the thighs, and chop them into bite sized pieces. Put them in a big mixing bowl, and add in your cashew cheese sauce you just blended and the rest of the ingredients except the shredded sharp cheddar cheese, and combine using a rubber spatula. Grease a large casserole dish, and put your chicken enchilada mixture in to the dish. Spread evenly.

Sprinkle the shredded sharp cheddar cheese on top, and bake for 30 minutes until the sides are bubbly. If you’d like, you can refrigerate it to bake later, just increase the baking time to 45 minutes.

Enjoy!

Gluten Free Apple Bread with Streusel Topping

Apple bread is obviously good all year round, but it is especially enticing during the fall when apples are available locally and the leaves are changing color and crunchy beneath our feet, and we start thinking about bringing out the buffalo plaid, flannel and light scarves and vests when we go outside

I am particularly fond of seasonal food. It gives us a reason to celebrate every season as it comes and goes. This apple cake uses grated apple, so there is apple throughout without the big chunks, and there is a scrumptious streusel topping. I’m telling you the wonderful aroma in the kitchen whilst it is baking will make your family happy with anticipation.

Here’s the recipe:

Gluten Free Apple Bread with Streusel Topping

Preheat your oven to 350 degrees F. Grease a 9 x 5 inch loaf pan well.

Ingredients:

1 3/4 Cup of Gluten Free Flour Blend with Xanthan Gum (I use King Arthur Measure for Measure)

1/2 Cup of Apple Butter

1/2 Cup of Plain Greek Yogurt

3 Large Eggs

1 Cup of Peeled and Grated Apple (about 1 large apple)

1/3 Cup of Cane Sugar

1/4 Cup of Olive Oil

1 1/2 Teaspoons of Baking Powder

1 Teaspoon of Vanilla Extract

1 Teaspoon of Cinnamon

1/8 Teaspoon of Nutmeg

1/2 Teaspoon of Salt

~~~~~~~~~~~~~~~~

For Streusel Topping:

2 Tablespoons of Butter, melted

3 Tablespoons of Gluten Free Flour Blend

1 Tablespoon of Light Brown Sugar

1/8 Teaspoon of Salt

1/2 Teaspoon of Cinnamon

a pinch of Nutmeg

Directions:

Grate your apple and set aside.

Mix together the crumb topping ingredients in a bowl with a fork, and set aside.

In a large mixing bowl beat the eggs, yogurt, apple butter, vanilla, sugar and olive oil.

In a medium bowl, sift together the dry ingredients. Add the dry ingredients to the wet ingredients you just blended. Fold in the grated apple, and then add the batter to your prepared loaf pan. Smooth the batter evenly with a spatula. Sprinkle the top with your streusel mixture. Bake in your preheated oven for 60 to 70 minutes, or until a toothpick inserted in the center comes out clean. Cool on a wire rack for 10 minutes. Then, run a knife around the pan before removing the loaf to cool completely on a cooling rack.

Homemade Maple Pecan Scones, Gluten Free Pastry!

Gluten Free Maple Pecan Scone Recipe
Gluten Free Scones – Baking Love
Maple Pecan Gluten Free Homemade Scones

Changing leaves, cooler weather, cozy sweaters, and this time of year makes me start baking things like these maple pecan scones. They are the perfect bit of sweet with a biscuit texture and buttery maple pecan flavor. It’s just the bit of comfort and homey cheer that says relax and put up your feet for a bit and savor the moment. I personally can’t think of scones without also thinking of a cup of tea to go with it. But that’s entirely up to you and maybe your jam is coffee or just eating it over the kitchen sink. We have family members known to do that….never me. 😉 What is your favorite tea to drink with something like a scone?

In this recipe, I used maple sugar, real butter, some natural maple flavor extract instead of vanilla and toasted pecans. They are a delicious way to treat yourself. A wonderful thing about scones is you can prep them all the way up to the point they are ready to pop into the oven and freeze some for later so you have fresh scones at your fingertips. This has come in very handy for me over the years. This recipe makes 24 scones, so you can bake them all at once, or freeze some for later. Just increase your baking time by about ten minutes from frozen.

Let’s make scones together, shall we?

Maple Pecan Scones, Gluten Free

Preheat your oven to 400 degrees F. and lay out two parchment lined baking sheets.

Ingredients:

3 Cups of Gluten Free Flour Blend with Xanthun Gum (I use Measure for Measure) Scooped and Leveled

2 Sticks of Cold Butter

1 Cup of Coconut Milk or Heavy Cream

4 Large Eggs

1 Cup of Toasted Pecans (toast in the oven for approximately 7 minutes at 350 degrees. Cool and chop)

1/4 Cup of Maple Sugar

1 1/2 Tablespoons of Baking Powder

1 1/2 Teaspoons of Salt

1 Teaspoon of Natural Maple Flavor (it’s gluten free!)

Egg wash (1 egg beaten with 1 Tablespoon of water for brushing the tops)

Directions:

Toast the pecans first at 350 degrees F. for seven minutes. Remove them from the oven and set aside to cool. Now, reset your oven to 400 degrees F. for the scones.

In a food processor with a blade, add your flour, maple sugar, baking powder, and salt. Pulse until combined. Cut the cold butter into chunks and add it to your food processor. Pulse the processor until you have fine pea size crumbs. Whisk together in a separate bowl the coconut milk or heavy cream, eggs, and maple extract. Add the beaten egg mixture to the flour mixture and pulse until combined evenly. You will need to remove the top a couple of times to scrape the sides. Dump the mixture into a mixing bowl and fold in the pecans evenly. Dump the scone dough onto a floured surface, and roll out until it is a 12 inch by 8 inch rectangle and the scones are 1 1/2 inches thick. Cut the dough into 12 squares with a sharp knife. Wipe the knife as you go if you get dough stuck to it for a cleaner cut. Now cut your twelve squares into triangles by cutting them in half on an angle. Place the scones on two baking trays spaced evenly about two inches apart. Brush the scones with egg wash and sprinkle with some additional maple sugar or cane sugar.

Bake in your preheated 400 degree F. oven for 16 minutes until golden brown on the edges. Cool.

These are delightful, and I hope you love the recipe! Happy baking!!

Gluten Free Shredded Chicken Bowls Board!

Gluten Free Shredded Chicken Bowls Board

Everyone loves a bowl! This is a chicken board you can make for dinner and set out bowls for everyone to grab and assemble as they like.

Meal Board with Shredded Chicken for Dinner

When I serve up shredded chicken with a mixture of crunchy, salty, chewy, crusty, creamy, savory and spicy ingredients, toppings and sauces, it is always a hit. People like to create their own versions based on their preferences and it pleases everyone.

This shredded chicken bowls board is a complete meal. Just hand everyone a bowl and tell them to dig in and pile high. I included a sweet, spicy, delectable house hot sauce from American Spoon Foods that is made with apricots, habanero chilies, ginger and lime. Choose ones your family and guests like. This one is delectable, and a great discovery. The other sauce is Chili Crisp which is very spicy, and trendy and has a lot more heat.

One of the fast things about this recipe is you will use an instant pot (or you can use a store bought rotisserie chicken and shred it to save time.) To cook the chicken in the instant pot, add one cup of water to the pot, place the whole chicken on a wire rack insert and sprinkle with Greek Gyro seasoning or another blend you like. This one is a very versatile one I always have in my pantry. Put the lid on the instant pot and seal. Set the manual timer for 25 minutes on high pressure. After it is done, let it sit and release slowly for 20 minutes. I’ve made this many times and some days I let the chicken set on warm until I am ready to shred it and it holds for a few hours which is very convenient. Let’s go!

Gluten Free Shredded Chicken Bowls

Ingredients:

1 Whole Cooked Chicken, shredded

1 Cup of Quinoa (I use a rice cooker!)

A loaf of good gluten free artisan bread (shown here is Challah from Gluten Free Artisan Bread in Five Minutes a Day. I highly recommend it if you want to take your gluten free bread baking to the next level.)

Shredded, Aged Cheddar Cheese

Cannellini or White Kidney Beans (I use Eden Organic)

Chopped Avocado

Chopped Tomato

Chopped Onion

Bacon, Cooked and Chopped

Marinated Asparagus (I used this one from Thrive Market)

Pitted Kalamata Olives

Hot Sauce

Chili Crisp Sauce

Gluten Free Homemade Challah Bread with Everything Bagel Topping

Directions: Prepare the quinoa as directed, or in the rice cooker, my favorite way. Rinse 1 cup of quinoa, then place it in the rice cooker with two cups of water and a half teaspoon of salt. Turn it on. Shred the Cooked Chicken, and Place it in a big bowl. Chop your avocado, tomatoes and onion. Rinse the beans and warm them in a bowl.

Place all the ingredients and toppings on a big board on your counter for serving. Place some pretty bowls beside it and let everyone make their own!

Everyone Loves a Meal in a Bowl

Delicious Four Ingredient Date Balls!

Delicious Date Balls with Four Ingredients. Sweet, Crunchy and Yummy!

I have been finding myself eating a handful of pecans and banana chips and a large date or two as an afternoon or evening snack lately, so that got me thinking about making this combination into a date ball. It’s a simple three ingredient snack that is healthy and delicious with a delightful combination of sweet and crunchy, just how I like it. I love the sugariness of the dates with their deep brown sugar like flavor, and the crunch of the pecans with their sweet buttery taste, and the unsweetened banana chips are perfect for crushing and rolling the date balls in for a subtle, crunchy coating.

Ingredients:

1 Cup of Pitted Medjool Dates

1 Cup of Pecans

4 Teaspoons of Tahini or Almond Butter

1/3 Cup of Unsweetened Banana Chips

Directions:

Pulse the banana chips in a food processor until they are fine crumbs. remove then and put them in a small bowl and set aside. Pulse the pecans in the food processor until ground. Place the pecans in a medium bowl. Add the dates to the food processor, and process until finely chopped. Add the pecans back to the food processor along with the tahini or almond butter, and pulse until it sticks together and is blended. Roll the date mixture into balls and roll them in the ground banana chips. Serve and store any extras in the refrigerator for a healthy snack!

Makes a dozen or so date balls.

Four Ingredient Date Balls that are sweet, crunchy and a perfect healthy pop in snack!
Easy, Delicious four ingredient date balls!

When I am baking and making sweet snacks I like to use natural sweeteners. Here is a handy guide to using them in place of cane sugar.

Pin for later! Delicious, Healthy Snack!

Fresh Seasonal Salad Days Are Here!

Seasonal Fresh Salad with Peas

It’s Friday and the kickoff of Memorial Day weekend, and unofficially the start of Summer! Warm weather makes me want to eat lots of fresh salads and seasonal veggies. Peas are in season and are a sweet addition to a salad

. I like to lightly steam them and then rinse them under cold water. Drain them, pat them dry, then sprinkle them on your salads along with pea shoots if you can find them or another type of sprout. The shoots are so pretty and elevate your salad to gourmet.

Peas contain an impressive amount of vitamins and minerals and are heart healthy, and also are a source of antioxidants and protein. Add a soft, buttery lettuce, some healthy fats from avocado, and sliced cooked beets! Bonus! Sprinkle on a little fermented vegetables for gut health benefits. (They are full of probiotics. If you like pickles, you will like them too.) Salt, pepper and your favorite vinaigrette, and you have a gorgeous, delicious salad with lots of healthy nutrition!

I’ve signed up for a local organic farms CSA box this Summer and also have planted a small vegetable garden with peas, bok choy, swiss chard, lettuce, tomatoes and peppers. It’s been awhile since I’ve had a vegetable garden, so I am keeping it small and manageable.

What seasonal vegetable do you most look forward to in the Summer? Eating seasonal and local vegetables is a wonderful way to eat very nutrient dense food!

Easy Homemade Grain Free Sandwich Bread (Dairy Free, Nut Free, Yeast Free)

Homemade Grain Free Sandwich Bread – Easy, Yeast Free, Gluten Free, Nut Free

Anyone who loves bread and is looking for healthy bread recipes, or has missed bread because their tummy can’t handle it, I have a recipe for you that is a very delicious, healthy and easy. There is no rising required, so it is fast, and the texture and flavor are really good! I have been tweaking this formula to get it just the right flavor and texture and have had my taste testers giving me feedback with their high standards. 😉 The ingredients are healthy, and it is a pleasure to make. Actually, it is just a pleasure to bite into a piece of bread with the texture of grain bread. I like to toast it and put an egg on top, make a sandwich, or crostini for dinner, or put a spread on it and eat it with a salad at lunch. My daughter made French Toast with it last Saturday, and proclaimed it delicious that way. I do hope you give it a try, Pin it for later too and let me know what you think!

Homemade Grain Free Sandwich Bread, Sliced – Yeast Free, Nut Free, Gluten Free

Easy Grain Free Sandwich Bread

Preheat your oven to 350 degrees F.

Ingredients:

4 Egg Whites

1/2 Cup of Olive Oil

27 grams of psyllium husk (this gives the bread it’s perfect texture. I like this pure brand with no additives just pure Psyllium Husk)

1/2 Cup of runny Tahini (Sesame Seed Butter – this is the one I love, it’s roasted and tastes amazing with no sugar)

3/4 Cup of Warm Water

70 grams of Coconut Flour

1 Tablespoon of Runny Honey

1 Teaspoon of Salt

1 Teaspoon of Baking Soda

3/4 Teaspoon of Baking Powder

2 Extra Tablespoons of Olive Oil for brushing the loaf while it bakes.

Directions:

Grease a bread loaf pan.

In a large bowl with a hand mixer, whisk together the egg whites until they are frothy.

Add the olive oil and tahini to the egg whites, and beat until they are fully incorporated.

Put the 3/4 cup of warm water in a separate bowl, and add the psyllium husk. Whisk and set aside. The mixture will gel quickly, that’s good!

In a separate bowl whisk together the coconut flour, salt, baking soda, and baking powder. When your psyllium and water is jelled, add it to the egg, tahini and olive oil mixture, Beat until it incorporates and is nice and smooth. This takes about 3 minutes. Now, add in the dry ingredients and continue beating until it is smooth and incorporated. Next, grease your hands with some olive oil, and using a bowl scraper or a rubber spatula, scoop up the dough into a loaf shape and using your hands form a loaf making it nice and smooth.

Forming the loaf with olive oil greased hands before placing in the bread pan

Place the formed loaf into your loaf pan. I don’t make the loaf the full length of the pan, it fills up as it bakes. Now brush the top of the loaf with a tablespoon of olive oil. Bake the bread in your oven for 30 minutes. After the first 30 minutes are up, remove the loaf from the oven, it will have started rising and browning, and brush it again with the second tablespoon of olive oil.

Second Brushing of Olive Oil then Back in the OvenGrain Free, Gluten Free Bread Baking

Bake in the oven an additional 45 minutes, tenting it with foil the last 15 minutes if it is browned nicely to prevent it from overbrowning. Check it after 30 minutes (one hour after initial start of baking). If it is brown, tent it for the final 15 minutes. The bread needs the full 45 minutes to make sure it is completely baked. The total baking time is one hour and fifteen minutes.

Remove the bread from the oven after the baking time, and set it on a wire rack. After 5 minutes of cooling in the pan, remove it from the pan and cool completely on the wire rack before slicing.

If you enjoy this recipe, don’t forget to share it! I hope you Enjoy! 🙂

Cooled Grain Free Homemade Bread Loaf, Ready to Slice (Gluten Free, Nut Free, Dairy Free)

Pin it! Thank you!

sameatshernutrients