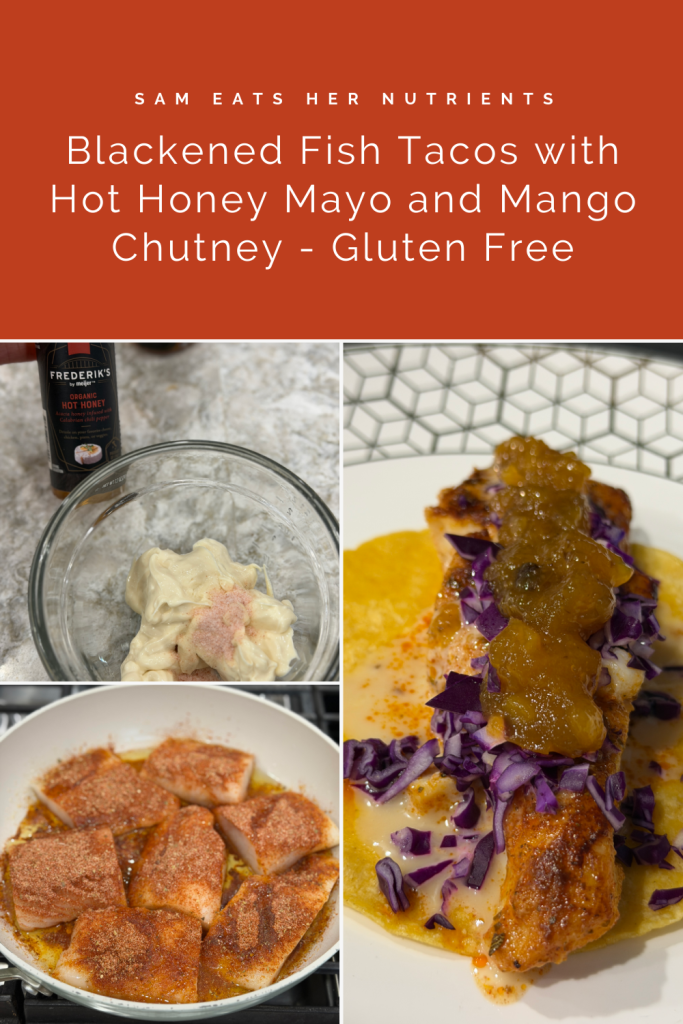
Blackened Fish Tacos with Hot Honey Mayo and Mango Chutney – Gluten Free
As I was gazing out the window sipping a cup of hot tea and watching the snow falling in quite a big snowstorm Monday, (also watching the birds at the feeder eating black sunflower seeds), I started thinking about what to do with the Cod I had in my freezer.
I have been bored with Cod, but in a fish taco, that could be exciting for the taste buds, especially if it had spices with some heat and was paired with a tangy hot honey sauce and mango chutney on top all wrapped in a warm corn tortilla with some red shredded cabbage for some crunch.
Cod is very finicky, you have to cook it to 145 degrees to be food safe, but just a smidge more, I mean 155 degrees, and it is like rubber. This Blackened Fish Taco hit all the spots, it was tender and flaky with spicy, savory and sweet. The family said this is definitely “blog worthy”. That is a phrase we use when I am testing recipes to share here. I hope you enjoy it as much as we do. In my opinion, it is definitely a reason to have cod in your freezer.
Blackened Fish Tacos with Hot Honey Mayo and Mango Chutney – Gluten Free
2 Pounds of Cod (approximately 7 pieces)
3 Tablespoons of Avocado Oil, for frying
Corn Tortillas
2 Limes
Shredded Purple Cabbage
Mango Chutney
Hot Honey
Mayonnaise
Blackened Seasoning, recipe follows
Salt
Let’s make the blackened seasoning ( you can also purchase it already made for you) Here is my homemade recipe that makes just enough for the fish:
Blackened Seasoning
1 Tablespoon of Paprika
1 Teaspoon of Salt
1 Teaspoon of Garlic Powder
1 Teaspoon of Onion Powder
1 Teaspoon of Oregano
1/4 to 1/2 Teaspoon of Cayenne Pepper depending on how much heat you like
Mix the spices together in a small bowl, and it’s ready to use.
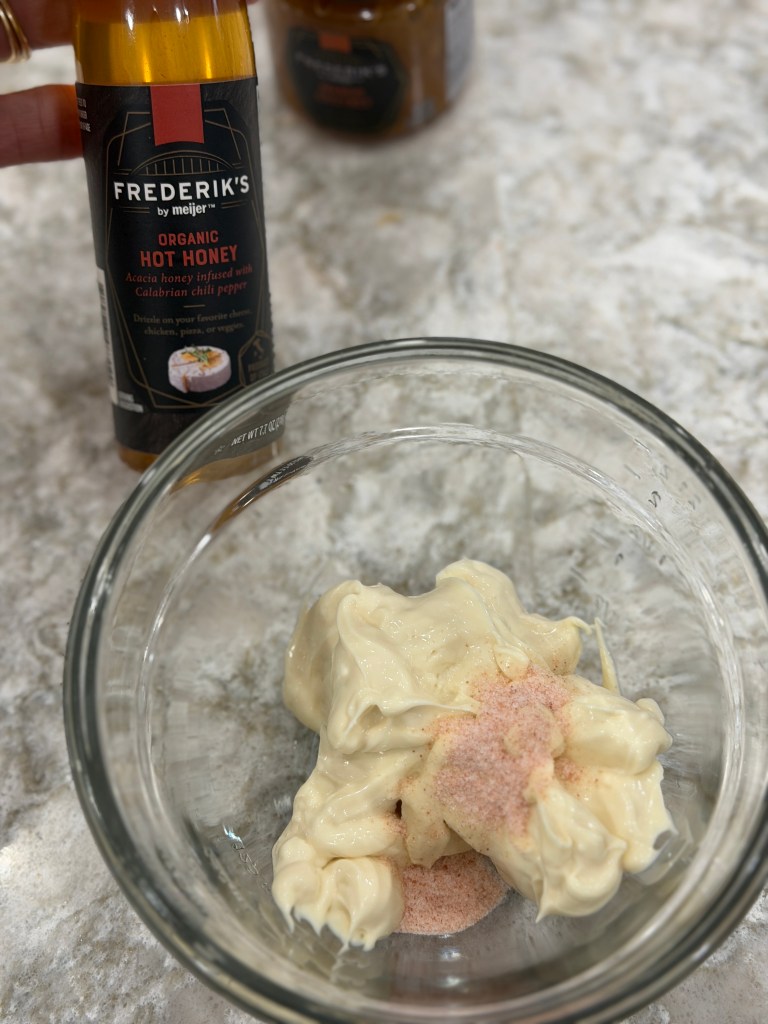
Hot Honey Mayonnaise
1/2 Cup of Mayo (I use Primal Kitchen)
1/4 Cup of Hot Honey (I got mine in the deli section of our grocery store)
1 Tablespoon of Freshly Squeezed Lime Juice
1/2 Teaspoon of Salt
Whisk it all together, and put it into the refrigerator until it’s time to serve.
Hot Honey Mayo
Directions for the Fish Tacos:
You will need a large frying pan for the fish, and a smaller one to warm the corn tortillas.
Place two tablespoons of avocado oil in the large pan and one tablespoon in the smaller pan.
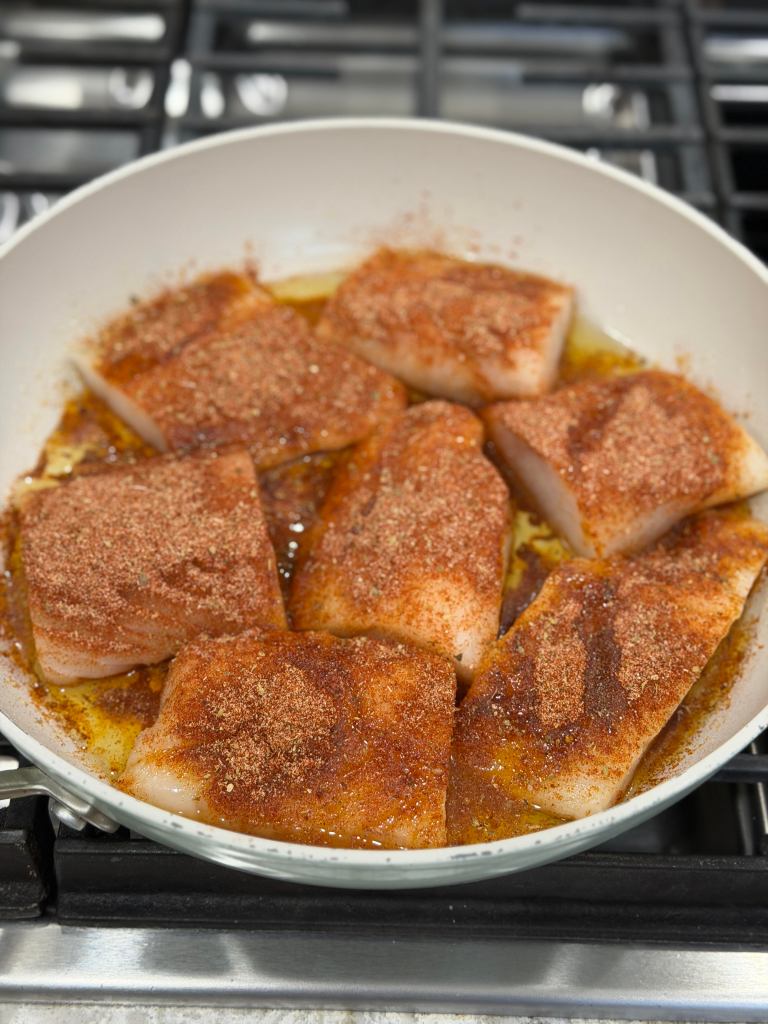
Blackened Seasoned Cod
Sprinkle your Cod with all of the blackened seasoning on both sides evenly, and place it in the pan. Put your pan on a hot burner on high, and cook the fish for three minutes on one side, and then flip it over for another three to four minutes. Use a thermometer to gage the heat until the fish reaches an internal temperature of 145 degrees, being careful not to go over, so your fish is as tender as possible. This depends on the thickness of your fish. When the fish is done, squeeze the juice of one lime all over the cooked fish.
Save this recipe for later 📌 Blackened Fish Tacos with Hot Honey Mayo & Mango Chutney
Meanwhile heat your corn tortillas in the smaller pan in avocado oil one at a time, flipping them with tongs to warm both sides.
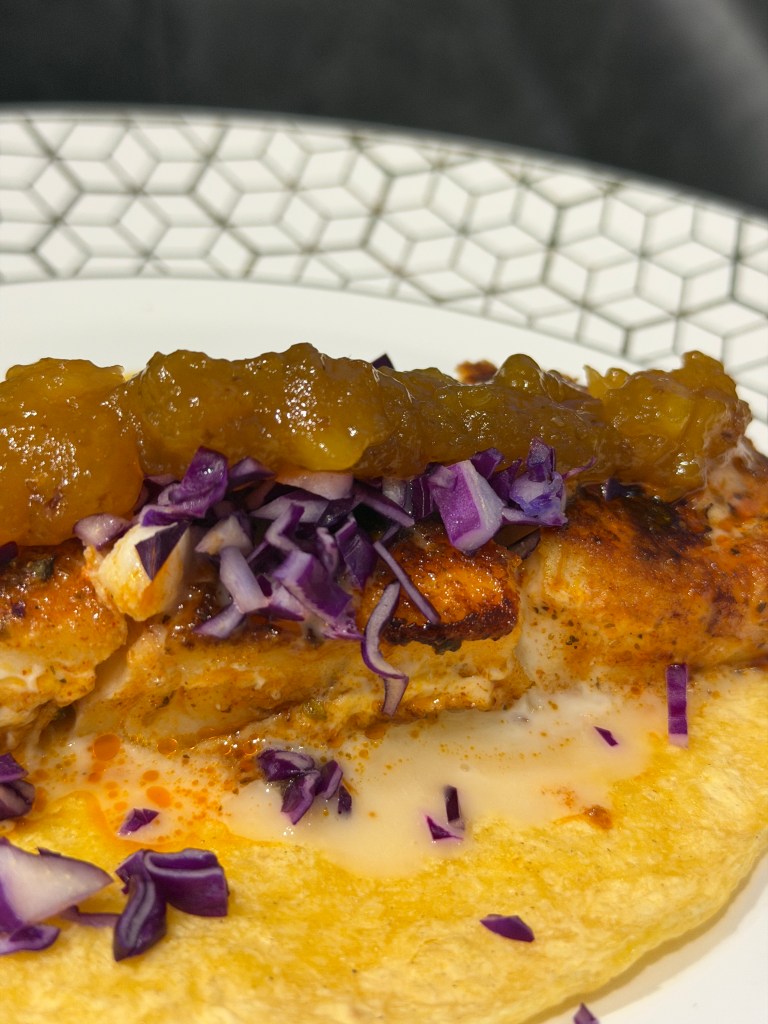
To serve, place a blackened piece of cod on a warm corn tortilla, top with hot honey mayo, a dollop of mango chutney, and some shredded purple cabbage. Enjoy! This recipe came together quick and easy, and I can’t wait to make it again. It is gluten free and dairy free, and a healthy dinner entree. Serve it with veggie sides or a nice leafy green salad.
Blackened Fish Taco with Hot Honey and Mango Chutney
As the near year is just a few days away, I wanted to also share my thoughts on going into 2026. Lets make 2026 unbelievably good for us. Let our mindsets be intentional this year. Not resolutions, but small choices and resets each week. Tips: Put some post it’s on your mirror, set a reminder on your phone, set aside daily space for yourself even if it’s 10 minutes that is different than before, start a journal that is vision centered kind of like a vision board.
“The greatest danger for most of us is not that our aim is too high…” – Michelangelo
I’m so glad you’re here! As many of you know, I’m a Certified Health Coach, and I’m passionate about creating recipes that help people feel their best. Recently, I’ve been incorporating Shaklee’s skincare and supplements into my daily routine after thoroughly researching the cleanest and safest brands on the market. After using their products for several months, I decided to become a Shaklee Wellness Advocate. My goal is to support you in feeling your best at any age with clean, science-backed nutrition and skincare. 💚
This February, I’m dreaming of spring! But let’s be honest: winter can leave us feeling a little sluggish, especially towards the end. That’s why I’m excited to share a new recipe to keep your energy up and help you sneak more greens into your day—all while treating your taste buds!
Delicious Green Energy Bites Recipe
These Green Energy Bites are a simple, delicious way to boost your energy while sneaking in a serving of greens. They’re perfect for picky eaters because you can’t even taste the greens! For a kid-friendly version, I recommend using peanut butter and honey. My kids say they taste like no-bake cookies, which is a win in my book.
One of the key ingredients in this recipe is Shaklee’s Organic Greens Booster. I’ve been using greens powder for over a decade, and finding an organic option is so important because greens are highly concentrated and you don’t want anything but greens in there. Shaklee tests their products for heavy metals and other contaminants and has the highest of safety standards. Just one scoop of this booster equals a full cup of raw, organic vegetables—a mix of kale, spinach, and broccoli sprouts. It contains no artificial flavors, sweeteners, or colors, and it’s gluten-free, non-GMO, vegan, and kosher.
1/2 Cup of Very Finely Chopped Nuts (pecans, walnuts, peanuts) (I’ve been using this mini express chopper for years and LOVE it)
1/4 Cup of Mini Dark Chocolate Chips (I use Enjoy Life brand)
1/2 tsp. Vanilla
1 pinch of salt
1 to 2 tablespoons of water if needed for consistency. Only if it’s not coming together.
Instructions:
Preheat your oven to 325 degrees F. Grind your nuts in a mini food processor or chop them very finely. Stir together the oats and finely chopped nuts on a rimmed baking sheet, and toast in the oven for 7 minutes.
In a mixing bowl, stir together the peanut butter and runny warm honey (I used honey and warmed it in the microwave a few seconds until warm and runny) or maple syrup. Combine all the rest of the ingredients except mini chocolate chips. Stir until well mixed.
Using a tablespoon cookie scoop, form the balls into round balls, then drop them in the mini chocolate chips and coat them lightly. Place on a tray and refrigerate for 30 minutes to firm up. Store in an airtight container in the fridge for up to a week.
These bites are perfect for an on-the-go snack, pre-workout fuel, or a healthy sweet treat!
Makes 14
Delicious Green Energy Bites Recipe
Here’s a wellness tip and a little treat just for you: Did you know that adding collagen to your morning routine can support healthy skin, hair, and joints? It’s one of my favorite easy upgrades! This month, Shaklee is offering 15% off when you invest in your health and purchase three select nutrition products of your choice using the code HEALTHY15. This includes the Organic Greens Booster featured in today’s recipe and the Collagen 9.
Why I Love This Recipe:
Quick and easy to make
Packed with clean, plant-based nutrition
Kid-approved
Organic Greens Booster
What’s Your Wellness Goal? I’d love to hear from you—what’s your top wellness goal right now? Reply and let me know! 💬
Thank you for letting me share this journey with you. I hope you love these Green Energy Bites as much as my family does. Here’s to feeling our best, no matter the season! 🌿
Chocolate Truffle Cookies Dusted with Cocoa Powder, Gluten Free and Decadent
The smell of a rich chocolate cookie baking in the oven is delightful. Pull them out, and let them cool, then sprinkle them with more high fat cocoa powder like my favorite Droste Cocoa Powder. After they cool, and you have dusted them with more heavenly cocoa powder, curl up on the sofa with a hot steamy cup of strong coffee, a couple of these cookies and a good book, and indulge in these buttery, cookie treats. Make sure you have a napkin, because you will be licking cocoa powder off your lips, and it may get on your book without one! 😉 You are sure to get a surge of joy, because chocolate is known for positively impacting mood, specifically dark chocolate with high cocoa content. This is due to the flavonoids and theobromine, which can stimulate the release of endorphins (feel-good chemicals) in the brain. I don’t know if being female makes me love it even more, but I don’t understand how you couldn’t like chocolate. Don’t forget the cozy throw or quilt! I have my own built in water bottle in the form of my delightfully fluffy pug, Ming.
Ming Ming the Pug
I have made these cookies on repeat, because they are so good and lower in sugar, without sacrificing flavor. The butter to flour ratio is perfection, and they are reminiscent of a decadent, rich chocolate dark chocolate truffle.
Winter is here in breathtaking Northern Michigan. I am delighted to say that the ski hills have opened in November this year, which hasn’t happened in a while because of warmer winters. There is plenty of powder and ski resorts to choose from. I expect the lake to freeze this year, due to the more seasonal weather we are having so far. Last year was a very mild winter and also very dry. This is a photo of my morning walk around the lake. I like to get outside and walk year round as long as the weather permits.
First Snow of the Winter, Up North Michigan
I think I may get a set of snow shoes to try out too. They have come a long way since I’ve last went snow shoeing. They are much smaller and easy to manage. Any advice on how to choose a pair? Coming in after a snowy adventure is a good time for cookies and a warm beverage!
Here is the recipe for my cookies:
Chocolate Truffle Cookies Dusted with Cocoa Powder, Gluten Free and Decadent
1/4 Cup of good quality cocoa powder with higher fat content (I use this.)
1/4 Teaspoon of Salt
1/2 Cup of Maple Sugar
1 Teaspoon of Quality Vanilla Extract
Directions: In a stand mixer or using a hand mixer with a large bowl, beat your butter, sugar and salt together for two minutes until light and fluffy. Add in your vanilla extract, and then in a separate bowl whisk your flour and 1/4 cup of cocoa powder together before adding it to the butter mixture. Mix on low speed until incorporated to prevent a flour mess, and then turn to high just until completely blended. Lay out a parchment lined cookie sheet, and using a tablespoon cookie scoop, scoop the cookies into balls on the cookie sheet. Now, pick up each scoop of dough, and roll it into a nicely shaped ball. Place the cookie sheet in the refrigerator for half of an hour. Meanwhile, preheat your oven to 325 degrees.
After the cookie dough has chilled, bake the cookies in your preheated oven two inches apart on two separate cookie sheets for 20 minutes. Remove the cookies from the oven, and cool completely. Then, dust them with more cocoa powder like shown below before eating.
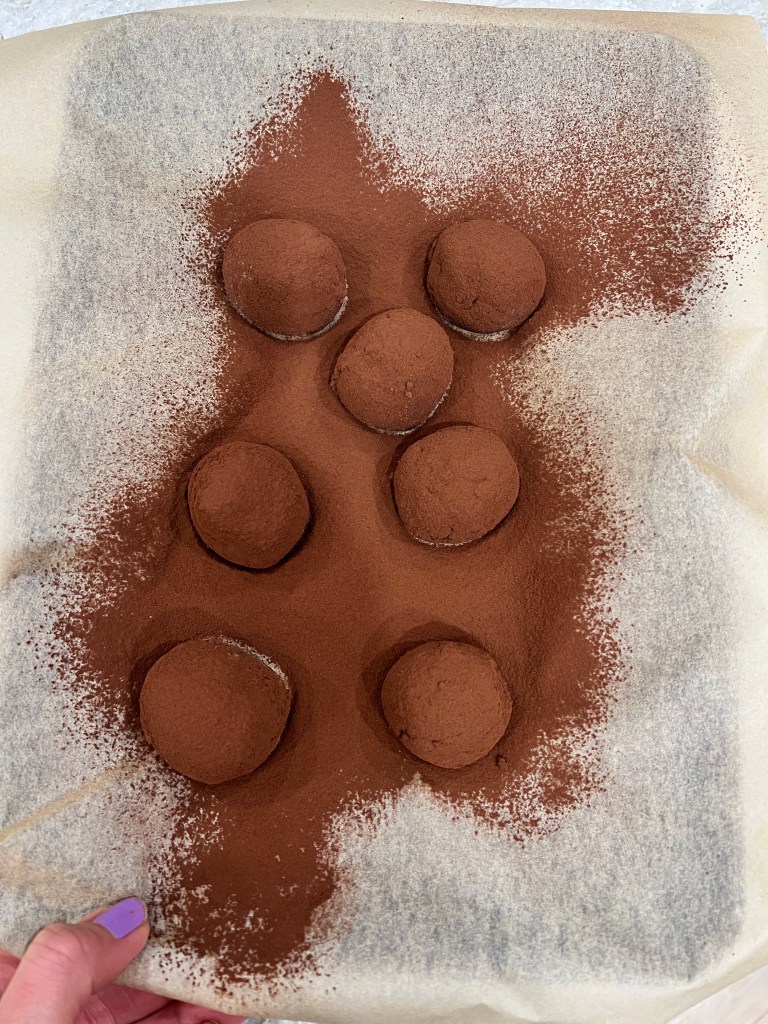
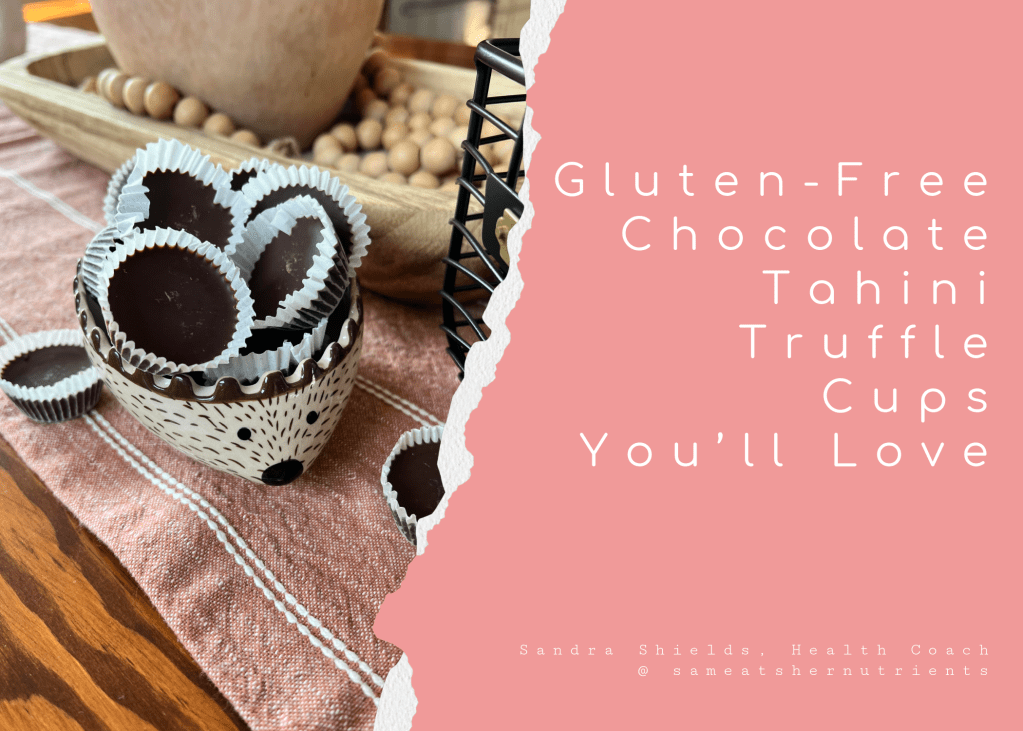
When September comes rolling around, I often find myself craving rich, indulgent treats, especially sweets that remind me of decadent chocolate truffles. I like to think I manage to behave pretty well around sweets. A big part of that self-control comes from my experience with food sensitivities—I’ve learned to be mindful, or else I pay the price later with feeling less than my best. After eliminating the troublesome culprits and getting serious about relearning what works for my body, I began healing my leaky gut. Through lab and genetic testing, I discovered my gluten intolerance. Since then, I’ve been able to reintroduce nearly all food groups—except for gluten. We constantly hear—and deep down, we all know—that too much sugar isn’t doing us any favors. But complete deprivation? That’s not an option for me. These two-bite chocolate cups are the perfect solution when those sweet, chocolatey cravings hit—they satisfy my sweet tooth without overindulging.
Chocolate Tahini Truffle Cups
Keep these delicious, creamy, nutty tasting, melt in your mouth chocolate cups in your freezer. Enjoy Life chocolate chips are my go to since they are so allergen friendly and excellent quality.
Can we talk cute woodland creatures for a minute? Isn’t this the cutest hedgehog dish? I am obsessed with cute hedgehogs and other woodland creature home decor. It’s so cozy, and bringing the nature theme indoors is so relaxing. These hedgehog dishes are so playful. I love their delicate little faces. I was gifted a set of four of these nesting hedgehogs. I love using them for company!
1 Cup of Chocolate Chips (you can use dark chocolate chips or semi-sweet)
You will need a mini muffin cup pan and approximately 20 mini muffin cup paper liners.
This recipe is Super Easy and much better for you than a store bought nut butter cup! In a double broiler, melt the Tahini and Chocolate Chips together, whisking until all the chocolate is melted. Using a teaspoon cookie scoop or spoons, evenly fill the muffin cup liners about two thirds full. Place the pan in your freezer. These will be solid in about 30 minutes. After they are firm, you can store your Chocolate Tahini Truffle Cups in an airtight container in the freezer. These yummy cups are a great little pick me up! Speaking of pick me ups, self care is huge for well being. When we get busy, run down or overloaded, it can be a recipe for disaster….(pun intended).
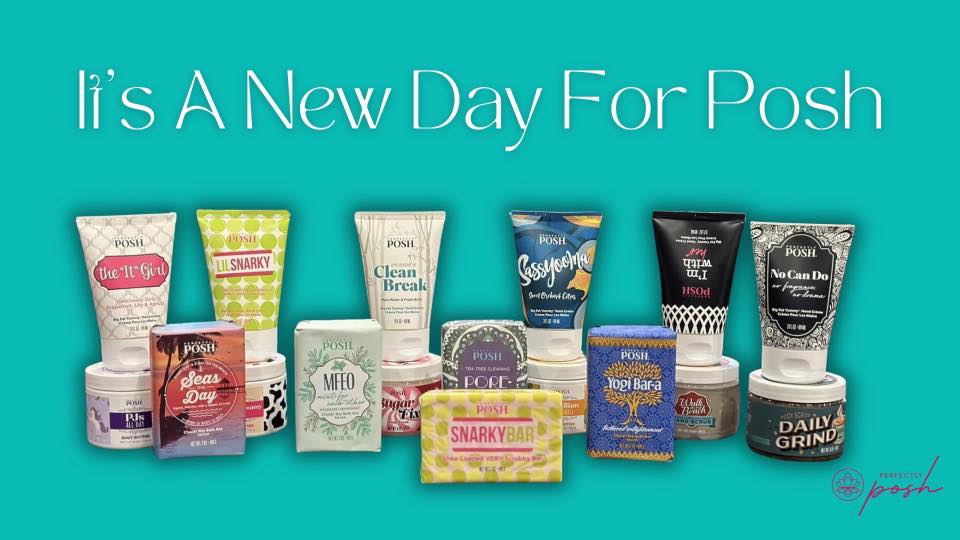
Many of you remember Perfectly Posh! Well, this pampering company is back in a BIG way! I couldn’t be happier to have all their natural based, quality bath, body and skincare products back in my life! It’s like a dream come true for many who these products were their go to favorites. They were a big part in reminding me to slow down and take time for self care. They have the best quality products at really good price points. I have a link to them at the top bar of my homepage. They don’t include nasty additives and ingredients, just good clean fun, and you can find a lot of the products rated in EWG Skin Deep! I am a Posh Advocate and am sharing my love of helping people through all areas of well being, in addition to healthy recipes. Perfectly Posh is the absolute BEST pampering company that has amazing products for self care and pampering! We can’t be there for others until we are there for ourselves first. Self Care is not a luxury, not a nice to have. It’s necessary. Self care is an essential daily practice that reminds us that we are alive and that we matter. Every person matters and deserves self care. It’s true you can’t pour from an empty cup, and it’s not just for girly girls. If you shower, Posh is for you! This includes the guys in your life.
Perfectly Posh Because You Deserve Self Care! We All Deserve to be Pampered.
You can find all their products here. I also have started a sample of the month club for free. Each month I send you a fun sample! But, you need to opt in by filling out this form for me.
Have a wonderful day! I hope you make and enjoy this new recipe! I’d love to hear from you in the comments!
Basil is an amazing herb. It is like sunshine in a plant, the flavor of it is beautiful and mild enough to eat the leaves tossed in a salad. It is my favorite fresh herb. I have a very large plant that keeps giving and giving, and it is more difficult to find after summer in large bunches. You can’t do a whole lot with a little plastic container that you find at the grocery store. I start craving fresh basil mid-winter after the crunchy autumn maple and oak leaves are covered by white snow, and my fresh basil has long been killed by frost. Up here in Northern Michigan that is about January.
I like to go to my local food coop to find large bunches when it’s too cold to grow it outdoors myself so I can make and freeze pesto. I also have grown it indoors in the wintertime with an Aerogarden Hydroponic System that is tabletop sized. This year, I have been making a compound butter with my fresh basil and freezing it into tablespoon sized cubes to keep the fresh basil flavors going in my kitchen long after Summer is gone.
Here is my easy and incredibly delicious recipe to add pops of flavor to vegetables, proteins like steak, eggs, and meatballs, pasta, and breads. I like to use this butter 50/50 with a drizzle of olive oil and a pat of this compounded butter over steamed vegetables. Try it with steamed Brussels sprouts! It’s delicious. For even more salty savory flavor, grate some fresh Parmesan over them too. Top a steak cooked on a Blackstone grill with this butter for a restaurant quality T-Bone or New York Strip. A cast iron pan stove top to oven works well also. I also like to use it for spiralized zoodles, and add it to halved baked squash fresh from the oven with a drizzle of honey. It’s excellent on beets, broccoli, carrots and potatoes. Here is my recipe:
Easy Compounded Fresh Basil Garlic Butter
2 Cups of Fresh Basil Leaves
1 Pound of high fat butter like Plugra or Kerrygold (cubed) You can use salted or unsalted.
2 Tablespoons of Garlic Infused Olive Oil
1 Teaspoon of Salt
In a food processor, add the fresh basil leaves and pulse until they are finely chopped. When the basil has been finely chopped, add in the remaining ingredients, and pulse in your food processor until it is blended and incorporated. You will have to stop the processor and scrape down the sides a couple of times. Lay out a parchment lined baking sheet and scrape your compounded basil garlic butter onto the sheet. Using an offset spatula, form the butter into a square block, and place it in the freezer overnight. The next day lay the frozen butter onto a cutting board and cut into 32 squares. Place your butter pats into a zipped freezer bag or sealed container, and keep them in the freezer. Use as needed!
Basil Garlic Compounded Butter on Gluten Free Bread Ready to Broil
Let me know how you like to use this butter. I’d also love to hear what your favorite fresh herb is and how you use it.
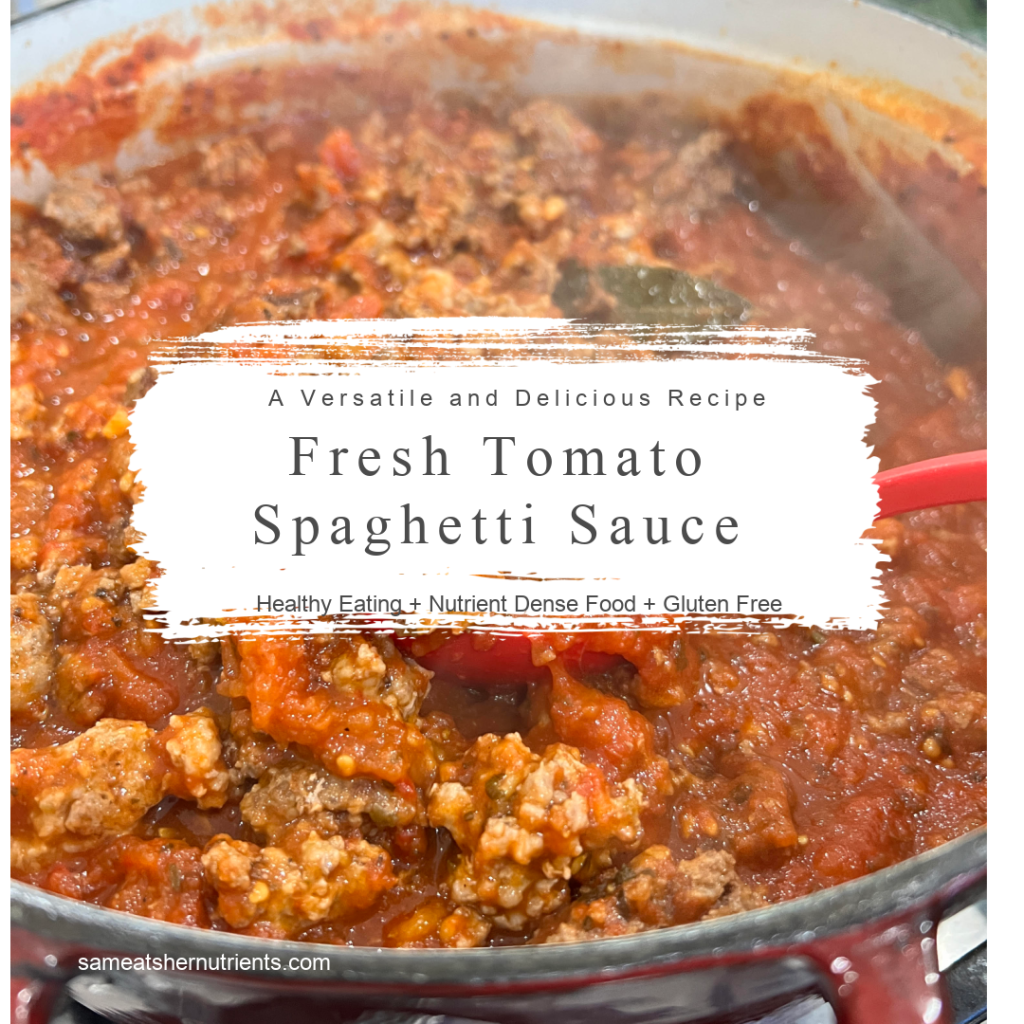
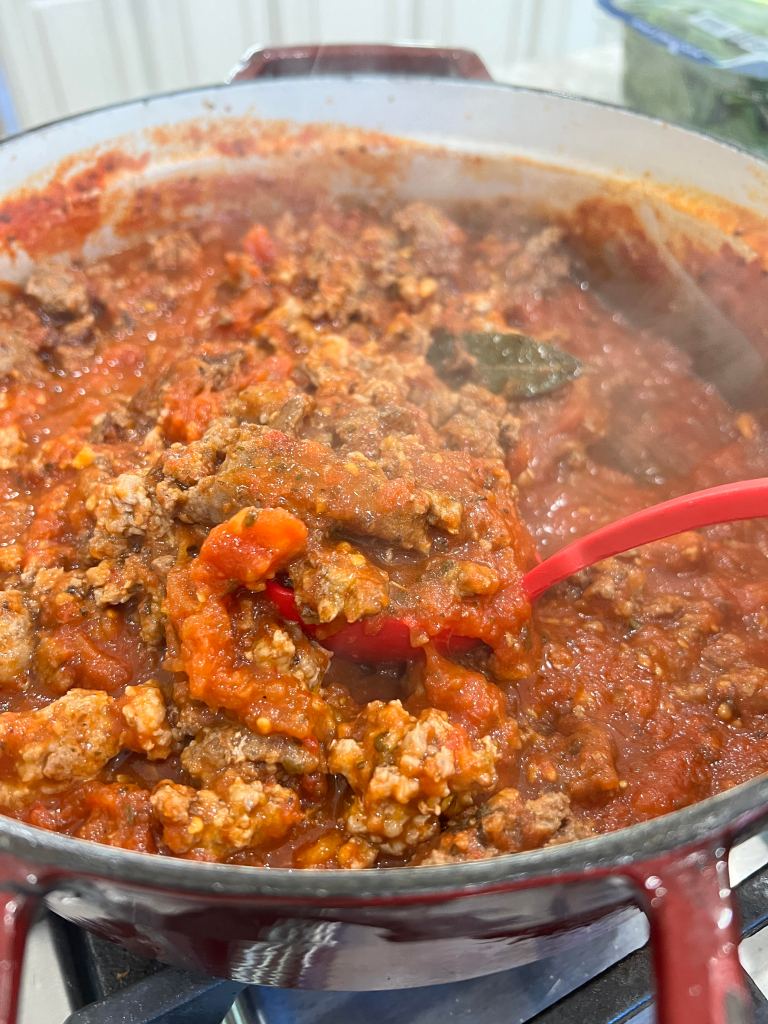
Hello! Can you believe how fast Summer went by? We still have plenty of gorgeous weather coming our way in September, and my tomato plants are producing like they are on steroids. I made the most delicious spaghetti sauce with them, and I wanted to share the recipe, because it is incredibly delicious, and a great way to take advantage of all the benefits tomatoes offer and use the bounty of fresh tomatoes. Fresh tomatoes are delicious, but when you are growing them, they are quite a bit like zucchini in their abundance when they start ripening. I don’t like to waste food, and the tomatoes need a good recipe. Now I’m a girl who loves a yummy sauce not just for pasta and spaghetti, this sauce is so good over vegetables, lentils, polenta, zoodles, and more. I have two options for you too. You can make it meatless, or as a last step in the recipe, you can add ground pork, sausage, beef, chicken or turkey.
Fresh Tomato Spaghetti Sauce: A Versatile and Delicious Recipe
In this recipe I removed the skins from the tomatoes, but left the seeds. I have a variety of tomatoes, and you use what you have. If you don’t grow your own garden, you can get fresh tomatoes at a local farmers market and produce stands. Trust me, it’s worth it.
I’d love to hear what fresh produce you have enjoyed most over the last few months in the comments. It has been a very busy season here, and the Summer was wonderful and fleeting. I tried to soak up as much outdoor activities and sunshine as possible. My son got married in August, and I had the pleasure of being in the company of my grandchildren quite a bit while they were off school. This included taking my granddaughter to swim lessons at the lake two days a week in the mornings. and taking all three of them boating and swimming. We’ve had lots of beach time and backyard BBQ’s, and I’m not quite ready to give it up! I will also be sharing this month another new recipe for a compounded butter using fresh basil that is a smart time saver that bumps up the zing factor. It is freezable into tablespoon pats! A delicious flavor boost!
So, enough gabbing, here is my recipe for Spaghetti Sauce using fresh tomatoes! But first here’s a photo of the sauce adding a combination of ground pork and beef. The hands on time for this sauce is about 45 minutes. It simmers for a few hours, and you just need to stir it a few times.
Fresh Tomato Spaghetti Sauce: A Versatile and Delicious Recipe
Spaghetti Sauce Using Fresh Tomatoes
Ingredients:
3 Pounds of Fresh Tomatoes
5 Cloves of Garlic (Peeled and Smashed) Low FodMap Option substitute 3 Tablespoons of Garlic Infused Olive Oil)
2 Tablespoons of Olive Oil (if you are making Low FodMap, this would be part of the garlic oil above.)
8 Ounces of Tomato Paste (I like this organic brand.)
4 Cups of Water
1 Tablespoon of Dried Parsley
1 Tablespoon of Dried Oregano
1 Teaspoon of Dried Basil
1 Bay Leaf
2 Teaspoons of Salt of Choice (I used Himalayan Pink Salt here. I like that you get trace minerals in this salt)
Ground Pepper to taste.
To begin this recipe we need peeled tomatoes. It is very easy to do with a pot of boiling water. The skins slip right off after plunging them in the water for 3 minutes. Bring a large stock pot up to a rolling boil. Add a tablespoon of salt. Now, carefully add half of your tomatoes into the boiling water and set a timer for 3 minutes (Alexa is my best friend). After the time is up, remove the tomatoes to a bowl with a mesh strainer and cool slightly. Meanwhile, add the remaining tomatoes to the boiling pot and set a timer. When the tomatoes are cool enough to handle, slip off the skins using a knife when necessary for the little bits that stick and remove the core. Slice the tomatoes in half. There is not a lot of chopping here. They will deconstruct with the cooking….easy! After all the tomatoes are peeled and halved. Prepare a large saucepan (I love my Martha Stewart Red Dutch Oven. It is heavy and built for a long simmer.)
Add the olive oil to the Dutch oven, and turn the burner on medium high. Peel and smash your garlic cloves. Leave them whole. They will infuse the sauce as it simmers. Add them to the just hot oil and cook until they are fragrant, about one minute. Now, add in your prepared tomatoes and the rest of the ingredients, including the tomato paste and 4 cups of water. Bring the sauce to a boil, then turn it to a low simmer and simmer uncovered for 2 to 3 1/2 hours. When the sauce is getting to be a nice thick consistency, it is ready. Taste it for salt and pepper. If you want to add ground meat, now is the time to saute your meat of choice and add it to the sauce. It is ready to serve over anything you want. It is so delicious! Enjoy. It’s a very good thing!
Delicious Gluten Free Cherry Cheesecake with Lactose Free Cream Cheese
Cheesecake. It is a much loved dessert here in America. There are so many variations of cheesecake and toppings. My sister had a gorgeous display of cheesecakes at her wedding when she was married. Of all the kinds of cheesecakes, I think cherry is still the most classic! So, having said that, I have an absolutely delicious gluten free cheesecake recipe for you today using lactose free cream cheese and Greek yogurt with those sensitive to dairy in mind. I made this cheesecake for a Summer picnic recently, and it was a big hit. My mother used to make the most delicious cherry cheesecake when I was a child, and although this is a different recipe, it is light and creamy like the ones I remembered eating as a young girl. One of the reasons I like this recipe so much is it is light and not overly rich. It is super creamy with just the right amount of graham cracker crust. I used frozen sweet cherries to make the topping, and the consistency to spoon on top of the cheesecake was just right. I find that using frozen cherries versus canned gives a much better flavor and texture. I also like that the bake time is quick with very little chance of the top cracking.
In this recipe, I used an 8 inch springform pan, and it serves 8 to 10 people. Let’s make a cheesecake!
Gluten Free Cherry Cheesecake
For the Crust:
1 1/2 Cups of Gluten Free Graham Cracker Crumbs (I used Pamela’s Graham Crackers and made crumbs in my food processor. You could also use a zipper bag and a rolling pin to crush them.) Pre-made Gluten Free Graham Cracker Crumbs works as well.
1/4 Cup of Sugar
6 Tablespoons of Melted Butter
Filling:
2 – 8 ounce tubs of lactose free cream cheese (I used Green Valley from my local grocery store)
2 Large Eggs at room temperature
1/2 Cup of Sugar
1 Teaspoon of Pure Vanilla Extract
Greek Yogurt Topping:
1 Cup of Plain Greek Yogurt
1/4 Cup of Sugar
1 Teaspoon of Pure Vanilla Extract
Sweet Cherry Topping:
14 Ounces of Frozen Sweet Cherries
1/2 Cup of Sugar
2 Tablespoons of Cornstarch dissolved in 2 Tablespoons of Water
1 Tablespoon of Lemon Juice
Directions:
Preheat your oven to 375 degrees F.
Mix your graham cracker crumb ingredients, and press it in the bottom and up the sides of the pan firmly. Set aside.
Now you’ll make the filling. Beat your cream cheese together with the sugar, eggs and vanilla in a medium bowl with electric beaters. Pour the filling into your graham cracker crust. Wrap the bottom of your springform pan with foil, and put it on a rimmed cookie sheet in case of any butter leakage. Bake for 20 minutes.
Remove the cheesecake from the oven, and let it rest for 15 minutes. Meanwhile, turn your oven up to 450 degrees F.
Now we will make the Greek yogurt topping while the cheesecake is cooling, this is the final baking step! While your cheesecake is cooling for 15 minutes, beat together the Greek yogurt topping ingredients, and spread it evenly over the top of the cheesecake. Bake at 450 degrees F. for just 10 minutes. Remove it from the oven, and cool at room temperature. Then, cover and chill in your refrigerator overnight or for 12 hours.
After it has chilled, you are ready for the last step, the cherry topping!
In a medium saucepan, cook the frozen cherries and sugar together until the sugar melts and the cherries thaw and start releasing their juices, stirring slowly and constantly over medium heat. Whisk the cornstarch and water together in a small bowl. Bring the cherry and sugar mixture to a boil and slowly whisk in the cornstarch. Cook until nicely thickened. Last of all, stir in the lemon juice and cook another 30 seconds or until it’s a nice, loose, jammy consistency. Remove from the heat, and cool for ten minutes, stirring occasionally. Spread the cherry topping evenly over the cheesecake with the back of a spoon, and chill for several hours until ready to serve. Remove the ring from the springform pan before serving and place it on a serving tray. This is really pretty on a fancy pedestal serving tray for company! I like to cut the cheesecake with a sharp knife run under hot water for clean slices, wiping the knife in between pieces. It’s so good! Also, if you like blueberries, frozen blueberries would work equally well in this recipe, so feel free to substitute. You could also use regular cream cheese if you are not sensitive to dairy.
I’d love to hear from you in the comments. Also, if you make this recipe, please leave me a review. Thank you! Sam
You are definitely going to want to pop these in! These are a healthier homemade treat with all the flavors of gingerbread and pumpkin! The warming spices and the melty, but chewy texture of these Gingerbread Pumpkin Cups are so delicious and a special way of treating yourself without a lot of added sugar. The flavors are comforting and a perfect treat for fall and winter. The depth of flavor from just a small amount of molasses and the maple sugar makes these next level good! There is real pumpkin in them and also some wonderful, healthy spices.
The primary fat used in this recipe is delicious coconut butter. Coconut butter is a source of healthy fats, primarily saturated fats in the form of medium-chain triglycerides (MCTs). These MCTs are believed to be metabolized differently in the body and can provide a quick source of energy.
There is the perfect amount of sweetness to these Gingerbread Pumpkin Cups using a little maple sugar, which is derived from maple trees and is a natural sweetener with a lower glycemic index than white table sugar, and molasses which is rich in minerals and flavor. Both of these flavors together give these cups a really special, yummy flavor.
There is also pumpkin in these cups to give them a softer texture and a little pumpkin flavor to compliment the spices. Just two teaspoons of ghee gives them the buttery flavor. I like ghee because it is lactose and casein free for those with dairy intolerance, and it is tolerated by many. It is also rich in vitamins. A small amount was used in this recipe. It is a saturated fat, and should be enjoyed in moderation. I do love that ghee contains antioxidants, such as beta-carotene and conjugated linoleic acid (CLA), which may have various health benefits, including potential anti-inflammatory properties. Ghee has been used for centuries in traditional Ayurvedic medicine and Indian cooking. It is often praised for its potential health-promoting qualities. It also has a higher smoke point for cooking, so it is a good choice for roasting vegetables. These cups are gently warmed. I chose the ghee for the flavor in this recipe, and only used 2 teaspoons.
I have been enjoying one or two of these delicious Gingerbread Pumpkin Cups a day. I keep them in the refrigerator. If you want to make them vegan, substitute more coconut butter for the ghee. They will be a little firmer in texture.
Here’s the recipe. This will make ten using mini muffin cup liners. These are about two bites.
Gingerbread Pumpkin Cups
Line a mini muffin pan with ten paper mini liners.
Ingredients:
1/2 Cup plus 2 Tablespoons of Coconut Butter (my favorite brand)
Add all the ingredients to a medium saucepan, and warm over low heat, whisking until the coconut butter and ghee is just melted and everything is completely incorporated. You just want to warm and melt the ingredients not bring them to a simmer, because the coconut butter will seize and get hard. Scoop the melted ingredients evenly into the mini muffin cups, tap the pan on the counter to level the cups or smooth gently with a butter knife. Then, refrigerate until firm. Remove the Gingerbread Pumpkin cups from the muffin tin, and store in the refrigerator in a sealed container.
As always, I love to hear from you. Share this recipe with a friend.
Buffalo Chicken dishes are a huge fan favorite, and I can say I crave buffalo chicken! When I recently had a company I was unaware of offer to send me samples of their gluten and grain free Rise & Puff Tortillas with only 5 clean ingredients (cassava flour, tapioca flour, pure avocado oil, honey and sea salt) and no preservatives, I said yes, and started brainstorming a delicious recipe to make with them. These are the Rise & Puff Award Winning Tortillas with no added gums and quality ingredients that tasted delicious.
The sky is the limit with these tortillas, and I am so excited to find one on the market that toasted up nicely and remains flexible for folding, or you can toast it longer and it becomes crispy!
Let’s go! This Buffalo Chicken Tostada recipe has shaved purple cabbage and yellow onion for crunch, and Greek yogurt, a healthier alternative to sour cream, and creamy delicious avocado! I always feel like I’ve hit the jackpot when an avocado is perfectly ripe! You are going to love the homemade buffalo sauce that is bursting with flavor, and I used boneless chicken thighs, which are very tender and don’t dry out.
Buffalo Chicken Tostadas, Gluten and Grain Free
The buffalo chicken is made in a skillet on the stovetop, then you simply toast the tostadas in a pan and assemble them. I love that you can make the buffalo chicken in advance and reheat it when you want to make them. I am all about time saving and ease! It’s a crazy busy world, and this makes it easier to make them quickly with low stress when you have hungry people to feed, including yours truly. Nothing worse than a hangry cook! These are also great to have on hand in the fridge for breakfast tostadas with eggs, taco night, and quesadillas. There are a lot of recipe ideas on their website as well if you’d like more inspiration.
Buffalo Chicken Tostadas, Gluten and Grain Free
This recipe makes 6 to 8 tostadas.
Ingredients:
To Cook the Chicken:
2 Pounds of Boneless, Skinless Chicken Thighs
1 1/2 Tablespoons of Olive Oil
1 Teaspoon of Sea Salt
1/4 Teaspoon of Black Pepper
In a large skillet add 1 1/2 tablespoons of olive oil, and brown the chicken thighs on each side sprinkling with the salt and pepper. They do not need to be cooked in the center. They will cook as the sauce simmers.
After you have browned the chicken on both sides and whisked together the sauce ingredients in a bowl, pour the sauce over the chicken in the skillet. Bring the chicken and sauce to a boil, then reduce the heat and simmer with the lid 3/4 on, so the steam escapes, for 20 minutes, or until the chicken is fork tender. Remove the lid and continue to cook on medium heat until the sauce has evaporated a good bit and is thick. Remove the chicken from the sauce onto a cutting board, and shred or chop. Add the chicken back to the skillet. Now you are ready to toast your tostadas and assemble. In a hot skillet with a little bit of olive oil (I used a coated cast iron skillet) toast the tortillas for 15 second per side, or until they have bubbled and browned. (see the photo)
Remove them from the skilled and assemble the tortillas by adding buffalo chicken to the bottom, following by shaved red cabbage, onion, avocado and Greek yogurt. Sprinkle with additional salt and pepper if desired. Enjoy!
I always love to hear from you! Leave a comment for me.
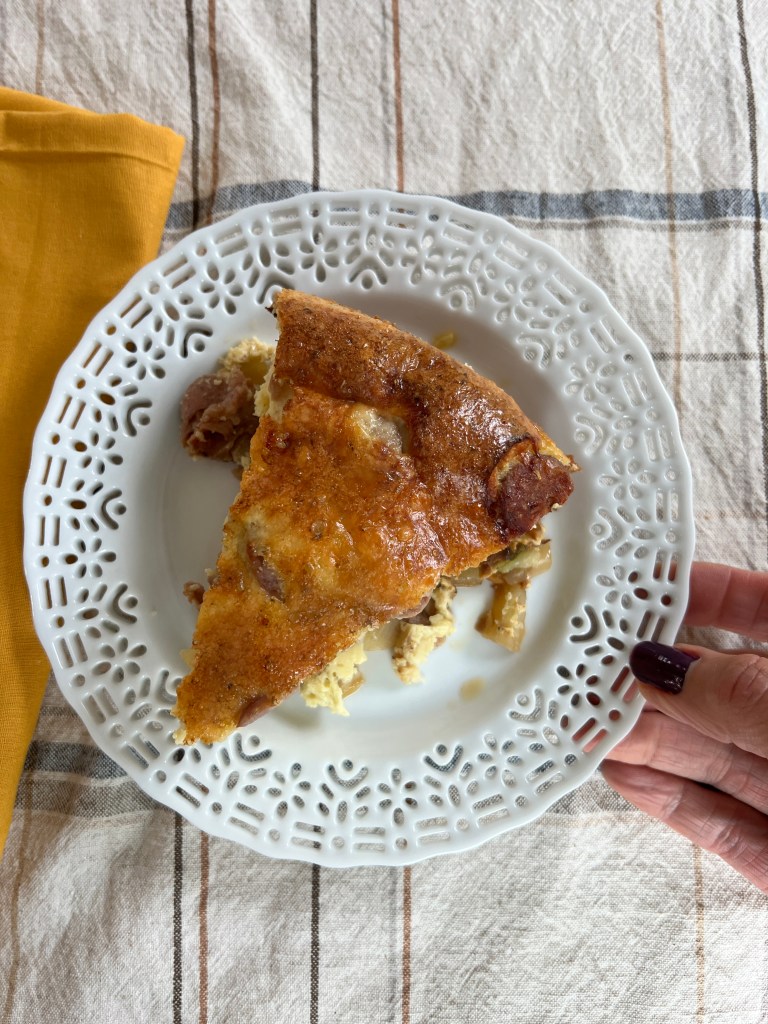
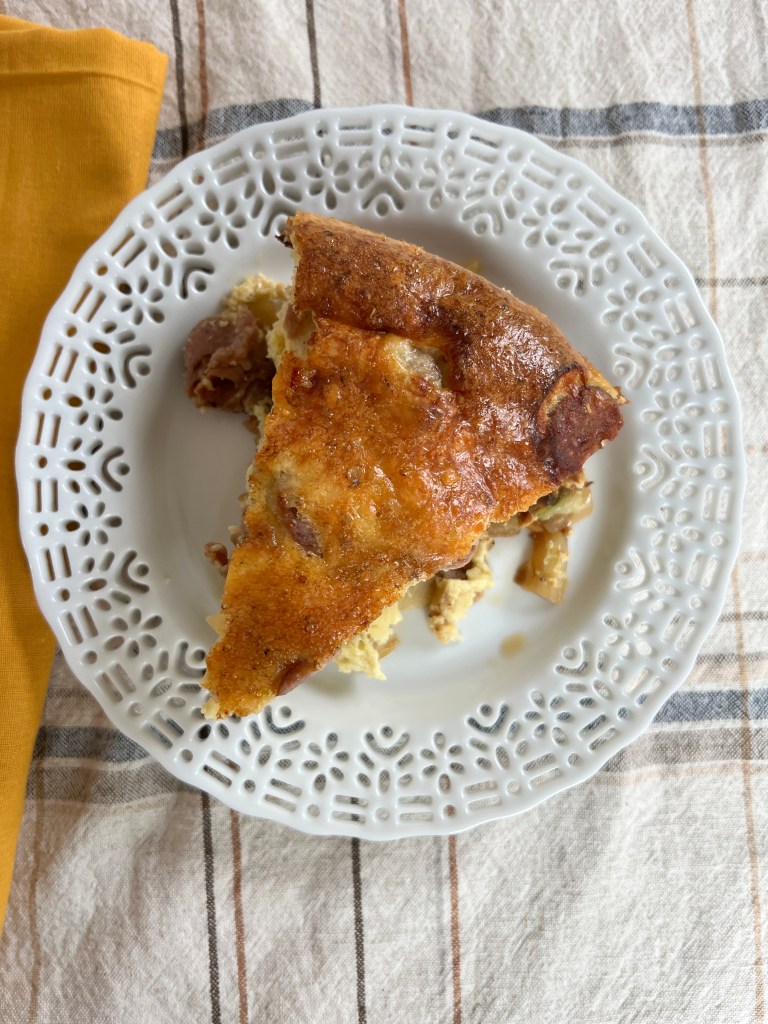
Farmhouse Fennel and Zucchini Frittata with Chicken Apple Sausages
Farmhouse Fennel and Zucchini Frittata with Chicken Apple Sausages
Eggs in a skillet with loads of delicious ingredients! Frittatas are the perfect way to use your vegetables, cheese and proteins in the fridge and reduce food waste. They are an easy, all in one skillet to oven meal that makes weeknight dinners easier. I think you are going to love this recipe for Fennel and Zucchini Frittata with fully cooked Chicken Apple Sausages. It’s one pan cooking, and an all in one meal. This would be good with a crisp green side salad. I made it in a heavy cast iron skillet with a ceramic coating inside called ‘The Always Pan’. You will need an approximately 10 1/2 inch skillet for this recipe that is oven safe up to 400 degrees F. If you use a larger skillet, that’s perfectly fine. Just shorten your baking time.
Farmhouse Fennel and Zucchini Frittata with Chicken Apple Sausages
It seems like I am always creating main dish recipes that are fairly quick. That’s because I feel the stress of getting dinner on the table for a family every night, and I think chances are you do too. I like to make homemade meals as much as I can, because they are healthier, and the bonus leftovers help pack lunches the next day. This Frittata is also a great breakfast choice!
You can use this frittata recipe as a template, and substitute equal amounts of other veggies that you have on hand instead too. Frittatas are very versatile, which is another bonus about them. Other suggestions are green, red or yellow peppers, leeks, spinach, kale, mushrooms, broccoli and asparagus.
Here’s how to make it!
Farmhouse Fennel and Zucchini Frittata with Chicken Apple Sausages
Preheat your oven to 400 degrees F.
Ingredients:
12 Large Eggs
1 Large Fennel Bulb, diced
1 Medium Yellow Onion, diced
1 Medium Zucchini, diced
1/2 Cup of Grated Parmesan Cheese
1 cup of Grated Irish Aged Cheddar Cheese (I like Kerrygold)
1 Package of Chicken Apple Sausages, or Another Chicken Sausage you like that is Fully Cooked (I used Butcher Box Sausages)
1/4 Cup of Milk of Choice
2 Tablespoon of Garlic Infused Olive Oil
2 Tablespoons of Butter of Ghee
1 1/2 Teaspoons of Sea Salt of Pink Salt
1 Teaspoon of Black Pepper
Directions: In your oven safe skillet, add the olive oil and butter or ghee. Chop your fennel, onion and zucchini. Add the fennel and onion to the skillet after the fat has melted and the skillet is hot along with 1/2 teaspoon of salt. Sautee these two vegetables, stirring occasionally until they are becoming tender. Then, add the chopped zucchini and another 1/2 teaspoon of salt and 1/2 teaspoon of black pepper, and cook for five more minutes. Meanwhile, whisk the eggs in a large bowl, add the milk to the eggs, the remaining 1/2 teaspoon of salt and pepper, and fold in the cheese, reserving about 1/4 cup for the top. Smooth the vegetables in the skillet into an even layer. Slice your sausages, and place them in an even layer on top of the sauteed vegetables. Now, gently pour the egg and cheese mixture over the sausages, and sprinkle with the rest of the cheese.
Place a baking pan under your skillet to catch any possible drips, and transfer it to your preheated 400 degree F. oven. Bake until golden and puffy and set in the center for 30 to 40 minutes.
This recipes makes 4 large servings or 6 regular serving
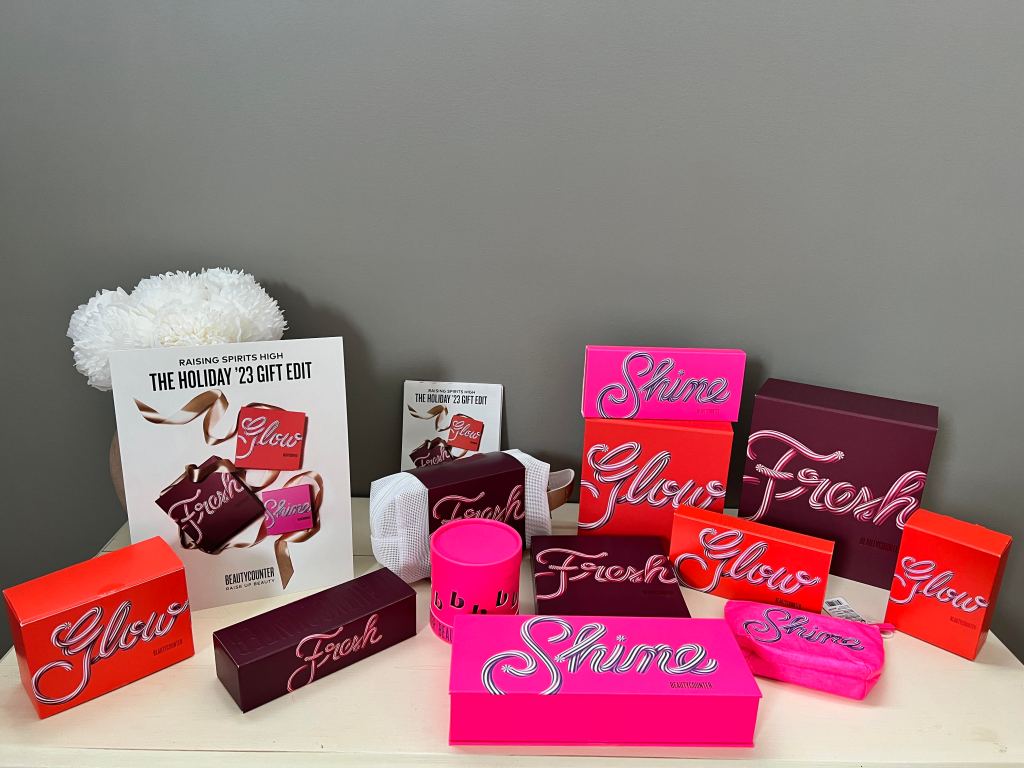
I’m so excited about these new safer beauty launches. What we put on our skin (our largest organ) absorbs into our bodies! Beautycounter’s 2023 Holiday Assortment has arrived! Yes, I am a consultant and use, trust and love them so much!
Beautycounter’s Holiday Sets are Here! Clean, Gorgeous, Highly Effective Skincare and Makeup.
Need a Fall Beauty Refresh? I do! Our Limited Edition Holiday Sets (14 sets!) include new formulas, new scents, new shades and a new category! It’s time to start your holiday shopping! You may not be in the holiday shopping mood yet, but we can always use some self care! So, go ahead and shop for yourself, you’re worth it!!
**Keep in mind that these are limited edition sets and when they are gone, they are gone for good!! We have fewer sets this year, so this is your warning to shop early!!! But, you can get their amazing skin, body and lip care year round. These sets are always pretty special.
Beautycounter’s Main Squeeze Lip Jellies are Gluten Free and High Shine in a Beautiful Hot Pink Box!Beautycounter Main Squeeze Lip Jellies in their exclusive Holiday Release are High Gloss and Gluten Free!
I am so excited about so many of these sets! A few of my must haves is the Main Squeeze Lip Jellies in 5 shades. They are pocket sized and are ultra glossy in different flavors. I stock up every year. The Shimmer & Glow Makeup Duo has a gorgeous, talc free bronzing highlighter and a golden Lid Glow Shadow in a new shade! The Sugar and Silk Body Set (it smells AMAZING) and for all you Countermatch users, we finally have the travel size set!! There are 14 sets, so make sure you go check them all out!
Polish and Plump with this Beautycounter Holiday Face Set!
If you have wanted to give your skin extra glow, hydration and smoothness, this set has it all in one! This is the Polish and Plump Face Set! It’s Gorgeous for gifting and a wonderful skincare gift for yourself! This includes an entire smaller sized regimen. The Lotus Glow Cleansing Balm (I love this so much!) is multipurpose! —a hydrating cleanser that moonlights as an overnight facial mask, made with a soothing blend of lotus extract, jojoba seed oil, and avocado seed oil. For softer, smoother, radiant-looking skin in just 10 minutes, also included is our Mini Reflect Effect AHA Smoothing Facial Mask—This makes your skin as smooth as a babies butt! No kidding! It’s an exfoliating formula clinically proven to improve skin texture, tone, and radiance.* and to moisturize…Then the last step is, getting plumped up with the Mini Mighty Plump Ceramide Water Cream! It’s made with two forms of hydrating hyaluronic acid plus barrier-protecting ceramide! This formula works like filler and feels like skin care and delivers real results, real fast. It’s very lightweight.
All the holiday sets are packaged beautifully and the value is very good. For instance this set contains $116 worth of products, but is only $89 for three smaller but still generous sizes.
Good Scents Hand Cream Trio for Smooth, Soft Hands is Beautycounter Holiday Pretty Set
This is the hand cream trio in one of the 14 holiday gift sets. They are exclusive scents in a beautiful gift box. Beautycounter hand creams are wonderful year after year, and this is a set that *always* sells out. Aren’t they pretty?
Benefits:
Lightweight, yet hydrating, non-greasy formula.
Softens and moisturizes hands.
Comes in three limited-edition scents: Coriander & Cucumber, Jasmine & Citrus, and Bergamot & Cedarwood.
Featured Ingredients:
Squalane: Derived from olives, it draws moisture into skin to replenish and condition.
Grapeseed Oil: Fast-absorbing and helps maintain moisture.
Jojoba Seed Oil: Works to soothe and moisturize skin.
Shea Butter: Helps hydrate and condition skin.
If you are a first time Beautycounter customer or have a new email you can use code CLEANFORALL20 and receive 20% off your first purchase, including holiday sets. Too busy to shop? I have included a checklist PDF in the photos below, just screen shot it and check off the sets you want, send it back to me, and I will send you a link to a shopping cart already ready for you to just check out. Happy shopping! I have had the opportunity to try all these sets in advance, and they are amazing and so gorgeous to gift!!
Have a happy, health day!
Beautycounter’s Safer Skincare Holiday Sets for 2023
Hello! I am Sam. I am a foodie, baker and a Health Coach who likes being in the kitchen making food. My recipes are all gluten free and there are recipes for different food intolerances as well. If you are looking to incorporate healthier eating habits and live a more balanced life, I hope to inspire you. I have had an obsession with baking since I was ten! I started this blog to share recipes I was making for myself after finding out I had gluten sensitivity and other food intolerances which I have mostly healed, but will always be sensitive to gluten. I went to school for Health Coaching as a second career at Institute for Integrative Nutrition. Nutrient dense food gives the body the best fuel and building blocks to be vibrant, healthy, prevent disease, and maintain great energy as well as heal. I am excited to share delicious food recipes, tips, baking and treats too!


Recent Comments